
Understanding Voice Recognition Module V
The Voice Recognition Module V is an innovative technology that allows users to control electronic devices using voice commands. It is a powerful tool that can bring a new level of convenience and interactivity to various projects, from home automation systems to robotics.
This module utilizes advanced algorithms and pattern recognition techniques to accurately capture and interpret spoken words. It can recognize a wide range of phrases and commands, making it a versatile tool for voice-controlled applications.
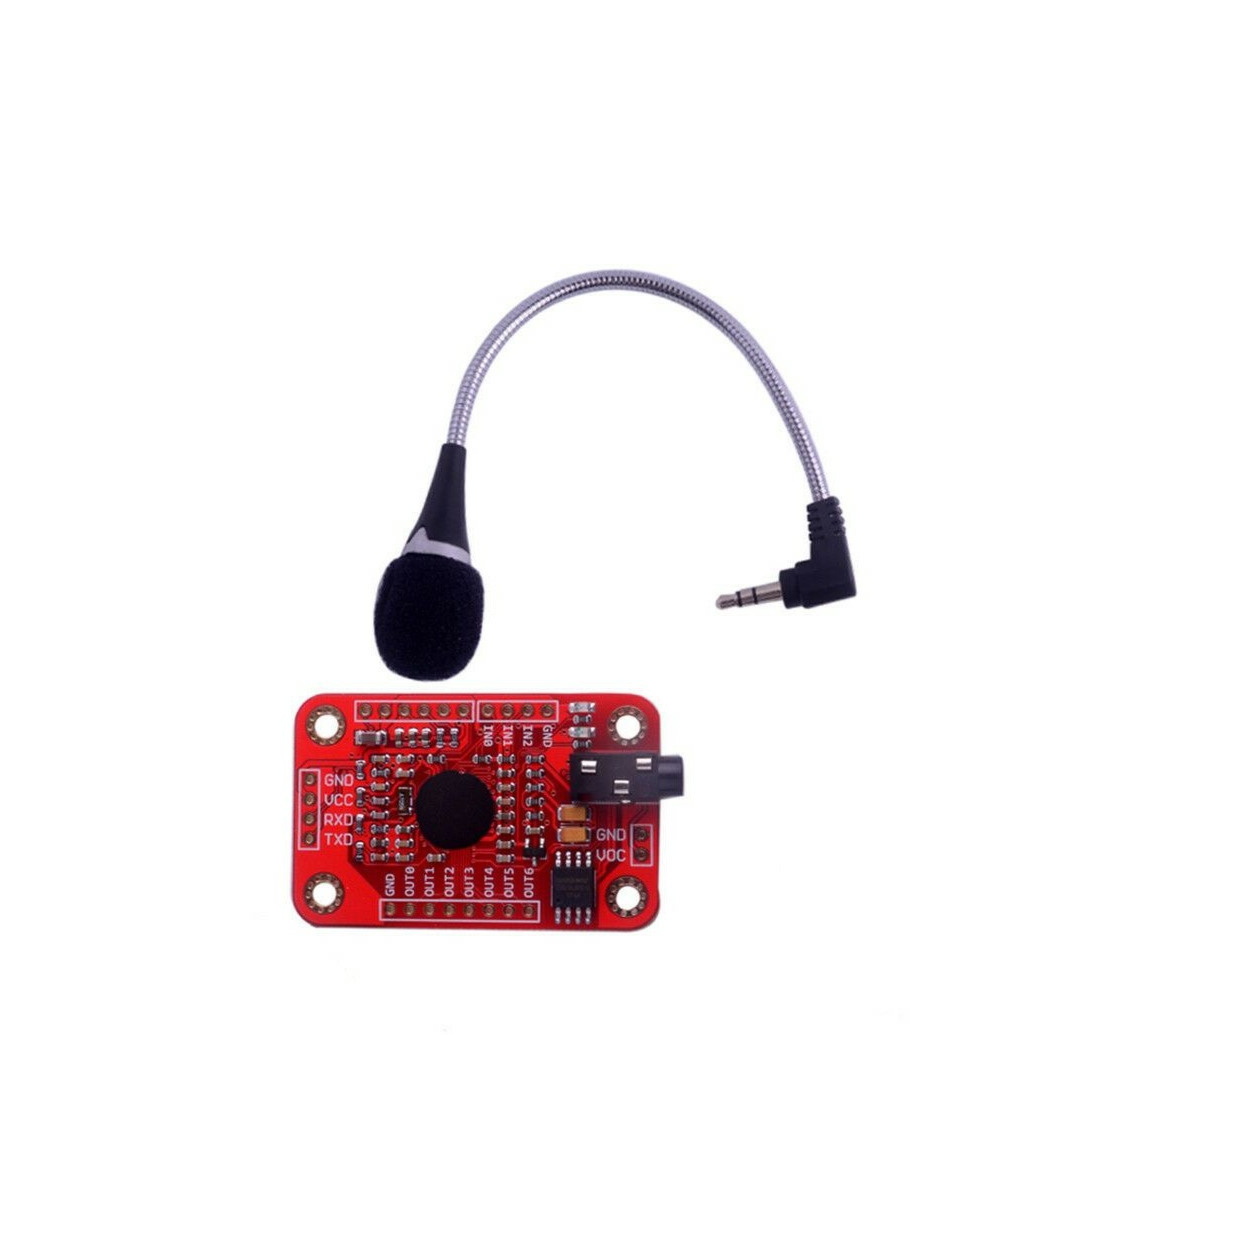
The Voice Recognition Module V consists of a microphone to capture audio signals, a voice recognition chip that processes the audio, and an array of digital pins for connecting to an Arduino board or other microcontrollers.
By understanding how this module works, you can harness its capabilities and unleash your creativity in designing voice-controlled projects. The microphone captures the user’s voice, which is then converted into digital audio signals. These signals are then processed by the voice recognition chip, which compares the input with pre-recorded voice commands stored in its memory.
The module uses pattern matching algorithms to determine if the recorded voice matches any of the stored commands. If a match is found, the module sends a corresponding signal to the Arduino, indicating that a specific command has been recognized.
It is important to note that the Voice Recognition Module V requires careful calibration and training for optimal performance. This involves recording the desired voice commands and fine-tuning the module to accurately recognize them. During the training process, the module learns the unique vocal characteristics and pronunciation of the user’s voice, enhancing the accuracy of recognition.
Additionally, it is crucial to minimize background noise and ensure clear pronunciation when using this module. Background noise can interfere with the accuracy of voice recognition, leading to incorrect or inconsistent results. Therefore, using the module in a quiet environment is recommended for the best performance.
The Voice Recognition Module V opens up new possibilities for controlling devices and systems using voice commands. With an understanding of how this module functions, you can harness its power to build innovative projects and add an interactive element to your creations.
Connecting Voice Recognition Module V to Arduino
The Voice Recognition Module V can be easily connected to an Arduino board to enable voice control in your projects. Here’s a step-by-step guide on how to establish the connection:
- Start by gathering the necessary components for the connection, including the Voice Recognition Module V, an Arduino board (such as Arduino Uno or Arduino Nano), jumper wires, and a power source.
- Identify the digital pins on the Voice Recognition Module V. These pins will be used to communicate with the Arduino board. The module typically has separate pins for power (VCC), ground (GND), and serial communication (RX and TX).
- Connect the VCC pin on the module to the 5V pin on the Arduino, and the GND pin to the GND pin on the Arduino. This will establish the power and ground connections.
- Establish a serial communication connection between the module and the Arduino. Connect the RX pin on the module to a digital pin (e.g., pin 10) on the Arduino, and the TX pin on the module to another digital pin (e.g., pin 11). These pins will serve as the communication interface.
- Connect the Arduino board to your computer using a USB cable. This will provide the necessary power for the Arduino and establish a connection for uploading the code.
- Once all the connections are made, double-check them to ensure they are secure and properly aligned.
- Finally, power up the Arduino board and the Voice Recognition Module V. You are now ready to start programming and utilizing voice commands in your Arduino projects.
It is important to note that the specific pin numbers used in the connection may vary depending on the Arduino board you are using. Make sure to refer to the pin layout diagram of your specific board and adjust the connections accordingly.
With the Voice Recognition Module V successfully connected to the Arduino board, you are one step closer to incorporating voice control into your projects. In the next sections, we will explore how to upload the necessary library, configure the module, record voice commands, and implement voice control in your Arduino code.
Uploading and Configuring the Library
In order to effectively communicate with the Voice Recognition Module V, you will need to upload and configure the appropriate library in your Arduino IDE. Here are the steps to get started:
- Open your Arduino IDE software and navigate to the “Sketch” menu. Choose “Include Library” and select “Manage Libraries” from the dropdown menu. This will open the Library Manager.
- In the Library Manager, search for the library required for the Voice Recognition Module V. Common libraries include “VRduino” or “VoiceRecognitionV3”. Select the library from the search results and click on the “Install” button to add it to your Arduino IDE.
- Once the library is installed, navigate back to the “Sketch” menu and select “Include Library”. You should now see the newly installed library listed. Click on it to include it in your sketch.
- Next, it is necessary to configure the library to work with the Voice Recognition Module V. Locate the library documentation or example code that came with the library. This will provide the necessary instructions and functions to configure the module.
- Follow the instructions provided by the library documentation and modify the example code accordingly. This may involve specifying the necessary pin connections, setting up the baud rate for serial communication, and initializing the module.
- Upload the modified code to your Arduino board by clicking on the upload button in the Arduino IDE. Make sure your Arduino board is connected to your computer via USB.
- Open the serial monitor in the Arduino IDE to view the output from the Voice Recognition Module V. This will allow you to verify if the module is properly configured and communicating with your Arduino.
- If you encounter any issues, refer to the library documentation or the manufacturer’s documentation for troubleshooting steps. Common problems may include incorrect pin connections, baud rate mismatches, or incorrect module configurations.
By uploading and configuring the library, you are setting the foundation for utilizing voice commands with the Voice Recognition Module V and Arduino. In the next sections, we will cover the process of setting up the module, recording and training voice commands, as well as coding the Arduino to receive voice commands.
Setting up the Voice Recognition Module V
Before you can start using the Voice Recognition Module V, it is important to go through the setup process to ensure its proper functionality. The following steps will guide you through the setup:
- Power off your Arduino board and disconnect it from any power source.
- Locate the power switch on the Voice Recognition Module V and set it to the “Off” position.
- Connect the microphone to the module using the provided connector. Ensure that it is securely connected.
- Toggle the power switch of the module to the “On” position.
- Observe the LED indicators on the module. The red LED should light up, indicating that the module is powered on.
- If the module has a separate trigger button, press and hold it until the red LED starts flashing rapidly.
- The module is now in “pairing” mode, waiting for a command to be recorded.
- Speak clearly into the microphone and state the desired command. For example, “Turn on the lights.”
- Release the trigger button and wait for the red LED to stop flashing. This indicates that the module has successfully recorded the command.
- Repeat the process for additional commands, ensuring that each command is recorded separately.
- Once all the desired commands are recorded, toggle the power switch of the module back to the “Off” position and disconnect it from any power source.
With the Voice Recognition Module V set up, you have successfully trained it to recognize specific voice commands. The recorded commands will serve as references for the module to identify and execute the corresponding actions when triggered.
It is important to note that during the setup process, you should be in a quiet environment to minimize background noise. This will help ensure the accuracy of voice recognition and prevent false triggers.
Now that the Voice Recognition Module V is set up and ready for use, we can move on to the next steps of configuring the module and coding the Arduino to receive voice commands.
Recording and Training Voice Commands
Recording and training voice commands is a crucial step in using the Voice Recognition Module V effectively. By following the steps below, you can ensure accurate and reliable recognition of your voice commands:
- Power on the Voice Recognition Module V and connect it to your Arduino or other microcontroller.
- Upload a sample Arduino code that communicates with the module and enables recording mode.
- Put the module into recording mode by sending the appropriate command from the Arduino code. This will allow the module to listen and store voice commands.
- Speak clearly into the microphone connected to the module and state the desired voice command. For example, “Open the door.”
- Wait for the module to confirm the successful recording of the command, usually indicated by an LED or serial output.
- Repeat the process for each command you want to train the module to recognize. It is best to record commands one at a time to ensure accuracy.
- Ensure that you pronounce each command consistently and clearly to improve recognition accuracy.
- Record a sufficient number of variations of each command to account for different vocal patterns or accents that may be used by different users.
- Test the module’s recognition accuracy by speaking the recorded commands and observing the module’s response. Make any necessary adjustments and retrain the module as needed.
- Keep in mind that the module may have limitations in terms of the number of commands it can store and the length of each command. Check the module’s documentation for specific details.
Remember that training the Voice Recognition Module V requires patience and attention to detail. Take your time to accurately record and train the commands to ensure successful recognition and execution in your projects.
Once the voice commands are successfully recorded and trained, you can proceed to the next steps of configuring the module and coding the Arduino to respond to the recognized commands.
Configuring Voice Recognition Module V
Configuring the Voice Recognition Module V is essential to enable accurate and reliable recognition of voice commands. Follow these steps to properly configure the module:
- Power on the Voice Recognition Module V and connect it to your Arduino or other microcontroller.
- Upload the appropriate Arduino code that communicates with the module and initializes its configuration.
- Ensure that the module is in configuration mode. This mode allows you to configure settings such as the baud rate, sensitivity, and other parameters.
- Send the necessary commands from your Arduino code to configure the desired settings. Refer to the module’s documentation or library for the specific commands and their corresponding meanings.
- Adjust the sensitivity level, if applicable, to optimize the module’s ability to recognize voice commands. This will allow the module to distinguish between background noise and intentional commands.
- Consider calibrating the module based on the environment in which it will be used. This may involve adjusting noise cancellation settings or microphone gain to reduce interference.
- Configure any additional settings that may be provided by the module, such as the number of attempts or timeout period for command recognition.
- Test the configuration by speaking the recorded commands and observing the module’s response. Fine-tune the configuration as needed to improve recognition accuracy.
- Ensure that the baud rate settings are consistent between the module and your Arduino code to establish proper serial communication.
- Document the configuration settings for future reference and to facilitate troubleshooting.
It is important to note that different Voice Recognition Module V models may have varying configuration options and commands. Familiarize yourself with the specific documentation and library associated with your module to ensure accurate configuration.
By properly configuring the Voice Recognition Module V, you will optimize its performance and enhance its ability to accurately recognize and respond to voice commands. The next step is to code your Arduino to receive and act upon the recognized commands.
Coding Arduino to Receive Voice Commands
Now that the Voice Recognition Module V is set up and configured, it’s time to code your Arduino to receive and respond to the recognized voice commands. Follow these steps to implement voice control in your Arduino projects:
- Start by including the necessary libraries in your Arduino sketch. This usually includes the library specific to the Voice Recognition Module V.
- Set up the serial communication between the Arduino and the Voice Recognition Module V by defining the appropriate baud rate.
- Create variables to store and handle the recognized voice commands. These variables will be used to compare the received commands with the ones you previously recorded.
- In the Arduino setup() function, initialize the necessary pin modes and serial communication settings.
- In the Arduino loop() function, continuously check for incoming serial data from the Voice Recognition Module V.
- Read the received data from the serial buffer and compare it with the recorded voice commands using if-else statements or switch-case structures.
- If a match is found, execute the corresponding action or function associated with the recognized command. This could involve controlling motors, turning on/off LEDs, or triggering other devices or actions.
- Include error handling in your code to handle cases where the received command does not match any of the recorded commands.
- Test your code with different voice commands and observe the Arduino’s response. Make any necessary adjustments to ensure accurate recognition and proper execution of actions.
- Document your code well, including comments that explain the purpose of each section and any specific configurations or requirements.
It is important to note that the implementation of voice control in your Arduino projects may vary depending on the specific functionalities and actions you want to achieve. Consider integrating appropriate sensors, actuators, or other components into your code to create a more interactive and dynamic project.
By coding your Arduino to receive voice commands, you can make your projects more user-friendly and responsive. Your Arduino will now be able to perform actions based on the recognized voice commands, opening up a wide range of possibilities for home automation, robotics, and other applications.
Implementing Voice Control in Arduino Projects
With the Voice Recognition Module V properly connected, configured, and the Arduino coded to receive voice commands, it’s time to implement voice control in your Arduino projects. Here are some key considerations and steps to follow:
- Determine the specific functionalities in your project that you want to control with voice commands. This could include turning on/off lights, adjusting motor speed, or triggering specific actions.
- Analyze the requirements and components needed to accomplish each desired functionality. Identify any additional sensors, actuators, or modules that may be required to interface with the Voice Recognition Module V.
- Based on the identified components, design and create the physical connections between the Arduino, the Voice Recognition Module V, and the other necessary hardware.
- Modify your existing Arduino code or create new functions to integrate the voice commands as triggers for the desired actions. Update the if-else statements or switch-case structures to execute the corresponding functions based on the recognized voice commands.
- Test the implementation by speaking the recorded commands and observing the Arduino’s response within your project. Make any necessary adjustments or fine-tuning to ensure seamless performance.
- Consider adding additional features to enhance the voice control experience. This could involve incorporating feedback mechanisms such as LEDs, LCD displays, or voice responses to acknowledge the execution of commands.
- Consider implementing voice control as part of a larger system or project, such as home automation, robotics, or voice-controlled interactive displays.
- During the testing phase, engage with users to gather feedback and improve the voice control experience. Address any issues or suggestions they may have to further optimize your project.
- Document your project thoroughly, including the hardware connections, code explanations, and any specific instructions or requirements for setup and usage.
Implementing voice control in your Arduino projects adds an exciting and interactive element, allowing users to control various functionalities with simple voice commands. The possibilities are endless, and by leveraging the capabilities of the Voice Recognition Module V, you can create unique and innovative projects.
Remember to continuously improve and refine your voice control implementation based on user feedback, as this will ensure a more seamless and user-friendly experience.
Troubleshooting Common Issues
While working with the Voice Recognition Module V and Arduino, you may encounter certain issues that can affect the performance of voice control in your projects. Here are some common troubleshooting steps to address these issues:
- No Voice Recognition: If the Voice Recognition Module V is not recognizing any voice commands, ensure that the microphone is properly connected and positioned. Check the sensitivity settings and adjust them if needed. Also, verify that the recorded voice commands match the ones you are speaking.
- Inconsistent Recognition: If the module recognizes some voice commands but fails to recognize others, retrain the module by recording the commands again, emphasizing clear and consistent pronunciation. Additionally, ensure that there is minimal background noise during recognition and that the microphone is positioned correctly.
- False Triggers: If the Voice Recognition Module V is continuously triggering commands without any spoken voice commands, check for any background noise or unintended sounds that may be triggering false activations. Adjust the sensitivity settings and consider implementing noise cancellation techniques to minimize false triggers.
- Poor Audio Quality: If the recorded voice commands sound distorted or unclear, check the microphone quality and positioning. Make sure there are no obstructions or interference affecting the audio signal. Consider using a higher-quality microphone or adjusting the microphone gain or output levels for better audio quality.
- Serial Communication Issues: If you are experiencing problems with serial communication between the Arduino and the Voice Recognition Module V, double-check the baud rate settings in both your Arduino code and the module configuration. Verify the accuracy of the connections between the module’s RX and TX pins and the corresponding Arduino pins.
- Module Not Responding: If the Voice Recognition Module V does not respond or seems unresponsive, ensure that it is properly powered on and connected to the Arduino. Check for any loose connections or wiring issues. Restart the module and Arduino to refresh their communication.
- Compatibility Issues: Ensure that the Voice Recognition Module V is compatible with your Arduino board or microcontroller. Check for any specific compatibility requirements or limitations mentioned in the module’s documentation or support resources.
- Insufficient Storage: If you have reached the maximum capacity of the module for storing voice commands, consider removing or re-recording some commands to create space for new ones. Refer to the module’s documentation for options to expand storage capacity if available.
If you are still encountering issues after troubleshooting, refer to the manufacturer’s documentation, online forums, or support communities for further assistance. Exploring these resources can provide valuable insights and solutions to overcome specific challenges you may face during your voice control implementation.
By methodically troubleshooting and addressing common issues, you can ensure the smooth and reliable operation of voice control in your Arduino projects.