
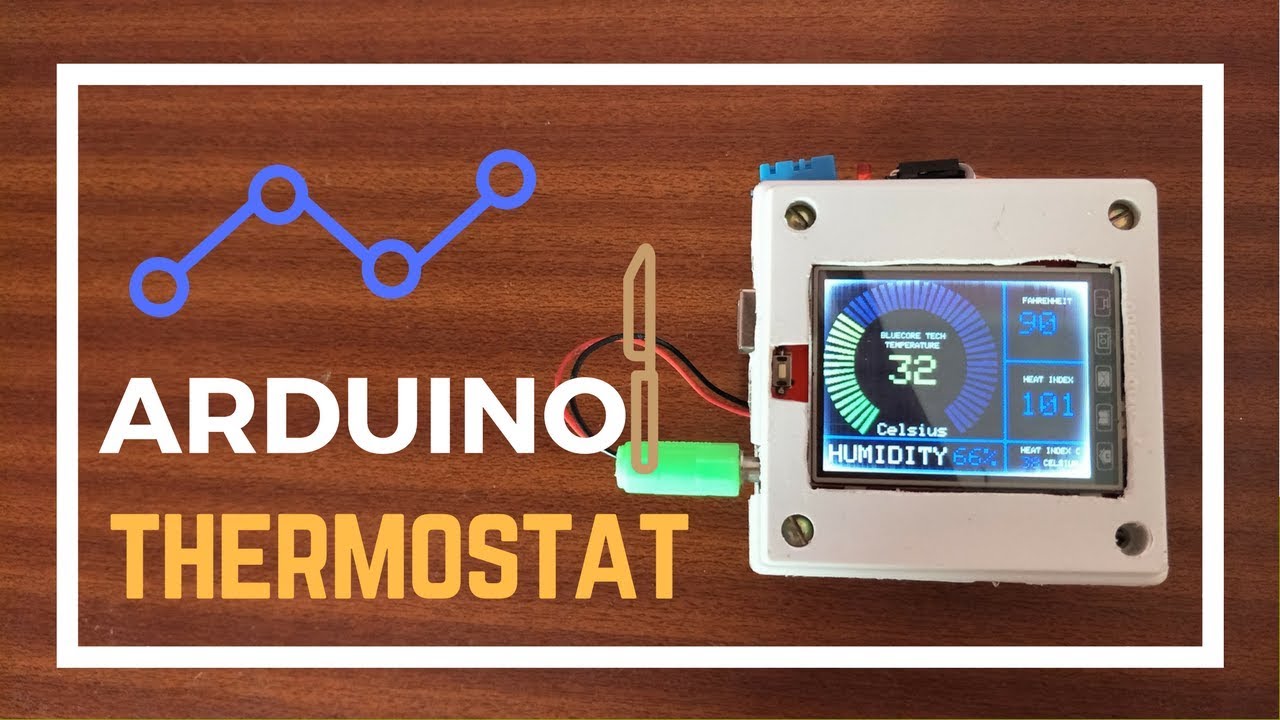
Understanding Arduino User Programmed Thermostats
Arduino user programmed thermostats are innovative devices that allow users to customize and control their heating, ventilation, and air conditioning (HVAC) systems with the help of Arduino microcontrollers. These thermostats offer a high level of flexibility and programming capabilities, allowing users to create personalized temperature control solutions for their homes or offices.
The main advantage of Arduino user programmed thermostats is the ability to tailor the temperature settings according to specific needs and preferences. With traditional thermostats, users are often limited to pre-defined temperature ranges and modes. However, Arduino thermostats empower users to program intricate temperature profiles to suit their daily routines, time of day, and even seasonal variations.
By leveraging Arduino’s coding capabilities, users can create complex temperature control algorithms that take into account factors such as ambient temperature, humidity levels, and occupancy. This allows for more efficient energy usage and better comfort optimization.
Arduino thermostats can also be integrated with various sensors to collect real-time data and make informed decisions about temperature adjustments. Temperature sensors, for example, can measure room temperature, while occupancy sensors can detect if anyone is in the room, triggering the thermostat to activate or deactivate accordingly.
Furthermore, Arduino thermostats can provide advanced features beyond basic temperature control. For instance, users can program their thermostats to switch between heating and cooling modes based on specific temperature thresholds and time intervals. They can also create customized schedules to ensure optimal comfort while minimizing energy consumption.
Overall, Arduino user programmed thermostats offer a versatile and customizable solution for temperature control. Whether you are a DIY enthusiast looking for a fun project or someone seeking better control over their HVAC system, Arduino thermostats provide an accessible platform to create efficient, personalized, and environmentally conscious heating and cooling solutions.
Choosing the Right Arduino Board for Your Thermostat Project
When embarking on an Arduino thermostat project, selecting the appropriate Arduino board is essential. The board you choose will determine the capabilities, processing power, and compatibility of your thermostat system.
The Arduino Uno is a popular choice for beginner and intermediate users due to its simplicity and affordability. It offers sufficient digital and analog inputs and outputs, making it suitable for basic thermostat functions. However, if you require more advanced features or connectivity options, you may need to explore other board options.
The Arduino Mega is a more powerful board, offering an extensive range of input and output pins. This makes it suitable for complex thermostat setups that involve multiple sensors and actuators. With its increased memory and computational capabilities, the Arduino Mega can handle more intricate programming and data processing tasks.
If you have size constraints or require portability, the Arduino Nano is a compact yet capable option. It offers a smaller form factor without compromising on functionality. The Arduino Nano is suitable for thermostat projects where space is limited.
If wireless connectivity is a priority, consider the Arduino WiFi Rev2 or Arduino MKR1000 boards. These boards come with built-in WiFi capabilities, allowing your thermostat to connect to the internet and interact with other smart devices. This opens up possibilities for remote control and integration with smart home systems.
For more advanced applications, the Arduino Due is a powerful board that offers a 32-bit ARM Cortex-M3 processor and increased memory. It can handle resource-intensive tasks, making it suitable for complex thermostat projects with demanding computational requirements.
Before selecting an Arduino board for your thermostat project, consider the specific features and requirements you need. Evaluate factors such as the number of pins, processing power, memory, connectivity options, and form factor. Additionally, consider the availability of libraries and community support for the chosen board, as this can significantly ease development and troubleshooting.
Reading Temperature Sensors with Arduino
One of the fundamental functions of an Arduino thermostat is to accurately measure and monitor temperature. This is achieved by using temperature sensors in conjunction with the Arduino board.
There are various types of temperature sensors that can be used with Arduino, such as the popular DS18B20 digital temperature sensor or the analog TMP36 sensor. These sensors provide precise temperature readings, allowing the thermostat to make informed decisions and adjustments.
To read temperature data from these sensors, you will need to connect them to the appropriate pins on the Arduino board. The DS18B20 sensor, for example, uses the OneWire library and requires a 4.7k ohm pull-up resistor between the sensor’s data line and the 5V line on the Arduino board. By using the OneWire library, you can accurately read the temperature data from the sensor.
On the other hand, the analog TMP36 temperature sensor requires a simple connection to one of the analog input pins on the Arduino board. By using the analogRead() function in the Arduino IDE, you can obtain the analog voltage output from the sensor, which can then be converted to temperature using a simple mathematical formula.
Once the temperature data is obtained from the sensor, you can utilize it in your thermostat logic. This may involve comparing the current temperature with a target temperature, activating or deactivating heating or cooling systems, or triggering other actions based on specific temperature thresholds.
To ensure accurate temperature readings, it’s important to consider factors such as sensor placement and calibration. The sensor should be placed in the area where you want to measure the temperature and away from sources of heat or cold drafts that could affect the accuracy of the readings. Additionally, calibrating the sensor by comparing its readings with a known reference temperature can help compensate for any discrepancies.
Reading temperature sensors with Arduino opens up a range of possibilities for creating intelligent and responsive thermostat systems. By accurately monitoring the temperature, you can create personalized and efficient temperature control algorithms to optimize comfort and energy usage in your space.
Programming the Thermostat Logic
Once you have the temperature readings from the sensors, the next step in creating an Arduino thermostat is to program the logic that controls the temperature settings and behavior. This involves defining the rules, conditions, and actions that the thermostat will follow.
The programming language used for Arduino is a simplified version of C/C++. If you’re new to programming, don’t worry. Arduino’s user-friendly IDE (Integrated Development Environment) and vast community support make it accessible for beginners.
The thermostat logic can be as simple or as complex as desired, depending on the level of customization you want to achieve. Here are some key elements to consider when programming the thermostat logic:
- Target Temperature: Set the desired temperature that the thermostat should maintain.
- Hysteresis: Define a temperature range around the target temperature in which the thermostat will not trigger any actions. This prevents frequent toggling of the heating or cooling systems.
- Temperature Thresholds: Specify high and low temperature thresholds at which the thermostat should activate the heating or cooling systems.
- Scheduling: Create a schedule for temperature changes during specific times of the day or days of the week. This allows for energy-saving periods when the temperature can be adjusted based on occupancy or specific needs.
- Override: Implement a mechanism that allows users to manually override the thermostat settings, if desired.
- Fault Detection: Incorporate error handling and fault detection mechanisms to identify and respond to sensor failures or other critical issues.
By combining these elements in your thermostat logic, you can create a responsive and intelligent temperature control system. For example, if the current temperature falls below the low threshold, the heating system will be activated until the temperature reaches the target temperature. Similarly, if the temperature rises above the high threshold, the cooling system will be turned on.
It’s important to regularly test and iterate your thermostat logic to ensure desired functionality and optimal performance. You can use serial output or LCD displays to visualize the temperature readings and the actions taken by the thermostat for debugging purposes.
Remember, the beauty of Arduino thermostats is the ability to experiment and customize. You can constantly refine and enhance the logic to meet your specific requirements and preferences, creating a truly personalized and efficient temperature control solution.
Controlling HVAC Systems with Arduino
Controlling heating, ventilation, and air conditioning (HVAC) systems is a crucial aspect of Arduino thermostat projects. By integrating the Arduino board with the HVAC system, you can automate and regulate the temperature settings more efficiently.
The control of HVAC systems typically involves activating and deactivating heating and cooling systems, controlling fans, and managing ventilation. This can be achieved through various methods, depending on the specific HVAC system and its compatibility with Arduino.
In many cases, HVAC systems already have control interfaces, such as relays or digital signals, that can be easily managed through Arduino. By connecting the appropriate components, such as relays or solid-state relays, to the Arduino board, you can control the on/off state of the heating and cooling systems based on the thermostat logic.
In addition to HVAC control, Arduino can also be used to control the operation of fans or dampers for ventilation purposes. By using a suitable motor driver or relay circuit, the Arduino board can control the speed or position of fans or dampers, allowing for precise airflow regulation.
It’s important to consider the power requirements and voltage compatibility when connecting Arduino to an HVAC system. Some HVAC systems operate at higher voltages that may require additional components, such as optocouplers or solid-state relays, to safely interface with the Arduino board.
Integration with advanced HVAC systems that utilize protocols such as BACnet or Modbus may require additional hardware and libraries to establish communication between Arduino and the HVAC system. Fortunately, the Arduino ecosystem has a wide range of libraries and community support, making it easier to interface with different systems.
Furthermore, by incorporating wireless communication modules, such as Wi-Fi or Bluetooth, Arduino thermostats can provide remote control and monitoring capabilities. This enables users to interact with the thermostat system through smartphone apps or web interfaces, offering convenience and flexibility.
It’s vital to ensure proper safety precautions when working with HVAC systems and electrical components. Always refer to the manufacturer’s guidelines, use appropriate protective measures, and, if necessary, consult with an HVAC professional or an electrician for guidance.
By leveraging the versatility and programmability of Arduino, you can effectively control your HVAC systems, resulting in efficient temperature regulation and enhanced comfort in your living or working space.
Building a Web Interface for Remote Thermostat Control
Building a web interface for remote thermostat control adds a new level of convenience, accessibility, and flexibility to your Arduino thermostat project. With a web interface, you can adjust and monitor the temperature settings of your thermostat from anywhere using a computer, smartphone, or tablet.
To create a web interface, you will need to incorporate web development technologies such as HTML, CSS, and JavaScript alongside your Arduino programming. Here are the essential steps to build a web interface for remote thermostat control:
1. Set up a web server: You can use an Arduino Ethernet shield or an Arduino with built-in Wi-Fi capabilities to host a local web server. This server will allow you to serve web pages and handle communications between the thermostat and the user interface.
2. Design the user interface: Create a visually appealing and user-friendly web interface using HTML and CSS. The interface should display the current temperature readings, target temperature, and any other relevant information or controls you want to include, such as buttons to adjust the temperature or switch between heating and cooling modes.
3. Implement interactivity: Use JavaScript to add interactivity to the web interface. This may involve sending AJAX requests to the server to get the current temperature data, updating the interface dynamically, and sending commands to the Arduino thermostat to adjust the temperature and control other functions.
4. Secure remote access: If you want to access the web interface remotely over the internet, it’s essential to implement security measures to protect your thermostat system. This may include using HTTPS for secure communication, authentication mechanisms to restrict access, and encryption techniques to safeguard sensitive data.
5. Test and debug: Ensure that the web interface is functioning as intended by testing it across various devices and browsers. Debug any issues and refine the interface based on user feedback or usability considerations.
With a web interface in place, you can conveniently access and control your thermostat from any location with an internet connection. This allows you to make temperature adjustments before arriving home or monitor and adjust settings while away on vacation.
Keep in mind that implementing a web interface requires extra considerations, such as network connectivity, security, and compatibility with different devices. It’s also important to test and update the interface regularly to ensure compatibility with the latest browser versions and to address any security vulnerabilities.
By integrating a web interface with your Arduino thermostat, you can enjoy the convenience and flexibility of remote control, ensuring optimal comfort and energy efficiency in your living or working space.
Integrating Smart Home Systems with Arduino Thermostats
Integrating your Arduino thermostat with smart home systems opens up a world of possibilities for seamless automation and control of your heating and cooling setup. By connecting your Arduino thermostat to platforms such as Amazon Alexa, Google Assistant, or Apple HomeKit, you can enjoy hands-free control and leverage the power of voice commands to adjust temperature settings.
Integrating Arduino thermostats with smart home systems requires bridging the communication gap between the Arduino board and the smart home hub or device. Here are the key steps to achieve this integration:
1. Identify the compatible smart home protocols: Determine the protocols supported by both your Arduino board and the smart home system you want to integrate. Common protocols include Wi-Fi, Zigbee, or Z-Wave. Evaluate the available options and choose the one that best suits your requirements and compatibility.
2. Select the appropriate communication module: Depending on the chosen protocol, you may need to add a specific communication module to your Arduino setup. For example, if you are using Wi-Fi, you might need an Arduino Wi-Fi shield or an Arduino board with built-in Wi-Fi capabilities.
3. Install the necessary libraries and setup instructions: The Arduino community offers a wide range of libraries for various smart home systems. Install the required libraries and follow the setup instructions to establish communication between your Arduino thermostat and the smart home hub or device.
4. Define the voice commands or automation rules: Once the Arduino thermostat is integrated with the smart home system, you can create custom voice commands or automation rules to control the temperature settings. For example, you can say, “Hey Google, set the thermostat to 72 degrees,” or create a rule that automatically adjusts the temperature based on the time of day or occupancy.
5. Test and refine the integration: After setting up the integration, thoroughly test the communication and functionality to ensure that commands are accurately interpreted, and actions are performed as expected. Make any necessary adjustments or refinements based on the testing results.
Integrating Arduino thermostats with smart home systems expands the capabilities and convenience of your thermostat setup. It allows you to seamlessly integrate temperature control with other smart devices or systems in your home, such as smart lighting, security, or energy management systems.
Remember to follow the specific guidelines and instructions provided by the smart home system and Arduino libraries to ensure proper integration and compatibility. Regularly update the software and firmware of your Arduino board and smart home devices to benefit from the latest features and improvements.
By integrating your Arduino thermostat with smart home systems, you can create a cohesive and intelligent environment that enhances comfort, convenience, and energy efficiency in your living space.
Troubleshooting and Debugging Tips for Arduino Thermostat Projects
While Arduino thermostat projects can be highly rewarding, they may encounter technical challenges that require diligent troubleshooting and debugging. Here are some tips to help you overcome common issues and ensure the smooth operation of your Arduino thermostat:
1. Double-check wiring connections: Incorrect or loose wiring connections can cause erratic behavior or malfunctioning of the thermostat. Carefully review the wiring connections between the Arduino board, temperature sensors, relays, and other components, ensuring they are securely and correctly connected.
2. Verify sensor readings: If the temperature readings seem erratic or inaccurate, verify the sensor readings using a separate thermometer or temperature probe. Ensure that the sensors are properly calibrated and placed in appropriate locations to deliver accurate measurements.
3. Check power supply stability: Inadequate power supply or fluctuations can lead to erratic behavior or system failures. Verify that your Arduino board is receiving a stable power supply within the recommended voltage range. Consider using a regulated power source or capacitors to stabilize the power supply if needed.
4. Utilize serial output for debugging: Use the Serial Monitor in the Arduino IDE to print out debug messages, sensor readings, or variable values. This allows you to track the flow of the program, identify potential issues, and pinpoint areas of concern within your thermostat logic.
5. Test and isolate components: If you suspect a particular component to be faulty, isolate it and test it separately. For example, you can test the temperature sensors on their own without the thermostat logic or test the relays by triggering them manually. This helps determine whether any specific component is causing the issue.
6. Update and troubleshoot libraries: If you are using libraries in your Arduino thermostat project, ensure that they are up to date. Outdated or incompatible libraries can lead to programming errors or inconsistencies. Refer to the library documentation and the Arduino forum for troubleshooting tips related to the specific libraries you are using.
7. Use proper debugging techniques: Debugging Arduino code involves systematically examining and testing various parts of the program. Utilize techniques such as adding debug statements, using breakpoints, or employing conditional statements to pinpoint issues and locate areas of concern in your code.
8. Seek community support: Arduino has a vast community of enthusiasts and experts. If you encounter difficulties, explore online forums, community groups, or the official Arduino forum for guidance and assistance. Describe your issue clearly, provide relevant code snippets, and be open to suggestions and feedback from the community.
Remember, troubleshooting and debugging are inherent parts of any electronic project. Approach the process patiently and methodically, testing one component or section at a time. By following these tips and leveraging community support, you can address issues effectively and ensure a successful Arduino thermostat project.