How to Access the Live Photo Editor
If you’re an iPhone user, you’re probably familiar with the Live Photos feature that brings your static pictures to life. But did you know that you can also edit your Live Photos right on your iPhone? With the Live Photo Editor, you can enhance your images, adjust settings, and unleash your creativity to make your Live Photos even more captivating. Here’s how you can access the Live Photo Editor on your iPhone.
To start editing a Live Photo, open the Photos app and browse through your photo library to find the Live Photo you want to edit. Once you’ve selected the photo, tap on the Edit button at the top right corner of the screen. This will open up the editing options for your Live Photo.
Within the Live Photo Editor, you’ll find a variety of tools and features that allow you to refine and enhance your image. These include crop and aspect ratio adjustments, filters, lighting adjustments, color balance, depth control, sharpness, red-eye and blemish removal, vignette effect, text and caption additions, as well as markup tools for drawing and annotating.
To access specific editing tools, swipe left or right on the editing toolbar located below your Live Photo. Each swipe will reveal a different set of tools, allowing you to choose the adjustments you want to make.
Once you have selected a tool, you can further refine the settings by using the various sliders and options available. For example, when adjusting the crop and aspect ratio, you can drag the corners of the frame to position and resize the photo. You can also choose from preset aspect ratios or manually adjust the proportions to your liking.
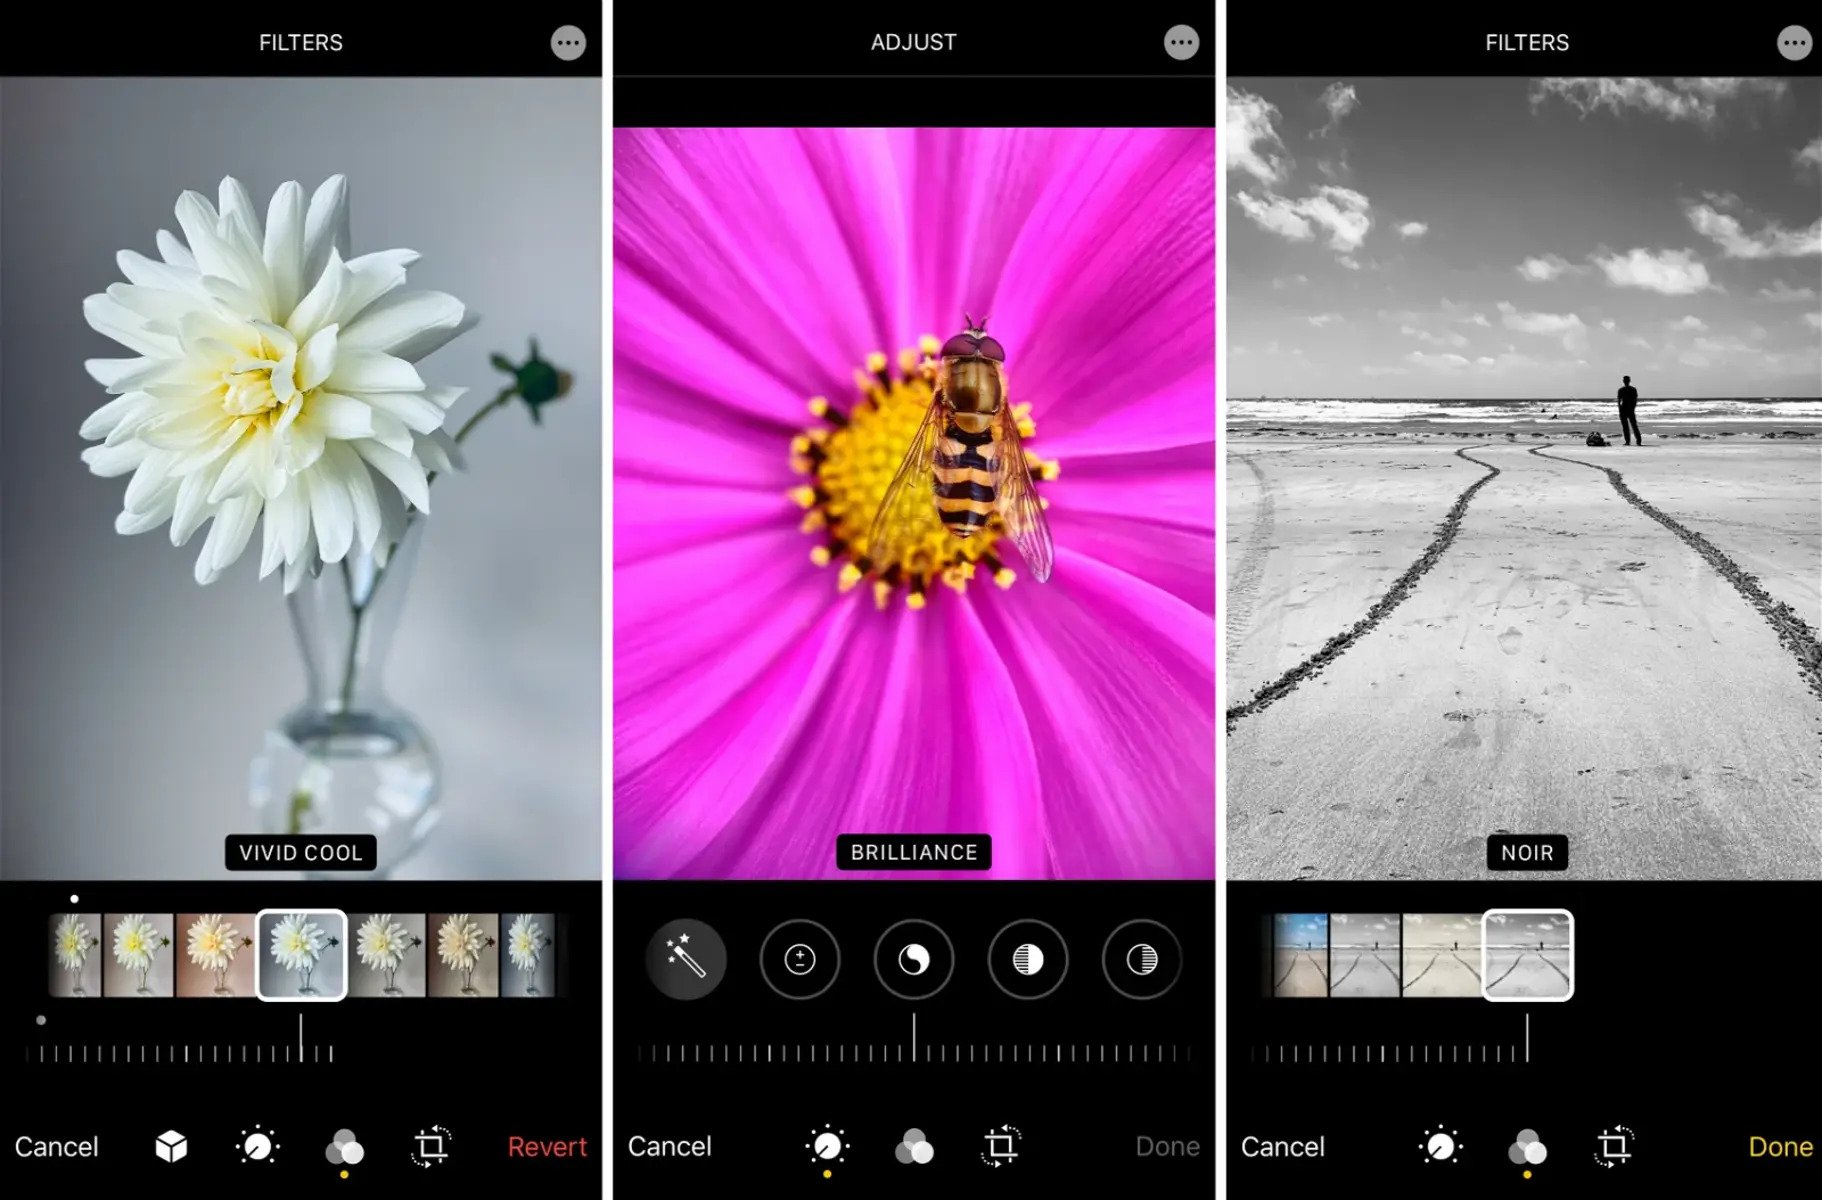
Similarly, when applying filters, you can swipe left or right to preview different filter options and tap on one to apply it to your Live Photo. Filters can dramatically change the mood and tone of your photo, so don’t be afraid to experiment and find the perfect look.
Remember to save your edits by tapping on the Done button in the top right corner of the screen. This will ensure that your changes are applied to the Live Photo and saved in your photo library.
Now that you know how to access the Live Photo Editor on your iPhone, you can unlock a world of creative possibilities. Whether you want to enhance the lighting, adjust the colors, or add text and annotations, the Live Photo Editor has all the tools you need to transform your Live Photos into stunning masterpieces.
Adjusting the Crop and Aspect Ratio
When editing your Live Photos, one of the key adjustments you can make is to the crop and aspect ratio. This allows you to reposition and resize your photo to highlight specific elements and create a more visually pleasing composition. Here’s how you can adjust the crop and aspect ratio of your Live Photos using the Live Photo Editor.
To begin, open the Live Photo you want to edit in the Photos app and tap on the Edit button. This will bring up the editing tools for your Live Photo. Swipe left or right on the toolbar to find the crop and aspect ratio adjustment option.
Once you’ve found the crop tool, you’ll see a rectangle overlay on your Live Photo. You can drag the corners of the rectangle to adjust the size and position of the crop. This allows you to focus on specific areas of the photo or remove unwanted elements by cropping them out.
Additionally, the Live Photo Editor offers a range of preset aspect ratios that you can choose from. These include options such as square, 4:3, 16:9, and more. Simply tap on the aspect ratio icon and select the desired option to automatically crop your Live Photo to the chosen proportions.
If you prefer more control over the aspect ratio, you can manually adjust the proportions by dragging the edges of the crop rectangle. This allows you to create a custom aspect ratio that perfectly suits your vision for the photo.
Keep in mind that adjusting the crop and aspect ratio can significantly alter the composition of your Live Photo. It’s important to experiment with different settings to find the best balance and ensure that the important elements are properly framed and highlighted.
Once you’re satisfied with the crop and aspect ratio adjustments, tap the Done button, and your changes will be applied to your Live Photo. You can then save the edited Live Photo to your photo library or continue making further adjustments using other tools in the Live Photo Editor.
By adjusting the crop and aspect ratio of your Live Photos, you can enhance the visual impact and create a more engaging composition. Whether you want to emphasize a subject, remove distractions, or create a unique framing, the crop and aspect ratio adjustments in the Live Photo Editor give you the flexibility to bring your vision to life.
Enhancing the Photo with Filters
The Live Photo Editor on your iPhone offers a wide range of filters that can help you enhance the look and mood of your Live Photos. Filters can add depth, vibrancy, and artistic flair to your images, transforming them into stunning visuals. Here’s how you can use filters to enhance your Live Photos.
To begin, open the Live Photo you want to edit in the Photos app and tap on the Edit button. Swipe left or right on the toolbar to find the filters option. Once you’re in the filters section, you’ll see a variety of filter options displayed at the bottom of the screen.
Scroll through the filters to preview the different effects they create on your Live Photo. As you swipe, the image will change in real-time, allowing you to see how each filter alters the colors, contrast, and overall tone of the photo.
When you find a filter that you like, simply tap on it to apply it to your Live Photo. The filter will be instantly applied, and you can compare the edited version with the original by tapping and holding the image or using the slider in the middle of the screen.
If you want to fine-tune the intensity of the filter, you can do so by adjusting the slider located above the filter options. Moving the slider to the left will reduce the intensity, while moving it to the right will increase it. This allows you to achieve the perfect balance and maintain the desired level of enhancement.
Experiment with different filters to find the one that complements the mood and aesthetic you want for your Live Photo. Some filters may work better for landscapes, while others may be more suited for portraits or urban scenes. Don’t be afraid to try out different combinations and see how they affect the overall look and feel of your photo.
Once you’re satisfied with the filter adjustments, tap the Done button to save the edited Live Photo to your photo library. You can then share your enhanced Live Photo with friends and family or continue editing it using other tools in the Live Photo Editor.
By using filters in the Live Photo Editor, you can enhance the visual appeal and evoke a specific atmosphere in your Live Photos. Whether you want to create a moody and dramatic effect or a vibrant and colorful look, filters provide a convenient and effective way to elevate the quality and impact of your images.
Applying Adjustments to the Lighting
One of the key aspects of photo editing is being able to control and adjust the lighting in your Live Photos. The Live Photo Editor on your iPhone provides several tools and adjustments that allow you to modify the lighting and create the desired mood for your images. Here’s how you can apply adjustments to the lighting in your Live Photos.
To begin, open the Live Photo you want to edit in the Photos app and tap on the Edit button. Swipe left or right on the toolbar to find the lighting adjustment options.
Within the lighting adjustment section, you’ll typically find options such as brightness, highlights, shadows, and contrast. Each of these adjustments can significantly impact the overall lighting and tone of your Live Photo.
Start by adjusting the brightness. Drag the slider left or right to increase or decrease the brightness level of your Live Photo. Increasing the brightness can help to bring out details in darker areas, while decreasing it can add a more dramatic effect.
Next, you can fine-tune the highlights and shadows. Adjusting the highlights can help to recover details in overexposed areas, while tweaking the shadows can bring out details in the darker regions of the photo. Experiment with these sliders to achieve the desired balance and contrast.
Another important lighting adjustment is contrast. Increasing the contrast can make your Live Photo appear more dynamic and vibrant, while reducing it can give a softer and more ethereal look. Play around with the contrast slider to find the perfect balance for your image.
Keep in mind that subtle adjustments to the lighting can often make a big difference. It’s important to carefully observe the changes as you adjust the sliders and make adjustments accordingly.
Once you’re satisfied with the lighting adjustments, tap the Done button to save the edited Live Photo. You can then share your enhanced Live Photo or continue editing it using other tools in the Live Photo Editor.
By applying adjustments to the lighting in your Live Photos, you have the power to control the mood, highlight specific elements, and create a visually stunning image. Whether you want to brighten a dark scene, add depth and dimension, or create a moody atmosphere, the lighting adjustment tools in the Live Photo Editor can help you achieve your vision.
Fine-tuning the Color Balance
Mastering the color balance in your Live Photos is crucial in creating visually appealing and captivating images. The Live Photo Editor on your iPhone provides various tools and adjustments that allow you to fine-tune the color balance and achieve the desired look for your photos. Here’s how you can fine-tune the color balance in your Live Photos.
To begin, open the Live Photo you want to edit in the Photos app and tap on the Edit button. Swipe left or right on the toolbar to find the color adjustment options.
In the color adjustment section, you’ll typically find sliders for adjusting the temperature and tint of your Live Photo. These sliders allow you to control the warmth or coolness of the overall colors in your image.
The temperature slider, usually represented by a color wheel, can be adjusted by moving it left or right. Moving it towards the blue end of the spectrum will make your Live Photo appear cooler, while moving it towards the yellow or orange end will make it appear warmer.
The tint slider, often represented by a purple and green scale, allows you to fine-tune the balance between these two colors. If your Live Photo appears too greenish, you can move the slider towards the purple end to correct the imbalance, and vice versa.
While adjusting the color balance, it’s important to take into account the desired mood and the lighting conditions in the original photo. Different lighting situations may call for different color adjustments to ensure that the image looks natural and pleasing.
Remember, subtle adjustments to the color balance can have a significant impact on the overall look and feel of your Live Photo. It’s important to carefully observe the changes as you make adjustments and make tweaks accordingly.
Once you’re satisfied with the color balance adjustments, tap the Done button to save the edited Live Photo. You can then share your enhanced Live Photo or continue editing it using other tools in the Live Photo Editor.
By fine-tuning the color balance in your Live Photos, you can create images that are visually appealing and accurately represent the atmosphere and mood of the moment they were captured. Experiment with different adjustments to achieve the perfect color balance and bring your Live Photos to life.
Adding Depth Control to the Photo
The Depth Control feature in the Live Photo Editor allows you to add a professional touch to your photos by adjusting the depth of field. With this feature, you can create stunning images with a shallow depth of field, where the subject is in sharp focus while the background is beautifully blurred. Here’s how you can add depth control to your Live Photos.
To start, open the Live Photo you want to edit in the Photos app and tap on the Edit button. Swipe left or right on the toolbar to find the depth control adjustment option.
Once you’re in the depth control section, you’ll see a slider that allows you to adjust the depth effect. Sliding it to the right will increase the blur, creating a stronger bokeh effect, while sliding it to the left will decrease the blur, giving more focus to the background.
It’s important to note that the depth control feature works best on photos that were captured using the Portrait mode on compatible iPhones. This mode uses the dual-camera system to create a depth map, allowing you to simulate the blurred background effect even after the photo has been taken.
If you have taken a Live Photo in Portrait mode, you can also adjust the depth control effect after the fact. This means you can experiment with different levels of blur and find the perfect balance for your image.
When adjusting the depth control, it’s essential to pay attention to the subject of your photo. By increasing the blur, you can make the subject stand out and draw attention to it. On the other hand, reducing the blur can keep more of the background in focus, which might be desirable for certain compositions.
Once you’re satisfied with the depth control adjustments, tap the Done button to save the edited Live Photo. You can then share your enhanced Live Photo or continue editing it using other tools in the Live Photo Editor.
By adding depth control to your Live Photos, you can take your photography to a whole new level. Whether you want to create stunning portraits or emphasize a particular element in your composition, the depth control feature allows you to unleash your creativity and capture breathtaking images with a professional look.
Adjusting the Sharpness and Definition
Ensuring that your Live Photos are sharp and well-defined is essential for creating high-quality images. With the Live Photo Editor on your iPhone, you have the ability to make precise adjustments to the sharpness and definition of your photos. Here’s how you can adjust the sharpness and definition of your Live Photos.
To begin, open the Live Photo you want to edit in the Photos app and tap on the Edit button. Swipe left or right on the toolbar to find the sharpness and definition adjustment options.
Within the sharpness and definition section, you’ll typically find sliders that allow you to control the amount of sharpness and clarity in your Live Photo. These adjustments can help bring out details and enhance the overall crispness of your image.
Start by adjusting the sharpness slider. Drag it to the right to increase the sharpness of your Live Photo, emphasizing the fine details and textures. Moving it to the left will reduce the sharpness, giving a softer and more diffused look to your image.
Next, you can fine-tune the definition. Increasing the definition can further enhance the clarity and depth of your Live Photo, adding more detail to the textures and lines. Decreasing the definition can create a smoother and more ethereal effect, perfect for certain artistic styles.
It’s important to strike a balance when adjusting sharpness and definition. Overdoing these adjustments can lead to unnatural and exaggerated results. While increasing sharpness and definition can enhance an image, it’s important to maintain a level of realism and avoid introducing artifacts or noise.
Remember to carefully observe the changes in your Live Photo as you make adjustments to the sharpness and definition sliders. Take into consideration the overall look and feel you want to achieve and make tweaks accordingly.
Once you’re satisfied with the sharpness and definition adjustments, tap the Done button to save the edited Live Photo. From there, you can share your enhanced Live Photo or continue editing it using other tools in the Live Photo Editor.
By adjusting the sharpness and definition of your Live Photos, you can significantly enhance their clarity and bring out the finer details. Whether you want a crisp and sharp look or a softer and dreamy atmosphere, the sharpness and definition adjustment options in the Live Photo Editor provide you with the tools to refine your images to your desired level of quality.
Removing Red-Eye and Blemishes
Red-eye and blemishes can often detract from the overall quality of your Live Photos. However, with the Live Photo Editor on your iPhone, you can easily remove these imperfections and ensure that your images look flawless. Here’s how you can remove red-eye and blemishes from your Live Photos.
To begin, open the Live Photo you want to edit in the Photos app and tap on the Edit button. Swipe left or right on the toolbar to find the red-eye and blemish removal tool.
When you select the red-eye removal tool, you’ll typically see a crosshair cursor. Position the cursor over the red-eye area you want to fix and tap on it. The Live Photo Editor will automatically detect the red-eye and correct it, making the eyes appear more natural and vibrant.
If you want to remove blemishes such as acne, spots, or other imperfections, select the blemish removal tool. With this tool, you can simply tap on the blemish, and the Live Photo Editor will analyze the area and automatically smooth out the imperfection.
While the auto-detection of red-eye and blemishes is usually quite accurate, you have the option to make manual adjustments if necessary. Simply use your finger to tap and hold on the red-eye or blemish area, and then drag your finger left or right to customize the correction.
It’s important to note that the Live Photo Editor provides non-destructive editing, meaning that the original image is preserved, and any adjustments you make can be easily undone. This allows you to experiment with different corrections until you achieve the desired results.
Once you’re satisfied with the removal of red-eye and blemishes, tap the Done button to save the edited Live Photo. You can then share your blemish-free Live Photo with confidence or continue editing it using other enhancements in the Live Photo Editor.
By removing red-eye and blemishes from your Live Photos, you can ensure that the focus remains on your subject and that distractions are eliminated. This process allows you to present flawless and professional-looking images that truly capture the essence of your photography.
Using the Vignette Effect
The vignette effect is a popular artistic technique used in photography to draw focus to the subject and create a more dramatic or vintage look. With the Live Photo Editor on your iPhone, you can easily apply the vignette effect to your Live Photos. Here’s how you can use the vignette effect to enhance your images.
To begin, open the Live Photo you want to edit in the Photos app and tap on the Edit button. Swipe left or right on the toolbar to find the vignette adjustment option.
Once you’ve found the vignette effect, you’ll see a circular slider that allows you to control the size and intensity of the vignette. Dragging the slider to the left will decrease the size and intensity of the vignette, while dragging it to the right will increase it.
The vignette effect works by darkening the edges of the photo, creating a gradual transition from the darker edges to the brighter center. This helps to draw attention to the subject in the center of the frame and adds a touch of drama or nostalgia to the overall image.
Experiment with different settings to achieve the desired vignette effect for your Live Photo. Depending on the subject and composition, you may want a subtle vignette or a more pronounced one to create a specific mood or aesthetic.
Another option available in the vignette adjustment section is the ability to adjust the feathering of the vignette. Feathering refers to the smoothness of the transition between the darkened edges and the brighter center. By adjusting the feathering slider, you can make the vignette blend more seamlessly into the image or create a distinct edge.
As with any editing adjustment, it’s important to use the vignette effect tastefully and sparingly. The goal is to enhance the overall visual impact of your Live Photo without distracting or overpowering the subject.
Once you’re satisfied with the vignette adjustments, tap the Done button to save the edited Live Photo. From there, you can share your enhanced Live Photo with friends and family or continue editing it using other tools in the Live Photo Editor.
By using the vignette effect in the Live Photo Editor, you can add depth, drama, and artistic flair to your photos. Whether you want to create a vintage look, highlight a specific subject, or evoke a certain mood, the vignette effect can help you achieve your desired visual style.
Adding Text and Captions to the Live Photo
The Live Photo Editor on your iPhone offers an array of possibilities when it comes to adding text and captions to your Live Photos. Whether you want to add a simple caption, insert a date and location, or include a personalized message, the ability to add text allows you to enhance the storytelling aspect of your images. Here’s how you can add text and captions to your Live Photos.
To begin, open the Live Photo you want to edit in the Photos app and tap on the Edit button. Swipe left or right on the toolbar to find the text and caption option.
Select the text and caption tool, and you’ll be presented with a text box where you can enter your desired text. You can type in the text directly or choose from a set of predefined captions and phrases.
Once you’ve entered your text, you can customize its appearance by selecting from various font styles, sizes, and colors. You can also position the text box anywhere on the Live Photo by dragging it with your finger.
If you want to add context to your Live Photo, you can also include the date and location information. The Live Photo Editor can automatically extract this information from the metadata of the photo, or you can manually enter the details.
Additionally, you can adjust the transparency of the text to make it blend seamlessly with the image. This allows you to find the perfect balance between the text and the visual elements of the Live Photo.
Remember to keep your text concise and legible. Avoid overcrowding the photo with too much text, as it can detract from the overall image. Choose a font style and size that is easily readable and complements the mood and theme of your Live Photo.
Once you’re satisfied with the text and caption adjustments, tap the Done button to save the edited Live Photo. You can then share your Live Photo with the added text, creating a personalized and engaging visual story.
By adding text and captions to your Live Photos, you can provide context, descriptions, or messages that enhance the storytelling aspect of your images. Whether you want to label a specific location, share a heartfelt message, or simply provide a caption that adds meaning to the photo, the Live Photo Editor makes it easy to incorporate text into your visual narratives.
Using Markup Tools to Draw and Annotate
The Live Photo Editor on your iPhone provides a set of powerful markup tools that allow you to draw, annotate, and highlight key elements in your Live Photos. These tools enable you to add a creative touch, emphasize details, or provide valuable information within your images. Here’s how you can use the markup tools to draw and annotate your Live Photos.
To begin, open the Live Photo you want to edit in the Photos app and tap on the Edit button. Swipe left or right on the toolbar to find the markup tool option.
Within the markup tool section, you’ll find a variety of annotation tools such as pens, highlighters, shapes, and a text tool.
Select the desired markup tool and tap on the screen to start drawing or adding annotations. You can change the color and thickness of the lines by selecting the appropriate options within the markup toolbar.
The text tool allows you to insert text within the Live Photo. Simply tap on the screen where you want the text to appear, and a text box will appear for you to enter your desired text. You can adjust the font style, size, and alignment of the text to suit your needs.
If you want to emphasize certain areas in your Live Photo, you can use the highlighter tool to draw attention to specific details. The highlighter adds a translucent overlay, allowing you to create emphasis without obstructing the underlying image.
The shapes tool within the markup tools provides you with the ability to add shapes such as rectangles, circles, or arrows to your Live Photos. This can be helpful for pointing out specific features or guiding the viewer’s attention.
Markup tools also allow you to undo or redo any changes you make, giving you flexibility and control over your annotations. Additionally, you can easily erase any annotations you’ve made by selecting the eraser tool and swiping over the area you want to remove.
Once you’re satisfied with the markups and annotations you’ve added, tap the Done button to save the edited Live Photo. You can then share your Live Photo with the added drawings and annotations, providing a unique and personalized touch to your visual story.
By using the markup tools to draw and annotate your Live Photos, you can add creativity, information, and emphasis to your images. Whether you want to highlight key elements, provide explanations, or simply add a touch of artistic expression, the markup tools in the Live Photo Editor allow you to make your photos truly your own.
Applying Effects and Filters to the Live Photo
Adding effects and filters to your Live Photos can transform them into stunning visual pieces, enhancing their mood and overall aesthetic appeal. The Live Photo Editor on your iPhone offers a wide array of effects and filters that you can apply to your images with just a few taps. Here’s how you can apply effects and filters to your Live Photos.
To begin, open the Live Photo you want to edit in the Photos app and tap on the Edit button. Swipe left or right on the toolbar to find the effects and filters option.
Within the effects and filters section, you’ll find a collection of pre-designed effects and filters that can dramatically alter the look and feel of your Live Photos. These include options such as Noir, Chrome, Vintage, and many more.
Scroll through the selection to preview the different effects and filters on your Live Photo. As you swipe, the image will update in real-time, allowing you to see how each effect or filter transforms the photo.
When you find an effect or filter that you like, simply tap on it to apply it to your Live Photo. The effect or filter will be instantly applied, and you can compare the edited version with the original by tapping and holding the image or using the slider in the middle of the screen.
Additionally, the Live Photo Editor allows you to adjust the intensity of the applied effect or filter. You can do this by using the intensity slider located above the effects and filters, allowing you to find the perfect balance for your image.
Experiment with different effects and filters to find the one that best complements your Live Photo. Each effect or filter can create a unique visual style and evoke a particular mood or atmosphere.
Once you’re satisfied with the effect or filter adjustments, tap the Done button to save the edited Live Photo. From there, you can share your enhanced Live Photo with friends and family, showcasing your creative vision.
By applying effects and filters to your Live Photos, you have the power to completely transform the appearance of your images. Whether you want to create a vintage look, add a touch of drama, or enhance the colors and tones, the effects and filters in the Live Photo Editor offer a wealth of creative possibilities to elevate your photos to new heights.
Saving and Sharing the Edited Live Photo
Once you’ve finished editing your Live Photo using the various tools and adjustments in the Live Photo Editor, it’s time to save and share your masterpiece. The process of saving and sharing your edited Live Photo is simple and convenient, allowing you to showcase your creativity and share your images with the world. Here’s how you can save and share your edited Live Photo.
After making all the desired edits to your Live Photo, tap on the Done button located at the top right corner of the screen. This will save all your changes and apply them to the Live Photo.
Once saved, your edited Live Photo will automatically update in your photo library, replacing the original unedited version. This ensures that you always have access to the most recent version of your Live Photo.
To share your edited Live Photo, open the Photos app and navigate to the edited Live Photo that you want to share. Tap on the Share button, which looks like an arrow pointing upwards, located at the bottom left corner of the screen.
A share sheet will appear, displaying various options for sharing your Live Photo. You can choose to share it via AirDrop, Messages, Mail, or social media platforms such as Instagram, Facebook, or Twitter.
Select your preferred sharing method and follow the prompts to complete the sharing process. Depending on the platform or method you choose, you may have additional options to customize the settings or add a caption or description to the shared Live Photo.
If you want to save a copy of your edited Live Photo to a different location or device, you can also choose the “Save to Files” option from the share sheet. This allows you to select a specific folder or directory where you want to store the edited Live Photo.
Remember that when saving or sharing a Live Photo, it retains its unique Live Photo characteristics, including the ability to play back the captured motion and audio. This sets Live Photos apart from traditional static images, offering a more dynamic and immersive viewing experience.
By saving and sharing your edited Live Photo, you can showcase your creativity, preserve your memories, and inspire others with your unique perspective. Whether you’re sharing with friends and family or showcasing your work on social media, the ability to save and share your edited Live Photo allows you to share your artistic vision and connect with others through visual storytelling.