
What are Smart Albums?
Smart Albums are a powerful feature in the Photos app for Mac that allow you to automatically organize and categorize your photos based on specific criteria. Unlike regular albums, which require manual sorting and adding of photos, smart albums automatically update themselves based on the criteria that you define.
Think of smart albums as virtual folders that can quickly sort through your vast photo collection, saving you time and effort in finding specific photos. With smart albums, you can create dynamic collections based on various attributes such as date range, location, keywords, facial recognition, ratings, and favorites.
The beauty of smart albums lies in their ability to adapt and update based on changes made to your photo library. If you add or remove photos that meet the smart album’s criteria, they will be automatically added or removed accordingly, ensuring that your smart album is always up to date.
Smart albums are incredibly useful for a variety of purposes. Whether you want to organize your vacation photos by location, gather all photos of a specific person, or compile a collection of your highest-rated images, smart albums provide a convenient and efficient way to do so.
By utilizing smart albums, you can effortlessly manage and access your photos based on specific attributes, allowing you to find and showcase your favorite memories without the hassle of manual organization.
Now that you understand what smart albums are and their potential benefits, let’s explore how to create and customize smart albums to suit your specific needs.
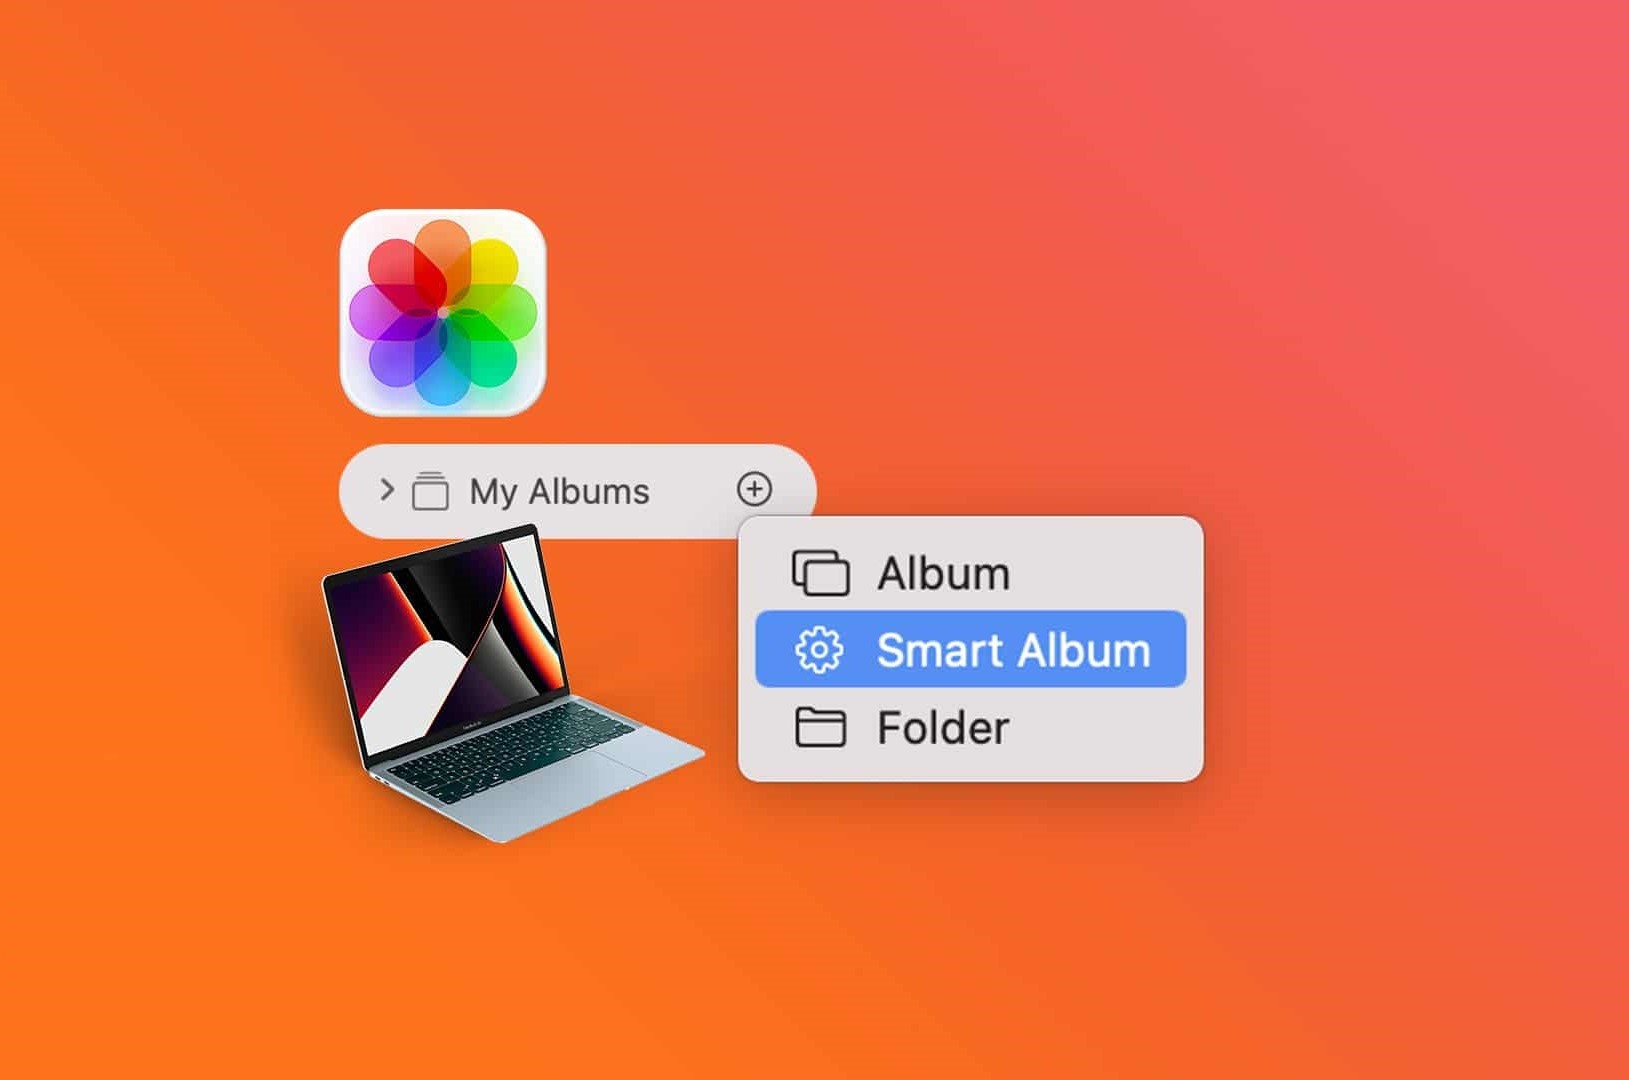
Creating a Smart Album
Creating a smart album in Photos for Mac is a straightforward process. Follow the steps below to get started:
- Open the Photos app on your Mac.
- Click on the “File” menu in the top menu bar and select “New Smart Album.”
- A new window will appear, prompting you to set the criteria for your smart album.
- Give your smart album a descriptive name in the “Smart Album Name” field.
- Choose the first criteria you want to apply to the smart album. This could be anything from a specific date range, location, keyword, facial recognition, rating, or favorite status.
- Click the “+” button to add more criteria to your smart album. You can add as many criteria as you need to narrow down your photo selection.
- Preview the results in the right-hand pane of the window to verify that the criteria are correctly applied.
- Once you are satisfied with the criteria, click the “OK” button to create the smart album.
Your smart album will now appear in the sidebar of the Photos app, under the “Albums” section. It will continuously update itself based on any changes made to your photos that meet the defined criteria.
Remember, you can always go back and edit the criteria of your smart album by right-clicking on it and selecting “Edit Smart Album.” This allows you to fine-tune the parameters and further customize the album to fit your preferences.
Now that you know how to create a smart album, let’s explore the different criteria options you can use to make your smart albums even more powerful and versatile.
Choosing Criteria for your Smart Album
When creating a smart album in Photos for Mac, you have a wide range of criteria options to choose from. These criteria allow you to customize and refine your smart albums to fit your specific needs. Here are some of the criteria options you can use:
- Date Range: Use this criterion to specify a specific date range or a range of dates for your smart album. This is particularly useful for organizing photos taken during specific events or vacations.
- Location: With this criterion, you can filter your photos based on the location in which they were taken. This is handy for creating albums that showcase photos from certain places or trips.
- Keywords: When you add keywords to your photos, you can use the keyword criterion to gather all photos that have a specific keyword assigned to them. This is helpful for grouping photos based on common themes or subjects.
- Facial Recognition: If you have enabled facial recognition in Photos, you can use this criterion to gather all photos that have a specific person tagged. This is great for creating albums dedicated to specific individuals.
- Ratings: By using the rating criterion, you can filter your photos based on their assigned ratings. This allows you to create smart albums that only include your highest-rated or favorite photos.
- Favorites: Similar to ratings, the favorites criterion enables you to gather all photos that you marked as favorites. This is a convenient way to create albums containing your most cherished memories.
You can combine multiple criteria together to create more specific and refined smart albums. For example, you can create a smart album that includes photos taken within a certain date range, at a specific location, with a specific keyword, and featuring a certain person. The possibilities are endless!
Remember that you can always experiment and fine-tune the criteria of your smart albums to achieve the desired results. Don’t be afraid to play around and explore the different options available in Photos for Mac to create customized and meaningful smart albums.
Now that you have a good understanding of the criteria options, let’s delve into some advanced criteria and sorting options that can further enhance your smart albums.
Using Date Range and Location Criteria
Date range and location criteria are powerful tools for organizing and filtering your photos in smart albums. They allow you to narrow down your selection based on specific timeframes and geographic locations. Here’s how you can leverage these criteria:
Date Range: Photos for Mac offers flexible options for setting a date range in smart albums. You can specify a specific date, a range of dates, or even create custom date ranges. This is ideal for organizing photos taken during specific events, holidays, or time periods. For example, you can create a smart album that includes all photos taken during the summer of 2022 or during a specific vacation.
Location: The location criterion enables you to filter your photos based on where they were taken. If your photos have geolocation data, you can create smart albums that gather all photos from a particular city, country, or even a specific venue or landmark. This is particularly useful for organizing travel photos or creating albums dedicated to specific locations.
Combining date range and location criteria allows you to create even more precise smart albums. For instance, you can create an album that includes all photos taken during a specific trip to Paris or during a specific date range in your hometown.
When using date range and location criteria, it’s important to ensure that your photos contain accurate date and location information. If any of your photos don’t have this metadata, they may not be included in the smart album. You can easily add or edit this information in the Photos app by selecting the photo and clicking on the “Info” button.
Remember to regularly update your smart albums if you add new photos that meet the criteria. This ensures that your smart albums remain up to date with your latest additions.
By utilizing the date range and location criteria in smart albums, you can effectively organize and locate your photos based on specific timeframes and geographic locations. This not only streamlines your photo management but also enables you to easily relive and share your memorable moments.
Next, let’s explore the options for adding keyword and facial recognition criteria to your smart albums.
Adding Keyword and Facial Recognition Criteria
Keyword and facial recognition criteria are powerful tools that allow you to further refine your smart albums in Photos for Mac. They enable you to categorize your photos based on specific keywords and the people featured in them. Here’s how you can utilize these criteria:
Keywords: Adding keywords to your photos allows you to categorize them based on common themes, subjects, or events. When creating a smart album, you can specify a keyword as a criterion, and the album will automatically include all photos that have that keyword assigned to them. This is particularly useful for creating themed albums or gathering photos related to specific topics. For example, you can create a smart album for all your photos tagged with “birthday,” “beach,” or “sunset.”
Facial Recognition: If you have enabled facial recognition in Photos, you can take advantage of this criterion to create smart albums based on people in your photos. The facial recognition feature analyzes your photos and identifies individuals, allowing you to easily gather all photos featuring a specific person. To create a smart album based on facial recognition, simply select the person’s name as the criterion, and the album will automatically include all photos that have that person tagged. This is excellent for creating albums dedicated to family members, friends, or even pets!
Using keywords and facial recognition in smart albums allows for effortless organization and retrieval of photos based on specific subjects or people. As you add new photos or assign keywords to existing ones, your smart albums will automatically update to include the appropriate photos.
It’s worth noting that accurately tagging photos with keywords and identifying individuals in facial recognition can take some time initially. However, the effort invested in organizing your photos will pay off as you enjoy the convenience of easily locating specific images in your smart albums.
Now that you understand how keywords and facial recognition criteria work in smart albums, let’s explore some advanced criteria options to further enhance your photo organization.
Advanced Criteria with Ratings and Favorites
Ratings and favorites are advanced criteria options that can greatly enhance your smart albums in Photos for Mac. By utilizing these criteria, you can create albums that include only your highest-rated or favorite photos. Here’s how you can use ratings and favorites to customize your smart albums:
Ratings: The rating criterion allows you to filter your photos based on the ratings you have assigned to them. In Photos, you can rate your photos on a scale of one to five stars. By selecting a specific rating as the criterion in your smart album, the album will automatically gather all photos with that rating or higher. For example, you can create a smart album that includes all your five-star rated photos or photos rated three stars and above.
Favorites: Marking a photo as a favorite is a quick way to highlight your most cherished memories. The favorites criterion enables you to create smart albums that gather all photos you have marked as favorites. This is especially valuable for creating albums that showcase your best and most meaningful photos.
Combining ratings and favorites with other criteria options allows you to create even more refined and personalized smart albums. For instance, you can create an album that includes all photos taken in a specific location, within a certain date range, and rated four stars or higher.
It’s important to note that ratings and favorites are subjective and can vary from person to person. However, they provide a valuable way to filter and highlight your photos based on your own preferences and sentimental value.
Keep in mind that as you add new photos or change the ratings and favorites of existing ones, your smart albums will automatically adjust to include or exclude the appropriate images.
By utilizing ratings and favorites in smart albums, you can easily showcase your best and most beloved photos, as well as quickly access images that meet specific quality or sentimental criteria.
Next, let’s explore the sorting and display options available for your smart albums in Photos for Mac.
Sorting and Display Options
Sorting and display options in Photos for Mac allow you to customize the way your smart albums are organized and presented. These options provide flexibility in how your photos are arranged and showcased within the album. Here are the sorting and display options you can utilize:
Sort Order: You can specify the order in which your photos appear within the smart album. Photos can be sorted by various attributes such as date taken, title, rating, or even manually in a custom order. This allows you to arrange your photos in a way that makes the most sense for your desired presentation.
View Options: Photos for Mac offers different view options to control how your photos are displayed within the smart album. You can choose from options like a grid view, which displays multiple photos in a grid pattern, or a single photo view, where only one photo is shown at a time. Additionally, you can customize the size of the thumbnails or enable the display of additional information, such as photo names or metadata.
Cover Photo: When viewing your smart album, you can choose a specific photo to serve as the cover photo. The cover photo acts as the representative image for the album and is displayed prominently. This is helpful for visually indicating the content or theme of the smart album.
By utilizing the sorting and display options, you can tailor the presentation of your smart albums to suit your personal preferences and showcase your photos in a visually appealing and meaningful way.
It’s important to note that these options can be adjusted at any time, allowing you to change the sorting or display preferences as needed. Additionally, the sorting and display options apply to the smart album itself, so you can have different settings for each individual smart album in your library.
Now that you have a good understanding of the sorting and display options available, let’s explore how to add photos to your smart albums.
Adding Photos to a Smart Album
Adding photos to a smart album in Photos for Mac is a seamless process. As you create the criteria for your smart album, it automatically scans your photo library and includes any photos that meet the specified criteria. Here’s how it works:
When you create a smart album, Photos for Mac automatically scans your entire photo library and evaluates each photo based on the criteria you set. Any photo that matches the criteria will be included in the smart album. This means that as you add new photos to your library or update existing ones, the smart album will automatically update itself if the newly added or modified photos meet the criteria.
This dynamic process ensures that your smart album always includes the most relevant and up-to-date photos that meet your specified criteria. There’s no need to manually add or remove photos from the smart album since it is continuously updating itself based on the criteria you defined.
If you want to check which photos are included in a smart album, you can select the album in the sidebar of the Photos app. The smart album will display all the matching photos based on the criteria you set. You can browse through the photos, view them in different display options, and even make edits or adjustments as needed.
It’s important to remember that when adding photos to a smart album, they must meet the criteria you have defined. If a photo doesn’t fit the criteria, it will not be included in the smart album. Therefore, it is crucial to carefully set the criteria to ensure that the desired photos are included in the smart album.
By utilizing smart albums in Photos for Mac, you can effortlessly gather and organize photos based on specific criteria, eliminating the need for manual sorting and organizing. This saves you time and effort, allowing you to focus on enjoying and sharing your precious memories.
Now that you know how to add photos to a smart album, let’s explore how to edit and manage your smart albums.
Editing and Managing Smart Albums
Editing and managing smart albums in Photos for Mac gives you the flexibility to modify the criteria and settings of your albums, ensuring they continue to meet your specific needs. Here are some key steps for editing and managing your smart albums:
Editing Criteria: To modify the criteria of a smart album, simply right-click on the album in the sidebar and select “Edit Smart Album.” This opens a window where you can make changes to the existing criteria or add new criteria. You can adjust the date range, location, keywords, facial recognition, ratings, or favorites as needed. Once you have made the necessary changes, click “OK” to save the modifications. The smart album will automatically update based on the modified criteria.
Renaming Smart Albums: If you want to change the name of a smart album, right-click on the album in the sidebar and select “Rename Smart Album.” Enter the new name in the text field and press “Enter” or click outside the text field to save the new name.
Reordering Smart Albums: The order of smart albums in the sidebar can be rearranged to suit your preferred organization. Simply click and drag the smart album to a new position in the sidebar. This allows you to group related smart albums or place frequently accessed albums at the top for easy access.
Deleting Smart Albums: If you no longer need a smart album, you can delete it by right-clicking on the album in the sidebar and selecting “Delete Smart Album.” A confirmation prompt will appear, asking you to confirm the deletion. Note that deleting a smart album does not delete the actual photos from your library; it only removes the dynamic organization of those photos based on the smart album’s criteria.
By regularly reviewing and managing your smart albums, you can ensure that they remain tailored to your changing needs and preferences. Whether you need to modify the criteria, rename an album, reorder the albums, or delete unnecessary ones, the flexibility to manage your smart albums gives you full control over your photo organization.
Now that you know how to edit and manage smart albums, let’s explore some additional tips and tricks to maximize your smart album experience.
Deleting Smart Albums
If you find that a smart album is no longer needed or does not serve its intended purpose, you have the option to easily delete it in Photos for Mac. Here’s how to delete a smart album:
To start, locate the smart album you wish to delete in the sidebar of the Photos app. Right-click on the smart album and a context menu will appear. From the context menu, select the “Delete Smart Album” option.
A confirmation prompt will appear to ensure you want to proceed with the deletion. Review the prompt and click “Delete” to confirm the action. The smart album will be permanently deleted from your Photos library.
It’s important to note that deleting a smart album does not remove the actual photos from your library. Only the dynamic organization of the photos within the smart album is eliminated. The individual photos will still be accessible in your library and any other albums they belong to.
Deleting smart albums gives you the freedom to declutter your photo organization and remove any unnecessary or outdated albums. It’s beneficial to periodically review your smart albums to ensure they align with your current needs and preferences.
If you accidentally delete a smart album or change your mind, there is a way to recover it. Simply go to the “Edit” menu at the top of the Photos app, click on “Undo” or use the keyboard shortcut Command + Z. This will revert the deletion and restore the smart album to your library.
By having the ability to delete smart albums, you can maintain a streamlined and organized photo library that reflects your desired categorization and arrangement.
Now that you understand how to delete a smart album, let’s explore some additional tips and tricks for optimizing your smart album usage.
Tips and Tricks for Smart Albums
Smart albums in Photos for Mac offer a wealth of possibilities for organizing and managing your photo library. To make the most out of this feature, consider the following tips and tricks:
Experiment with Different Criteria: Don’t be afraid to explore different criteria options and combinations for your smart albums. Mix and match criteria such as date range, location, keywords, facial recognition, ratings, and favorites to create highly specific and personalized albums.
Fine-Tune Criteria Parameters: Take advantage of the ability to edit smart albums and fine-tune the criteria parameters as needed. You can adjust date ranges, add or remove keywords, and modify other criteria to ensure your smart albums capture the exact photos you desire.
Use Multiple Smart Albums: Instead of relying on a single smart album to organize your entire library, consider creating multiple smart albums with different criteria. This allows for better organization and targeted retrieval of photos based on specific attributes and themes.
Regularly Review and Update: It’s important to periodically review your smart albums and update them as needed. Remove outdated criteria, add new keywords, or adjust the parameters to ensure your smart albums stay relevant and accurately represent your photo collection.
Combine Manual and Smart Albums: While smart albums are powerful tools, don’t forget the value of manual albums. You can create traditional albums and combine them with smart albums to create a comprehensive and personalized organization structure.
Utilize Enhancements and Edits: Smart albums consider all enhancements and edits made to your photos. This means that modifications such as cropping, adjustments, filters, or retouching will be reflected in your smart albums, ensuring the most updated versions are included.
Collaborate and Share: Smart albums can be shared with others, allowing for collaboration and easy sharing of specific photos with friends, family, or colleagues. When sharing a smart album, others will have access to the dynamically updated collection of photos that meet the set criteria.
Keep your Library Organized: Using smart albums is just one way to keep your photo library organized. Regularly review and delete unwanted photos, organize your manual albums, and rename or reorganize your folders to maintain a well-structured and easy-to-navigate library.
Backup your Library: Make sure to regularly back up your photo library to safeguard your precious memories. Whether you choose to use an external hard drive, cloud storage, or other backup solutions, having a backup ensures that your photos are protected in case of accidental deletion or hardware failure.
By employing these tips and tricks, you can optimize your smart albums in Photos for Mac and create a seamless and efficient system for organizing, accessing, and enjoying your photos.
With the power of smart albums at your fingertips, take the time to explore, experiment, and customize your photo organization to suit your unique preferences and needs.