
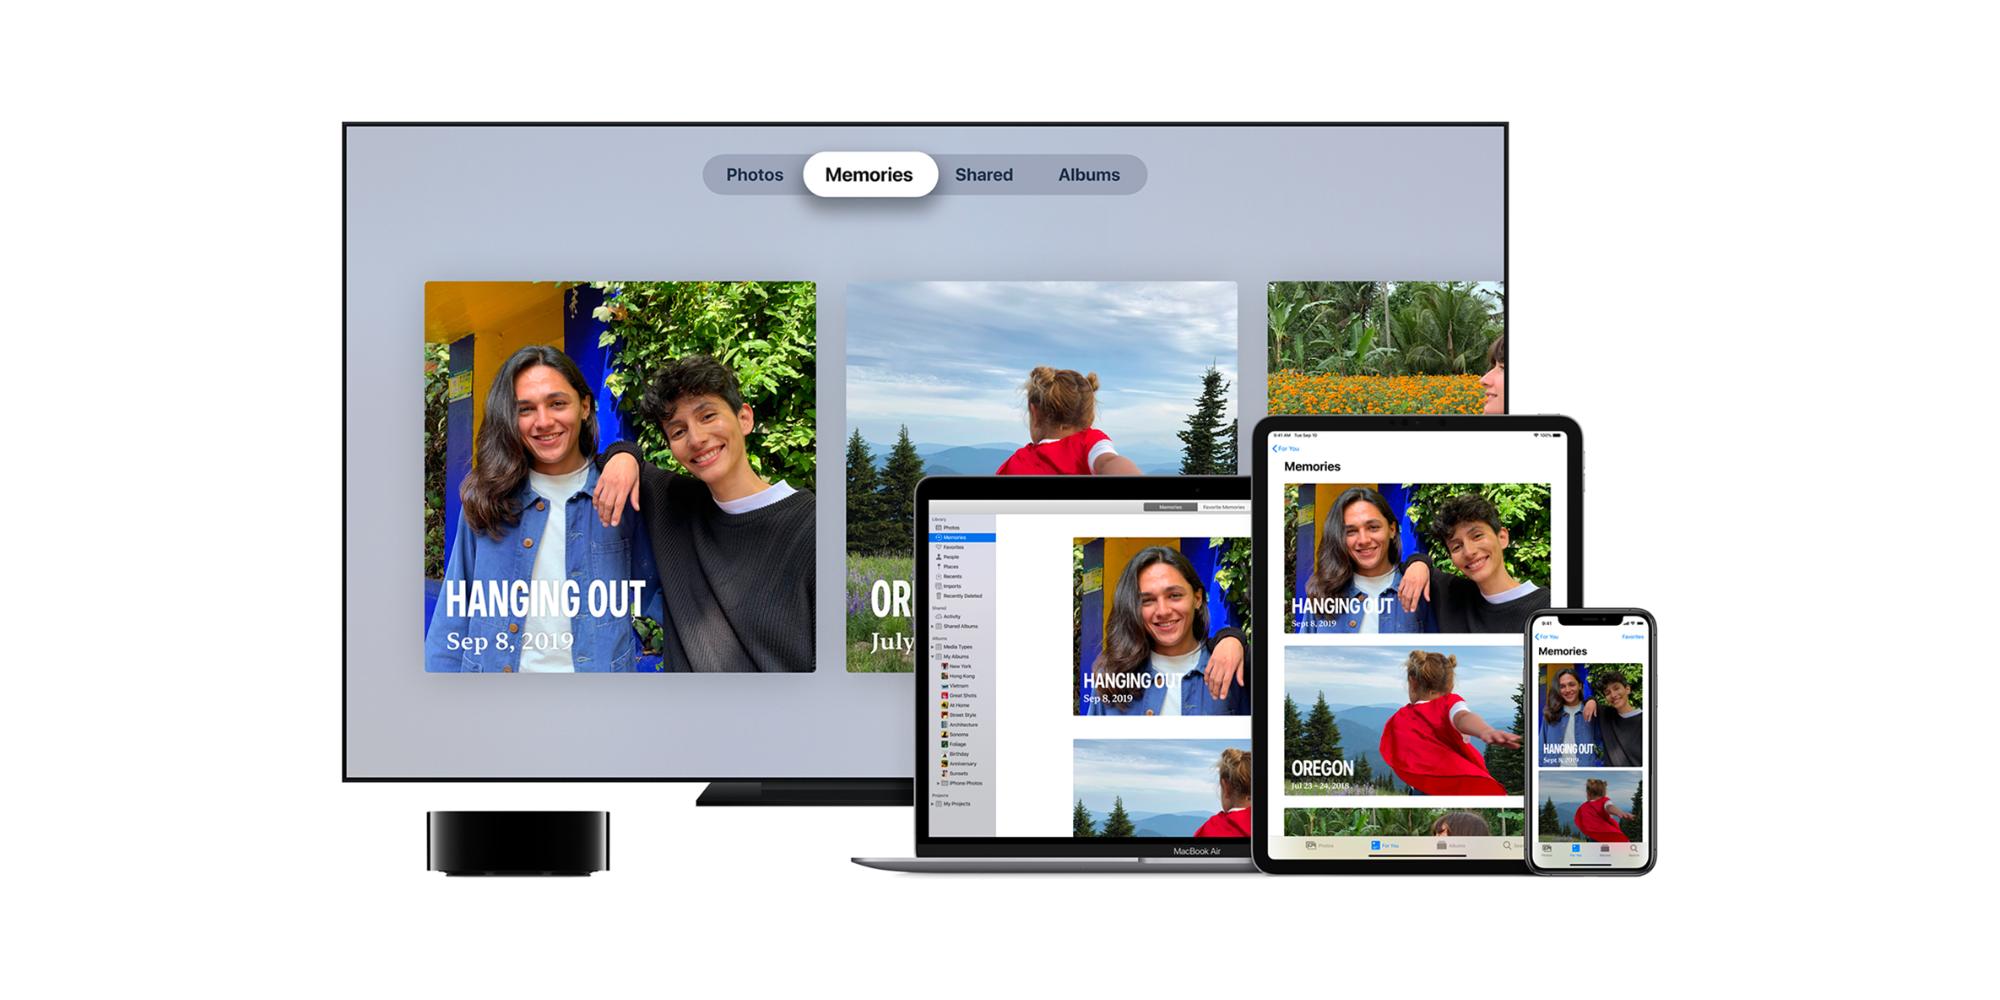
What is iCloud Photo Library?
iCloud Photo Library is a cloud-based service provided by Apple that allows you to store, organize, and share your photos and videos across all your Apple devices. It seamlessly syncs your media files, making them accessible from your iPhone, iPad, Mac, or even through the iCloud website. This powerful tool eliminates the need for physical storage devices and ensures that your precious memories are safe and easily accessible.
With iCloud Photo Library, you can effortlessly store your entire photo and video collection in the cloud. It intelligently manages storage on your devices by automatically optimizing file sizes or keeping full-resolution originals, depending on the available space. This means you can have all your photos and videos at your fingertips without worrying about running out of storage space on your devices.
One of the standout features of iCloud Photo Library is its ability to keep your entire photo library updated across all your devices. Any changes or edits you make to a photo or video on one device are instantly reflected on all your other devices. Whether you capture a photo on your iPhone, edit it on your iPad, or view it on your Mac, iCloud Photo Library ensures that all devices are in sync, offering a seamless user experience.
Furthermore, iCloud Photo Library makes it easy to locate specific photos or videos using advanced organization capabilities. You can search for images based on keywords, people, places, or even specific dates. This convenient feature takes the hassle out of scrolling through endless albums and allows you to find the exact media file you’re looking for in an instant.
With iCloud Photo Library, you can also create and manage shared albums, which are perfect for families, friends, or colleagues who want to collaboratively curate a collection of photos and videos. This allows multiple users to contribute and view the shared media, enabling a shared experience and fostering a sense of connection among the participants.
In summation, iCloud Photo Library is a comprehensive solution for managing and sharing your photos and videos. Its seamless synchronization, effortless organization, and convenient sharing capabilities make it an invaluable tool for preserving memories and connecting with loved ones.
How does iCloud Photo Library work?
iCloud Photo Library works by utilizing the power of the cloud to store and synchronize your photos and videos across all your Apple devices. Here’s a breakdown of how it works:
1. Storage in the cloud: When you enable iCloud Photo Library on your device, all your photos and videos are uploaded to Apple’s servers in the cloud. This allows you to access your entire photo library from any device with iCloud Photo Library enabled.
2. Synchronization: Once your media files are uploaded to the iCloud servers, they are automatically synchronized across all your Apple devices. This means that any edits, additions, or deletions you make to your photo library on one device are instantly reflected on all other devices.
3. Optimization: iCloud Photo Library intelligently manages storage on your devices. It can optimize the storage of your media files by automatically replacing full-resolution photos and videos with smaller versions, known as “optimized versions.” These optimized versions take up less space on your device while still providing high-quality viewing.
4. Accessibility: With iCloud Photo Library, you can access your entire photo library from any device with an internet connection. Whether you’re using your iPhone, iPad, Mac, or even an internet browser through the iCloud website, your photos and videos are always just a few clicks away.
5. Organization: iCloud Photo Library offers powerful organization features to help you find and manage your photos and videos. You can create albums, tags, and smart folders to categorize your media files, making it easy to locate specific photos or videos with a quick search.
6. Sharing: One of the key features of iCloud Photo Library is the ability to create shared albums. You can invite family members, friends, or colleagues to contribute to these albums, allowing everyone to add their own photos and videos. This makes it a great tool for collaborative projects or simply sharing memories with loved ones.
Overall, iCloud Photo Library simplifies the management and accessibility of your photos and videos. By harnessing the power of the cloud, it ensures that your media files are securely stored, synchronized, and easily available across all your Apple devices.
Why is the Shared iCloud Photo Library important for family albums?
The Shared iCloud Photo Library is an essential feature for family albums, as it offers a convenient and collaborative way for family members to share and preserve their precious memories. Here are some key reasons why it’s important:
1. Seamless sharing: The Shared iCloud Photo Library allows family members to effortlessly share their photos and videos with each other. With just a few taps, everyone can contribute their own moments to a shared album, creating a collective family archive.
2. Preserving memories: Family albums are not just about capturing individual moments but also about creating a shared narrative of the family’s history. The Shared iCloud Photo Library ensures that these memories are preserved and easily accessible to all family members, regardless of their physical location.
3. Building connections: Shared albums enable family members to connect, even when they are apart. Whether it’s sharing milestones, vacations, or everyday moments, the Shared iCloud Photo Library fosters a sense of togetherness and strengthens family bonds.
4. Collaborative curation: With the Shared iCloud Photo Library, family members can collaborate on curating the family album. They can collectively select, organize, and annotate photos and videos, creating a more comprehensive and meaningful collection.
5. Easy access: The Shared iCloud Photo Library ensures that all family members can access the shared albums from their own devices. Whether it’s on an iPhone, iPad, Mac, or even through the iCloud website, everyone can view and reminisce over the shared memories anytime, anywhere.
6. Privacy and control: While sharing precious memories is important, so is privacy. The Shared iCloud Photo Library provides granular control over who can contribute to shared albums and who can view the shared content. This means that family members have control over how private or public they want their shared album to be.
In summation, the Shared iCloud Photo Library is vital for family albums as it offers a seamless way to share, preserve, and collaborate on creating a shared family memory bank. It brings family members closer, fosters connections, and ensures that precious moments are cherished and accessible for generations to come.
How to set up the Shared iCloud Photo Library?
Setting up the Shared iCloud Photo Library is a straightforward process that allows you to easily share and collaborate on albums with your family members. Here’s a step-by-step guide to help you get started:
1. Enable iCloud Photo Library: First, make sure that iCloud Photo Library is enabled on your device. To do this, go to “Settings” on your iPhone or iPad, and then tap on your name at the top. Next, go to “iCloud > Photos” and toggle on “iCloud Photo Library.” On a Mac, open the Photos app, click on “Photos” in the menu bar, and select “Preferences.” Then, go to the “iCloud” tab and check the box next to “iCloud Photo Library.”
2. Create a shared album: Once iCloud Photo Library is enabled, open the Photos app on your device. Tap on the “Albums” tab at the bottom, and then select “Shared” from the options. Next, tap on the “+” button to create a new shared album.
3. Name the album and add contributors: Give your shared album a name that reflects its content, such as “Family Memories” or “Vacation 2021.” You can also add a brief description if you’d like. After that, tap on “Next” and select the people you want to invite as contributors. You can choose from your contacts or enter their email addresses manually.
4. Customize album settings: Once you’ve added contributors, you can customize the settings of the shared album. You can choose to allow others to add photos and videos, allow comments, or even let subscribers receive notifications when new content is added. Adjust these settings according to your preferences.
5. Start sharing: Now that your shared album is set up, you can start adding photos and videos. Tap on the shared album you created, and then tap on the “+” button to select the media you want to add from your photo library. You can select multiple items at once or add them one by one.
6. Invite family members: To invite family members to contribute to the shared album, tap on the “People” tab at the bottom of the album screen. Then, tap on the “Invite” button and select the contacts or enter the email addresses of the family members you want to invite. They will receive an invitation to join the album.
That’s it! You’ve successfully set up the Shared iCloud Photo Library. Now everyone invited can start contributing their own photos and videos to the shared album, creating a collaborative and memorable family album.
How to create a shared album?
Creating and sharing an album with your family members through the Shared iCloud Photo Library is a simple process. Here’s a step-by-step guide to help you create a shared album:
1. Open the Photos app: Launch the Photos app on your iPhone, iPad, or Mac. Ensure that you have iCloud Photo Library enabled in your device settings.
2. Tap on “Albums”: In the bottom menu of the Photos app on iOS or in the sidebar on Mac, select the “Albums” tab to access your photo albums.
3. Tap on “+” or “Create Album”: On iOS, tap on the “+” icon located at the top left of the screen, while on Mac, click on “File” in the menu bar and select “Create Album.”
4. Name your album: Give your new album a descriptive name that reflects its content or purpose. For example, you can name it “Family Vacation 2022”.
5. Select photos and videos: Next, choose the photos and videos you want to include in the shared album. You can do this by tapping on the desired items or dragging and dropping them into the album on Mac.
6. Add more photos later (optional): If you don’t have all the desired photos and videos at the moment, you can always add more later. This allows you to continuously update and expand the shared album with new memories.
7. Invite contributors: To share the album with your family members, look for the option to invite contributors. On iOS, tap on “People” and then tap on the “Add People” button. On Mac, click on the “Add People” button in the toolbar.
8. Enter contact names or email addresses: Enter the names or email addresses of the family members you want to invite as contributors to the shared album. You can also select contacts from your address book.
9. Customize album settings (optional): If desired, you can customize the settings of the shared album. You can allow contributors to add photos and videos, enable comments, or even allow subscribers to receive notifications when new content is added.
10. Save and share: Once you have completed these steps, save the changes to create the shared album. The invitees will receive a notification or email inviting them to join the album. They can then start contributing their own photos and videos to the shared album.
Creating a shared album through the Shared iCloud Photo Library provides a collaborative and convenient way to curate and share memories with your family members. Enjoy collecting and reminiscing over shared moments with your loved ones!
How to add photos and videos to a shared album?
Once you have created a shared album in the Shared iCloud Photo Library, adding photos and videos to it is a breeze. Follow these simple steps to contribute your own media to a shared album:
1. Open the Photos app: Launch the Photos app on your iPhone, iPad, or Mac. Ensure that you have iCloud Photo Library enabled in your device settings.
2. Go to the shared album: Navigate to the shared album in which you want to add your photos and videos. You can find your shared albums under the “Albums” tab in the Photos app.
3. Tap on the “Add” button: On iOS, tap on the “Add” button (usually a “+” icon) located at the bottom of the screen when viewing the shared album. On Mac, click on the “Add” button in the toolbar or right-click on the album and select “Add Photos and Videos”.
4. Select the media: A selection screen will appear, allowing you to choose the photos and videos you want to add. You can select multiple items by tapping on them or by using the Shift or Command key on Mac.
5. Confirm the addition: After selecting your desired media files, tap on “Add” or a similar confirmation button. The selected photos and videos will be uploaded and added to the shared album for everyone to enjoy.
6. Wait for synchronization: Depending on the size and number of files you’re adding, it may take some time to upload and synchronize the media across all devices. Be patient and ensure that your device is connected to the internet.
7. Repeat as needed: You can add more photos and videos to the shared album at any time by following the same steps. Simply access the shared album and tap or click on the “Add” button to choose additional media from your library.
It’s important to note that when you add photos or videos to a shared album, they are stored and accessible to all contributors. Be mindful of privacy and only add media that you are comfortable sharing with the other members of the shared album.
By adding your own photos and videos to a shared album in the Shared iCloud Photo Library, you contribute to the collective memories and create a shared space for family members to enjoy and connect over their shared experiences.
How to invite family members to contribute to the shared album?
Inviting family members to contribute to a shared album in the Shared iCloud Photo Library is a simple process that allows everyone to collaborate and share their photos and videos. Follow these steps to invite family members to contribute:
1. Open the Photos app: Launch the Photos app on your iPhone, iPad, or Mac. Make sure you have iCloud Photo Library enabled in your device settings.
2. Select the shared album: Navigate to the shared album to which you want to invite family members. You can find your shared albums under the “Albums” tab in the Photos app.
3. Tap on the “People” tab: On iOS, tap on the “People” tab located at the bottom of the screen. On Mac, click on the “People” tab in the sidebar.
4. Tap on the “Add People” button: On the People screen, look for the “Add People” button (usually a “+” icon) and tap on it.
5. Choose your invite method: You can invite family members by selecting their names from your contacts or by entering their email addresses manually. Choose the appropriate option based on the information you have for your family members.
6. Enter contact names or email addresses: If you’re selecting names from your contacts, simply tap on the names of the family members you want to invite. If you’re manually entering email addresses, type in the email addresses of the family members you want to invite, separating each email address with a comma or semicolon.
7. Customize the invitation (optional): Optionally, you can customize the invitation by adding a message or adjusting the invitation settings. For instance, you can choose whether to allow invited members to add their own photos and videos, enable comments, or allow subscribers to receive notifications when new content is added.
8. Send the invitation: Once you have selected the family members you want to invite and customized the invitation if desired, tap on the “Send” or “Done” button to send the invitation. Family members will receive a notification or email inviting them to join the shared album.
That’s it! Family members who accept the invitation can now contribute their own photos and videos to the shared album, creating a collaborative and enjoyable experience for everyone. The shared album becomes a shared space where everyone can contribute, connect, and cherish their precious memories together.
How to view and comment on shared photos and videos?
Viewing and commenting on shared photos and videos in the Shared iCloud Photo Library allows you to engage with the content contributed by your family members. Here’s how you can view and leave comments on shared media:
1. Open the Photos app: Launch the Photos app on your iPhone, iPad, or Mac. Ensure that you have iCloud Photo Library enabled in your device settings.
2. Access the shared album: Locate the shared album that you want to view and comment on. You can find shared albums under the “Albums” tab in the Photos app.
3. Tap or click on the shared album: Tap or click on the shared album to open it. You will see a collection of photos and videos contributed by family members.
4. View shared photos and videos: A grid or stream view of the shared media will appear. Scroll through the photos and videos to view them individually or watch videos by tapping or clicking on them.
5. Leave comments: To leave a comment on a specific photo or video, tap or click on it to open it in full view. Look for the comment field below the media, and tap or click on it to start typing your comment. Once you’ve composed your comment, tap or click on “Post” to submit it.
6. View comments from others: You can also view comments left by other family members. Comments will appear beneath the media they are associated with. Scroll through the comments to see what others have said about a particular photo or video.
7. Reply to comments: If you want to reply to a specific comment, tap or click on the comment and a reply field will appear. Enter your reply and tap or click on “Post” to submit it. This allows for further engagement and conversation among family members.
8. Like photos and videos (optional): Some shared albums may allow you to “like” photos and videos. Look for a heart-shaped icon or a similar option to express your appreciation for specific media contributed by family members.
By viewing and commenting on shared photos and videos in the Shared iCloud Photo Library, you can actively engage with your family members’ contributions, share your thoughts and reactions, and foster a sense of connection and conversation around the shared memories.
How to save shared photos and videos to your own library?
Saving shared photos and videos from the Shared iCloud Photo Library to your own library allows you to keep a copy of the shared media for yourself. Here’s a guide on how to save them:
1. Open the Photos app: Launch the Photos app on your iPhone, iPad, or Mac. Make sure that you have iCloud Photo Library enabled in your device settings.
2. Access the shared album: Locate the shared album from which you want to save photos and videos. You can find shared albums under the “Albums” tab in the Photos app.
3. Tap or click on the shared album: Tap or click on the shared album to open it. You will see a collection of photos and videos contributed by family members.
4. Select the media to save: Choose the specific photos or videos that you want to save to your own library. To select multiple items, tap and hold on one item, then tap on additional items to add them to the selection. On Mac, use the Command key while clicking to select multiple items.
5. Tap or click on the “Save” button: Look for the “Save” option, usually represented by a download icon or a similar label. Tap or click on it to save the selected photos and videos to your own library.
6. Wait for the synchronization: Depending on the number and size of the selected media files, it may take some time for them to sync and appear in your own library. Be patient and ensure that your device is connected to the internet.
7. Verify the saved media: Once the synchronization is complete, navigate to your own library within the Photos app. Look for the saved photos and videos to confirm that they are successfully saved and accessible for your personal use.
Note: Saving shared media to your own library creates a separate copy in your library. Any edits or changes made to the original shared media will not affect the saved copies in your library.
By saving shared photos and videos to your own library, you can ensure that you have a personal copy of the cherished memories contributed by your family members. This allows you to preserve those moments in your own collection and access them anytime, even if the shared album is modified or deleted.
How to delete shared photos and videos?
If you no longer want certain photos or videos in a shared album or if you want to clean up your library, you can delete shared photos and videos from the Shared iCloud Photo Library. Here’s how:
1. Open the Photos app: Launch the Photos app on your iPhone, iPad, or Mac. Make sure that you have iCloud Photo Library enabled in your device settings.
2. Access the shared album: Locate the shared album from which you want to delete photos and videos. You can find shared albums under the “Albums” tab in the Photos app.
3. Tap or click on the shared album: Tap or click on the shared album to open it. You will see a collection of photos and videos contributed by family members.
4. Select the media to delete: Choose the specific photos or videos that you want to delete from the shared album. To select multiple items, tap and hold on one item, then tap on additional items to add them to the selection. On Mac, use the Command key while clicking to select multiple items.
5. Tap or click on the “Trash” or “Delete” option: Look for the “Trash” or “Delete” option, usually represented by a trash can icon or a similar label. Tap or click on it to delete the selected photos and videos from the shared album.
6. Confirm the deletion: A confirmation prompt may appear, asking you to confirm the deletion. Review the message and confirm the deletion to proceed. Note that once you delete shared photos and videos, they will be removed from the shared album and will no longer be accessible to other contributors.
7. Deleted items go to “Recently Deleted”: Deleted photos and videos from the Shared iCloud Photo Library are moved to the “Recently Deleted” album. They will remain in this album for a specific period of time, giving you the option to recover them if needed. After the designated period, they will be permanently deleted.
Remember that deleting shared photos and videos only removes them from the shared album and your own library. It does not delete the original media files from the devices or libraries of other contributors. Each contributor can manage their own copy of the media independently.
By deleting shared photos and videos, you can keep your shared albums organized, remove unwanted content, and ensure that the shared album reflects the memories you want to preserve and share with your family members.
Tips to keep your shared album organized and private
Keeping your shared album organized and private ensures that your family memories are well-preserved and shared with only the intended audience. Here are some tips to help you maintain an organized and private shared album:
1. Set album guidelines: Establish clear guidelines on what types of photos and videos are appropriate for the shared album. This helps ensure that the content remains relevant and contributes to the overall purpose of the album.
2. Regularly curate the album: Periodically review the shared album and remove any photos or videos that are no longer relevant or meaningful. This helps keep the album organized and focused on the most important memories.
3. Create sub-albums: Consider creating sub-albums within the main shared album for different events, trips, or themes. This allows for better organization and easier navigation within the shared album.
4. Add captions or descriptions: Adding captions or descriptions to the photos and videos provides context and enhances the storytelling aspect of the shared album. It helps family members understand the significance behind each image.
5. Enable comments and conversations: Encourage family members to leave comments and engage in conversations about the shared memories. This fosters a sense of connection and allows for a deeper appreciation of the shared album.
6. Be mindful of privacy settings: Before sharing the album, double-check and adjust the privacy settings to ensure that only invited family members have access. This helps protect the privacy of your family’s memories.
7. Limit access to contributors: Consider limiting the number of contributors to the shared album to maintain a more intimate and focused sharing experience. This reduces the chance of unwanted or unrelated content being introduced.
8. Regularly communicate with contributors: Stay in touch with family members who have access to the shared album. Discuss any changes or updates related to the album’s content, guidelines, or privacy settings to maintain clarity and ensure everyone is on the same page.
9. Take advantage of organization features: Utilize the organization features of the Photos app, such as tags, keywords, and smart albums, to further categorize and manage the photos and videos in the shared album.
10. Respect others’ content: Remember that while you contribute and engage with the shared album, other family members do as well. Be respectful of their content, opinions, and preferences, fostering a positive and collaborative sharing environment.
By implementing these tips, you can create an organized and private shared album that truly reflects and preserves your family’s memories. It ensures that the album remains focused, meaningful, and enjoyed by all members while respecting the privacy and individual contributions of each family member.