
Required Hardware and Software
Before you can use your laptop as a monitor, there are a few key pieces of hardware and software that you will need. Ensuring you have the necessary components will make the process smoother and more successful. Here’s what you’ll need:
- Laptop: Obviously, you’ll need a laptop that is in good working condition. Make sure the laptop has a video output port, such as HDMI or VGA, as this will allow you to connect it to the monitor.
- Monitor: You’ll need a monitor with a compatible input port, such as HDMI or VGA, that matches the video output port of your laptop. The monitor should also have a power source and be in good working condition.
- Video Cables: Depending on the available ports on your laptop and monitor, you’ll need the appropriate video cable to connect the two devices. HDMI and VGA cables are the most commonly used options. Ensure that the cables are of high quality to maintain good signal transmission.
- Software: Depending on your operating system, you may need additional software to configure your laptop as a monitor. Check the manufacturer’s website or support documentation to see if any specific software is required.
It’s crucial to ensure that all the hardware components are compatible and in proper working condition. This will help avoid any unnecessary frustrations or difficulties during the setup process. Once you have all the required hardware and software in place, you can proceed to the next step of connecting your laptop to the monitor.
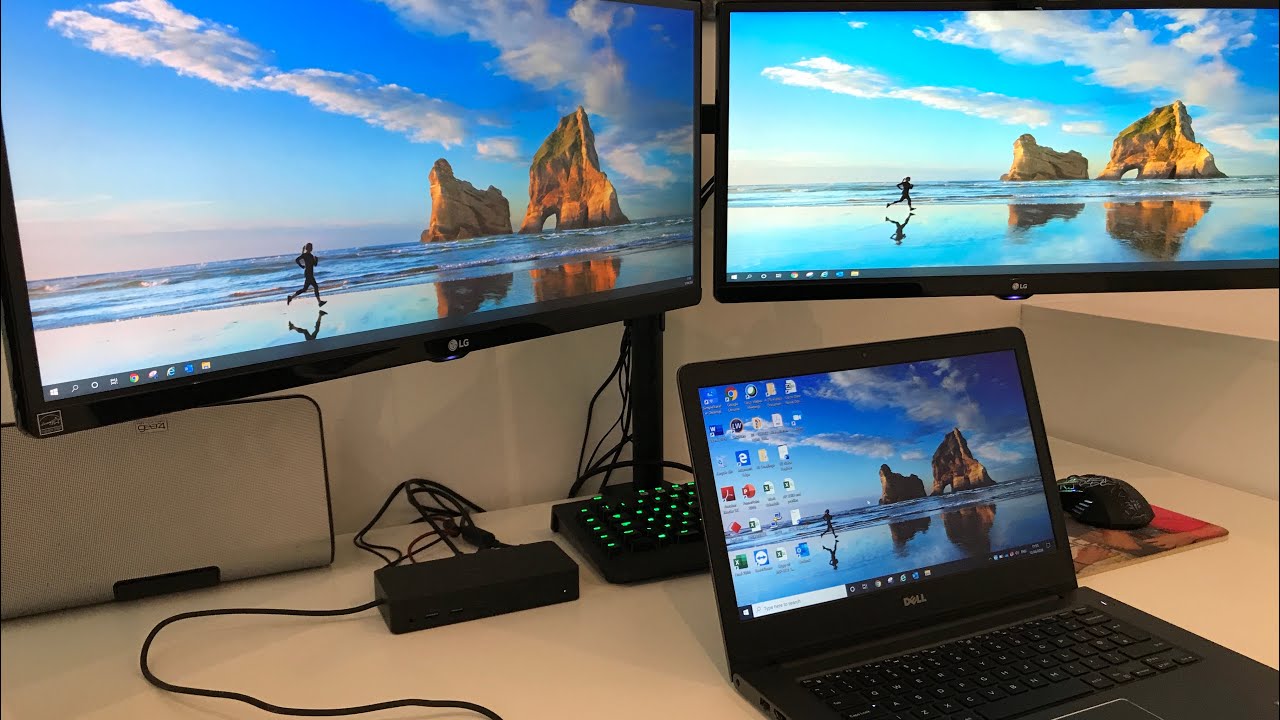
Connecting Your Laptop to the Monitor
Now that you have gathered all the necessary hardware and software, it’s time to connect your laptop to the monitor. The process may vary depending on the type of cables and ports you are using. Here’s a step-by-step guide on how to make the connection:
- Step 1: Power off both devices: Before connecting any cables, it’s important to turn off both your laptop and the monitor. This ensures that you won’t encounter any electrical issues during the process.
- Step 2: Identify the video output port on your laptop: Look for a video output port on your laptop. The most common ones are HDMI and VGA ports. Check the user manual or manufacturer’s website if you’re unsure about the location of the port.
- Step 3: Identify the input port on the monitor: Similarly, locate the compatible input port on your monitor. It could be HDMI, VGA, or any other supported port. Refer to the monitor’s user manual or documentation for guidance.
- Step 4: Connect the video cable: Take the appropriate video cable and connect one end to the video output port on your laptop and the other end to the input port on the monitor. Ensure that the connections are secure and snug.
- Step 5: Power on the monitor: Once the cable is connected, power on the monitor and set it to the correct input/source. Most monitors have a button or menu option to select the input source. Use the monitor’s user manual for reference if needed.
- Step 6: Power on your laptop: After the monitor is powered on and set to the correct input/source, you can turn on your laptop. It should detect the new display automatically or you may need to adjust the display settings manually.
- Step 7: Configure display settings: Depending on your operating system, you may need to configure the display settings to extend or duplicate your laptop’s display to the monitor. Access the display settings on your laptop and make the necessary adjustments.
Once you have completed these steps, your laptop should now be successfully connected to the monitor. You can enjoy a larger screen experience and utilize the additional display for work, multimedia, or other purposes. If you encounter any issues or the display does not work as expected, refer to the troubleshooting section for assistance.
Adjusting Display Settings on Your Laptop
After connecting your laptop to the monitor, you may need to adjust the display settings to ensure optimal functionality and visual clarity. Depending on your operating system, the steps to adjust these settings may vary. Here’s a general guide to help you get started:
- Step 1: Access the display settings: On Windows, right-click on the desktop and select “Display settings” from the context menu. On macOS, go to the Apple menu, select “System Preferences,” and then click on “Displays.”
- Step 2: Select the monitor: In the display settings, you should see both your laptop screen and the connected monitor. Click on the monitor to adjust its settings.
- Step 3: Choose the display mode: Decide how you want to use the monitor. You can select “Extend” to have an extended desktop across both screens, or “Duplicate” to mirror your laptop screen on the monitor.
- Step 4: Adjust the resolution: Set the resolution for the monitor. Choose a resolution that matches its native resolution for the best image quality. You can also experiment with different resolutions to find the one that suits your preferences.
- Step 5: Arrange the displays: If you choose the “Extend” mode, you can arrange the position of the monitors. Drag and drop the screens in the display settings to match their physical layout on your desk.
- Step 6: Additional settings: Explore other display settings such as brightness, contrast, and color calibration to personalize the viewing experience and adjust it according to your preferences.
By making these adjustments, you can optimize the display settings on your laptop and the connected monitor to ensure a seamless and visually pleasing experience. Experiment with different settings until you find the optimal configuration that suits your needs.
Remember that the available display settings may vary depending on your operating system and graphics card. If you’re unsure about any specific settings or encountering difficulties, consult the user manual for your laptop or refer to the support documentation provided by the operating system or graphics card manufacturer.
Using HDMI or VGA Cables
When connecting your laptop to a monitor, two of the most commonly used cables are HDMI and VGA. Each of these cables has its own advantages and considerations. Let’s explore how to use HDMI or VGA cables to connect your laptop to a monitor:
HDMI Cables:
HDMI (High Definition Multimedia Interface) cables are widely used for connecting devices that support high-definition video and audio. Here’s how you can use HDMI cables to connect your laptop to a monitor:
- Step 1: Check for HDMI ports: Ensure that both your laptop and the monitor have HDMI ports. Most modern laptops and monitors come equipped with HDMI ports, making it easy to establish a connection.
- Step 2: Connect the HDMI cable: Take one end of the HDMI cable and plug it into the HDMI port on your laptop. Then, connect the other end to the HDMI port on the monitor.
- Step 3: Select HDMI as the input source: Power on the monitor and use its menu or buttons to select the HDMI input source. This will allow the monitor to receive the signal from your laptop through the HDMI cable.
- Step 4: Adjust display settings: Access the display settings on your laptop to extend or duplicate the display on the monitor. Make any necessary adjustments to the resolution or orientation to ensure optimal viewing experience.
VGA Cables:
VGA (Video Graphics Array) cables are an older technology, but they are still commonly used, especially for connecting VGA-enabled monitors. Here’s how you can use VGA cables to connect your laptop to a monitor:
- Step 1: Check for VGA ports: Ensure that your laptop and the monitor have VGA ports. VGA ports are typically blue and have three rows of pins.
- Step 2: Connect the VGA cable: Take one end of the VGA cable and plug it into the VGA port on your laptop. Then, connect the other end to the VGA port on the monitor.
- Step 3: Connect the audio (if necessary): Unlike HDMI, VGA cables only transmit video signals. If you need audio, you may need to connect a separate audio cable from your laptop’s audio output to the monitor’s audio input.
- Step 4: Adjust display settings: Access the display settings on your laptop and configure them to utilize the extended or duplicated display on the monitor. Make sure to adjust the resolution and other settings to achieve the desired visual output.
Using HDMI or VGA cables provides a convenient and reliable way to connect your laptop to a monitor. However, always check the available ports on both devices to ensure compatibility. Additionally, keep in mind that VGA cables only transmit video signals, so separate audio connections may be required when using VGA cables. Make necessary adjustments to the display settings on your laptop to optimize the monitor’s performance.
Wireless Connection Options
If you prefer a cable-free setup or your laptop and monitor don’t have compatible video ports, wireless connection options can provide a convenient alternative. Here are some wireless methods you can use to connect your laptop to a monitor:
Wireless HDMI:
Wireless HDMI adapters allow you to transmit audio and video signals from your laptop to the monitor without the need for physical cables. Here’s how you can use a wireless HDMI connection:
- Step 1: Purchase a wireless HDMI kit: Look for a wireless HDMI kit that suits your needs. These kits typically consist of a transmitter that connects to your laptop and a receiver that plugs into the monitor. Ensure that the kit supports the resolution and range you require.
- Step 2: Connect the transmitter and receiver: Connect the wireless HDMI transmitter to your laptop’s video output port. Then, plug the wireless HDMI receiver into the input port on the monitor. Follow the manufacturer’s instructions to establish a secure connection between the two devices.
- Step 3: Adjust the display settings: Once the wireless HDMI connection is established, adjust the display settings on your laptop to extend or duplicate the display on the monitor. Make any necessary adjustments to the resolution and other settings to ensure optimal viewing experience.
Wireless Display Standards:
Some laptops and monitors support wireless display standards like Miracast or AirPlay. These standards allow you to mirror your laptop screen on a compatible monitor wirelessly. To use wireless display standards, follow these steps:
- Step 1: Check your laptop and monitor compatibility: Ensure that your laptop and monitor support the same wireless display standard, such as Miracast for Windows or AirPlay for Mac.
- Step 2: Enable wireless display: On your laptop, access the display settings or preferences and enable the wireless display feature. Follow the on-screen instructions to establish a connection with the monitor.
- Step 3: Adjust the display settings: Once the wireless display connection is established, adjust the display settings on your laptop to extend or duplicate the display on the monitor.
Wireless connection options provide flexibility and convenience when connecting your laptop to a monitor. However, keep in mind that wireless connections may introduce some latency or connectivity issues compared to wired connections. Additionally, ensure that both your laptop and monitor support the same wireless standards for a successful connection.
When using wireless connections, it’s essential to troubleshoot any potential interference or connection problems. Follow the manufacturer’s instructions for troubleshooting, or consult their support resources for assistance.
Troubleshooting Tips
While connecting your laptop to a monitor is generally a straightforward process, you may encounter some challenges along the way. Here are some troubleshooting tips to help you resolve common issues and ensure a successful connection:
1. Check cable connections:
Ensure that all cables are securely and properly connected to both the laptop and the monitor. Loose or faulty connections can result in a lack of video or audio output. In particular, check the pins on VGA cables for any bent or damaged pins.
2. Update display driver:
If the display is not working correctly or appears distorted, you may need to update your laptop’s display driver. Visit the manufacturer’s website or use the device manager to check for available updates and install them accordingly.
3. Adjust display settings:
If the monitor is not receiving a signal or is not showing the correct resolution, access the display settings on your laptop and adjust them to ensure compatibility with the monitor’s native resolution and refresh rate.
4. Restart devices:
Sometimes a simple restart can resolve connection issues. Power off both your laptop and the monitor, wait for a few seconds, and then power them back on. This can help reset any temporary glitches or conflicts.
5. Try different cables:
If you are using HDMI or VGA cables, try using different cables to rule out any cable-related issues. Sometimes, cables with manufacturing defects or damage can cause connectivity problems.
6. Disable conflicting software:
Some software, such as screen recording or remote desktop applications, can interfere with the display output. Temporarily disable or close these applications to see if it resolves the issue.
7. Update firmware:
If you are using a wireless HDMI adapter or any other external device, check for firmware updates on the manufacturer’s website. Keeping the firmware up to date can help resolve compatibility issues and improve performance.
8. Test with another monitor or laptop:
If possible, try connecting your laptop to another monitor or connect another laptop to the same monitor. This can help identify whether the issue lies with the laptop or the monitor itself.
9. Seek professional help:
If you have exhausted all troubleshooting steps and are still experiencing issues, it may be best to seek professional assistance. Contact the manufacturer’s support team or consult an expert for further guidance.
By following these troubleshooting tips, you can tackle common connectivity and display issues when connecting your laptop to a monitor. Remember to be patient and systematic in your approach, and don’t hesitate to seek help if needed.
Extending and Mirroring Your Display
When using your laptop as a monitor, you have the option to extend or mirror your display. These display modes offer different functionalities and can be useful in various scenarios. Here’s a breakdown of how to extend and mirror your display:
Extending Your Display:
Extending your display allows you to use the additional monitor as an extended workspace. You can move windows and applications from your laptop screen to the external monitor, effectively increasing your screen real estate. Follow these steps to extend your display:
- Step 1: Access display settings: Visit the display settings on your laptop by right-clicking on the desktop and selecting “Display settings” for Windows or going to “System Preferences” > “Displays” for macOS.
- Step 2: Configure display settings: In the display settings, you should see both your laptop screen and the connected monitor. Select your laptop screen first and then enable the “Extend desktop to this display” option. Click on the external monitor and ensure it is positioned correctly relative to your laptop screen.
- Step 3: Adjust individual settings: After extending your display, you can customize individual settings such as resolution, orientation, and scaling for each monitor. These settings will allow you to optimize your workflow and make the most of the extended workspace.
Mirroring Your Display:
Mirroring your display duplicates the content on your laptop screen to the external monitor. This is useful when you want to show the same content simultaneously on both screens. Follow these steps to mirror your display:
- Step 1: Access display settings: Access the display settings on your laptop following the same procedure mentioned above.
- Step 2: Enable mirroring: In the display settings, look for the option to mirror your display. Depending on your operating system, this option may be labeled as “Mirror display” or “Duplicate display.” Enable this option to duplicate your laptop screen on the external monitor.
- Step 3: Adjust settings (if needed): You may need to adjust resolution or other settings to ensure optimal display and compatibility with the external monitor.
By extending your display, you can maximize productivity by utilizing the extra space and spreading your tasks across multiple screens. On the other hand, mirroring your display is handy when giving presentations or sharing your laptop screen with others. Choose the appropriate display mode based on your needs and workflow requirements.
Remember that the process to extend or mirror your display may vary depending on your operating system. Refer to the user manual or the support documentation provided by your laptop manufacturer for specific instructions if needed.
Importance of Display Resolution
The display resolution of your laptop and monitor plays a crucial role in determining the visual clarity, image quality, and overall viewing experience. It refers to the number of pixels that can be displayed on the screen horizontally and vertically. Here’s why display resolution is important:
Visual Clarity:
A higher display resolution results in sharper and more detailed images. It allows you to see fine details, intricate designs, and small text more clearly. This is particularly important when working with graphics, editing photos, or watching high-resolution videos. A lower display resolution may lead to pixelation, blurriness, and loss of details, causing strain on your eyes and affecting the overall visual experience.
Productivity and Multitasking:
A larger display resolution provides more screen real estate, allowing you to fit more content on the screen without compromising readability. This is especially beneficial for productivity tasks, such as working with multiple windows or applications side by side. With a higher resolution, you can view more information at once, enhancing your workflow and efficiency.
Enhanced Gaming Experience:
Gaming enthusiasts often prioritize a high display resolution to enjoy immersive and visually stunning gaming experiences. Higher resolutions offer more detailed textures, crisper graphics, and smoother gameplay. They also provide a wider field of view, allowing you to see more of the gaming environment. Gamers often opt for resolutions like 1080p (Full HD), 1440p (QHD), or 4K for an immersive gaming experience.
Video and Media Playback:
When watching movies, TV shows, or online videos, a higher display resolution enhances your viewing experience. It allows you to see more details and a more vibrant representation of colors. The higher pixel density contributes to a more lifelike and immersive visual experience. Resolutions like 4K (Ultra HD) or even 8K offer stunning video playback and future-proof your display for upcoming high-resolution content.
Compatibility with Applications:
Some software applications and programs are designed with specific display resolutions in mind. Using the recommended display resolution ensures compatibility with these applications and ensures that you can fully utilize their user interfaces and features. Mismatched resolutions may result in elements appearing too small, cropped, or distorted, affecting usability and work efficiency.
Choosing the right display resolution is essential for optimizing your viewing experience and productivity. Consider the purpose of your usage, the type of content you work with, and your personal preferences when selecting or adjusting the display resolution on your laptop and monitor. With the appropriate display resolution, you can enjoy sharper visuals, improved productivity, and an immersive multimedia experience.