
What is Flux?
Flux is a crucial component in the process of soldering electronics. It is a chemical compound that is applied to the surfaces being soldered to improve the quality of the solder joint. Flux aids in the soldering process by removing oxidation, facilitating heat transfer, and promoting the flow of molten solder.
Flux is typically available in the form of a liquid or paste and contains active ingredients that actively react with the oxides present on the metal surfaces. These oxides, if not removed, can prevent the solder from adhering properly to the components, resulting in weak connections or cold solder joints.
When heated, flux begins to dissolve the oxides and other contaminants on the metal surfaces, creating a clean surface ready for solder application. In addition to removing oxidation, flux also acts as a protective barrier, preventing new oxides from forming during the soldering process.
The two main types of flux used in electronics soldering are rosin-based flux and water-soluble flux:
- Rosin-based flux: This type of flux is derived from pine sap and is known for its excellent solderability and ability to remove oxides effectively. It leaves a residue that should be cleaned after soldering.
- Water-soluble flux: As the name suggests, water-soluble flux can be easily cleaned with water. It is commonly used in situations where residue removal is critical, such as in the assembly of medical or high-reliability electronic devices.
Flux also comes in different formulations, such as no-clean flux and flux with different activity levels. No-clean flux is designed to leave minimal residue and is suitable for applications where post-soldering cleaning is not possible or desired. Flux with different activity levels is available to suit different soldering requirements.
Understanding the different types and formulations of flux is essential in choosing the right flux for your project. The correct flux will ensure reliable soldering connections and prevent issues such as cold joints or electrical failures. In the next section, we will discuss how to choose the right flux for your soldering project.
Why do you need Flux when soldering?
Flux plays a vital role in the soldering process, serving several important functions that ensure the integrity and reliability of the soldered connections. Here are some key reasons why flux is necessary when soldering electronics:
1. Oxidation removal: When metal surfaces are exposed to air, they naturally form oxide layers. These oxides act as barriers, preventing the solder from properly wetting and bonding with the metal. Flux effectively removes these oxides, allowing the solder to form strong, reliable connections.
2. Increased solder flow: Flux helps in the flow of molten solder by reducing its surface tension. This enhanced flow ensures that the solder reaches every nook and cranny of the joint, resulting in a stronger bond and better electrical conductivity.
3. Protection against reoxidation: Flux creates a protective layer on the metal surfaces, preventing them from reoxidizing during the soldering process. This layer acts as a barrier and ensures long-term stability and reliability of the solder joint.
4. Improved wetting: Wetting refers to the ability of the solder to spread and adhere to the metal surfaces being soldered. Flux promotes better wetting by reducing surface tension and enabling the solder to bond effectively with the components, wires, or pads being soldered.
5. Prevention of solder bridging and shorts: Flux helps reduce the likelihood of solder bridging and short circuits. By promoting proper solder flow and preventing excessive solder from clinging to nearby components or pads, flux ensures cleaner, more precise solder joints.
6. Thermal transfer enhancement: Flux aids in the transfer of heat during soldering, ensuring that the components reach the required temperature for soldering. This helps prevent thermal stress and possible damage to sensitive electronic components.
By using flux during soldering, you can ensure that your soldered connections are strong, reliable, and free from defects. It is an essential tool in achieving high-quality soldering results and ensuring the proper functioning of electronic devices.
Types of Flux
Flux is available in various types, each designed to suit specific soldering applications and preferences. Understanding the different types of flux will help you choose the most suitable one for your soldering project. Here are the main types of flux commonly used in electronics soldering:
- Rosin-based flux: Rosin-based flux, also known as rosin flux, is one of the most commonly used types of flux in electronics soldering. It is derived from pine sap and typically comes in liquid or paste forms. Rosin flux is known for its excellent solderability and ability to effectively remove oxides from the metal surfaces. While it produces a residue that needs to be cleaned after soldering, the residue is usually non-conductive and does not compromise the functionality of the circuit.
- Water-soluble flux: Water-soluble flux is another popular type, especially in applications where residue removal is important. As the name suggests, this type of flux can be easily cleaned using water. Water-soluble flux is preferred in industries such as medical electronics and aerospace, where thorough cleaning of the circuit boards after soldering is required. This flux type is typically more expensive than rosin-based flux, but it ensures a clean, residue-free finish.
- No-clean flux: No-clean flux is designed to leave minimal residue after soldering. It is particularly useful when post-soldering cleaning is not possible or desired. This type of flux is commonly used in consumer electronics and other applications where thorough cleaning is not necessary. No-clean flux reduces the overall soldering process time and eliminates the need for additional cleaning steps.
- Activated flux: Activated flux, also known as high-activity flux, is formulated with stronger chemical agents to remove tough oxides and contaminants more effectively. This type of flux is suitable for soldering on surfaces that are heavily oxidized or contaminated, ensuring optimal wetting and bonding of the solder. Activated flux requires careful handling and should be used with adequate ventilation, as it may produce more fumes than regular flux.
- Flux-cored solder: Flux-cored solder is a convenient option where the flux is enclosed within the solder wire. This eliminates the need for separate flux application and makes the soldering process more efficient. Flux-cored solder is available in various types, including rosin-core, water-soluble core, or no-clean core, allowing for easy selection based on specific project requirements.
It is essential to choose the right flux type based on the soldering application and desired results. Consider factors such as residue requirements, cleaning capabilities, and the level of oxide removal necessary. By selecting the appropriate flux, you can ensure successful soldering and reliable solder joints.
Choosing the right Flux for your project
Choosing the right flux is crucial to ensure successful soldering and reliable solder joints. Different soldering projects and requirements may call for specific types of flux. Here are some factors to consider when selecting the right flux for your project:
1. Application: Consider the specific application for which you are soldering. Different projects may have different requirements in terms of residue, cleaning, and flux compatibility. For example, medical or aerospace applications may require water-soluble flux to ensure thorough cleanliness.
2. Flux type: Understand the different types of flux available, such as rosin-based, water-soluble, no-clean, activated, or flux-cored solder. Each type has its advantages and considerations. Evaluate the specific requirements of your project and choose the flux type that aligns with those needs.
3. Oxide removal: Consider the level of oxidation on the metal surfaces being soldered. If heavy oxidation is present, using an activated flux may be more effective in removing tough oxides and ensuring optimal solder wetting. For lighter oxidation, a rosin-based or no-clean flux may be sufficient.
4. Residue requirements: Determine whether the presence of residue after soldering is acceptable. Rosin-based flux typically leaves a residue that should be cleaned, while water-soluble flux can be easily removed with water. No-clean flux leaves minimal residue, eliminating the need for cleaning in certain applications.
5. Cleaning capabilities: Consider the cleaning capabilities available for your project. If you have access to proper cleaning equipment and processes, you may have more flexibility in choosing a flux with a higher residue level. However, if thorough cleaning is not possible, opting for a no-clean flux or water-soluble flux may be a better choice.
6. Compatibility: Ensure that the flux you choose is compatible with the soldering materials and components you are using. Some fluxes may be better suited for certain types of metals or solder alloys. Check the manufacturer’s specifications for compatibility information.
7. Personal preference: Consider your own personal preference and experience with different types of flux. If you have had success with a particular flux in the past, you may feel more confident using it for future projects.
By carefully considering these factors, you can choose the right flux that meets the requirements of your project and ensures successful soldering with reliable and durable solder joints.
Applying Flux to the solder joint
The proper application of flux is essential to achieve effective and consistent soldering results. Here are some steps to follow when applying flux to the solder joint:
1. Clean the surfaces: Before applying flux, ensure that the surfaces to be soldered are clean and free from any dirt, oxide layers, or contaminants. Use a clean cloth or sponge to wipe the surfaces and remove any debris that could hinder a proper solder bond.
2. Determine the right amount: Apply a sufficient but not excessive amount of flux to the solder joint. A small bead or a thin layer of flux is usually enough to cover the area being soldered. Too much flux can lead to excessive solder flow and potential bridging between adjacent components, while too little may result in an insufficient wetting and weak solder joint.
3. Use a flux pen or brush: Flux can be applied using a flux pen or a small brush. Flux pens provide more precise control and allow for easy application directly to the desired area. Brushes can be useful for larger surfaces or when applying flux to a large number of solder joints simultaneously.
4. Apply flux before heating: It is important to apply flux to the solder joint before applying heat. Heating the flux directly can cause it to evaporate before it has a chance to remove oxidation and contaminants effectively.
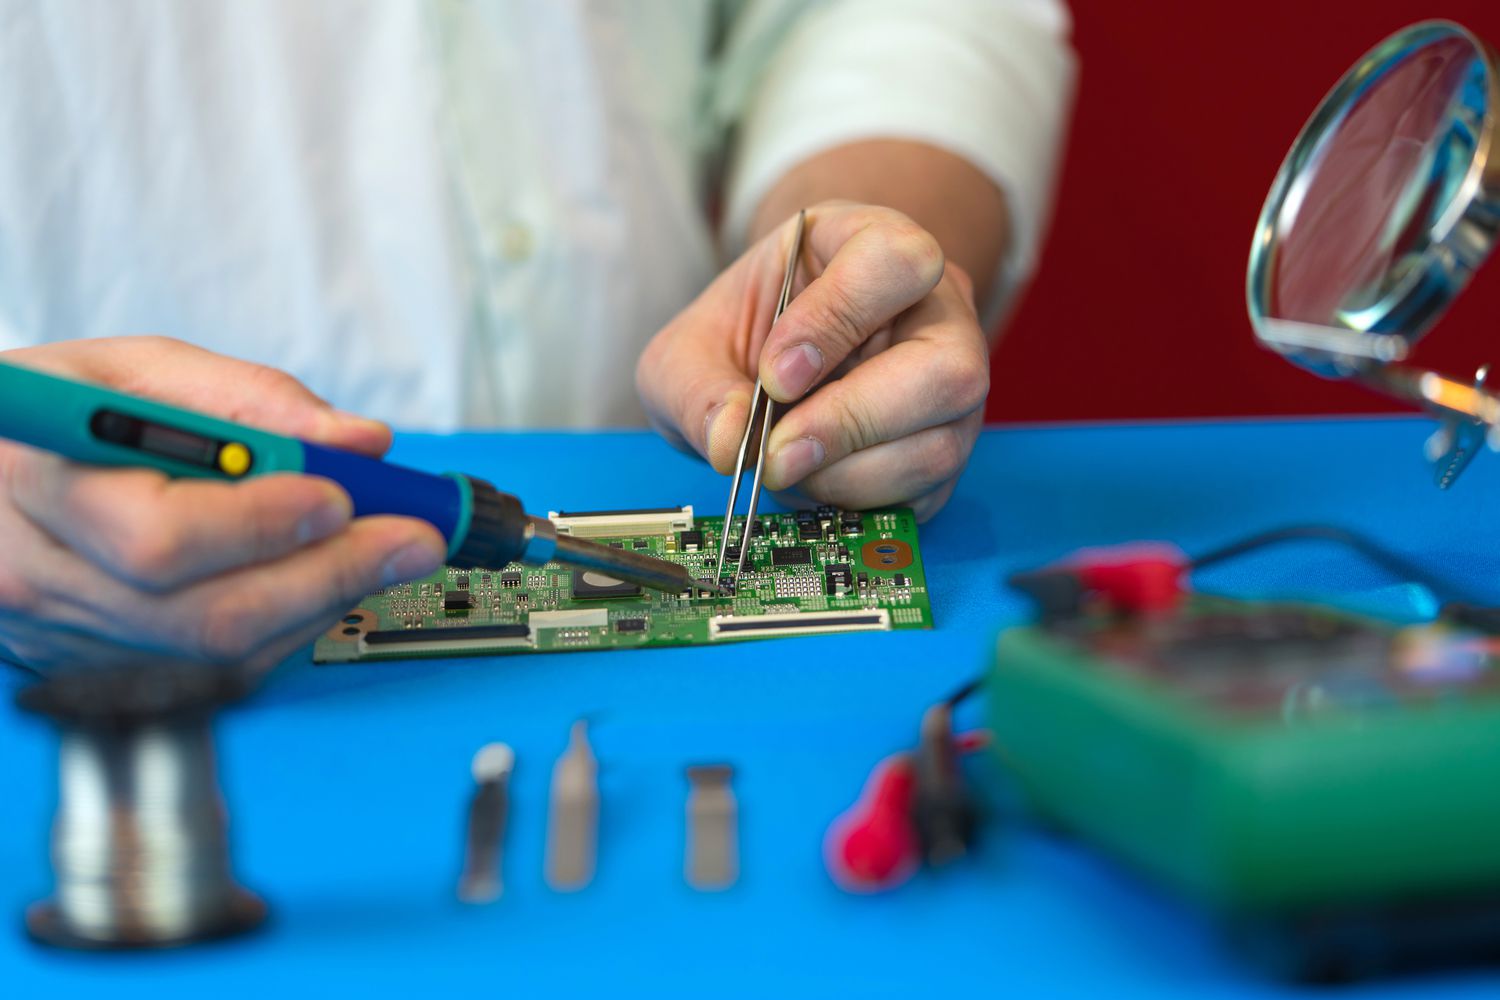
5. Heat the solder joint: Once the flux is applied, heat the solder joint using a soldering iron or a heat gun. The heat will activate the flux and facilitate the removal of oxides, allowing the solder to flow and create a strong bond between the components.
6. Observe the flux behavior: Pay attention to the behavior of the flux as you heat the solder joint. The flux may bubble, smoke, or change color, indicating that it is doing its job of removing oxidation and contaminants. Proper flux activation ensures clean surfaces for optimal solder wetting.
7. Add solder: After the flux has been adequately activated, add solder to the heated joint. The flux will help the solder flow and spread evenly over the metal surfaces, creating a strong and reliable bond.
8. Clean excess flux: Once the soldering process is complete, it is important to clean any excess flux residue left on the solder joint. Leaving flux residue can lead to corrosion and affect the long-term performance of the soldered connection. Use appropriate cleaning methods and agents, such as isopropyl alcohol or specialized flux removers, to remove the residue effectively.
By following these steps, you can ensure proper flux application and achieve high-quality solder joints that are reliable and durable.
Soldering with Flux
Soldering with flux is a critical process that ensures strong and reliable solder joints. When used in conjunction with solder, flux facilitates the bonding of components by removing oxidation, promoting solder flow, and improving wetting. Here are the steps to successfully solder with flux:
1. Prepare the materials: Gather all the necessary materials for soldering, including the components, soldering iron, solder wire, and flux. Ensure that the surfaces to be soldered are clean and free from debris or contaminants.
2. Apply flux: Apply a small amount of flux to the areas where you will be soldering. The flux helps remove any oxidation and provides a clean surface for the solder to adhere to. Use a flux pen or a brush to evenly distribute the flux over the soldering area.
3. Heat the soldering iron: Plug in the soldering iron and allow it to heat up to the appropriate temperature for your solder and components. The correct temperature will depend on the specific solder and components you are using, so refer to the manufacturer’s recommendations.
4. Tin the soldering iron tip: To ensure good thermal transfer and proper solder flow, tin the soldering iron tip by melting a small amount of solder onto it. This helps create a thin layer of solder on the tip, allowing heat to transfer efficiently.
5. Heat the joint: Place the soldering iron tip on the joint, applying gentle pressure to ensure good contact with the surfaces to be soldered. Heat the joint for a few seconds to ensure proper heat transfer to the components and the flux. Maintain an appropriate temperature to prevent overheating or damage to the components.
6. Apply solder: With the joint heated, touch the solder wire to the joint, not the soldering iron tip. As the joint heats up, the solder will melt, flow, and adhere to the clean surfaces. Allow the solder to flow smoothly and create a strong bond between the components.
7. Remove the heat: Once the solder has flowed adequately and formed a solid connection, remove the heat by lifting the soldering iron away from the joint. Avoid disturbing the joint or moving the components until the solder has cooled and solidified fully.
8. Clean the solder joint: After soldering, it is essential to clean the solder joint to remove any residual flux. Flux residue, if left uncleaned, can lead to corrosion and affect the long-term performance of the soldered connection. Use appropriate cleaning agents or methods, such as isopropyl alcohol or a specialized flux remover, to clean the solder joints thoroughly.
Remember to practice proper safety precautions when soldering, such as wearing safety glasses, working in a well-ventilated area, and keeping flammable materials away from the workspace. With flux playing a crucial role in the soldering process, following these steps will help you achieve reliable and durable solder joints.
Tips for using Flux effectively
Using flux effectively is crucial for achieving successful soldering results and reliable solder joints. Here are some valuable tips to help you use flux effectively in your soldering projects:
1. Choose the right flux for the job: Consider the specific requirements of your project and select the appropriate flux type. Whether it is rosin-based, water-soluble, or no-clean flux, choosing the right one ensures compatibility with your materials and desired cleaning requirements.
2. Apply flux sparingly: Use only the necessary amount of flux on the solder joint. Applying too much may lead to excessive solder flow and potential bridging, while using too little may result in insufficient oxide cleaning. Aim for a thin and even layer of flux that covers the soldering area.
3. Properly store flux: Keep your flux stored in a cool, dry place and tightly sealed when not in use. Exposure to moisture or excessive heat can degrade the flux’s effectiveness over time. Follow the manufacturer’s recommendations for storage conditions.
4. Pre-clean the surfaces: Ensure that the surfaces being soldered are clean and free from contaminants before applying the flux. Pre-cleaning removes any dirt, grease, or oxidation that may hinder the flux’s performance and compromise the quality of the solder joint.
5. Activate the flux: Heat the flux properly to activate its chemical properties. The flux should bubble, smoke, or change color as it reacts with the oxides on the metal surfaces. Take care not to overheat or burn the flux, as it may affect its ability to remove oxides effectively.
6. Observe the solder flow: Watch how the solder flows and wets the solder joint. The flux assists in promoting proper solder flow and wetting by reducing surface tension. If the solder does not flow smoothly or does not wet the components properly, reapply flux or examine the soldering iron temperature.
7. Clean the flux residue: After soldering, clean any flux residue left on the solder joint. Flux residue, if not removed, can cause corrosion and electrical issues over time. Use appropriate cleaning agents, such as isopropyl alcohol or specialized flux removers, to thoroughly clean the soldered connections.
8. Practice proper safety precautions: Work in a well-ventilated area to prevent inhalation of flux fumes. Wear safety glasses to protect your eyes from solder splashes or flux particles. Follow all safety guidelines and recommendations provided by the flux manufacturer.
By following these tips, you can effectively use flux in your soldering projects, ensuring clean, reliable, and durable solder joints.
Common mistakes to avoid when using Flux
Using flux is crucial for successful soldering, but it’s important to be aware of common mistakes that can compromise the quality of your solder joints. Here are some common mistakes to avoid when using flux:
1. Applying too much flux: Applying an excessive amount of flux can lead to excessive solder flow, bridging between adjacent components, and poor solder joint quality. Use the recommended amount of flux to ensure optimal performance.
2. Not properly cleaning the surfaces: Failure to clean the surfaces before applying flux can result in poor solder wetting and weak solder joints. Make sure to remove any dirt, grease, or oxidation from the surfaces to achieve a clean, oxide-free soldering area.
3. Not activating the flux: Flux needs to be properly heated to activate its oxidizing and cleaning properties. Not providing enough heat or overheating the flux can lead to ineffective oxide removal and compromised solder joints.
4. Using expired or degraded flux: Using flux that has expired or degraded can result in poor soldering performance. Check the expiration date and storage conditions of your flux to ensure its effectiveness.
5. Ignoring safety precautions: Flux can emit fumes when heated, so it’s crucial to work in a well-ventilated area and wear appropriate protective gear, such as safety glasses. Always follow the safety guidelines provided by the flux manufacturer.
6. Not properly cleaning flux residue: Leaving flux residue on the solder joints after soldering can lead to long-term reliability issues, such as corrosion or electrical failures. Thoroughly clean the soldered connections using appropriate cleaning agents to remove any flux residue.
7. Using the wrong type of flux: Choosing an incompatible flux for your soldering project can result in poor soldering performance. Different projects require specific types of flux, so make sure to select the right flux based on your needs and the materials being soldered.
8. Rushing the soldering process: Soldering requires patience and precision. Rushing the process can lead to inadequate flux activation, poor solder flow, and weak solder joints. Take your time and ensure that each step is executed properly.
Avoiding these common mistakes when using flux will help you achieve clean, reliable, and durable solder joints, ensuring the success of your soldering projects.
Cleaning up Flux residue
Cleaning up flux residue is an important step in the soldering process to ensure the long-term reliability and performance of the solder joints. Flux residue, if left uncleaned, can lead to corrosion, poor electrical conductivity, and even failure of the soldered connections. Here are some effective methods for cleaning up flux residue:
1. Isopropyl alcohol: Isopropyl alcohol, also known as IPA, is a commonly used cleaning agent for flux residue. Dampen a clean cloth or cotton swab with IPA and gently wipe the soldered joint to remove the residue. Ensure that the flux residue is completely dissolved and removed before proceeding.
2. Water and soap: For water-soluble flux, using water and soap can be an effective cleaning method. Rinse the soldered joint under running water to remove the flux residue. Gently scrub the joint using a soft brush or sponge with a mild soap solution to further clean the surface. Thoroughly rinse the area with clean water and dry it completely before continuing.
3. Flux removers: There are specific flux removers available in the market designed to remove flux residue. These removers are formulated to dissolve and clean flux effectively. Follow the manufacturer’s instructions for proper application and ensure that the removers you use are compatible with your soldering materials.
4. Ultrasonic cleaning: Ultrasonic cleaning can be beneficial for removing stubborn or hard-to-reach flux residue. Ultrasonic cleaners generate high-frequency sound waves that create microscopic bubbles, which help dislodge and remove the residue from the soldered joint. Place the soldered components in the ultrasonic cleaner with an appropriate cleaning solution and follow the manufacturer’s instructions.
5. Compressed air: Using compressed air can be helpful in removing loose flux residue after cleaning. Direct a stream of compressed air onto the soldered joint to blow away any remaining debris or cleaning agents. Ensure that the compressed air is clean and free from any contaminants that may further affect the joint.
6. Visual inspection: After cleaning, perform a visual inspection to ensure that all flux residue has been adequately removed. Use a magnifying glass or a microscope to examine the joint for any remaining residue. If necessary, repeat the cleaning process until the soldered joint is clean and free from flux residue.
7. Post-cleaning protection: After cleaning the flux residue, it is essential to protect the soldered joint from potential recontamination. Use a conformal coating or an appropriate protective spray to provide a barrier against moisture, dust, and other contaminants. This coating helps to maintain the cleanliness and reliability of the soldered connections.
By following these cleaning methods, you can effectively remove flux residue and ensure that your soldered joints are reliable, corrosion-free, and perform optimally over time.