Benefits of Using Find and Replace in Word
Microsoft Word’s “Find and Replace” feature is a powerful tool that can save you time and effort when editing your documents. Whether you’re working on a short assignment or a lengthy report, this feature offers numerous benefits that can greatly enhance your productivity and efficiency. Here are some key advantages of using Find and Replace in Word:
- Saving Time: One of the biggest benefits of using Find and Replace is its ability to quickly locate and modify specific words or phrases throughout your document. Instead of manually searching for each occurrence, you can simply enter the word or phrase you want to find, and Word will instantly locate and highlight all instances. This saves you valuable time, especially when dealing with large documents.
- Easy Editing: Find and Replace allows for easy and seamless editing. If you need to make changes to a particular word or phrase, you can replace it with just a few clicks. This eliminates the need to manually go through each occurrence and amend them individually, ensuring consistency and accuracy in your document.
- Consistency: Find and Replace ensures consistency in your document by replacing all instances of a particular word or phrase. This is particularly useful when you need to change a name, a date, or any other element that appears multiple times throughout your document. With just a couple of clicks, you can update all instances simultaneously, maintaining the coherence of your content.
- Global Changes: Find and Replace allows you to make global changes in your document. For example, if you decide to change a heading style or a certain formatting element, you can easily replace it throughout the entire document. This saves you from manually modifying each occurrence, especially when dealing with lengthy documents or multiple files.
- Error Correction: Find and Replace is a valuable tool for error correction. If you discover a misspelled word or a typographical error that repeats multiple times, you can quickly find and replace it with the correct spelling or wording. This helps you maintain a professional and polished document that is free from errors.
- Efficient Formatting: With Find and Replace, you can also replace formatting elements such as font size, color, or style. This is particularly useful when you want to maintain a consistent look and feel throughout your document. For example, if you decide to change the font style from Arial to Times New Roman, you can easily accomplish this using Find and Replace.
These are just a few of the many benefits of using the Find and Replace feature in Microsoft Word. By utilizing this powerful tool, you can save time, ensure consistency, and make efficient changes to your document, ultimately enhancing your productivity and the quality of your work.
How to Access the Find and Replace Feature
In order to take advantage of the Find and Replace feature in Microsoft Word, you need to know how to access it. Fortunately, accessing this powerful tool is quick and easy. Here’s a step-by-step guide on how to access the Find and Replace feature:
- Open Microsoft Word: Start by opening Microsoft Word on your computer. You can do this by clicking on the Word icon on your desktop or searching for it in your Start menu.
- Navigate to the Home Tab: Once Word is open, navigate to the Home tab located at the top of the screen. This tab contains various formatting and editing options.
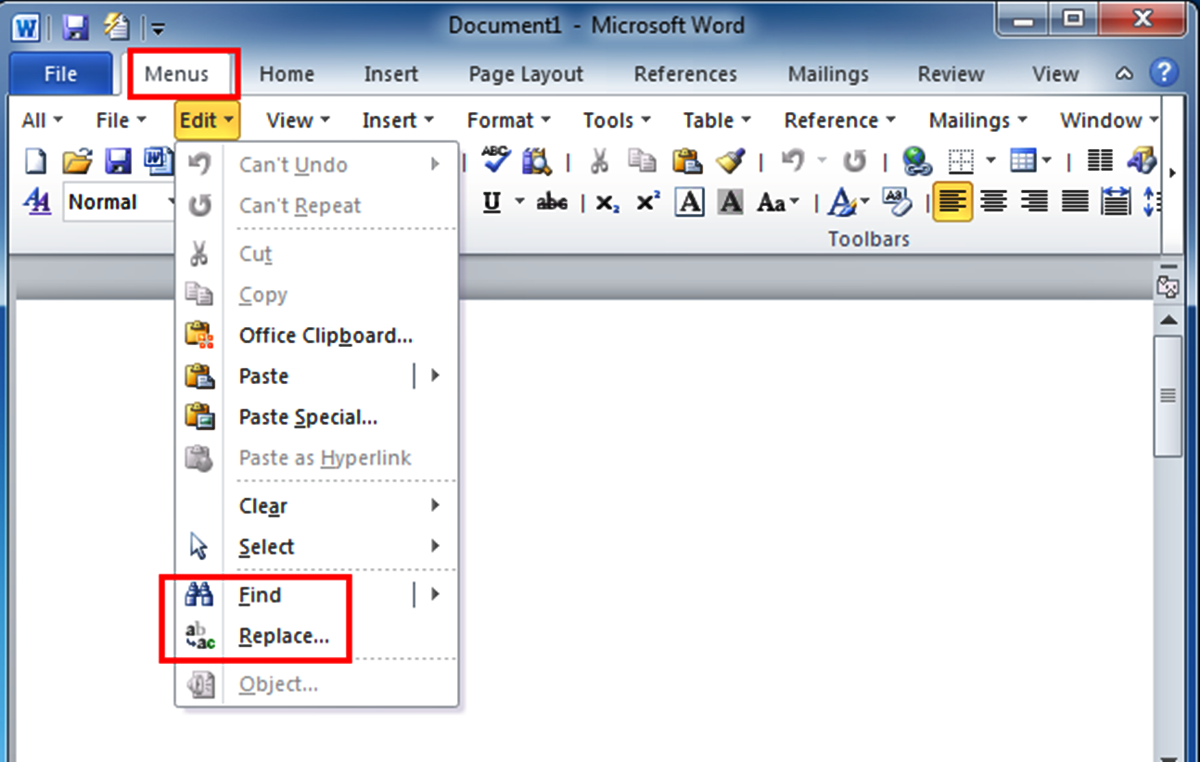
- Locate the Find and Replace Button: Within the Home tab, you will find a section labeled “Editing” on the right-hand side. In this section, you will see the “Find” and “Replace” buttons. Click on the “Find” button to open the Find and Replace pane.
- Use the Keyboard Shortcut: Alternatively, you can use the keyboard shortcut to access the Find and Replace feature. Simply press Ctrl + F on your keyboard, and the Find and Replace pane will appear.
- Explore the Find and Replace Pane: Once the Find and Replace pane is open, you will see two tabs: “Find” and “Replace.” The “Find” tab allows you to search for specific words or phrases in your document, while the “Replace” tab enables you to find and replace specific words or phrases with alternative text.
- Enter the Search Term: In the “Find” tab, enter the word or phrase you want to find in the “Find what” field. You can also specify additional search options, such as matching case or whole words only.
- Perform the Search: After entering the search term, click on the “Find Next” button to start the search. Word will highlight the first occurrence of the search term in your document.
- Utilize the Replace Function: If you want to replace the search term with alternative text, switch to the “Replace” tab in the Find and Replace pane. Enter the word or phrase you want to replace the search term with in the “Replace with” field. Click on the “Replace” button to replace the current occurrence or “Replace All” to replace all occurrences.
- Close the Find and Replace Pane: Once you’ve finished using Find and Replace, you can close the pane by clicking the “X” button at the top right corner or pressing the Esc key on your keyboard.
By following these simple steps, you can easily access and utilize the powerful Find and Replace feature in Microsoft Word. Whether you need to find specific words, replace text, or perform global changes in your document, this feature will greatly simplify your editing process and enhance your productivity.
Finding and Replacing Text
One of the primary uses of the Find and Replace feature in Microsoft Word is to locate specific words or phrases within your document and replace them with alternative text. This function is incredibly helpful when you need to make changes or corrections throughout your document. Here’s a step-by-step guide on how to find and replace text using Microsoft Word:
- Access the Find and Replace Pane: Open the Find and Replace pane by clicking on the “Find” button in the Home tab or by using the Ctrl + F keyboard shortcut.
- Enter the Text to Find: In the “Find what” field, enter the word or phrase you want to find within your document.
- Navigate Through the Matches: Click on the “Find Next” button to search for the first instance of the text. Word will highlight the text, and you can click “Find Next” again to navigate through the subsequent matches.
- Replace Individual Occurrences: If you want to replace the currently highlighted instance, click on the “Replace” button. Word will replace the text and automatically navigate to the next occurrence. To replace multiple instances, keep clicking “Replace” until you’ve made all the desired changes.
- Replace All Occurrences: If you want to replace all instances of the text in one go, click on the “Replace All” button. Word will swiftly replace every occurrence of the text throughout your document.
- Use the Match Case and Whole Word Options: To further refine your search, you can enable the “Match case” option to ensure that only text with the same capitalization is found. The “Whole words only” option will find the specified text only when it appears as a complete word, excluding partial matches.
- Undo Mistakes: If you accidentally replace text or make a mistake, you can use the “Undo” function by pressing Ctrl + Z on your keyboard. This will revert the last action and restore the original text.
- Close the Find and Replace Pane: When you’re finished finding and replacing text, you can close the Find and Replace pane by clicking the “X” button or pressing the Esc key on your keyboard.
By following these steps, you can easily find and replace specific text within your Microsoft Word document. This feature is particularly useful when you need to make corrections, update information, or ensure consistency in your content. Make the most of the Find and Replace function to streamline your editing process and save time on manual revisions.
Using Wildcards in Find and Replace
Microsoft Word’s Find and Replace feature is not only limited to searching for specific words or phrases but also offers the flexibility of using wildcards. Wildcards are special characters that represent a group of characters or a pattern, allowing for more advanced and customizable search options. Here is a guide on how to use wildcards in Find and Replace in Microsoft Word:
- Access the Find and Replace Pane: Open the Find and Replace pane by clicking on the “Find” button in the Home tab or using the Ctrl + F keyboard shortcut.
- Enable Wildcards: In the Find and Replace pane, click on the “More” button to expand the options. Check the box next to “Use wildcards” to activate the use of wildcards in your search.
- Use Wildcard Characters: Wildcard characters help define patterns and are useful for finding specific types of text. Here are some commonly used wildcard characters:
- * (asterisk): This represents any number of characters. For example, searching for “ca*t” will find “cat”, “cart”, “carrot”, and so on.
- ? (question mark): This represents a single character. Searching for “h?t” will find “hat”, “hot”, and “hit”, but not “hut” or “heat”.
- [ ] (square brackets): This represents a group of characters. For example, searching for “gr[ae]y” will find both “gray” and “grey”.
- [! ] (exclamation mark within square brackets): This represents any character except those specified. Searching for “b[!ae]d” will find “bid” and “bud”, but not “bad” or “bed”.
- Combine Wildcards: You can combine multiple wildcards to create more complex patterns. For instance, searching for “m??l*” will find “mail”, “mild”, “metal”, and “molecule”.
- Replace Using Wildcards: If you want to replace text using wildcards, switch to the “Replace” tab in the Find and Replace pane. Enter the replacement text and use the appropriate wildcard characters in the “Find what” and “Replace with” fields.
- Perform the Search or Replace: Click on the “Find Next” button to search for the text that matches the wildcard pattern. Use “Replace” or “Replace All” to replace the matched text if desired.
- Close the Find and Replace Pane: Once you’ve finished using wildcards in your search or replace operation, you can close the pane by clicking the “X” button or pressing the Esc key.
By utilizing wildcards in Find and Replace, you can take advantage of more advanced search options and create specific patterns to find and replace text in your Microsoft Word documents. This allows for greater flexibility and precision in modifying your content, ultimately enhancing your editing experience.
Replacing Formatting in Word
When working with Microsoft Word, you may come across situations where you need to make changes to the formatting of your document. The Find and Replace feature in Word not only allows you to search for specific text but also provides the capability to replace formatting elements. Here’s how you can replace formatting in Microsoft Word:
- Access the Find and Replace Pane: Open the Find and Replace pane by clicking on the “Find” button in the Home tab or by using the Ctrl + F keyboard shortcut.
- Click on the “More” Button: In the Find and Replace pane, click on the “More” button to expand the options and access additional features.
- Click on the “Format” Button: Once the options are expanded, click on the “Format” button located at the bottom of the Find and Replace pane.
- Select the Formatting Element to Replace: A drop-down menu will appear, providing a range of formatting options such as font, paragraph styles, highlighting, and more. Choose the specific formatting element you want to replace.
- Specify the Replacement Formatting: Once you’ve selected the formatting element, a new dialog box will open, allowing you to specify the replacement formatting options. For example, if you want to change the font size, choose the desired size from the options provided.
- Perform the Search or Replace: Click on the “Find Next” button to search for the text with the specified formatting. Word will highlight the instances that match the formatting. To replace the formatting, click on the “Replace” button or use “Replace All” to replace all instances.
- Close the Find and Replace Pane: Once you’ve finished replacing the formatting, you can close the Find and Replace pane by clicking the “X” button or pressing the Esc key on your keyboard.
By utilizing the formatting replacement feature in Microsoft Word, you can easily modify specific formatting elements throughout your document. Whether you need to change the font style, adjust the paragraph spacing, or apply a different highlight color, the Find and Replace feature offers a convenient way to achieve consistent formatting in your Word documents.
Finding and Replacing Special Characters
In Microsoft Word, special characters such as symbols, non-printing characters, or specific formatting elements can be essential for creating and editing documents. However, finding and replacing these special characters can sometimes be a challenge. Thankfully, Word’s Find and Replace feature provides an easy way to locate and replace special characters throughout your document. Here’s how you can find and replace special characters in Microsoft Word:
- Access the Find and Replace Pane: Open the Find and Replace pane by clicking on the “Find” button in the Home tab or using the Ctrl + F keyboard shortcut.
- Enter the Special Character: In the “Find what” field of the Find and Replace pane, enter the special character you want to locate within your document. For example, if you want to find all instances of a specific symbol, type the symbol or the character representation.
- Navigate Through the Matches: Click on the “Find Next” button to search for the first occurrence of the special character. Word will highlight the special character, and you can click “Find Next” again to navigate through subsequent matches.
- Replace Individual Occurrences: To replace the currently highlighted special character, click on the “Replace” button. Word will replace the special character, and you can continue clicking “Replace” to replace additional occurrences individually.
- Replace All Occurrences: If you want to replace all instances of the special character throughout your document, click on the “Replace All” button. Word will quickly replace every occurrence of the special character.
- Use Escape Sequences: Some special characters may require the use of escape sequences to be properly recognized in Find and Replace. For example, if you want to find an escaped character like a paragraph mark, you can enter “^p” in the Find what field.
- Close the Find and Replace Pane: Once you’ve finished finding and replacing special characters, you can close the Find and Replace pane by clicking the “X” button or pressing the Esc key on your keyboard.
With the help of the Find and Replace feature in Microsoft Word, locating and replacing special characters becomes a straightforward task. Whether you need to find specific symbols, non-printing characters, or other formatting elements, this feature simplifies the editing process and allows for precise control over special characters in your Word documents.
Finding and Replacing in Headers, Footers, and Footnotes
Microsoft Word’s Find and Replace feature not only helps you search and replace text within the main body of your document but also allows you to find and replace text within headers, footers, and footnotes. This functionality is particularly useful if you need to make changes to specific sections of your document. Here’s how you can find and replace text in headers, footers, and footnotes:
- Access the Find and Replace Pane: Open the Find and Replace pane by clicking on the “Find” button in the Home tab or using the Ctrl + F keyboard shortcut.
- Click on the “More” Button: In the Find and Replace pane, click on the “More” button to expand the options and access additional features.
- Check the “Headers & Footers” Option: Within the expanded options, check the box next to “Headers & Footers” to enable the search within these sections of your document.
- Specify the Text to Find: In the “Find what” field, enter the text you want to find within the headers, footers, or footnotes of your document.
- Perform the Search: Click on the “Find Next” button to search for the first occurrence of the specified text within the headers, footers, or footnotes. Word will highlight the text within these sections, allowing you to review and make changes if needed.
- Replace Individual Occurrences: If you want to replace the currently highlighted text, click on the “Replace” button. Word will replace the text in the current occurrence within the headers, footers, or footnotes.
- Replace All Occurrences: If you want to replace all occurrences of the text within the headers, footers, or footnotes, click on the “Replace All” button. Word will quickly replace all instances of the text within these sections.
- Close the Find and Replace Pane: Once you’ve finished finding and replacing text within headers, footers, or footnotes, you can close the Find and Replace pane by clicking the “X” button or pressing the Esc key on your keyboard.
By utilizing the Find and Replace feature in Microsoft Word, you can easily locate and replace text within headers, footers, and footnotes. This functionality allows for efficient editing and ensures consistency throughout your document, even in these specific sections.
Utilizing Advanced Options in Find and Replace
Microsoft Word’s Find and Replace feature offers advanced options that can further refine your search and replace operations. These options allow you to customize your searches and make more precise changes within your document. Here are some advanced options you can utilize in Find and Replace:
- Match Case: The “Match case” option ensures that the search is case-sensitive. When enabled, it will only find instances of the text that match the capitalization you specified in the search.
- Match Whole Words Only: Enabling the “Match whole words only” option ensures that Word searches for complete words only. It will not find partial matches within words or combined with other characters.
- Search Up/Down: By default, Word searches from the current cursor position in a downward direction. However, you can change the search direction to “Up” if you prefer to search from the current position upward.
- Use Regular Expressions: If you have a more complex search pattern, you can enable the “Use wildcards” or “Use regular expressions” option. This allows you to utilize wildcard characters or regular expressions to define patterns in your search.
- Find Formatting: In addition to finding and replacing text, the Find and Replace feature also allows you to find specific formatting elements. You can search for formatting such as font styles, font colors, underline, and more.
- Replace Formatting: Similar to finding formatting, you can also replace formatting elements using the Find and Replace feature. This allows you to make consistent changes to the formatting throughout your document.
- Use Find Next and Find All: The “Find Next” button allows you to find and review occurrences one by one, while the “Find All” button displays a list of all occurrences found. Find All is helpful when you want to see all matches at once.
- Save and Load Settings: If you often use specific find and replace criteria, Word allows you to save your settings. You can save a set of criteria and recall them later, which is useful for repetitive tasks or when working with multiple documents.
- Preview Changes: Before performing a replace operation, you can preview the changes that will be made. This allows you to review the replacements and ensure they are accurate.
By exploring and utilizing these advanced options in the Find and Replace feature, you can enhance your editing process and perform more customized and precise searches and replacements in Microsoft Word. These options provide additional flexibility and control over your document’s content and formatting.
Saving and Reusing Find and Replace Criteria
Microsoft Word’s Find and Replace feature allows you to save and reuse your frequently used find and replace criteria. This feature is particularly helpful when working with repetitive tasks or managing multiple documents that require similar search and replace operations. Here’s how you can save and reuse find and replace criteria in Microsoft Word:
- Define Find and Replace Criteria: Begin by specifying the find and replace criteria in the Find and Replace pane. Enter the text you want to find and the replacement text, as well as any additional options such as match case, whole word, wildcards, or specific formatting.
- Click on the “More” Button: In the Find and Replace pane, click on the “More” button to expand the options and access additional features.
- Save the Criteria: In the expanded options, click on the “Options” button. From the drop-down menu, select “Save Selection as a Quick Part”.
- Provide a Name: A dialog box will appear, prompting you to enter a name for the quick part. Give it a descriptive name that reflects the purpose or nature of the find and replace criteria. For example, you can name it “Product Names” if you frequently need to find and replace product names in your documents.
- Save the Quick Part: Click the “OK” button to save the quick part with the specified name. It will be stored in the gallery for quick access in the future.
- Access the Saved Criteria: To reuse the saved find and replace criteria, open the Find and Replace pane as usual. Click on the “More” button, then select “Quick Parts” from the drop-down menu.
- Select the Saved Criteria: In the Quick Parts menu, you will see a list of all your saved find and replace criteria. Select the one you want to use for the current search and replace operation.
- Perform the Search or Replace: Once you’ve selected the saved criteria, click on the “Find Next” button to initiate the search, or “Replace” or “Replace All” to perform the replace operation.
- Close the Find and Replace Pane: After using the saved criteria, you can close the Find and Replace pane by clicking the “X” button or pressing the Esc key on your keyboard.
By saving and reusing find and replace criteria in Microsoft Word, you can streamline your editing process and save time on repetitive tasks. Whether you work with standard phrases, specific terms, or formatting elements, this feature allows for efficient management and application of commonly used find and replace operations.
Tips and Tricks for Using Find and Replace Efficiently
Microsoft Word’s Find and Replace feature is a powerful tool that can greatly enhance your editing workflow. To make the most out of this feature and ensure efficient usage, here are some tips and tricks to consider:
- Keyboard Shortcuts: Instead of relying solely on the mouse, utilize keyboard shortcuts for quicker access to the Find and Replace feature. Use Ctrl + F to open the Find and Replace pane and Ctrl + H to directly access the Replace tab.
- Use Wildcards: Incorporate wildcards and regular expressions for more advanced and flexible searches. Experiment with wildcard characters like *, ?, and [ ] to create precise search patterns that target specific text variations.
- Optimize Formatting Replacements: When replacing formatting elements, pay attention to the options available in the Replace tab. Check the “Match case” box to ensure that the replacement formatting matches the original, and use the “Find what” field to select specific formatting attributes.
- Preview Changes: Before performing a mass replace operation using “Replace All,” use the “Find Next” button to review each occurrence individually. This allows you to ensure that replacement is accurate and avoids unintended changes.
- Utilize Advanced Options: Take advantage of advanced options like “Match case” and “Match whole words only” to narrow down your search and improve accuracy. These options can help you find and replace specific instances without affecting other parts of the document.
- Saving Frequently Used Find and Replace Criteria: Save your commonly used find and replace criteria as Quick Parts. This allows you to access them easily from the Quick Parts menu, saving you time and effort when performing repetitive find and replace operations.
- Consider Hidden Formatting: Keep in mind that formatting changes in hidden sections, such as headers, footers, or footnotes, may not be immediately visible. Make sure to review these sections separately to ensure consistency throughout your document.
- Be Cautious with Replacing Formatting: When replacing formatting, double-check the changes to avoid unintentional modifications. Use the “Find what” field to specify the formatting to be replaced and the “Replace with” field to specify the desired replacement formatting.
- Explore Other Advanced Options: Familiarize yourself with additional advanced options, such as searching for special characters or finding and replacing in headers, footers, and footnotes. These options can enhance your editing capabilities and help you achieve greater precision in your document modifications.
- Undo and Verify: If you accidentally replace text or make a mistake, utilize the “Undo” function (Ctrl + Z) to revert the last action. Always double-check your replaced text to ensure accuracy before finalizing the changes.
By employing these tips and tricks, you can optimize your usage of the Find and Replace feature in Microsoft Word. Whether it’s through efficient navigation, advanced options, or smart usage of shortcuts, these techniques will enhance your editing efficiency and streamline your document modifications.