
Using the Find feature in MS Word
Finding specific text in a lengthy document can be a time-consuming task. Thankfully, MS Word offers a powerful search feature that allows you to quickly locate desired text within your document. Here’s how you can make the most of the “Find” feature in MS Word:
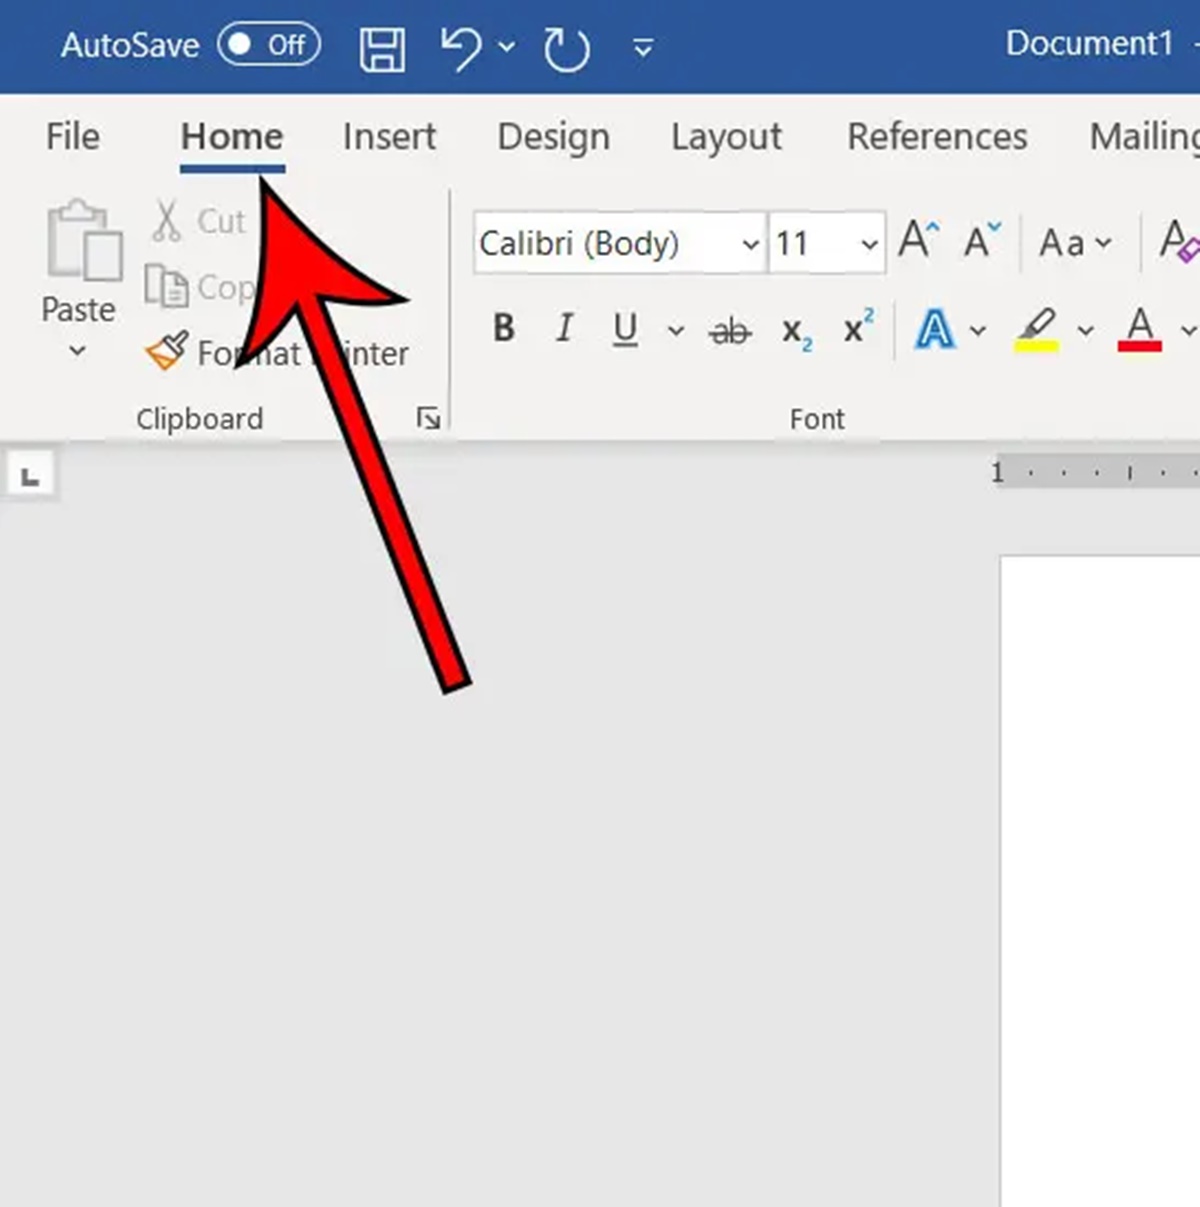
- Open your MS Word document and click on the “Home” tab.
- Locate the “Find” button in the far-right corner of the ribbon and click on it. Alternatively, you can use the shortcut key “Ctrl + F” to open the Find dialog box.
- In the Find dialog box, enter the specific word or phrase you want to search for in the “Find What” field.
- Choose the options you want to include in your search. For example, you can choose to match the case, find whole words only, or search for the exact phrase.
- Click on the “Find Next” button to begin the search. MS Word will highlight the first occurrence of the word or phrase in the document.
- If you want to find the next occurrence of the word or phrase, click on the “Find Next” button again. Continue clicking on it until you have found all the instances you need.
- To modify or refine your search, you can click on the “Options” button in the Find dialog box. Here, you can specify additional search criteria or limit your search to specific sections or document elements.
Using the Find feature in MS Word not only saves time but also increases efficiency when searching for specific text within a document. Whether you are looking for a single word or a complex phrase, this feature allows you to navigate through your document with ease.
By utilizing the options available in the Find dialog box, you can customize your search to suit your specific needs. Whether you want to search for case-sensitive text, limit your search to whole words only, or find exact phrases, MS Word provides the necessary tools to refine your search queries.
Using the Find and Replace feature in MS Word
In addition to the basic “Find” feature, MS Word also offers a powerful “Find and Replace” function that allows you to not only locate specific text but also replace it with something else. This feature can be incredibly useful when you need to make global changes to your document. Here’s how you can take advantage of the “Find and Replace” feature in MS Word:
- Open your MS Word document and click on the “Home” tab.
- locate the “Replace” button in the far-right corner of the ribbon and click on it. Alternatively, you can use the shortcut key “Ctrl + H” to open the Find and Replace dialog box.
- In the Find and Replace dialog box, enter the text you want to locate in the “Find What” field.
- If needed, specify any additional search criteria such as matching the case or finding whole words only.
- In the “Replace With” field, enter the text you want to use as a replacement. You can leave this field blank if you want to delete the found text without replacing it.
- To replace individual instances of the found text, click on the “Find Next” button. MS Word will highlight the first occurrence and prompt you to replace it. Click “Replace” to make the change or “Find Next” to move on to the next occurrence without replacing.
- To replace all instances of the found text at once, click on the “Replace All” button. MS Word will replace all occurrences without prompting you for each one.
- To refine your search and replacement options, click on the “More” button in the Find and Replace dialog box. Here, you can specify additional search criteria, format options, or even use wildcards for more advanced searches.
The Find and Replace feature in MS Word is a powerful tool that allows you to make changes to your document quickly and efficiently. Whether you need to correct a common typo, update a recurring term, or reformat specific elements, this feature saves you from manually searching and modifying each instance individually.
By utilizing the options available in the Find and Replace dialog box, you can customize your search and replacement criteria to suit your specific needs. Whether you want to replace text based on case sensitivity, limit replacements to whole words only, or make changes to specific formatting, MS Word provides the necessary tools to accurately modify your document.
Searching for specific formatting in MS Word
In addition to finding and replacing specific text, MS Word also allows you to search for specific formatting within your documents. This feature can be particularly useful when you want to locate certain styles, fonts, colors, or other formatting elements. Here’s how you can search for specific formatting in MS Word:
- Open your MS Word document and click on the “Home” tab.
- Click on the “Find” button in the far-right corner of the ribbon or press “Ctrl + F” to open the Find dialog box.
- In the Find dialog box, click on the “More” button to expand the options.
- Click on the “Format” button located at the bottom of the Find dialog box. A drop-down menu will appear with various formatting options.
- Select the specific formatting option you want to search for, such as font, style, paragraph format, or highlighting.
- In the corresponding dialog box that appears, specify the desired formatting details for your search. For example, if you want to find all text in a specific font, choose the font from the drop-down menu.
- Click on the “OK” button to confirm your search criteria.
- Click on the “Find Next” button to start the search. MS Word will highlight the first occurrence of the specified formatting element in the document.
- To find the next occurrence, click on the “Find Next” button again. Continue clicking on it until you have found all the instances that meet your formatting criteria.
Searching for specific formatting in MS Word allows you to efficiently locate and modify sections of your document that have a consistent style or appearance. Whether you want to update the font throughout your document, find text with a specific paragraph format, or highlight specific sections, the formatting search feature saves you time and effort.
By utilizing the various formatting options available in the Find dialog box, you can narrow down your search to meet your specific needs. Whether you are searching for a specific font, style, color, or other formatting elements, MS Word provides the necessary tools to help you find and modify your document with precision.
Searching for specific styles in MS Word
MS Word allows you to apply different styles to your document, providing a consistent and professional look. When working with styles, it can be helpful to search for specific styles within your document. This allows you to quickly locate and make changes to text that has been formatted with a particular style. Here’s how you can search for specific styles in MS Word:
- Open your MS Word document and click on the “Home” tab.
- Click on the “Replace” button in the far-right corner of the ribbon or press “Ctrl + H” to open the Find and Replace dialog box.
- In the Find and Replace dialog box, click on the “Format” button located at the bottom and select “Style” from the drop-down menu.
- In the “Find Style” dialog box, choose the specific style you want to search for from the list. You can also click on the “Format” button to access additional options such as font, paragraph, or numbering styles.
- Once you have selected the style, click on the “OK” button to close the dialog box.
- In the Find and Replace dialog box, you can specify additional search criteria or leave them blank to search for all instances of the selected style.
- Click on the “Find Next” button to start the search. MS Word will highlight the first occurrence of the selected style in the document.
- To find the next occurrence, click on the “Find Next” button again. Continue clicking on it until you have found all the instances of the selected style.
Searching for specific styles in MS Word allows you to easily identify and modify text that has been formatted with a particular style. Whether you want to modify the font, spacing, or other formatting elements associated with a style, the style search feature streamlines the process and ensures consistency in your document.
By utilizing the various options in the Find and Replace dialog box, you can customize your search to meet your specific needs. Whether you are searching for a heading style, a paragraph style, or a custom style, MS Word provides the necessary tools to efficiently find and modify your document based on styles.
Searching for specific objects in MS Word
In addition to text, MS Word allows you to insert various objects into your documents, such as images, shapes, tables, and charts. When working with complex documents that contain multiple objects, it can be helpful to search for and locate specific objects. This allows you to easily make changes or apply formatting to individual objects. Here’s how you can search for specific objects in MS Word:
- Open your MS Word document and click on the “Home” tab.
- Click on the “Find” button in the far-right corner of the ribbon or press “Ctrl + F” to open the Find dialog box.
- In the Find dialog box, click on the “More” button to expand the options.
- Click on the “Go To” tab in the Find dialog box.
- In the “Go to what” section, select the type of object you want to search for from the drop-down menu. The available options include “Page”, “Table”, “Comment”, “Textbox”, “Footnote”, and more.
- Click on the “Next” button to start the search. MS Word will navigate to the next occurrence of the selected object type in the document.
- To find the next occurrence, click on the “Next” button again. Continue clicking on it until you have found all the instances of the selected object type.
Searching for specific objects in MS Word allows you to easily locate and modify individual objects within a document. Whether you want to resize an image, format a table, or edit a shape, the object search feature helps you efficiently navigate through the document and make targeted changes.
By utilizing the various object types available in the Find dialog box, you can narrow down your search and search for specific types of objects in MS Word. Whether you are searching for tables, images, comments, or other objects, MS Word provides the necessary tools to locate and modify individual objects with precision.
Searching for specific symbols in MS Word
Symbols are an essential part of many documents, and MS Word provides a wide range of symbols to choose from. When working with specific symbols or trying to locate and replace certain symbols within your document, it can be helpful to use the search feature. Here’s how you can search for specific symbols in MS Word:
- Open your MS Word document and click on the “Insert” tab.
- In the “Symbols” group, click on the “Symbol” button and choose “More Symbols” from the dropdown menu.
- In the “Symbol” dialog box, select the “Symbols” tab if it’s not already selected.
- From the “Subset” dropdown menu, choose the category that contains the specific symbols you want to search for.
- Scroll through the list to find the symbol you want to search for. If you know the character code, you can enter it directly in the “Character code” field.
- Click on the “Insert” button to add the symbol to your document.
- Press “Ctrl + F” or click on the “Find” button in the far-right corner of the ribbon to open the Find dialog box.
- In the Find dialog box, enter the symbol you want to search for in the “Find what” field.
- Click on the “Find Next” button to start the search. MS Word will locate the first instance of the specified symbol in the document.
- To find the next occurrence, click on the “Find Next” button again. Continue clicking on it until you have found all the instances of the symbol.
Searching for specific symbols in MS Word allows you to quickly locate and work with specific characters within your document. Whether you need to replace a symbol, format it differently, or delete it entirely, the symbol search feature helps you navigate through your document with ease.
By utilizing the symbol selection options in the “Symbol” dialog box and the Find feature in MS Word, you can search for and manipulate specific symbols to match your document’s requirements. Whether you are searching for mathematical symbols, arrows, currency symbols, or other special characters, MS Word provides the necessary tools to locate and modify symbols quickly and accurately.
Using wildcards in MS Word searches
MS Word offers a powerful feature known as “wildcards” that allows you to search for text patterns rather than specific words or phrases. This can be particularly useful when you are looking for variations or patterns within your document. Here’s how you can use wildcards in MS Word searches:
- Open your MS Word document and click on the “Home” tab.
- Click on the “Find” button in the far-right corner of the ribbon or press “Ctrl + F” to open the Find dialog box.
- In the Find dialog box, click on the “More” button to expand the options.
- Check the “Use wildcards” option at the bottom of the Find dialog box.
-
Enter the desired search pattern using wildcards. Wildcards are special characters that represent unknown characters or a group of characters:
- ?: Represents any single character. For example, “gr?y” will find “gray” and “grey”.
- *: Represents any number of characters. For example, “comp*” will find “computer”, “company”, and “composition”.
- [ ]: Represents a range of characters. For example, “[aeiou]” will find any vowel, and “[a-z]” will find any lowercase letter.
- Click on the “Find Next” button to start the search. MS Word will highlight the first occurrence that matches the search pattern.
- To find the next occurrence, click on the “Find Next” button again. Continue clicking on it until you have found all the instances that match the pattern.
Using wildcards in MS Word searches allows you to find text patterns and variations within your document. Whether you are looking for words with different spellings, variations of a particular phrase, or specific patterns in your text, the wildcard feature is a valuable tool.
By understanding and utilizing different wildcard characters in your search patterns, you can conduct precise searches that match your specific criteria. Whether you are searching for specific letters, groups of characters, or variable word length, MS Word’s wildcard feature enhances your ability to find and manipulate text efficiently.
Using advanced search options in MS Word
While the basic search functions in MS Word are powerful, you can further enhance your search capabilities by using advanced search options. These options allow you to specify additional criteria and customize your search to meet your specific needs. Here’s how you can use advanced search options in MS Word:
- Open your MS Word document and click on the “Home” tab.
- Click on the “Find” button in the far-right corner of the ribbon or press “Ctrl + F” to open the Find dialog box.
- In the Find dialog box, click on the “More” button to expand the options.
-
In the expanded Find dialog box, you will see several advanced search options:
- Match case: Check this box if you want your search to be case-sensitive. This means that “apple” will not match “Apple”.
- Find whole words only: Check this box if you want to search for complete words rather than partial matches. For example, searching for “and” will not match “land” or “sand”.
- Use wildcards: Check this box if you want to use wildcards in your search, as we discussed in the previous section.
- Sound like: Check this box if you want to search for words that sound similar. This option can be helpful in finding words with similar pronunciations or spellings.
- Find all word forms: Check this box if you want to search for different forms of the same word. For example, searching for “run” will also match “running” and “ran”.
-
On the same dialog box, click on the “Options” button to view more advanced search options:
- Format: Specify additional search criteria based on formatting elements like font, paragraph, style, or even specific symbols.
- Special: Use this option to search for specific document elements such as footnotes, endnotes, or comments.
- Find in: Choose whether to search within the main document, headers, footers, footnotes, endnotes, or other specific document sections.
- Once you have set your desired advanced search options, click on the “Find Next” button to start the search. MS Word will locate the first occurrence that matches your criteria.
- To find the next occurrence, click on the “Find Next” button again. Continue clicking on it until you have found all the instances that meet your search criteria.
Using advanced search options in MS Word allows you to refine and customize your search to match specific criteria. Whether you want to perform case-sensitive searches, search for whole words, utilize wildcards, or search within specific formatting elements, MS Word’s advanced search options provide enhanced functionality and flexibility.
By utilizing the different advanced search options available, you can conduct more detailed and accurate searches in your MS Word documents. This allows you to navigate through your document efficiently and locate the specific information you need with precision.
Using the Navigation pane in MS Word
When working with long and complex documents in MS Word, it can be challenging to navigate through various sections and quickly find specific content. The Navigation pane feature in MS Word provides a convenient and efficient way to navigate through your document, view the structure, and locate specific headings or content. Here’s how to use the Navigation pane in MS Word:
- Open your MS Word document and click on the “View” tab.
- In the “Show” group, check the “Navigation Pane” box. The Navigation pane will appear on the left side of your document.
- In the Navigation pane, you will see a list of headings and subheadings present in your document, if any. If your document doesn’t have headings, you can use the “Headings” option in the “Show” dropdown menu to assign headings to specific sections.
- To navigate to a specific heading or section, simply click on the entry in the Navigation pane. MS Word will automatically scroll to the corresponding section in your document.
- To collapse or expand the view of the headings in the Navigation pane, you can click on the small arrow icon next to each heading. This allows you to focus on specific sections or get an overview of the entire document structure.
- If you have assigned styles to specific headings in your document, you can also use the “Headings” option in the “Navigation” group to filter and view only sections with those specific styles.
- In addition to headings, you can also use the search bar at the top of the Navigation pane to search for specific words or phrases within your document. The results will be displayed, and clicking on a result will take you directly to the corresponding section.
The Navigation pane in MS Word provides a visual representation of your document’s structure, making it easy to navigate and locate specific content. Whether you have a lengthy report, a thesis, or a complex document with multiple sections, the Navigation pane saves you time and effort in finding and jumping to the desired sections.
By utilizing the collapse and expand feature, as well as the search bar in the Navigation pane, you can quickly locate and navigate through different sections of your document. This helps you maintain an organized workflow and enhances your overall productivity when working with large MS Word documents.
Using the Go To function in MS Word
When working with long documents in MS Word, it can be time-consuming and tedious to scroll through numerous pages to find a specific section or page. The Go To function in MS Word provides a quick and efficient way to navigate to a specific page, section, or even a particular element within your document. Here’s how to utilize the Go To function in MS Word:
- Open your MS Word document and click on the “Home” tab.
- Press “Ctrl + G” on your keyboard or click on the “Find” button in the far-right corner of the ribbon and select “Go To” from the dropdown menu. The Go To dialog box will appear.
-
In the Go To dialog box, you will see several options to navigate to specific elements within your document:
- Page: Select this option if you know the specific page number you want to go to. Enter the page number in the “Enter page number” field.
- Section: Choose this option if your document contains multiple sections, and you want to go to a particular section. Enter the section number in the “Enter section number” field.
- Line: Use this option if you want to go to a specific line within a page or section. Enter the line number in the “Enter line number” field.
- Bookmark: If you have set up bookmarks in your document, you can select this option and choose a specific bookmark from the dropdown list.
- Footnote or Endnote: This option allows you to navigate to a specific footnote or endnote in your document.
- After selecting the desired option and entering the corresponding information, click on the “Go To” button. MS Word will navigate to the specified page, section, or element within your document.
The Go To function in MS Word provides a fast and efficient way to navigate to specific locations within your document, regardless of its length. Whether you need to find a particular page, section, line, or element, the Go To function saves you time and helps you maintain productivity while working with long documents.
By utilizing the different options in the Go To dialog box, you can easily jump to the desired page, section, line, or element within your document. This feature streamlines your workflow and enables you to access the necessary information quickly and efficiently in MS Word.
Searching for text within tables in MS Word
Tables are a common element used in many MS Word documents to organize and present data. When working with complex documents that contain multiple tables, it can be challenging to locate specific text within those tables. Thankfully, MS Word provides a convenient way to search for text specifically within tables. Here’s how you can search for text within tables in MS Word:
- Open your MS Word document that contains tables.
- Click anywhere within the table in which you want to search for text.
- Press “Ctrl + F” on your keyboard to open the Find dialog box or click on the “Home” tab and click on the “Find” button in the far-right corner of the ribbon.
- In the Find dialog box, enter the text you want to search for within the table in the “Find what” field.
- Click on the “Reading Highlight” button or press “Alt + L” to expand the options.
- From the “Highlight” dropdown, select “Highlight All” to show all instances of the text within the table.
- MS Word will highlight all occurrences of the searched text within the table.
- To navigate to each highlighted occurrence, press “Ctrl + PgDn” on your keyboard or click on the “Next” button in the Find dialog box.
Searching for text within tables in MS Word allows you to quickly locate specific information within complex documents. Whether you are looking for particular data, values, or keywords within a table, this feature enables you to efficiently find and navigate through the table’s content.
By using the “Highlight All” option within the Find dialog box, you can easily view and review all occurrences of the searched text within the table. This visual aid helps you identify and examine the data or information you need, improving your productivity and accuracy when working with tables in MS Word.
Searching for text in footnotes and endnotes in MS Word
Footnotes and endnotes are commonly used in academic and professional documents to provide additional information or citations. When working with documents that contain footnotes or endnotes, it’s important to have the ability to search for specific text within those notes. MS Word offers a convenient feature that allows you to search for text within footnotes and endnotes. Here’s how you can do it:
- Open your MS Word document that contains footnotes or endnotes.
- Click on the “View” tab in the ribbon.
- In the “Show” group, click on the “Draft” button to switch to the Draft view. This view displays footnotes and endnotes at the bottom of each page.
- Press “Ctrl + F” on your keyboard or click on the “Home” tab and click on the “Find” button in the far-right corner of the ribbon to open the Find dialog box.
- In the Find dialog box, enter the text you want to search for within the footnotes or endnotes in the “Find what” field.
- Click on the “Reading Highlight” button or press “Alt + L” to expand the options.
- From the “Highlight” dropdown, select “Highlight All” to show all instances of the text within the footnotes or endnotes.
- MS Word will highlight all occurrences of the searched text within the footnotes or endnotes.
- To navigate to each highlighted occurrence, press “Ctrl + PgDn” on your keyboard or click on the “Next” button in the Find dialog box.
Searching for text in footnotes and endnotes in MS Word allows you to efficiently locate and review specific information within your document. Whether you are looking for references, citations, or additional explanations, this feature enables you to easily navigate and extract the relevant content from footnotes and endnotes.
By highlighting all instances of the searched text within the footnotes or endnotes, MS Word helps you quickly identify and browse through the relevant information. This feature enhances your productivity and accuracy when working with documents that contain footnotes and endnotes.
Searching for text in headers and footers in MS Word
Headers and footers in MS Word are commonly used to display recurring information, such as page numbers, document titles, or company logos, at the top or bottom of each page. When working with documents that have headers and footers, it’s important to have the ability to search for specific text within these sections. MS Word provides a convenient feature that allows you to search for text within headers and footers. Here’s how you can do it:
- Open your MS Word document that contains headers or footers.
- Double-click on the header or footer section of the page where you want to search for text. The header or footer section will become editable.
- Press “Ctrl + F” on your keyboard or click on the “Home” tab and click on the “Find” button in the far-right corner of the ribbon to open the Find dialog box.
- In the Find dialog box, enter the text you want to search for within the header or footer in the “Find what” field.
- Click on the “Reading Highlight” button or press “Alt + L” to expand the options.
- From the “Highlight” dropdown, select “Highlight All” to show all instances of the text within the header or footer.
- MS Word will highlight all occurrences of the searched text within the header or footer section.
- To navigate to each highlighted occurrence, press “Ctrl + PgDn” on your keyboard or click on the “Next” button in the Find dialog box.
- Once you have finished searching within the header or footer, double-click outside the header or footer section to exit the editing mode.
Searching for text in headers and footers in MS Word allows you to quickly locate and modify specific information within these sections of your document. Whether you need to update contact details, change page numbering styles, or find certain text for consistency, this feature enables you to efficiently navigate and extract information from headers and footers.
By highlighting all occurrences of the searched text within the header or footer section, MS Word helps you identify and focus on the relevant information. This feature enhances your productivity and accuracy when working with documents that contain headers and footers.
Searching for text in comments in MS Word
Comments in MS Word are a valuable tool for collaboration and providing feedback on a document. When working with documents that contain multiple comments, it’s important to have the ability to search for specific text within those comments. MS Word offers a convenient feature that allows you to search for text within comments. Here’s how you can do it:
- Open your MS Word document that contains comments.
- Click on the “Review” tab in the ribbon.
- In the “Comments” group, click on the “Next” button to navigate to the first comment in your document.
- Once you are at a comment, use the “Find” feature to search for specific text within the comment. Press “Ctrl + F” on your keyboard or click on the “Home” tab and click on the “Find” button in the far-right corner of the ribbon to open the Find dialog box.
- In the Find dialog box, enter the text you want to search for within the comments in the “Find what” field.
- Click on the “Reading Highlight” button or press “Alt + L” to expand the options.
- From the “Highlight” dropdown, select “Highlight All” to show all occurrences of the text within the comments.
- MS Word will highlight all instances of the searched text within the comments.
- To navigate to each highlighted occurrence, press “Ctrl + PgDn” on your keyboard or click on the “Next” button in the Find dialog box.
- Continue navigating through the comments to find and review all instances of the searched text.
Searching for text in comments in MS Word allows you to quickly locate and review specific comments within your document. Whether you are looking for feedback, addressing suggestions, or finding specific information, this feature enables you to efficiently navigate and extract the relevant content from comments.
By highlighting all instances of the searched text within the comments, MS Word assists you in identifying and focusing on the relevant feedback. This feature enhances your productivity and accuracy when working with documents that contain comments, ensuring that you address all necessary revisions and collaborate effectively.
Searching for text in tracked changes in MS Word
When collaborating on a document in MS Word and tracking changes made by multiple reviewers, it’s important to have the ability to search for specific text within those tracked changes. MS Word offers a convenient feature that allows you to search for text within the tracked changes. Here’s how you can do it:
- Open your MS Word document that contains tracked changes.
- Click on the “Review” tab in the ribbon.
- In the “Tracking” group, click on the “Previous” or “Next” button to navigate to the first tracked change in your document.
- Once you are at a tracked change, use the “Find” feature to search for specific text within the change. Press “Ctrl + F” on your keyboard or click on the “Home” tab and click on the “Find” button in the far-right corner of the ribbon to open the Find dialog box.
- In the Find dialog box, enter the text you want to search for within the tracked changes in the “Find what” field.
- Click on the “Reading Highlight” button or press “Alt + L” to expand the options.
- From the “Highlight” dropdown, select “Highlight All” to show all occurrences of the text within the tracked changes.
- MS Word will highlight all instances of the searched text within the tracked changes.
- To navigate to each highlighted occurrence, press “Ctrl + PgDn” on your keyboard or click on the “Next” button in the Find dialog box.
- Continue navigating through the tracked changes to find and review all instances of the searched text.
Searching for text in tracked changes in MS Word allows you to quickly locate and review specific modifications made by different reviewers. Whether you are looking for revised content, addressing reviewer comments, or finding specific information, this feature enables you to efficiently navigate through the document and extract the relevant content from tracked changes.
By highlighting all instances of the searched text within the tracked changes, MS Word assists you in identifying and focusing on the relevant modifications. This feature enhances your productivity and accuracy when collaborating on a document with tracked changes, ensuring that you review and address all necessary revisions effectively.
Searching for text in hyperlinks in MS Word
Hyperlinks in MS Word allow you to add clickable links to external websites, documents, or specific locations within your document. When working with documents that contain numerous hyperlinks, it can be helpful to search for specific text within these links. MS Word provides a convenient feature that allows you to search for text within hyperlinks. Here’s how you can do it:
- Open your MS Word document that contains hyperlinks.
- Press “Ctrl + F” on your keyboard or click on the “Home” tab and click on the “Find” button in the far-right corner of the ribbon to open the Find dialog box.
- In the Find dialog box, enter the text you want to search for within the hyperlinks in the “Find what” field.
- Click on the “Reading Highlight” button or press “Alt + L” to expand the options.
- From the “Highlight” dropdown, select “Highlight All” to show all occurrences of the text within the hyperlinks.
- MS Word will highlight all instances of the searched text within the hyperlinks in your document.
- To navigate to each highlighted occurrence, press “Ctrl + PgDn” on your keyboard or click on the “Next” button in the Find dialog box.
Searching for text in hyperlinks in MS Word allows you to quickly locate and review specific linked content within your document. Whether you are looking for referenced sources, related documents, or specific web addresses, this feature enables you to easily identify and navigate through the hyperlinked text.
By highlighting all instances of the searched text within the hyperlinks, MS Word helps you quickly identify and focus on the relevant information. This feature enhances your productivity and accuracy when working with documents that contain hyperlinks, ensuring that you find and access the desired linked content with ease.
Searching for text in equations in MS Word
Equations play a crucial role in scientific, mathematical, and technical documents. When working with documents that contain complex equations, it’s important to have the ability to search for specific text within those equations. MS Word offers a convenient feature that allows you to search for text within equations. Here’s how you can do it:
- Open your MS Word document that contains equations.
- Click on the “Home” tab in the ribbon.
- Press “Ctrl + F” on your keyboard to open the Find dialog box or click on the “Find” button in the far-right corner of the ribbon.
- In the Find dialog box, enter the text you want to search for within the equations in the “Find what” field.
- Click on the “Reading Highlight” button or press “Alt + L” to expand the options.
- From the “Highlight” dropdown, select “Highlight All” to show all occurrences of the text within the equations.
- MS Word will highlight all instances of the searched text within the equations.
- To navigate to each highlighted occurrence, press “Ctrl + PgDn” on your keyboard or click on the “Next” button in the Find dialog box.
Searching for text in equations in MS Word allows you to quickly locate and review specific information within mathematical or scientific documents. Whether you are looking for variable names, specific terms, or keywords within equations, this feature enables you to efficiently extract the relevant content from the mathematical expressions.
By highlighting all occurrences of the searched text within the equations, MS Word assists you in identifying and focusing on the relevant information. This feature enhances your productivity and accuracy when working with documents that contain equations, ensuring that you find and analyze the desired mathematical expressions with ease.
Using the Quick Find feature in MS Word
MS Word offers a handy feature called Quick Find that allows you to quickly search for specific text within your document. This feature is especially useful when you need to locate and navigate through different instances of the same text efficiently. Here’s how you can use the Quick Find feature in MS Word:
- Open your MS Word document.
- Press “Ctrl + F” on your keyboard. The Quick Find toolbar will appear at the top right corner of the document window.
- Enter the text you want to search for in the input box on the Quick Find toolbar.
- As you type, MS Word will automatically highlight the first occurrence of the text in your document.
- To quickly jump to the next occurrence, press “Enter” on your keyboard or click on the right arrow button on the Quick Find toolbar. MS Word will highlight each subsequent occurrence as you navigate through the document.
- To search for the previous occurrence, click on the left arrow button on the Quick Find toolbar.
- To refine your search, you can utilize the options in the Quick Find toolbar, such as matching case or searching for whole words only.
- To exit the Quick Find mode, click on the “X” button on the Quick Find toolbar or press “Esc” on your keyboard.
The Quick Find feature in MS Word provides a swift and efficient way to search for specific text within your document. Whether you are looking for a single word or a specific phrase, Quick Find allows you to navigate through your document with ease, locating and reviewing the desired text quickly.
By utilizing the options in the Quick Find toolbar, you can customize your search to match your specific needs. Whether you want to match case, search for whole words only, or refine your search further, MS Word’s Quick Find feature offers flexibility and convenience for searching within your document.
Searching for text in multiple documents in MS Word
When working with a collection of documents in MS Word, it can be time-consuming to search each file individually for specific text. Luckily, MS Word provides a powerful feature that allows you to search for text across multiple documents simultaneously. Here’s how you can search for text in multiple documents in MS Word:
- Open MS Word and navigate to the “File” tab in the ribbon.
- Click on the “Open” option to access the file browser.
- Select the documents or folder where your target documents are stored. Hold down the “Ctrl” key on your keyboard to select multiple files or click on the folder to search within all documents it contains.
- Click on the “Open” button to open the selected documents in MS Word.
- Press “Ctrl + F” on your keyboard to open the Find dialog box or click on the “Home” tab and click on the “Find” button in the far-right corner of the ribbon.
- In the Find dialog box, enter the text you want to search for in the “Find what” field.
- Click on the “Reading Highlight” button or press “Alt + L” to expand the options.
- From the “Highlight” dropdown, select “Highlight All” to show all occurrences of the text within the multiple documents.
- MS Word will highlight all instances of the searched text across the open documents.
- To navigate to each highlighted occurrence, press “Ctrl + PgDn” on your keyboard or click on the “Next” button in the Find dialog box.
Searching for text in multiple documents in MS Word allows you to efficiently locate and review specific information across a collection of files. Whether you need to find a specific phrase, references, or keywords within a set of documents, this feature saves you time and effort by simultaneously searching and highlighting occurrences across multiple files.
By using the “Highlight All” option within the Find dialog box, you can easily view and review all instances of the searched text within the multiple documents. This visual aid helps you identify and analyze the relevant information, improving your productivity and accuracy when working with a group of files in MS Word.
Finding and navigating through search results in MS Word
When performing a search in MS Word, it is important to be able to efficiently navigate through the search results and review each occurrence of the searched text. MS Word provides convenient features that allow you to find and move seamlessly between search results. Here’s how to find and navigate through search results in MS Word:
- Open your MS Word document and perform a search using the appropriate search method, such as the Find or Quick Find feature.
- MS Word will locate the first occurrence of the searched text and highlight it in the document.
- To navigate to the next occurrence, press “Ctrl + PgDn” on your keyboard or click on the “Next” button in the Find or Quick Find toolbar.
- MS Word will automatically move to the next instance of the searched text and highlight it in the document.
- To navigate to the previous occurrence, press “Ctrl + PgUp” on your keyboard or click on the “Previous” button in the Find or Quick Find toolbar.
- Continue pressing “Ctrl + PgDn” or “Ctrl + PgUp” to move forward or backward through the search results, respectively.
- To review each occurrence in detail, pause at each highlighted instance and make any necessary changes or take notes.
- If desired, click on the “Close” button in the Find or Quick Find toolbar to exit the search mode and return to normal document view.
Finding and navigating through search results in MS Word allows you to efficiently review each occurrence of the searched text within your document. Whether you are searching for specific information, checking for errors, or making revisions, these features enable a smooth workflow as you move from one result to another.
By utilizing the navigation buttons in the Find or Quick Find toolbar, you can quickly jump between instances of the searched text. This saves time and effort compared to manually finding each occurrence, ensuring that you can easily review and address each result with precision in MS Word.