
Why Use Canva Templates
Canva templates are a powerful tool that can help elevate your design projects in various ways. Whether you’re a seasoned graphic designer or a small business owner with limited design experience, Canva templates offer a range of benefits that make them worth considering for your next project.
First and foremost, using Canva templates saves you time. Instead of starting from scratch, templates provide you with a ready-made design that you can simply customize to fit your needs. This is especially helpful if you’re working on a tight deadline or if you have limited design skills. Canva’s extensive library of templates covers a wide range of design categories, including social media posts, presentations, flyers, business cards, and more.
Another advantage of using Canva templates is the professional and polished look they provide. These templates are created by highly skilled graphic designers, ensuring that they are aesthetically pleasing and on-trend. Even if you don’t have a design background, you can still create visually stunning and cohesive designs by utilizing Canva’s pre-made templates.
Canva templates are also versatile and customizable, allowing you to adapt them to suit your brand and preferences. You have the freedom to edit and modify various elements of the template, such as colors, fonts, images, and layout. This ensures that your design remains unique and reflective of your brand’s personality.
Using Canva templates can also help maintain consistency across your design materials. By using the same template or design elements across different platforms, such as your website, social media profiles, and printed materials, you can establish a cohesive and recognizable brand identity. This consistency helps to build brand trust and recognition among your audience.
Additionally, Canva templates offer a collaborative aspect. If you’re working on a design project with a team or if you want to seek feedback from others, Canva allows you to easily share your design and collaborate in real-time. This makes it convenient for multiple stakeholders to provide input and make necessary changes to the design without the hassle of sharing files back and forth.
How to Access Canva Templates
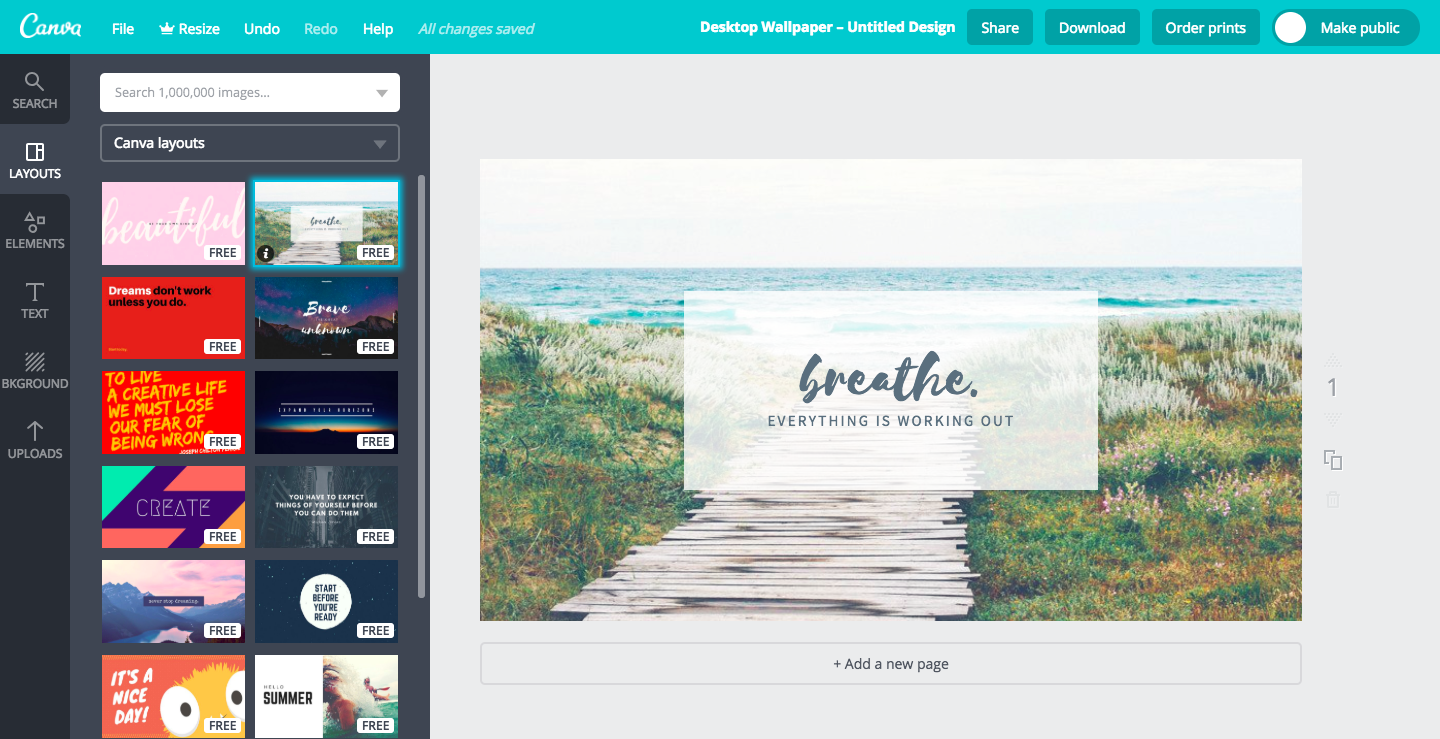
Accessing Canva templates is quick and easy, and there are several ways to do so. Whether you’re using the web version or the mobile app, you’ll be able to find a wide variety of templates to choose from.
If you’re using the Canva website, simply visit www.canva.com and log into your account. If you don’t have an account yet, you can create one for free. Once you’re logged in, you’ll be taken to the Canva homepage where you can start creating designs. On the left-hand side of the screen, you’ll find a toolbar with various design categories, such as “Social Media,” “Presentations,” “Marketing Materials,” and more. Click on the category that best suits your needs.
Alternatively, you can use the search bar at the top of the page to search for specific templates. For example, if you’re looking for a social media post template, type “social media post” in the search bar and hit enter. Canva will display a list of relevant templates for you to choose from.
If you’re using the Canva mobile app, open the app on your device and sign in to your account. Once you’re logged in, you’ll be taken to the main dashboard. Tap on the “+” button at the bottom center of the screen to create a new design. From there, you’ll be able to browse and select different template categories or use the search function to find specific templates.
Regardless of whether you’re using the web version or the mobile app, once you’ve selected a category or conducted a search, you’ll be presented with a variety of professionally designed templates. Take your time to browse through the options, and when you find a template that catches your eye, click on it or tap on it to open it in the editor.
It’s important to note that while there are many free templates available in Canva, some premium templates may require a paid subscription or a one-time purchase. However, Canva provides a wide range of free templates to choose from, making it accessible to users with different budgets.
Once you’ve accessed a template, you can begin customizing it to fit your specific needs and preferences. The next section will guide you through the process of choosing the right template and customizing it to create a design that stands out.
Choosing the Right Template
When it comes to choosing the right template in Canva, there are a few factors to consider to ensure that your design resonates with your audience and achieves your desired goals. Here are some tips to help you make an informed decision:
Firstly, consider the purpose of your design. Are you creating a social media post, a flyer, a presentation, or a business card? Each of these design categories serves a different purpose, and the template you choose should align with that purpose. Canva provides a wide range of template categories to choose from, so take the time to explore them and find the one that best suits your needs.
Next, think about your target audience. Who are you trying to reach with your design? Consider factors such as age group, interests, and demographics. Canva has various templates tailored to different industries and target audiences, so look for designs that align with your audience’s preferences and interests.
Another important aspect to consider is your brand identity. If you have established brand guidelines, such as specific colors, fonts, and visual elements, try to choose a template that reflects and complements your brand. Canva allows you to customize templates, but starting with a design that already aligns with your brand’s aesthetics will save you time and effort.
Additionally, pay attention to the layout and structure of the template. Does it have the right balance of text and visuals? Is the arrangement of elements visually appealing and easy to read? Remember that your design should capture attention and convey information effectively. Look for templates that have a clear and logical structure that will help you communicate your message efficiently.
Lastly, take into account the overall style and design elements of the template. Does it have a modern, minimalist, or playful look? Consider the emotions and impressions you want your design to evoke and choose a template that aligns with that vision. Canva provides a variety of design styles, so explore different options until you find the one that resonates with you and your brand.
By considering the purpose, target audience, brand identity, layout, and overall style of the template, you can make an informed decision and choose the right template that will serve as a strong foundation for your design. Once you have selected a template, it’s time to customize it to make it uniquely yours, which will be covered in the next section.
Customizing Your Template
Once you have chosen a template in Canva, it’s time to customize it and make it uniquely yours. Customizing a template allows you to tailor the design to your specific needs, brand identity, and preferences. Here’s how you can go about customizing your Canva template:
1. Edit Text: Start by replacing the existing text in the template with your own content. Click on the text element you want to edit and simply type in your text. You can also change the font, size, color, and alignment of the text to match your brand or design aesthetic. Canva offers a wide variety of fonts to choose from.
2. Customize Colors: To give the template a personalized touch, you can change the colors to align with your brand or design preferences. Canva provides a color palette tool that allows you to choose custom colors or select from a range of pre-set color combinations. Click on an element, such as a shape or text box, and use the color picker to select a new color.
3. Modify Images: If the template includes images, you can replace them with your own. Canva provides a library of stock photos and illustrations that you can search and use within your design, or you can upload your own images. Simply click on the image element in the template and select “Replace” to choose a new image.
4. Rearrange and Resize Elements: Feel free to arrange and resize elements within the template to create a layout that suits your design vision. Click and drag elements to reposition them, or use the resize handles to adjust their size. This allows you to create a unique composition that grabs attention and conveys your message effectively.
5. Add Elements: If you want to enhance your design further, Canva offers a wide range of additional elements to choose from. You can add shapes, icons, lines, stickers, and more to complement your design or emphasize certain elements. Explore Canva’s extensive library of elements and drag them onto your template to enhance its visual appeal.
6. Apply Filters and Effects: Canva also provides various filters and effects that you can apply to your design to give it a more polished and professional look. Experiment with different filters and effects, such as blur, vignette, or grayscale, to add visual interest and make your design stand out.
Remember that the goal of customization is to align the template with your brand, engage your audience, and make your design unique. However, be mindful of not overcrowding your design with too many elements or effects. Keep it clean, visually appealing, and easy to read.
Once you have finished customizing your template, take a moment to review and ensure that everything looks cohesive and professional. Don’t be afraid to make adjustments and fine-tune the design until you are satisfied with the final result. When you’re ready, it’s time to move on to the next steps, such as adding and editing elements, changing colors and fonts, and uploading images.
Adding and Editing Elements
Adding and editing elements is a crucial step in customizing your Canva template and bringing your design to life. Elements such as images, shapes, icons, and illustrations can enhance the visual appeal and convey your message effectively. Here’s how you can add and edit elements in Canva:
1. Add Images: To add images to your template, click on the “Elements” tab on the left-hand side of the screen. From there, you can browse through various categories, such as “Photos,” “Icons,” “Illustrations,” and more. Canva offers a wide selection of stock images and illustrations that you can choose from. Simply drag and drop an image onto your canvas to add it to your design.
2. Edit Images: Once you’ve added an image to your design, you can edit it to fit your vision. Click on the image element and select “Edit Image.” Canva provides basic editing tools, such as crop, filter, brightness/contrast adjustments, and more. You can use these tools to fine-tune your image, adjust its size, and make it visually appealing.
3. Add Shapes and Icons: If you want to add shapes or icons to your design, navigate to the “Elements” tab and choose the “Shapes” or “Icons” category. Canva offers a wide variety of shapes and icons that you can use to enhance your design. Simply drag and drop them onto your canvas, and you can customize their size, color, and position to fit your design concept.
4. Edit Text Elements: Editing text elements is an essential part of customizing your template. Click on a text element in your design to edit its content, font, size, color, alignment, and other formatting options. Canva has a vast collection of fonts for you to choose from, allowing you to find the perfect typography to complement your design.
5. Use Illustrations and Stickers: Canva offers a variety of illustrations and stickers that can add visual interest and convey specific messages in your design. Navigate to the “Elements” tab and choose the “Illustrations” or “Stickers” category to explore the available options. Drag and drop the illustrations or stickers you like onto your canvas, and you can resize, rotate, and adjust them to fit your design concept.
6. Group and Arrange Elements: Canva allows you to group elements together and arrange them to create a visually pleasing composition. Select multiple elements by holding down the Shift or Command key and clicking on each element you want to group or arrange. Right-click and choose “Group” to group them together, or use the arrange buttons on the top toolbar to move elements forward or backward in the layer order.
Remember to keep the overall design balanced, visually appealing, and in line with your branding and design goals. Adding and editing elements allows you to personalize your Canva template and create a design that stands out. Once you’ve added and edited the necessary elements, it’s time to move on to the next step, which is changing colors and fonts.
Changing Colors and Fonts
Changing colors and fonts in your Canva template is an effective way to give it a personalized touch and make it reflect your brand or design aesthetic. Colors and fonts play a crucial role in conveying emotions, establishing brand identity, and enhancing the overall visual appeal of your design. Here’s how you can change colors and fonts in Canva:
1. Changing Colors:
- Select an element in your design that you want to change the color of.
- In the toolbar at the top of the screen, you’ll find the color picker. Click on it to open the color options.
- You can choose a color from the pre-set color palette, or use the color wheel to select a custom color that matches your brand or design concept.
- Click on the desired color, and it will be applied to the selected element in your design.
2. Applying Color Palettes:
- If you have specific brand colors or a color palette you want to use, Canva allows you to create and save your own color palettes.
- Click on the “Colors” tab on the left-hand side of the screen to access the color palettes and edit them according to your needs.
- You can also use pre-designed color palettes from Canva’s library, which can help you achieve a harmonious and cohesive color scheme in your design.
3. Changing Fonts:
- To change the font of a text element in your design, select the text and click on the font dropdown menu in the toolbar at the top.
- Canva offers a wide range of fonts to choose from, including popular ones as well as unique and creative options.
- Browse through the available fonts, and click on the desired font to apply it to your text element.
4. Font Pairing:
- When selecting fonts for your design, consider font pairing to create a visually appealing and harmonious combination.
- Canva provides font pairing suggestions that you can explore, or you can use your own knowledge of typography to create a visually appealing combination of fonts.
- Remember to choose fonts that are legible and appropriate for your design’s purpose and target audience.
5. Consistency and Branding:
- It’s important to maintain consistency in your design by using a limited number of fonts and colors.
- Choose a primary font for headings and a secondary font for body text to establish a cohesive and professional look.
- Stick to your brand’s color palette to ensure your design aligns with your brand identity and maintains a consistent visual aesthetic.
By changing colors and fonts, you can add a personal touch to your Canva template, enhance its visual appeal, and make it reflect your brand or design vision. Once you have customized the colors and fonts, it’s time to move on to the next step, which is uploading your own images.
Uploading Your Own Images
While Canva provides a vast library of stock photos and illustrations, you may have specific images that you want to use in your design. Uploading your own images to Canva allows you to personalize your design and make it truly unique. Here’s how you can upload your own images:
1. Access the Image Upload:
- In the left-hand sidebar, click on the “Uploads” tab. You will see an “Upload an image or video” button.
- Click on the button to open your file explorer or drag and drop your image directly into the Canva interface.
2. Select and Upload Your Image:
- Navigate to the image file on your computer that you want to upload. Click on the file, and it will begin uploading to Canva.
- Depending on the size of the image, the upload process may take a few moments.
- Once the image is uploaded, it will appear in the “Uploads” folder in the left-hand sidebar.
3. Add Your Uploaded Image to Your Design:
- Drag and drop the uploaded image from the “Uploads” folder onto your canvas.
- Resize and position the image as desired within your design.
4. Edit and Customize Your Uploaded Images:
- Click on the uploaded image in your design to reveal a toolbar with various editing options.
- Canva allows you to crop, rotate, flip, and add filters to your uploaded images.
- Use the editing tools to enhance your image and ensure it fits seamlessly into your design.
By uploading your own images, you can incorporate personal photos, company logos, or specific visuals that are relevant to your design. This allows you to create a more personalized and meaningful design that aligns with your branding and messaging. Remember to choose high-quality images that are relevant to your design’s purpose and will enhance its overall visual appeal.
Once you have uploaded and customized your own images, you can proceed to the next step, which is collaborating with others to gather feedback or work on your design collectively.
Collaborating with Others
Collaboration is often a vital aspect of design projects, and Canva provides convenient features that allow you to collaborate with others seamlessly. Whether you’re working with colleagues, clients, or stakeholders, Canva’s collaboration tools make it easy to gather feedback, make revisions, and work together in real-time. Here’s how you can collaborate with others in Canva:
1. Sharing Your Design:
- Once you have completed your design, click on the “Share” button in the top-right corner of the Canva editor.
- You can choose to share the design via email, by generating a link, or by inviting others to collaborate directly.
- Specify the level of access you want to grant to others, whether it’s view-only access, comment access, or edit access.
- Canva will generate a shareable link or send an email invitation to the specified recipients, granting them access to the design and allowing them to collaborate with you.
2. Collaborative Editing:
- Once someone has access to your design, they can view or edit it depending on the access level you granted them.
- Collaborators can make changes, add comments, or suggest revisions directly within the Canva editor.
- You can see their edits in real-time and have the option to accept or reject their suggestions.
- By collaborating with others, you can gather different perspectives and ensure that your design meets the needs and preferences of all stakeholders.
3. Commenting and Feedback:
- Canva’s collaboration tools also include commenting features, allowing collaborators to leave feedback on specific elements or sections of the design.
- Comments can be used to discuss changes, ask questions, or provide suggestions for improvement.
- You can respond to comments, address concerns, and have discussions within the Canva editor, making the collaboration process efficient and streamlined.
4. Version History:
- Canva keeps a record of the design’s version history, allowing collaborators to revert to previous versions if needed.
- This feature is especially useful when experimenting with different design approaches or when changes need to be rolled back.
- Collaborators can access the version history and review previous iterations of the design.
Collaborating with others in Canva ensures that your design benefits from different perspectives, knowledge, and expertise. It allows for efficient communication, feedback gathering, and real-time collaboration, ultimately enhancing the overall quality of the design and achieving the desired results.
Once you have gathered feedback and made the necessary revisions, it’s time to save and export your design, which will be covered in the next section.
Saving and Exporting Your Design
Once you have completed the customization, collaboration, and final touches to your design in Canva, it’s important to save and export your work in the appropriate format. Canva provides various options for saving and exporting your designs to ensure they can be used for different purposes. Here’s how you can save and export your Canva design:
1. Saving Your Design:
- Canva automatically saves your design periodically as you work, ensuring that your progress is not lost.
- To manually save your design, click on the “File” menu in the top-left corner of the editor and select “Save” or use the shortcut “Ctrl+S” (Windows) or “Cmd+S” (Mac).
- By saving your design, you can easily access and continue working on it at a later time.
2. Downloading Your Design:
- To download your design, click on the “Download” button in the top-right corner of the Canva editor.
- Canva offers various download options, including PDF, PNG, JPEG, and more, depending on your needs.
- Select the desired file format, and Canva will generate a high-quality downloadable version of your design.
- Choose the appropriate file format based on where you intend to use the design, such as for print or digital purposes.
3. Sharing Your Design:
- If you want to share your design with others who do not have Canva accounts, you can choose to generate a sharing link.
- Click on the “Share” button in the top-right corner of the Canva editor and select the sharing option you prefer.
- Canva will generate a shareable link that you can copy and share via email, messaging apps, or social media.
4. Printing Your Design:
- If you plan to print your design, make sure to export it in a print-ready format, such as PDF or high-resolution JPEG.
- Consider the recommended resolution, bleed, and color modes required by your printing service to ensure optimal print quality.
- Canva provides customization options for these settings in the download menu.
By saving and exporting your Canva design, you can ensure that it is readily accessible for your intended use. Whether you’re using it for digital platforms, printing, or sharing with others, Canva offers a range of formats and options to suit your needs.
With your design saved and exported, you can confidently share and showcase your work with others or utilize it in your marketing or creative projects.
Tips and Tricks for Using Canva Templates
Using Canva templates can significantly streamline your design process and help you create visually stunning designs. To make the most out of Canva’s template features, consider the following tips and tricks:
1. Explore Different Categories: Canva offers a wide range of template categories, so take the time to explore and experiment with various options. Even if a template seems unrelated to your project at first glance, you may find inspiration or elements that can be adapted to suit your needs.
2. Customize Colors and Fonts: To make a template truly yours, customize the colors and fonts to align with your brand or design preferences. By using consistent colors and fonts across your designs, you can establish a recognizable and cohesive visual identity.
3. Utilize Resize Feature: Canva allows you to resize your designs with just a few clicks. If you find a template that you love but need it in a different size, use the resize feature to adjust the dimensions accordingly. This saves time and ensures that your design remains proportionate.
4. Experiment with Layout: While templates provide a great starting point, don’t be afraid to experiment with the layout and rearrange elements to suit your design vision. Drag and drop elements, resize them, and try different arrangements until you achieve the desired composition.
5. Use Grids and Guides: Canva provides grid and guideline features to help you align and position elements accurately. Enable the grid or guide feature under the “View” menu to ensure a clean and organized layout. This is particularly useful when working with multiple elements or creating precise designs.
6. Take Advantage of Elements: Canva offers a wide selection of elements, including shapes, icons, illustrations, and more. Explore these options to enhance your design, add visual interest, or emphasize specific elements. This can help you create custom and eye-catching designs.
7. Experiment with Effects and Filters: Canva provides an array of effects and filters that can give your design a unique and polished look. Play around with effects like blur, shadow, or sepia, or apply filters to add a touch of creativity and visual interest to your design.
8. Preview and Test: Before finalizing your design, use the preview feature to see how it will look to others. Check for any inconsistencies, text alignment issues, or elements that may need adjusting. It’s always a good idea to test your design on different devices and screen sizes to ensure it remains visually appealing and legible.
9. Save Templates for Future Use: If you come across a template that you particularly like or that aligns with your brand, save it as a favorite for easy access in the future. Canva allows you to favorite templates so that you can quickly find and reuse them for future projects.
10. Learn from the Canva Community: Canva has a large community of users sharing design tips, tricks, and inspiration. Join the community, explore the Canva blog, or follow Canva’s social media channels to stay updated on the latest trends, tutorials, and design best practices. Learning from others can help you further enhance your design skills and make the most of Canva’s features.
By implementing these tips and tricks, you can maximize the potential of Canva templates and create professional-quality designs that capture attention and communicate your message effectively.