
Why Use a Wireless Key?
A wireless key, also known as a Wi-Fi password or network security key, is a crucial component for securing and controlling access to your computer network. In today’s digital age, where connectivity and data exchange are integral to our daily lives, utilizing a wireless key is essential for several reasons.
First and foremost, a wireless key ensures the privacy and security of your network. Without a key, anyone within range of your Wi-Fi signal can potentially connect to your network, leading to unauthorized access and potential data breaches. By using a wireless key, you create a virtual barrier that only allows authorized users with the correct key to access your network. This helps protect sensitive information, such as personal data, financial transactions, and confidential documents, from falling into the wrong hands.
Moreover, a wireless key helps mitigate network congestion. With the proliferation of Wi-Fi enabled devices, such as smartphones, tablets, and smart home appliances, networks can become overwhelmed with the influx of devices attempting to connect simultaneously. By employing a wireless key, you can control the number of devices that can access your network, ensuring a smoother and more efficient connection for authorized users.
Using a wireless key also allows you to manage bandwidth allocation. If you have limited bandwidth, setting a wireless key can help regulate and prioritize the devices or users that can access your network. This ensures that critical tasks, such as video conferencing or streaming, receive sufficient bandwidth while preventing non-essential activities from hogging the network resources.
Another significant advantage of using a wireless key is the prevention of neighboring network interference. In densely populated areas or apartment buildings, multiple Wi-Fi networks can overlap, leading to signal interferences and slow connection speeds. By securing your network with a unique wireless key, you minimize the likelihood of interference from other networks, resulting in a more stable and reliable connection for your devices.
Lastly, utilizing a wireless key grants you better control over your network. You can easily add or remove devices from your network by sharing or changing the wireless key, respectively. This flexibility allows you to manage and monitor the devices connected to your network, ensuring that only trusted devices have access.
Overall, a wireless key is a fundamental tool for safeguarding your network, managing access, and optimizing connectivity. By implementing a wireless key, you can protect sensitive data, prevent unauthorized access, and enjoy a more secure and efficient network experience.
Types of Wireless Keys
When it comes to securing your computer network with a wireless key, there are several types of keys you can choose from. Each type offers varying levels of security and compatibility. Let’s explore the most common types:
1. WEP (Wired Equivalent Privacy): WEP was one of the earliest encryption standards introduced for wireless networks. However, it is now considered relatively insecure due to vulnerabilities that can be exploited by hackers. It is recommended to avoid using WEP whenever possible.
2. WPA (Wi-Fi Protected Access): WPA is an improved encryption standard that addresses the weaknesses of WEP. It provides a higher level of security by using dynamic encryption keys, making it more difficult for unauthorized users to gain access to your network. WPA2, a stronger version of WPA, further enhances security and is widely used today.
3. WPA3: The latest addition to the Wi-Fi Protected Access family, WPA3, offers even stronger security features. It introduces enhanced password-based authentication and encryption protocols, making it harder for attackers to crack passwords or intercept data. Although still relatively new, WPA3 is gradually becoming more prevalent.
4. Open Networks: Open networks, as the name suggests, do not require a wireless key for access. While convenient for guests or public networks, open networks leave your network vulnerable to unauthorized access. It is advisable to use open networks cautiously, especially for personal or sensitive information.
5. Enterprise Level Security: For larger organizations or businesses, enterprise-level security options such as WPA2-Enterprise or 802.1X authentication are recommended. These methods involve using a RADIUS server for centralized user authentication, offering a higher level of security and control over network access.
When selecting a wireless key, it is crucial to consider your network’s needs and the level of security required. For home networks, WPA2 is generally sufficient and widely supported by most devices. However, for business or enterprise networks, utilizing stronger encryption methods and implementing centralized authentication is highly recommended.
Remember, using a robust and well-chosen wireless key is essential for protecting your network and maintaining data privacy. It is advisable to regularly update your network’s security protocols to stay ahead of evolving threats and ensure the utmost protection.
Preparing for Wireless Key Installation
Before you can set up a wireless key for your computer network, there are a few essential steps you need to take to ensure a smooth installation process. By properly preparing for wireless key installation, you can avoid potential issues and optimize your network security. Here are some key considerations:
1. Check Router Compatibility: Ensure that your wireless router supports the desired encryption method, such as WPA or WPA2. Most modern routers are compatible with these encryption types, but it is always good to double-check the specifications or consult the user manual to confirm compatibility.
2. Update Firmware: It is crucial to keep your router’s firmware up to date. Firmware updates often contain important security patches and bug fixes that enhance the overall functionality and security of your router. Consult the manufacturer’s website or the router’s administration panel to check for any available firmware updates.
3. Document Network Settings: Before proceeding with the wireless key installation, document your current network settings, including the network name (SSID), IP addressing, and any port forwarding or firewall configurations. Having this information on hand will help ensure that you can easily restore your network settings in case of any unforeseen issues during the installation process.
4. Gather Network Credentials: Make sure you have the necessary network credentials to access your router’s administration panel. Typically, this includes the router’s username and password. If you have forgotten or misplaced these credentials, consult the router’s documentation or contact your Internet Service Provider (ISP) for assistance in resetting them.
5. Check Device Compatibility: Verify that the devices you intend to connect to your network support the encryption type you plan to use for your wireless key. While most devices are compatible with WPA2, older devices may have limitations. In such cases, it may be necessary to choose a compatibility mode on your router or consider upgrading the device’s firmware if available.
6. Gather Key Requirements: Determine the criteria for your wireless key, such as its length and complexity. A strong wireless key typically includes a combination of uppercase and lowercase letters, numbers, and special characters. Prepare a list of potential key options that meet your desired criteria, as you will need to select and enter the wireless key during the installation process.
By taking these preparatory steps, you will be well-equipped to proceed with the wireless key installation process smoothly. This will make it easier to protect your network, maintain optimal security, and ensure a hassle-free connection for your devices.
Setting Up a Wireless Key on Windows
If you’re using a Windows operating system, setting up a wireless key for your computer network is a straightforward process. Follow these steps to secure your network:
- Open the Network Settings: Click on the network icon in the system tray located at the bottom right of your screen. Then, click on “Network & Internet settings.”
- Select Your Wi-Fi Network: Under the “Wi-Fi” section, click on the network name (SSID) of the wireless network you want to secure with a key.
- Manage Network Settings: In the network settings, click on “Properties” to access the network properties for the selected Wi-Fi network.
- Set Network Encryption: Locate the “Security” tab within the network properties window. Here, you can select the desired encryption type, such as WPA2, from the drop-down menu. Choose the strongest encryption available to maximize network security.
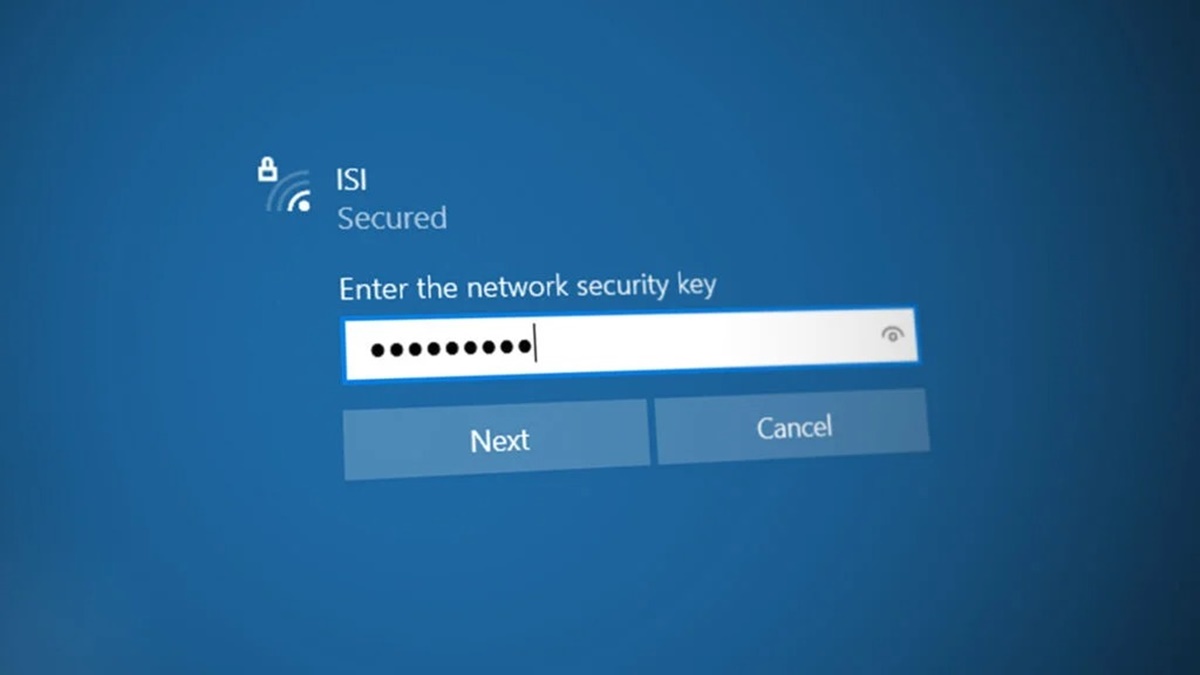
- Create a Wireless Key: After selecting the encryption type, click on the field labeled “Network security key” or “Password.” Enter a secure and unique key that meets the recommended criteria for length, complexity, and variety of characters. Make sure to write down the key or store it securely as you will need to enter it when connecting devices to your network.
- Save Changes: Once you have entered the wireless key, click on “OK” or “Apply” to save the changes and secure your Wi-Fi network.
After completing these steps, your wireless network will now require the entered wireless key to connect. Any devices attempting to join the network will need to enter the correct key to gain access.
It’s important to note that the steps may vary slightly depending on the version of Windows you are using. However, the general process remains similar across different versions and editions of Windows.
By setting up a wireless key on your Windows computer, you can ensure that only authorized users have access to your network, protecting your data and maintaining the security of your network connections.
Setting Up a Wireless Key on Mac
Securing your Wi-Fi network with a wireless key on a Mac is a simple process. Follow the steps below to set up a wireless key and protect your network:
- Open Network Preferences: Click on the Wi-Fi icon in the menu bar at the top right corner of your screen and select “Open Network Preferences.”
- Select Your Wi-Fi Network: In the Network Preferences window, select your Wi-Fi network from the list of available networks. Click on the “Advanced” button to access advanced network settings.
- Go to Wi-Fi Security: In the Wi-Fi settings, navigate to the “Wi-Fi” or “AirPort” tab and locate the network security settings section.
- Choose Security Type: From the drop-down menu, select the desired security type, such as WPA2. It’s recommended to choose the strongest encryption available to enhance network security.
- Set Wireless Key: Once you’ve selected the security type, enter a secure and unique wireless key in the “Password” or “Network Security Key” field. Make sure to use a key that meets the recommended criteria for length, complexity, and variety of characters.
- Save Changes: After entering the wireless key, click on “OK” or “Apply” to save the changes and secure your Wi-Fi network with the provided key.
With these steps, you have successfully set up a wireless key on your Mac, ensuring that only authorized users can access your Wi-Fi network.
Please note that the exact steps may vary slightly depending on the version of macOS you are using. However, the general process and options for setting up a wireless key remain consistent across different versions.
By securing your Wi-Fi network with a wireless key on your Mac, you can prevent unauthorized access, protect your data, and maintain a secure network connection.
Setting Up a Wireless Key on Linux
Configuring a wireless key on a Linux distribution is a straightforward process that can be done through the built-in network manager. Follow the steps below to set up a wireless key on Linux:
- Open Network Settings: Access the network settings on your Linux distribution. This can typically be found in the system tray or in the system settings menu.
- Select Your Wi-Fi Network: In the network settings, locate the Wi-Fi network you want to secure with a wireless key.
- Set Up Network Security: Edit the Wi-Fi network properties by clicking on the gear icon or selecting “Edit” or “Properties.” Look for the security settings or encryption options to set the desired security type, such as WPA2.
- Create a Wireless Key: Once you’ve chosen the security type, you can enter a wireless key in the appropriate field. Use a secure and unique key that meets the recommended criteria for length, complexity, and variety of characters.
- Save and Apply Changes: After entering the wireless key, save the changes and apply the configuration. The network manager will then connect to the Wi-Fi network using the specified key.
The specific steps may vary slightly depending on the Linux distribution and the network manager being used. However, the general process for setting up a wireless key remains consistent across most Linux environments.
In some cases, you may need to manually edit configuration files or use command-line utilities, such as “wpa_supplicant” or “nmcli,” to set up a wireless key. Refer to the documentation or online resources for your specific Linux distribution for detailed instructions.
By setting up a wireless key on your Linux distribution, you can ensure that only authorized users can access your Wi-Fi network, maintaining the security and integrity of your network connections.
Troubleshooting Wireless Key Installation
Setting up a wireless key for your computer network is generally a seamless process. However, occasionally, you may encounter issues during the installation or configuration. Here are some common troubleshooting steps to help resolve any problems:
1. Double-Check the Key: Make sure you have entered the wireless key correctly. Even a small typo or mistake can prevent devices from connecting to your network. Verify the key’s accuracy and re-enter it if necessary.
2. Restart Your Devices: Sometimes, a simple restart can resolve connectivity issues. Restart your router, modem, and devices that are unable to connect to your network. This can help refresh the network settings and establish a proper connection.
3. Update Router Firmware: Ensure that your router’s firmware is up to date. Outdated firmware can cause compatibility issues and security vulnerabilities. Check the manufacturer’s website for any available updates and follow their instructions for updating your router’s firmware.
4. Modify Key Security Type: If devices are still unable to connect to your network, try modifying the security type for your wireless key. Some older devices may have limitations in supporting newer encryption methods. Switch to a compatible security type, such as WPA or WPA2, to allow these devices to connect.
5. Disable MAC Filtering: If you have enabled MAC filtering on your router, which only allows specific devices to connect based on their MAC addresses, check if the blocked device’s MAC address is on the allowed list. If not, add the MAC address to the list or temporarily disable MAC filtering to test the connection.
6. Signal Strength and Range: Ensure that the device you are trying to connect has an adequate signal strength. If it is outside the range of your router’s Wi-Fi signal, move closer to the router or consider using range extenders to improve signal coverage in dead zones.
7. Reset Network Settings: If all else fails, you can try resetting your network settings. This can involve resetting the router to its factory default settings or reinstalling the network drivers on your devices. Remember to back up any configuration settings or data before performing a reset.
If you are still experiencing issues after attempting these troubleshooting steps, it may be helpful to consult the manufacturer’s documentation or seek support from their customer service. They can provide further guidance or assist in resolving any specific issues related to your router or devices.
By addressing and troubleshooting any wireless key installation issues, you can ensure a secure and reliable connection for your devices, maximizing the benefits of your computer network.
Securing Your Wireless Key
Securing your wireless key is crucial to maintaining the integrity of your computer network and protecting sensitive data. By following these best practices, you can enhance the security of your wireless key:
1. Choose a Strong Key: Select a wireless key that is complex and difficult to guess. Ensure it includes a combination of uppercase and lowercase letters, numbers, and special characters. Avoid using easily guessable information such as names, birthdates, or common phrases.
2. Regularly Update Your Key: Periodically change your wireless key to prevent unauthorized access. It is recommended to update it every few months or if you suspect any potential security breaches. Updating your key helps maintain the confidentiality of your network and prevents long-term unauthorized access.
3. Avoid Sharing Your Key with Unauthorized Users: Only provide your wireless key to trusted individuals who need access to your network. Be cautious about sharing your key with guests or unfamiliar individuals, as this can compromise the security of your network.
4. Keep Your Key Confidential: Avoid writing down your wireless key on easily accessible surfaces or in easily guessable locations. Instead, store it securely in an encrypted file or password manager. Ensure that only authorized individuals have access to the location where your wireless key is stored.
5. Disable WPS (Wi-Fi Protected Setup): WPS can be vulnerable to brute-force attacks and compromise your wireless key. Disable this feature on your router to prevent potential security risks. Instead, manually configure your network settings to ensure maximum security.
6. Monitor Connected Devices: Regularly check the list of devices connected to your network. If you notice any unfamiliar devices, investigate and promptly remove them from your network. This can help prevent unauthorized access and potential security breaches.
7. Enable Network Encryption: Ensure that your wireless network is encrypted using the strongest available encryption method, such as WPA2 or WPA3. Encryption adds an extra layer of protection to your network by encoding the data transmitted between devices.
8. Update Router Firmware: Keep your router’s firmware up to date to ensure you have the latest security patches and bug fixes. Check the manufacturer’s website periodically for firmware updates and follow their instructions for updating your router.
By implementing these security measures, you can minimize the risk of unauthorized access to your network and protect your personal and sensitive information from potential threats. Securing your wireless key is an essential step in maintaining a secure and reliable computer network.
Managing Multiple Wireless Keys
If you have multiple wireless keys for different networks or purposes, it is essential to effectively manage and organize them. Here are some tips for managing multiple wireless keys:
1. Create a Key Management System: Develop a system to store and organize your wireless keys. This can be as simple as maintaining a secure document or spreadsheet that lists the network name (SSID) along with the corresponding key and any relevant notes or details.
2. Unique Key for Each Network: Use a unique wireless key for each network you manage. This ensures that even if one network is compromised, the others remain secure. Avoid reusing keys across different networks to minimize the potential impact of a security breach.
3. Label and Categorize Keys: Assign labels or categories to your wireless keys to easily identify and differentiate them. For example, you can organize keys by network type (home, work, public), location, or purpose (personal, guest, IoT devices). This makes it simpler to locate the correct key when needed.
4. Store Keys Securely: Keep your wireless keys in a secure location, such as an encrypted file or a password manager. This helps protect them from unauthorized access. Use strong, unique passwords to secure any password manager you use.
5. Regularly Review and Update Keys: Periodically review and update your wireless keys, especially for networks you no longer use or networks that have experienced security incidents. Remove any unnecessary or outdated keys from your records to maintain a well-organized and secure key management system.
6. Backup Your Key Management System: Make regular backups of your key management system to prevent data loss. This ensures that even if your primary storage becomes inaccessible or corrupted, you can quickly restore your wireless keys from a backup copy.
7. Share Keys Carefully: When sharing wireless keys with trusted individuals or guests, be cautious not to share keys for networks that contain sensitive information. Consider creating separate guest networks with their own keys to limit access to your primary network.
8. Keep Track of Expiring Keys: Some networks enforce the periodic expiration of wireless keys for security purposes. Keep track of any expiry dates associated with your keys and proactively update them before they expire to ensure uninterrupted network access.
By effectively managing and organizing multiple wireless keys, you can ensure efficient network access and maintain the security of your various networks. Regular review and updates to your key management system will help you stay organized and minimize the risk of unauthorized access or security breaches.