
How to Access your iTunes & App Store settings
Turning off auto-renewal for subscriptions on your iPhone requires accessing the iTunes & App Store settings. These settings are where you can manage your app purchases, subscriptions, and other account-related information. To get started, follow the step-by-step guide below:
- Open the Settings app on your iPhone. You can find the Settings app icon on your home screen.
- Scroll down and tap on “iTunes & App Store.” It’s usually located towards the top of the list.
- On the iTunes & App Store settings screen, you will see your Apple ID displayed at the top. Tap on it to access your account details.
- A pop-up menu will appear with several options. Select “View Apple ID” to proceed.
- Depending on your device’s security settings, you may be prompted to authenticate your identity using Face ID, Touch ID, or your Apple ID password.
- Once you’ve entered the necessary authentication, you will be taken to the Account settings page.
Congratulations! You have successfully accessed your iTunes & App Store settings on your iPhone. Now that you’ve reached this point, you’re ready to navigate to the Subscriptions page to manage your active subscriptions and turn off auto-renewal for the ones you choose.
How to Navigate to the Subscriptions Page
Once you have accessed your iTunes & App Store settings, you’re just a few steps away from reaching the Subscriptions page. Here’s how you can easily navigate to it:
- On the Account settings page, scroll down until you find the “Subscriptions” option. Tap on it to proceed.
- The Subscriptions page will now open, displaying a list of your active subscriptions.
- From here, you can see the details of each subscription, such as the name, duration, and next renewal date.
It’s worth noting that the Subscriptions page will only appear if you have active subscriptions associated with your Apple ID. If you don’t have any active subscriptions, the page may not be visible or accessible.
Now that you know how to navigate to the Subscriptions page, you’re ready to move on to the next step: viewing your active subscriptions.
How to View Your Active Subscriptions
Once you’ve reached the Subscriptions page, you can easily view all of your active subscriptions and gather important details about each one. To do so, follow the steps below:
- On the Subscriptions page, you will see a list with all of your active subscriptions.
- Scroll through the list to see the name, duration, and next renewal date of each subscription.
- If you want to learn more about a particular subscription, tap on it to expand the details.
- On the expanded view, you may find additional information such as the pricing details and any available upgrade or downgrade options.
This view allows you to have a clear overview of your active subscriptions and stay informed about their status and upcoming renewals. Taking the time to review your subscriptions regularly can help you manage your expenses and ensure that you’re subscribed to services you truly need and enjoy.
Now that you’re familiar with viewing your active subscriptions, let’s move on to the next section: how to turn off auto-renewal for a specific subscription.
How to Select the Subscription You Want to Turn off Auto Renewal For
Once you have accessed the Subscriptions page and reviewed your active subscriptions, you can choose which subscription(s) you want to turn off auto-renewal for. Follow these steps to select the specific subscription(s):
- On the Subscriptions page, locate the subscription that you want to manage and tap on it.
- This will bring up the subscription details, including the name, duration, and price.
- Review the information to ensure that you have selected the correct subscription.
It’s crucial to double-check the subscription details, especially if you have multiple subscriptions, to prevent accidentally turning off auto-renewal for the wrong one. Take a moment to confirm that you have selected the desired subscription before proceeding to the next step.
Now that you’ve selected the subscription you wish to manage, it’s time to learn how to turn off auto-renewal for that specific subscription. This will ensure that you have control over your subscriptions and can make informed decisions about their renewal.
How to Turn off Auto Renewal for a Specific Subscription
If you’ve selected the subscription you want to manage, you can now proceed to turn off auto-renewal for that specific subscription. Here’s how:
- On the subscription details page, you will see an option to manage the subscription. This option may be labeled “Manage Subscription,” “Cancel Subscription,” or something similar. Tap on it.
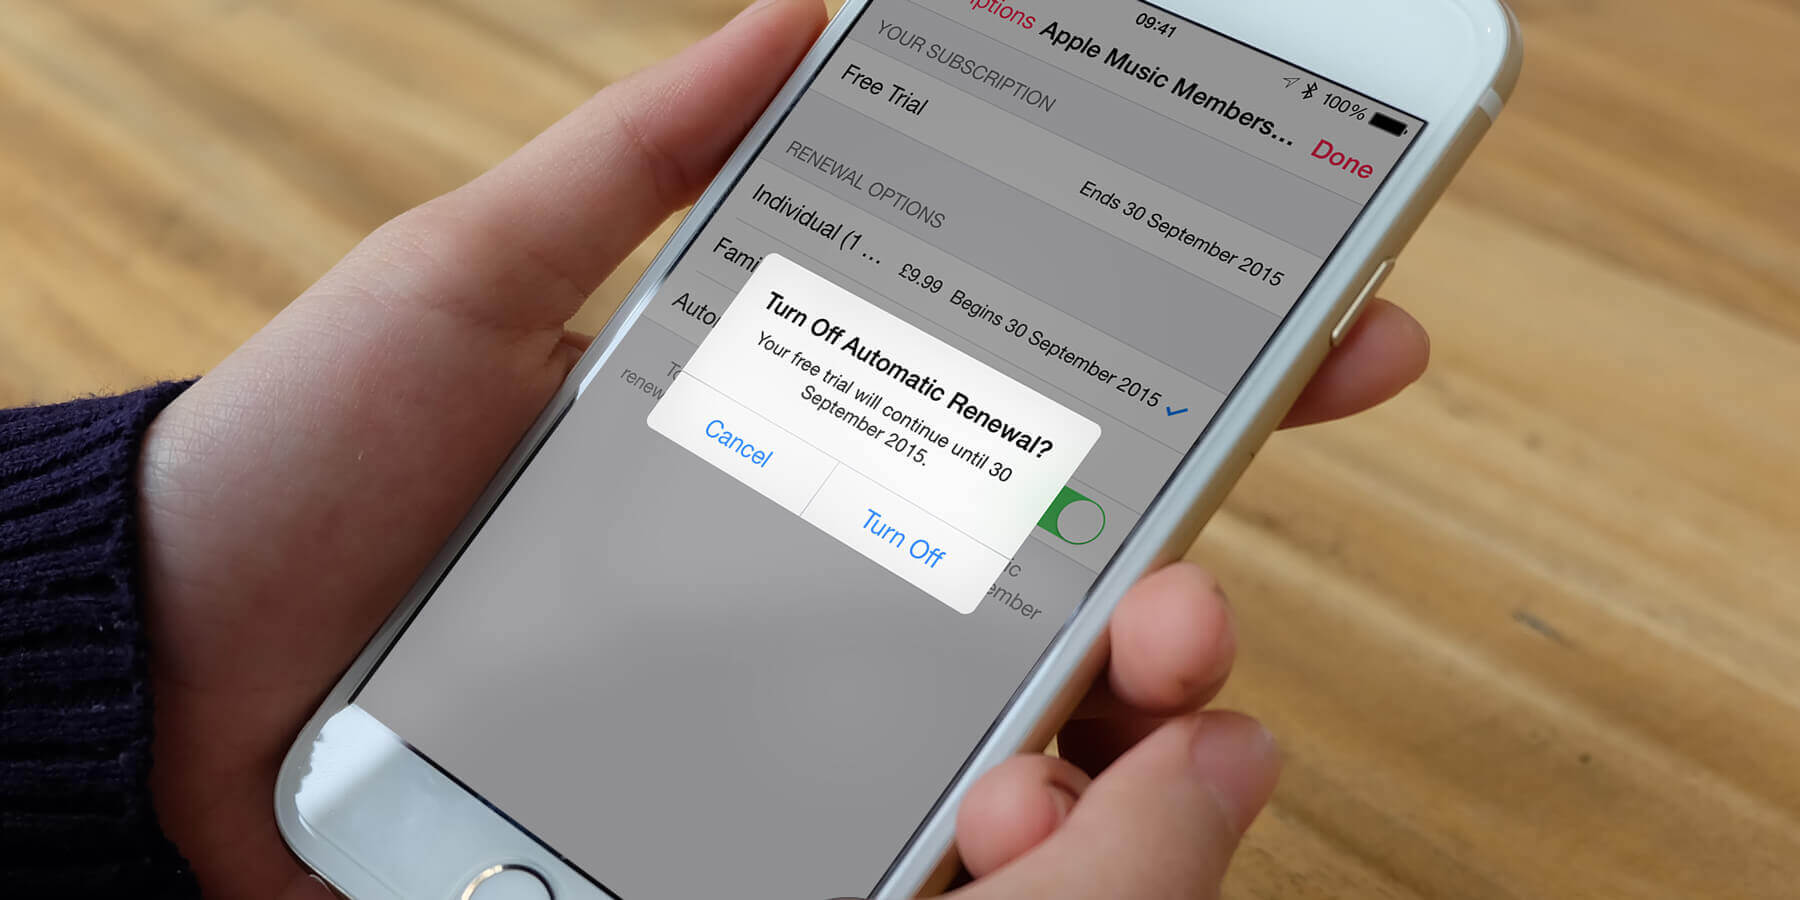
- A confirmation prompt will appear, asking if you want to turn off auto-renewal for the subscription. Tap on “Turn Off” or “Confirm” to proceed.
- Once you’ve confirmed, you will receive a notification confirming that auto-renewal has been turned off for that specific subscription.
By turning off auto-renewal, you are ensuring that the subscription will not automatically renew at the end of its current billing period. It’s important to note that you will still have access to the subscription benefits until the end of the current period.
Turning off auto-renewal gives you more control over your subscriptions, allowing you to evaluate whether you want to continue with the service or explore other options. Now that you have successfully turned off auto-renewal for the subscription, it’s time to confirm the changes you made.
How to Confirm the Changes You Made
After turning off auto-renewal for a specific subscription, it’s important to confirm that the changes have been applied successfully. Follow these steps to ensure that the changes you made have been registered:
- Return to the Subscriptions page by tapping the back button or navigating back to the iTunes & App Store settings.
- On the Subscriptions page, find the subscription you just turned off auto-renewal for.
- Check the status of the subscription. It should now indicate that auto-renewal has been turned off or that it will not renew automatically.
- Confirm that the subscription’s next renewal date reflects the changes you made. It should show the date when the current subscription period ends.
By confirming that the changes have been applied, you can be confident that the subscription will not renew automatically and that you won’t be charged for the next billing period.
Keep in mind that you can always revisit the Subscriptions page at any time to review your active subscriptions or make further changes if needed. Now that you’ve confirmed the changes you made, it’s time to conclude the process by verifying that auto-renewal is turned off for your subscription.
How to Verify that Auto Renewal is Turned off for Your Subscription
Once you have turned off auto-renewal for a specific subscription, it’s important to verify that the changes have been applied correctly. Here’s how you can ensure that auto renewal is turned off:
- Return to the subscription details page by navigating back to the Subscriptions page.
- Review the subscription details to confirm that auto-renewal is indeed turned off. Look for a message or indicator that explicitly states that auto-renewal has been disabled.
- Check the next renewal date displayed for the subscription. It should now show the end date of the current subscription period rather than a future renewal date.
- If you have any doubts or need further confirmation, consider contacting the customer support of the respective app or service provider.
By verifying that auto-renewal is turned off, you can ensure that you won’t be charged for the subscription automatically. It’s important to double-check this information to avoid any unexpected charges or renewals.
Remember, you can always revisit your iTunes & App Store settings and the Subscriptions page to review or make additional changes to your subscriptions. Taking the time to manage your subscriptions effectively will help you stay in control of your expenses and ensure that you only subscribe to services that align with your needs and preferences.