
Charging the Controller
Keeping your Nintendo Switch controllers charged is essential for uninterrupted gaming sessions. Here’s how you can charge your controllers:
1. Connect the controller to the console:
If you’re using the Joy-Con controllers, you can attach them directly to the sides of the Switch console or use the Joy-Con charging grip to charge them simultaneously. Simply slide the Joy-Cons onto the rails on either side of the console or the charging grip, ensuring they click into place. The console will start charging the controllers automatically.
2. Use the Pro Controller charging cable:
If you have a Pro Controller, you can charge it by connecting the USB-C end of the charging cable to the controller’s USB-C port and the other end to a USB port on the console or a compatible charging dock. Once connected, the controller will start charging.
3. Utilize a charging dock:
Another option is to use a charging dock specifically designed for the Switch controllers. With a charging dock, you can simultaneously charge multiple controllers at once by simply placing them onto the dock’s charging slots. This is a convenient way to keep all your controllers ready for gaming.
It is important to note that while charging, the controllers can still be used wirelessly. So, you can continue playing while the controllers are charging, especially if you are using a charging dock or charging grip.
Make it a habit to charge your controllers whenever they’re running low on battery to avoid any unexpected interruptions during your gaming sessions.
Powering Off the Controller
When you’re done playing or want to conserve battery, it’s important to know how to power off your Nintendo Switch controller. Here are the steps to power off different types of controllers:
1. Powering off the Joy-Con controllers:
If you’re using the Joy-Con controllers in handheld mode or detached from the console, you can power them off by pressing and holding the small circular power button located on the side of each Joy-Con. Hold the button down for a few seconds until the LED lights on the controller turn off. This indicates that the Joy-Con is powered off and no longer connected to the console.
2. Powering off the Pro Controller:
If you’re using a Pro Controller, you can power it off by pressing and holding the small circular power button located on the top of the controller. Hold the button down for a few seconds until the controller’s LED lights turn off. This indicates that the Pro Controller is powered off.
3. Powering off the console:
If you want to power off the entire Nintendo Switch console, you can do so by pressing and holding the power button located on the top of the console. A menu will appear on the screen, prompting you to choose between Sleep Mode, Power Off, or Restart. Select the “Power Off” option to completely shut down the console.
It’s important to note that when you power off the controllers, they will disconnect from the console and will need to be reconnected when you want to play again. Likewise, powering off the console will require you to turn it back on before resuming your gaming.
By following these steps, you can easily power off your Nintendo Switch controllers, conserving battery life and ensuring they’re ready for your next gaming session.
Turning off the Joy-Cons
When you’re not using your Nintendo Switch in handheld mode or want to power off the Joy-Con controllers while they are detached, you can easily turn them off. Here’s how:
1. Locate the power buttons:
On each Joy-Con controller, there is a small circular power button located on the side. These buttons are used to power on and power off the Joy-Cons.
2. Press and hold the power buttons:
To turn off the Joy-Con controllers, simply press and hold the power buttons located on each controller. Hold the button down for a few seconds until the LED lights on the controllers turn off. This indicates that the Joy-Cons are powered off and no longer connected to the console.
3. Detach the Joy-Cons if desired:
If you prefer to play with the Joy-Cons detached from the console, you can remove them by sliding the release levers located on the back of each Joy-Con. Once detached, you can power off the Joy-Cons using the method mentioned earlier.
It is worth mentioning that when you power off the Joy-Cons, they will disconnect from the console and will need to be reconnected when you want to play again. To reconnect the Joy-Cons, simply slide them back onto the rails on the sides of the console or attach them to the Joy-Con charging grip if you’re using it.
By turning off the Joy-Cons when not in use, you can conserve battery life and ensure they are ready for your next gaming session with your Nintendo Switch.
Disconnecting a Pro Controller
If you’re using a Pro Controller with your Nintendo Switch and need to disconnect it for any reason, here’s how you can do it:
1. Power off the Pro Controller:
Before disconnecting the Pro Controller, it’s important to power it off. To do this, simply press and hold the small circular power button located on the top of the controller. Hold the button down for a few seconds until the LED lights on the controller turn off. This indicates that the Pro Controller is powered off.
2. Remove the Pro Controller from the console:
Once the Pro Controller is powered off, you can safely disconnect it from the Nintendo Switch console. If the controller is physically connected to the console using the USB-C charging cable, unplug the cable from the controller’s USB-C port.
3. Reconnecting the Pro Controller:
If you want to use the Pro Controller again, you can easily reconnect it to the Switch console. To do this, either connect the USB-C charging cable back to the controller and the console, or press and hold the small circular power button on the controller to turn it on. Once the Pro Controller is powered on, it will automatically reconnect to the console.
It’s important to note that disconnecting the Pro Controller will render it unusable until you reconnect it to the console. So, make sure to reconnect it before you want to start gaming again.
By following these steps, you can easily disconnect the Pro Controller from your Nintendo Switch and reconnect it whenever you’re ready to play again.
Putting the Console in Sleep Mode
If you’re taking a break from gaming and want to conserve battery life on your Nintendo Switch without fully powering it off, you can put the console in sleep mode. Sleep mode allows you to quickly resume your game without going through the entire startup process. Here’s how to put your Nintendo Switch in sleep mode:
1. Access the Quick Menu:
Press and hold the Home button on your Joy-Con or Pro Controller to bring up the Quick Menu. The Home button is the circular button with a Nintendo logo located in the middle of the controller.
2. Select Sleep Mode:
In the Quick Menu, use the control stick or directional buttons to navigate to the Sleep Mode option. It is represented by an icon resembling a crescent moon. Once you have highlighted Sleep Mode, press the A button to select it.
3. Confirm entering Sleep Mode:
A confirmation screen will appear, asking if you want to enter Sleep Mode. Use the control stick or directional buttons to highlight “OK” and press the A button to confirm. The console will now go into sleep mode, indicated by the screen turning off and the power LED light on the console remaining on but dimmed.
To wake the console from sleep mode, simply press any button on the Joy-Con or Pro Controller. The console will quickly resume where you left off, allowing you to jump back into your game without delay.
Putting your Nintendo Switch in sleep mode is a convenient way to conserve battery life and ensure a quick and seamless gaming experience whenever you’re ready to play again.
Using the Controller Reset Button
If you’re experiencing issues with your Nintendo Switch controller, such as unresponsiveness or connectivity problems, you can try using the controller reset button to resolve the issue. Here’s how:
1. Locate the controller reset button:
On the Joy-Con controllers, the reset button is located on the rail where the controllers connect to the console. It is a small circular button that you may need a paperclip or a similarly sized object to press. For the Pro Controller, the reset button is located on the back, near the center of the controller.
2. Press and hold the reset button:
Using a paperclip or a similar tool, press and hold the reset button on the controller for a few seconds. You should feel a slight click when pressing the button. Keep holding it until the LED lights on the controller start flashing.
3. Reconnecting the controller:
After releasing the reset button, you will need to reestablish the connection between the controller and the console. For the Joy-Con controllers, simply slide them onto the rails on the sides of the console or attach them to the Joy-Con charging grip. The LED lights on the Joy-Cons will stop flashing and stabilize once they are successfully connected. For the Pro Controller, press and hold the circular power button to turn it on again.
By using the controller reset button, you can troubleshoot and resolve minor issues with your Nintendo Switch controller. It helps to reset the connection and can improve responsiveness and connectivity.
If the problem persists, consider charging the controller, updating the console’s firmware, or contacting Nintendo support for further assistance.
Turning off the Switch Console
When you’re finished playing on your Nintendo Switch and want to power off the entire console, here’s what you need to do:
1. Locate the power button:
The power button on the Nintendo Switch is located on the top of the console, next to the volume buttons. It is a small rectangular button with a circular power symbol.
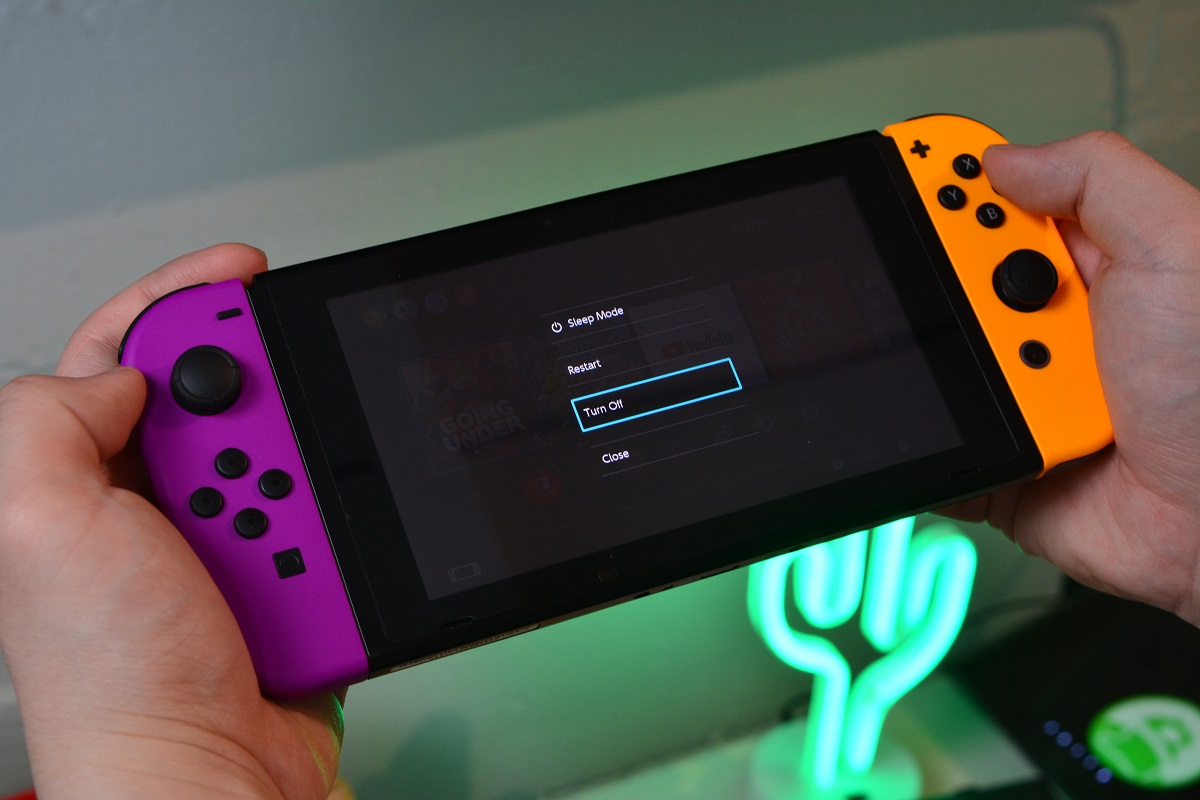
2. Press and hold the power button:
Press and hold the power button for a few seconds until a menu appears on the screen. This menu provides options to either put the console in Sleep Mode, Power Off, or Restart.
3. Select Power Off:
Use the control stick or directional buttons on the Joy-Con controllers to navigate to the “Power Off” option in the menu. Once the option is highlighted, press the A button to select it.
4. Confirm the power off:
A confirmation message will appear on the screen, asking if you’re sure you want to power off the console. Use the control stick or directional buttons to highlight “OK” and press the A button to confirm. The console will now begin to power off.
After a few seconds, the screen will turn dark, and the console will be completely powered off. You can now safely disconnect any peripherals or accessories, such as the Joy-Con controllers or Pro Controller, if desired.
Remember that when you power on the Nintendo Switch after turning it off, it will start from a completely powered-off state, unlike when it’s in Sleep Mode. So, make sure to power it on again before you resume your gaming.
Knowing how to properly power off your Nintendo Switch console ensures that it’s safely shut down and ready for the next time you want to play.