
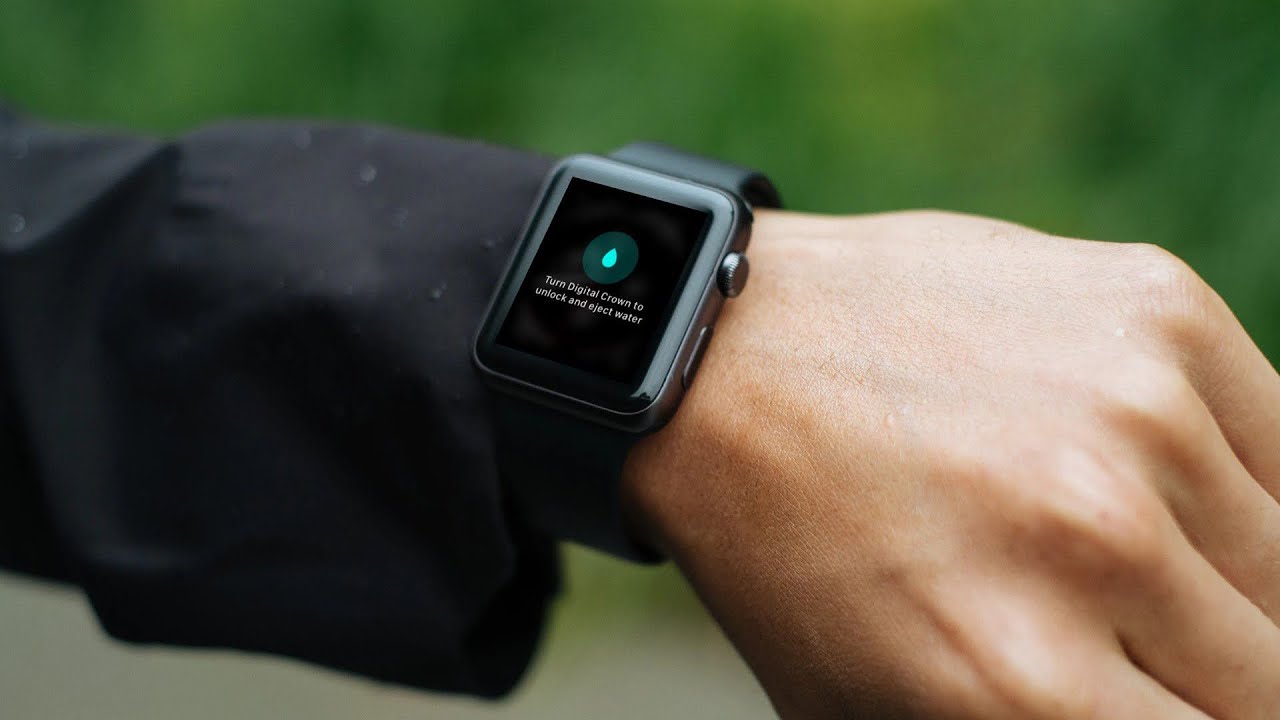
What is the Digital Crown?
The Digital Crown is a unique feature found on certain smartwatches, such as the Apple Watch, Android Wear, Samsung Gear, and Fitbit. It is a small rotating dial located on the side of the watch, resembling a traditional watch crown.
Unlike a traditional watch crown that is used for winding or setting the time, the Digital Crown on smartwatches serves a different purpose. It is a versatile input mechanism that allows users to interact with the device in various ways.
The Digital Crown on an Apple Watch, for example, can be rotated to navigate through menus, scroll through content, zoom in and out, adjust the volume, and perform other functions. It also acts as a home button when pressed, returning users to the watch face.
Similarly, Android Wear smartwatches feature a Digital Crown-like button that can be rotated to scroll through notifications, menus, and apps. It provides a convenient and intuitive way to navigate the watch’s interface and access different features.
The Samsung Gear smartwatches, on the other hand, have a rotating bezel that functions as a Digital Crown. Users can rotate it to navigate through apps, adjust settings, and perform various actions without having to touch the screen.
Fitbit smartwatches, like the Ionic and Versa, also employ a Digital Crown-like button that can be pressed and rotated to navigate through watch features, control music playback, and interact with the device.
The Digital Crown represents a modern and innovative approach to user interaction on smartwatches. It provides users with a tactile and convenient way to navigate and control their devices, enhancing the overall user experience.
As smartwatches continue to evolve, it is likely that we will see further advancements and refinements to the Digital Crown concept, making it an even more integral part of smartwatch interaction.
Why would you want to turn off the Digital Crown?
The Digital Crown on smartwatches is a versatile and convenient input mechanism that offers users an easy way to navigate and control their devices. However, there may be instances where you would prefer to turn off the Digital Crown functionality for various reasons.
One common reason to turn off the Digital Crown is to prevent accidental inputs or unintended actions. The Digital Crown can be sensitive, and if you find yourself frequently bumping or turning it inadvertently, you may want to disable it temporarily to avoid any unintended interactions with your smartwatch.
Another reason to turn off the Digital Crown is if you prefer to use alternative methods of navigation or control on your smartwatch. For example, if your smartwatch has a touchscreen, you may find it more intuitive and easier to navigate by directly tapping and swiping on the screen rather than using the Digital Crown.
In some cases, you may also want to turn off the Digital Crown to conserve battery life. Although it may not consume a significant amount of power, disabling the Digital Crown when you are not actively using it can help maximize the battery life of your smartwatch.
Additionally, if you have a specific app or feature on your smartwatch that conflicts with the Digital Crown functionality, you may need to turn it off temporarily to ensure smooth operation. Some apps or features may have their own dedicated gestures or buttons that may interfere with the Digital Crown’s functionality or cause unintended interactions.
Furthermore, if you prefer a minimalistic or streamlined interface on your smartwatch, disabling the Digital Crown can remove a visual and physical element from the watch’s design, resulting in a cleaner and more minimalist look.
It’s worth noting that not all smartwatches allow you to turn off the Digital Crown. The availability of this option may vary depending on the make and model of your smartwatch. If you are unsure whether your smartwatch supports disabling the Digital Crown, consult the user manual or check the settings menu on your device.
Ultimately, the decision to turn off the Digital Crown on your smartwatch depends on your personal preferences and needs. Whether it’s to prevent accidental inputs, conserve battery life, or simply customize your smartwatch’s interface, having the option to disable the Digital Crown provides users with further flexibility in their smartwatch experience.
How to turn off the Digital Crown on an Apple Watch
If you own an Apple Watch and want to disable the Digital Crown functionality, you can easily do so by following these steps:
Step 1: Open the Settings app on your Apple Watch. The app icon resembles a gear.
Step 2: Tap on “General.” It is usually the second option in the Settings menu.
Step 3: Scroll down and select “Accessibility.” This menu contains various accessibility settings for your watch.
Step 4: Tap on “Accessibility Shortcut.” It is located under the “Physical and Motor” section.
Step 5: Toggle off the “Digital Crown” option by tapping on the toggle switch next to it. When the toggle switch turns gray, it means the Digital Crown functionality has been disabled.
Once you have completed these steps, the Digital Crown on your Apple Watch will no longer perform its usual functions. You can still use other methods, such as swiping on the screen or using the side button, to navigate and interact with your watch.
Keep in mind that disabling the Digital Crown may limit certain features and functionalities that rely on its input, such as scrolling through long lists or zooming in on content. If you decide to re-enable the Digital Crown, you can simply follow the same steps and toggle the “Digital Crown” option back on.
By having the option to turn off the Digital Crown on your Apple Watch, you can customize your watch’s interaction style to your preference and needs.
Step 1: Open the Settings app on your Apple Watch
To begin the process of turning off the Digital Crown on your Apple Watch, you need to open the Settings app. The Settings app allows you to adjust various settings and preferences on your watch.
To open the Settings app, follow these steps:
1. Turn on your Apple Watch
If your Apple Watch is not already turned on, press and hold the side button until the Apple logo appears on the screen. Once the watch is powered on, you will see the watch face.
2. Access the app menu
Swipe your finger from left to right on the watch face. This action will take you to the app menu, which contains all the apps installed on your Apple Watch.
3. Find and tap on the Settings app
Scroll through the app menu by swiping up or down until you locate the Settings app. The Settings app icon features a gear-like symbol. Tap on the icon to launch the app.
4. Enter the Settings menu
Once you have opened the Settings app, you will be presented with a list of different options and settings. You can scroll vertically to navigate through the menu.
Following this step-by-step guide, you have successfully opened the Settings app on your Apple Watch. Now, you can proceed to the next steps to continue disabling the Digital Crown function.
Keep in mind that the process for opening the Settings app may slightly differ depending on the watch model and the version of watchOS. However, the general steps outlined here should work on most Apple Watch models.
Now that you have accessed the Settings app, you can progress to the next step and continue disabling the Digital Crown on your Apple Watch.
Step 2: Tap on “General”
After opening the Settings app on your Apple Watch, the next step in turning off the Digital Crown is to navigate to the “General” menu. The “General” menu contains various settings and options that are related to the overall functionality of your watch.
To access the “General” menu, follow these steps:
1. Navigate to the main menu
If you are not already in the main Settings menu, use the digital crown or swipe up and down on the screen to scroll to the top of the menu.
2. Locate and select “General”
Once you have reached the top of the Settings menu, locate the option labeled “General”. It is often towards the top of the menu and is represented by an icon resembling a gear.
3. Tap on “General”
With the “General” option highlighted, tap on it to enter the “General” menu. This will present you with a range of general settings and configurations for your Apple Watch.
By following these steps, you have successfully navigated to the “General” menu on your Apple Watch. This brings you closer to turning off the Digital Crown and customizing your watch’s functionality to suit your preferences.
It is important to note that the position of the “General” menu may vary slightly depending on the version of watchOS installed on your Apple Watch. However, the general process remains the same.
Now that you have accessed the “General” menu, you can proceed to the next step and continue the process of turning off the Digital Crown on your Apple Watch.
Step 3: Scroll down and select “Accessibility”
After accessing the “General” menu on your Apple Watch, the next step in turning off the Digital Crown is to scroll down within the menu and select the “Accessibility” option. The “Accessibility” menu contains various settings that enhance the usability of your Apple Watch for individuals with different needs and preferences.
To scroll down and select the “Accessibility” option, follow these steps:
1. Scroll down within the “General” menu
Use the digital crown or swipe upwards on the touchscreen to scroll down within the “General” menu. Continue scrolling until you see the option labeled “Accessibility”.
2. Select “Accessibility”
Once you have located the “Accessibility” option, tap on it to enter the “Accessibility” menu. This menu contains a range of settings that allow you to customize the accessibility features, including the option to turn off the Digital Crown.
By following these steps, you have successfully scrolled down within the “General” menu and selected the “Accessibility” option on your Apple Watch. You are now one step closer to disabling the Digital Crown and tailoring your watch’s functionality to your specific preferences.
Keep in mind that the precise location of the “Accessibility” option within the “General” menu may vary slightly depending on the version of watchOS installed on your Apple Watch. However, the general process remains the same.
Now that you have accessed the “Accessibility” menu, you can proceed to the next step and continue the process of turning off the Digital Crown on your Apple Watch.
Step 4: Tap on “Accessibility Shortcut”
After entering the “Accessibility” menu on your Apple Watch, the next step in turning off the Digital Crown is to locate and tap on the “Accessibility Shortcut” option. This option allows you to quickly access specific accessibility features through a shortcut on your watch.
To tap on “Accessibility Shortcut”, follow these steps:
1. Scroll down within the “Accessibility” menu
Use the digital crown or swipe upwards on the touchscreen to scroll down within the “Accessibility” menu. Continue scrolling until you find the option labeled “Accessibility Shortcut”.
2. Select “Accessibility Shortcut”
Once you have located the “Accessibility Shortcut” option, tap on it to open the settings for the accessibility shortcuts. This will provide you with the ability to customize which accessibility features are included in the shortcut.
By following these steps, you have successfully tapped on the “Accessibility Shortcut” option within the “Accessibility” menu on your Apple Watch. This brings you closer to disabling the Digital Crown and customizing your watch’s functionality to suit your needs.
It’s important to note that the options presented in the “Accessibility Shortcut” settings may vary depending on the specific features and functionality available on your Apple Watch. However, the general process remains the same.
Now that you have accessed the “Accessibility Shortcut” settings, you can proceed to the next step and continue the process of turning off the Digital Crown on your Apple Watch.
Step 5: Toggle off the “Digital Crown” option
Once you have opened the “Accessibility Shortcut” settings on your Apple Watch, you can proceed to the final step of turning off the Digital Crown. This step involves toggling off the “Digital Crown” option, effectively disabling its functionality.
To toggle off the “Digital Crown” option, follow these steps:
1. Locate the “Digital Crown” option
Scroll through the “Accessibility Shortcut” settings until you find the option labeled “Digital Crown”. This option controls the functionality of the Digital Crown on your Apple Watch.
2. Toggle off the “Digital Crown” option
To disable the Digital Crown, tap on the toggle switch next to the “Digital Crown” option. When the toggle switch turns gray, it means that the Digital Crown functionality has been turned off.
By following these steps, you have successfully toggled off the “Digital Crown” option within the “Accessibility Shortcut” settings on your Apple Watch. This disables the Digital Crown and customizes your watch’s functionality to your desired preferences.
It’s important to note that disabling the Digital Crown may limit certain features and functionalities that rely on its input, such as scrolling through long lists or zooming in on content. If you decide to re-enable the Digital Crown, you can simply follow the same steps and toggle the “Digital Crown” option back on.
Now that you have turned off the Digital Crown, you can go back to using your Apple Watch without the Digital Crown’s input. This customization allows you to navigate and interact with your watch using other methods, such as swiping on the screen or using the side button.
How to turn off the Digital Crown on an Android Wear smartwatch
If you own an Android Wear smartwatch and want to disable the Digital Crown functionality, you can do so by following these steps:
Step 1: Open the Settings app on your smartwatch
To begin, swipe down from the top of the screen to open the quick settings menu on your Android Wear smartwatch. Locate and tap on the gear-shaped icon or the “Settings” option to access the Settings app.
Step 2: Scroll down and select “Gestures”
In the Settings app, scroll down until you find the “Gestures” option. Tap on it to enter the Gestures settings menu.
Step 3: Toggle off the “Scrolling” option
Within the Gestures settings menu, locate the “Scrolling” option. Tap on the toggle switch next to it to turn off scrolling using the Digital Crown or similar rotating dials on your Android Wear smartwatch.
Once you have completed these steps, the Digital Crown or rotating dial on your Android Wear smartwatch will no longer be used for scrolling through menus or content. You will need to use other methods, such as swiping on the touchscreen or using physical buttons, to navigate and interact with your smartwatch.
Please note that the specific steps to disable the Digital Crown may vary slightly depending on the make and model of your Android Wear smartwatch. However, most smartwatches running Android Wear should have similar settings and options to control the Digital Crown’s functionality.
Keep in mind that disabling the Digital Crown on an Android Wear smartwatch may limit certain features and functionalities that rely on its input. If you decide to re-enable the Digital Crown, you can follow the same steps and toggle the “Scrolling” option back on.
Now that you have successfully disabled the Digital Crown on your Android Wear smartwatch, you can navigate your device using alternative methods and customize your smartwatch experience according to your preferences.
Step 1: Open the Settings app on your smartwatch
To turn off the Digital Crown on your Android Wear smartwatch, the first step is to open the Settings app. The Settings app allows you to access and customize various settings and options on your smartwatch.
To open the Settings app, follow these steps:
1. Wake up your smartwatch
If your smartwatch is in sleep mode or the display is off, press the power button or tap on the touchscreen to wake it up.
2. Swipe down from the top of the screen
On most Android Wear smartwatches, swipe down from the top of the screen to open the quick settings menu. This menu provides access to various settings and features of your smartwatch.
3. Find and tap on the gear icon or “Settings”
In the quick settings menu, locate the gear icon or the word “Settings”. Tap on it to open the Settings app on your smartwatch.
4. Navigate to the Settings app
Once you have tapped on the gear icon or “Settings”, you will be taken to the main Settings screen of your smartwatch. This screen displays a list of different settings and options that you can customize.
By following these steps, you have successfully opened the Settings app on your Android Wear smartwatch. Now, you can proceed to the next steps to continue turning off the Digital Crown.
Keep in mind that the exact steps for opening the Settings app may vary slightly depending on the make and model of your Android Wear smartwatch. However, the general process remains the same.
Now that you have accessed the Settings app, you can move on to the next step and continue the process of disabling the Digital Crown on your Android Wear smartwatch.
Step 2: Scroll down and select “Gestures”
Once you have opened the Settings app on your Android Wear smartwatch, the next step in turning off the Digital Crown is to scroll down within the app and select the “Gestures” option. The “Gestures” menu contains settings related to the different gestures and movements on your smartwatch.
To scroll down and select “Gestures”, follow these steps:
1. Navigate to the main Settings screen
If you are not already on the main Settings screen of your smartwatch, use the touchscreen or the navigation buttons, if available, to move to the top of the screen.
2. Scroll down within the Settings app
Swipe upwards on the touchscreen or rotate the bezel, if applicable, to scroll down within the Settings app. Continue scrolling until you see the option labeled “Gestures”.
3. Select the “Gestures” option
Once you have located the “Gestures” option, tap on it to enter the “Gestures” menu. This menu will provide you with various gestures and movements-related settings on your Android Wear smartwatch.
By following these steps, you have successfully scrolled down within the Settings app and selected the “Gestures” option on your Android Wear smartwatch. This brings you closer to disabling the Digital Crown and customizing your smartwatch’s functionality to your liking.
Please note that the exact location of the “Gestures” option within the Settings app may vary slightly depending on the make and model of your Android Wear smartwatch. However, the general process remains the same.
Now that you have accessed the “Gestures” menu, you can proceed to the next step and continue the process of turning off the Digital Crown on your Android Wear smartwatch.
Step 3: Toggle off the “Scrolling” option
After entering the “Gestures” menu on your Android Wear smartwatch, the next step in turning off the Digital Crown is to locate and toggle off the “Scrolling” option. This option controls the functionality of scrolling through menus and content using the Digital Crown or similar rotating dials on your smartwatch.
To toggle off the “Scrolling” option, follow these steps:
1. Locate the “Scrolling” option
Scroll through the “Gestures” menu on your smartwatch until you find the option labeled “Scrolling”. This option typically appears under the section related to gesture-based controls.
2. Tap on the toggle switch next to “Scrolling”
Tap on the toggle switch next to the “Scrolling” option to turn it off. The toggle switch will usually change its position or color to indicate that the scrolling functionality via the Digital Crown or rotating dials is disabled.
By following these steps, you have successfully toggled off the “Scrolling” option within the “Gestures” menu on your Android Wear smartwatch. This disables the Digital Crown’s ability to scroll through menus and content on your device.
Keep in mind that turning off the scrolling functionality may limit certain features and functionalities that rely on the Digital Crown’s input. If you wish to re-enable the scrolling functionality, you can follow the same steps and toggle the “Scrolling” option back on.
Now that you have turned off the Digital Crown on your Android Wear smartwatch, you can navigate and interact with your device using alternative methods, such as swiping on the touchscreen or using physical buttons. This customization allows you to tailor your smartwatch experience to your preferences and needs.
How to turn off the Digital Crown on a Samsung Gear smartwatch
If you own a Samsung Gear smartwatch and want to disable the Digital Crown functionality, you can do so by following these steps:
Step 1: Swipe down from the top of the screen to open the quick settings menu
To begin, swipe down from the top of the screen of your Samsung Gear smartwatch. This action will open the quick settings menu, which provides access to various settings and features.
Step 2: Tap on the “Settings” icon
In the quick settings menu, locate the “Settings” icon. It typically resembles a gear or cogwheel. Tap on this icon to open the settings for your Samsung Gear smartwatch.
Step 3: Scroll down and select “Display”
In the settings menu, scroll down until you find the option labeled “Display”. Tap on it to access the display settings of your Samsung Gear smartwatch.
Step 4: Tap on “Scrolling toggle”
Within the display settings, locate and tap on the option labeled “Scrolling toggle”. This option controls the functionality of the Digital Crown or rotating bezel on your Samsung Gear smartwatch.
Step 5: Toggle off the “Digital Crown” option
Within the scrolling toggle settings, you will find the option to disable the Digital Crown. Toggle off the “Digital Crown” option by tapping on the toggle switch next to it. When the switch is toggled off, it means the Digital Crown functionality is turned off on your Samsung Gear smartwatch.
By following these steps, you have successfully turned off the Digital Crown on your Samsung Gear smartwatch. This customization allows you to navigate and control your device using alternative methods, such as touch gestures or physical buttons.
Please note that the steps provided may vary slightly depending on the specific model and version of your Samsung Gear smartwatch. However, the general process remains the same.
Now that you have disabled the Digital Crown, you can use your Samsung Gear smartwatch according to your preferences, without relying on the Digital Crown for navigation or control.
Step 1: Swipe down from the top of the screen to open the quick settings menu
To begin the process of turning off the Digital Crown on your Samsung Gear smartwatch, you need to open the quick settings menu. This menu provides access to various settings and features on your smartwatch, allowing you to navigate and customize its functionality.
To swipe down from the top of the screen and open the quick settings menu, follow these steps:
1. Wake up your Samsung Gear smartwatch
If your smartwatch is in sleep mode or the display is off, press the power button or tap on the screen to wake it up. Ensure that the screen is active and responsive.
2. Touch and swipe downwards from the top of the display
Place your finger at the top edge of the screen and swipe downwards towards the bottom of the display. This action will initiate the opening of the quick settings menu on your Samsung Gear smartwatch.
3. Access the quick settings menu
As you swipe downwards, the quick settings menu will start to appear from the top edge of the screen. Continue swiping until the entire menu is visible.
By following these steps, you have successfully swiped down from the top of the screen and opened the quick settings menu on your Samsung Gear smartwatch. This menu provides access to a range of settings and features that you can configure and control.
Please note that the exact method of accessing the quick settings menu may vary slightly depending on the specific model and operating system of your Samsung Gear smartwatch. However, the general process remains the same.
Now that you have accessed the quick settings menu, you can proceed to the next steps and continue the process of turning off the Digital Crown on your Samsung Gear smartwatch.
Step 2: Tap on the “Settings” icon
After opening the quick settings menu on your Samsung Gear smartwatch, the next step in turning off the Digital Crown is to locate and tap on the “Settings” icon. The “Settings” icon provides access to the settings menu where you can customize various features and options on your smartwatch.
To tap on the “Settings” icon, follow these steps:
1. Look for the “Settings” icon
While in the quick settings menu, scan the icons displayed on the screen to locate the one representing “Settings”. The icon is typically depicted as a gear or a cogwheel, and it signifies the settings menu.
2. Tap on the “Settings” icon
Once you have identified the “Settings” icon, use your finger to tap directly on the icon. This action will open the settings menu on your Samsung Gear smartwatch.
By following these steps, you have successfully tapped on the “Settings” icon within the quick settings menu on your Samsung Gear smartwatch. This brings you closer to turning off the Digital Crown and customizing the functionality of your smartwatch.
Please note that the position and appearance of the “Settings” icon may vary slightly depending on the specific model and software version of your Samsung Gear smartwatch. However, the general process remains the same.
Now that you have accessed the settings menu, you can proceed to the next step and continue the process of turning off the Digital Crown on your Samsung Gear smartwatch.
Step 3: Scroll down and select “Display”
Once you have opened the settings menu on your Samsung Gear smartwatch, the next step in turning off the Digital Crown is to scroll down within the menu and select the “Display” option. The “Display” menu contains settings related to the visual aspects of your smartwatch, including the Digital Crown or rotating bezel functionality.
To scroll down and select “Display”, follow these steps:
1. Start scrolling within the settings menu
Use the touchscreen or the rotating bezel, if applicable, to scroll down within the settings menu on your Samsung Gear smartwatch. Continue scrolling until you find the option labeled “Display”.
2. Select the “Display” option
Once you have located the “Display” option, tap on it to enter the “Display” settings menu. This menu allows you to customize various visual aspects of your smartwatch, including the functionality of the Digital Crown or rotating bezel.
By following these steps, you have successfully scrolled down within the settings menu and selected the “Display” option on your Samsung Gear smartwatch. This brings you closer to disabling the Digital Crown and customizing the functionality of your smartwatch to suit your preferences.
Please note that the exact location of the “Display” option within the settings menu may vary slightly depending on the specific model and software version of your Samsung Gear smartwatch. However, the general process remains the same.
Now that you have accessed the “Display” settings menu, you can proceed to the next step and continue the process of turning off the Digital Crown on your Samsung Gear smartwatch.
Step 4: Tap on “Scrolling toggle”
After entering the “Display” settings menu on your Samsung Gear smartwatch, the next step in turning off the Digital Crown is to locate and tap on the “Scrolling toggle” option. This option controls the functionality of the Digital Crown or rotating bezel for scrolling through menus and content on your smartwatch.
To tap on the “Scrolling toggle” option, follow these steps:
1. Explore the options within the “Display” settings menu
Within the “Display” settings menu, swipe or scroll through the various options available. Look for the option labeled “Scrolling toggle”. This option is typically found under the section related to the Digital Crown or rotating bezel functionality.
2. Tap on the “Scrolling toggle” option
Once you have located the “Scrolling toggle” option, tap on it to access the settings for the Digital Crown or rotating bezel. This is where you can disable the functionality of the Digital Crown.
By following these steps, you have successfully tapped on the “Scrolling toggle” option within the “Display” settings menu on your Samsung Gear smartwatch. This brings you closer to turning off the Digital Crown and customizing the functionality of your smartwatch.
Please note that the precise location and appearance of the “Scrolling toggle” option may vary slightly depending on the specific model and software version of your Samsung Gear smartwatch. However, the general process remains the same.
Now that you have accessed the settings for the Digital Crown or rotating bezel, you can proceed to the next step and continue the process of turning off the Digital Crown on your Samsung Gear smartwatch.
Step 5: Toggle off the “Digital Crown” option
Once you have accessed the settings for the Digital Crown or rotating bezel on your Samsung Gear smartwatch, the final step in turning off the Digital Crown is to locate and toggle off the “Digital Crown” option. Disabling this option will deactivate the functionality of the Digital Crown or rotating bezel.
To toggle off the “Digital Crown” option, follow these steps:
1. Locate the “Digital Crown” option
Within the settings for the Digital Crown or rotating bezel, look for the option labeled “Digital Crown”. This option may be named differently depending on your specific device model and software version.
2. Tap on the toggle switch next to “Digital Crown”
Once you have located the “Digital Crown” option, tap on the toggle switch next to it to turn it off. When the toggle switch is in the off position, it means that the Digital Crown functionality is disabled on your Samsung Gear smartwatch.
By following these steps, you have successfully toggled off the “Digital Crown” option within the settings for the Digital Crown or rotating bezel on your Samsung Gear smartwatch. This allows you to deactivate the Digital Crown’s functionality and customize your smartwatch’s control method according to your preference.
Keep in mind that turning off the Digital Crown may limit certain features and functionalities that rely on its input, such as scrolling through menus or zooming in on content. If you wish to re-enable the Digital Crown, simply follow the same steps and toggle the “Digital Crown” option back on.
Now that you have turned off the Digital Crown on your Samsung Gear smartwatch, you can navigate and control your device using other methods, such as swiping on the touchscreen or using physical buttons. This customization allows you to tailor your smartwatch experience to your liking.
How to turn off the Digital Crown on a Fitbit smartwatch
If you own a Fitbit smartwatch and want to disable the Digital Crown functionality, you can do so by following these steps:
Step 1: Open the Fitbit app on your smartphone
To begin, locate and open the Fitbit app on your smartphone. The Fitbit app is the primary companion app for managing and customizing your Fitbit smartwatch.
Step 2: Tap on your device icon in the top left corner of the screen
Once the Fitbit app is open, look for the device icon in the top left corner of the screen. It typically resembles your Fitbit smartwatch model. Tap on this device icon to access the settings for your Fitbit smartwatch.
Step 3: Scroll down and select “Settings”
In the device settings menu, scroll downwards until you find the option labeled “Settings”. Tap on it to enter the settings for your Fitbit smartwatch.
Step 4: Tap on “Quick View”
Within the settings menu, locate and tap on the option labeled “Quick View”. This setting controls the behavior of your Fitbit smartwatch’s display when you raise your wrist or tap on the screen.
Step 5: Toggle off the “Digital Crown” option
Within the “Quick View” settings, you will find the option to disable the Digital Crown. Tap on the toggle switch next to the “Digital Crown” option to turn it off. When the switch is toggled off, it means that the Digital Crown functionality is disabled on your Fitbit smartwatch.
By following these steps, you have successfully turned off the Digital Crown on your Fitbit smartwatch. This customization allows you to navigate and interact with your smartwatch using alternative methods, such as swiping on the touchscreen or using physical buttons.
Please note that the steps and options provided here may vary slightly depending on the specific model and software version of your Fitbit smartwatch. However, the general process remains the same.
Now that you have disabled the Digital Crown, you can use your Fitbit smartwatch according to your preferences, without relying on the Digital Crown for navigation or control.
Step 1: Open the Fitbit app on your smartphone
To begin the process of turning off the Digital Crown on your Fitbit smartwatch, the first step is to open the Fitbit app on your smartphone. The Fitbit app serves as the central hub for managing and customizing your Fitbit smartwatch and its settings.
To open the Fitbit app, follow these steps:
1. Locate the Fitbit app on your smartphone
Locate the Fitbit app on your smartphone’s home screen or app drawer. The Fitbit app icon typically features the Fitbit logo and may be labeled “Fitbit” or have the name of your specific Fitbit model.
2. Tap on the Fitbit app icon
Tap on the Fitbit app icon to launch the app on your smartphone. This will open the Fitbit app and take you to the main screen or dashboard.
3. Sign in to your Fitbit account (if necessary)
If you have not already signed in to your Fitbit account, you may be prompted to do so. Enter your Fitbit account credentials (email and password) to log in to your account. If you do not have a Fitbit account, you will need to create one before proceeding.
By following these steps, you have successfully opened the Fitbit app on your smartphone. This brings you closer to turning off the Digital Crown and customizing the settings of your Fitbit smartwatch.
Please note that the steps for opening the Fitbit app may vary slightly depending on the make and model of your smartphone and the specific operating system. However, the general process remains the same.
Now that you have opened the Fitbit app on your smartphone, you can proceed to the next steps and continue the process of turning off the Digital Crown on your Fitbit smartwatch.
Step 2: Tap on your device icon in the top left corner of the screen
After opening the Fitbit app on your smartphone, the next step in turning off the Digital Crown on your Fitbit smartwatch is to tap on your device icon. The device icon represents your specific Fitbit smartwatch model and provides access to its settings and customization options.
To tap on your device icon, follow these steps:
1. Look for the device icon
On the main screen or dashboard of the Fitbit app, locate the device icon located in the top left corner of the screen. It typically resembles your specific Fitbit smartwatch model or the Fitbit logo. Tap on this device icon to proceed.
2. Tap on your specific Fitbit smartwatch model
Once you have located the device icon, tap on it to access the settings and customization options for your specific Fitbit smartwatch model. This will take you to the device-specific page within the Fitbit app.
3. Access the settings for your Fitbit smartwatch
On the device-specific page, you will find a range of settings and options related to your Fitbit smartwatch. This includes various customization options, features, and settings that you can adjust according to your preferences. Explore the different sections of the settings to locate the option for the Digital Crown.
By following these steps, you have successfully tapped on your device icon within the Fitbit app on your smartphone. This allows you to access the specific settings and customization options for your Fitbit smartwatch, including the Digital Crown settings.
Please note that the appearance of the device icon and its location may vary slightly depending on the version of the Fitbit app and the specific Fitbit smartwatch model you own. However, the general process remains the same.
Now that you have accessed the device-specific page, you can proceed to the next steps and continue the process of turning off the Digital Crown on your Fitbit smartwatch.
Step 3: Scroll down and select “Settings”
After tapping on your device icon within the Fitbit app on your smartphone, the next step in turning off the Digital Crown on your Fitbit smartwatch is to scroll down within the device-specific page and select the “Settings” option. The “Settings” menu provides access to various customization options and configurations for your Fitbit smartwatch.
To scroll down and select “Settings,” follow these steps:
1. Start scrolling within the device-specific page
Using your finger, swipe upwards on the screen or scroll downwards to navigate within the device-specific page of your Fitbit smartwatch settings. Continue scrolling until you find the option labeled “Settings”.
2. Select the “Settings” option
Once you have located the “Settings” option, tap on it to enter the settings menu for your Fitbit smartwatch. This will bring you to a page that contains a variety of options to customize your device.
By following these steps, you have successfully scrolled down within the device-specific page and selected the “Settings” option for your Fitbit smartwatch. This brings you closer to turning off the Digital Crown and adjusting other settings according to your preferences.
Please note that the position of the “Settings” option may vary depending on your specific Fitbit smartwatch model and the version of the Fitbit app. However, the general process remains the same.
Now that you have accessed the “Settings” menu, you can proceed to the next step and continue the process of turning off the Digital Crown on your Fitbit smartwatch.
Step 4: Tap on “Quick View”
After entering the settings menu for your Fitbit smartwatch, the next step in turning off the Digital Crown is to locate and tap on the “Quick View” option. This option controls the behavior of your smartwatch’s display when you raise your wrist or tap on the screen.
To tap on “Quick View”, follow these steps:
1. Scroll down within the settings menu (if necessary)
If the “Quick View” option is not immediately visible on the screen, scroll down within the settings menu to explore more options. This will allow you to locate the “Quick View” setting.
2. Locate and tap on “Quick View”
Once you have found the “Quick View” option, tap on it to open the settings for this feature. “Quick View” is typically used to control the display behavior of your Fitbit smartwatch, including how the screen turns on or off when you interact with the device.
By following these steps, you have successfully tapped on the “Quick View” option within the settings menu for your Fitbit smartwatch. This brings you closer to turning off the Digital Crown and adjusting other settings according to your preferences.
Please note that the location and appearance of the “Quick View” option may vary slightly depending on your specific Fitbit smartwatch model and version of the Fitbit app. However, the general process remains the same.
Now that you have accessed the “Quick View” settings, you can proceed to the next step and continue the process of turning off the Digital Crown on your Fitbit smartwatch.
Step 5: Toggle off the “Digital Crown” option
After opening the “Quick View” settings on your Fitbit smartwatch, the final step in turning off the Digital Crown is to locate and toggle off the “Digital Crown” option. Disabling this option will deactivate the functionality of the Digital Crown on your smartwatch.
To toggle off the “Digital Crown” option, follow these steps:
1. Locate the “Digital Crown” option
Within the “Quick View” settings, scroll down if necessary to find the “Digital Crown” option. It may also appear as “Wrist Twist” or another similar name depending on your specific model of Fitbit smartwatch.
2. Tap on the toggle switch next to “Digital Crown”
Once you have located the “Digital Crown” option, tap on the toggle switch next to it to turn it off. When the switch is in the off position, it means that the Digital Crown functionality is disabled on your Fitbit smartwatch.
By following these steps, you have successfully toggled off the “Digital Crown” option within the “Quick View” settings on your Fitbit smartwatch. This deactivates the Digital Crown and allows you to customize your smartwatch experience using other methods of interaction, such as touchscreen gestures or physical buttons.
Keep in mind that disabling the Digital Crown may limit certain features and functionalities that rely on its input, such as scrolling through menus or navigating through screens. If you wish to re-enable the Digital Crown, simply follow the same steps and toggle the “Digital Crown” option back on.
Now that you have turned off the Digital Crown on your Fitbit smartwatch, you can navigate and interact with your device using other methods that suit your preferences. This customization allows you to personalize your smartwatch experience according to your liking.