
Connecting Your Camera to Your iPhone
Do you love capturing moments on your camera but wish you could easily transfer those photos to your iPhone? Well, you’re in luck! With the advancements in technology, transferring photos from your camera to your iPhone has never been easier. In this guide, we will walk you through two simple methods to connect your camera to your iPhone and transfer your precious memories.
Using an SD Card Reader: The first method involves using an SD card reader. Most cameras have an SD card slot where photos are stored. To start the transfer process, remove the SD card from your camera and insert it into an SD card reader compatible with your iPhone. Connect the SD card reader to your iPhone using the lightning port. Your iPhone will automatically recognize the SD card and open the Photos app. From there, you can select the photos you want to transfer and tap on the “Import” button. It’s that simple!
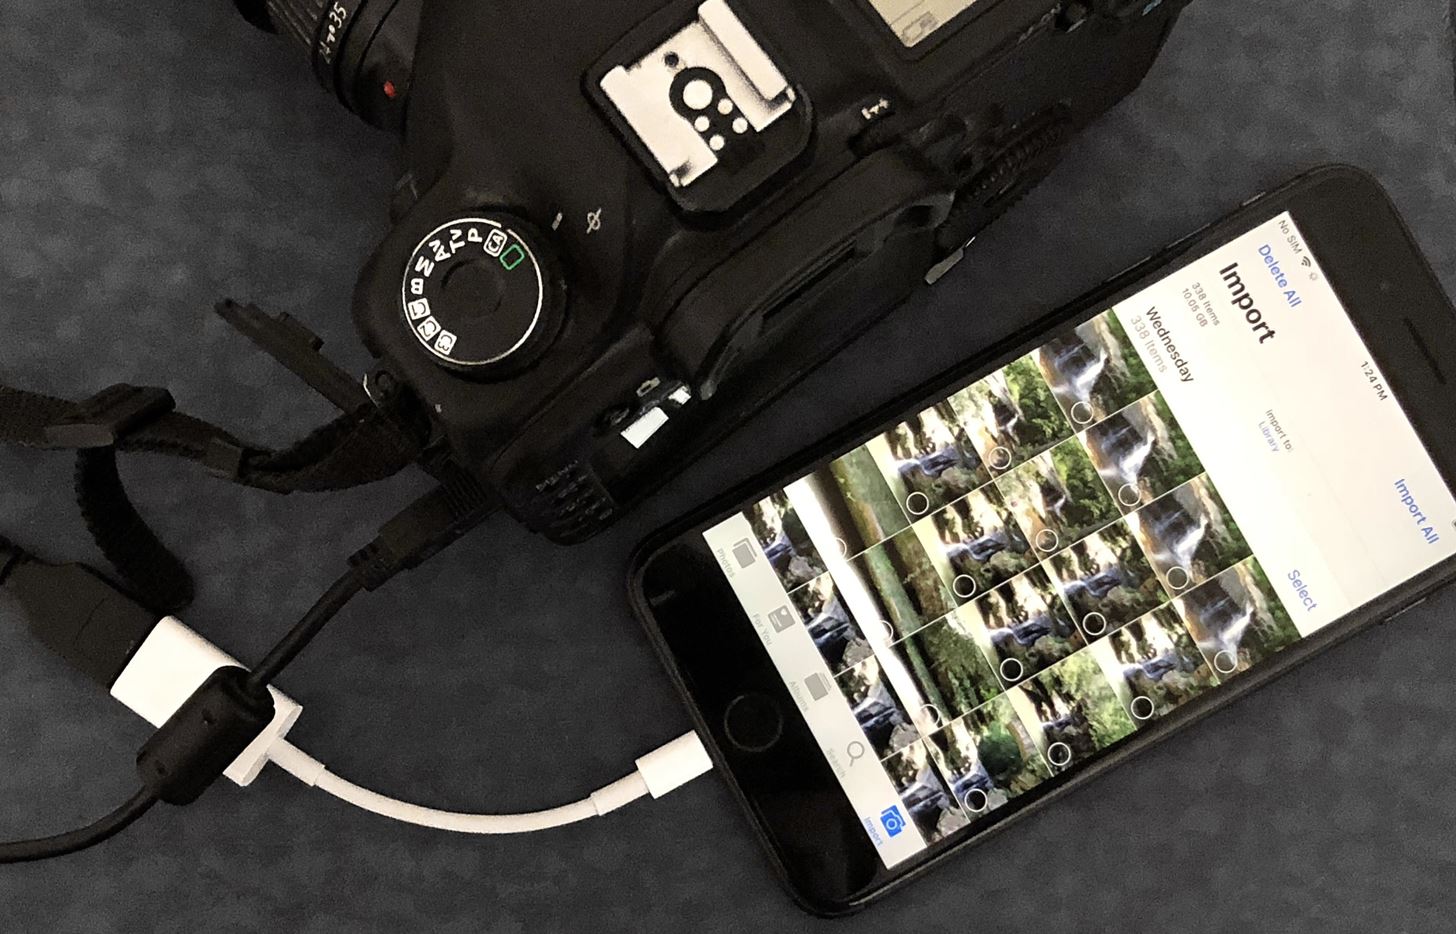
Transferring Photos via Lightning to USB Cable: If your camera supports a USB connection, you can directly connect it to your iPhone using a Lightning to USB cable. Connect one end of the cable to your camera and the other end to your iPhone’s lightning port. Once connected, your iPhone will display a prompt asking if you trust the connected device. Tap “Trust” to proceed. The Photos app will then open, allowing you to select and transfer the desired photos from your camera to your iPhone.
No matter which method you choose, it’s important to ensure that both your camera and iPhone are fully charged or connected to a power source throughout the transfer process. This will prevent any interruptions and allow for a smooth transfer of your photos.
With these easy-to-follow steps, you can effortlessly connect your camera to your iPhone and transfer your photos in no time. So, why wait? Start enjoying your favorite camera shots on your iPhone and share them with friends and family today!
Using an SD Card Reader
Transferring photos from your camera to your iPhone is a breeze when using an SD card reader. This method allows you to easily access your camera’s SD card and import your favorite photos directly to your iPhone. Here’s a step-by-step guide on how to use an SD card reader for photo transfer:
Step 1: Remove the SD Card
First, remove the SD card from your camera. Locate the SD card slot on your camera and gently push on the card until it pops out. Be sure to handle the SD card with care, as it contains your precious memories captured through your camera lens.
Step 2: Insert the SD Card into the Reader
Next, insert the SD card into the SD card reader. The SD card reader is a small device with a slot that matches the size and shape of your SD card. Gently slide the SD card into the slot until it is fully inserted. Ensure that the card is properly aligned with the reader to avoid any damage.
Step 3: Connect the SD Card Reader to Your iPhone
Take the SD card reader and connect it to your iPhone using the lightning port. The lightning port is the small port located at the bottom of your iPhone. Insert the connector end of the SD card reader into the lightning port until it clicks into place.
Step 4: Open the Photos App
Once the SD card reader is connected to your iPhone, it will automatically trigger the Photos app to open. The Photos app is the default app on your iPhone for managing and organizing your photos. It provides a user-friendly interface for importing and organizing your camera roll.
Step 5: Select and Import Photos
With the Photos app open, you will see a “Import” option at the top of the screen. Tap on the “Import” button to start importing the photos from your SD card. You can either choose to import all the photos or manually select the ones you want to transfer.
Step 6: Wait for the Transfer to Complete
After selecting the photos you wish to transfer, the Photos app will begin importing them. Be patient and allow the transfer process to complete. The Photos app will display a progress bar indicating the transfer status. Once the transfer is finished, you will find your imported photos in the “Imported” album within the Photos app.
Using an SD card reader is a convenient way to transfer your camera photos to your iPhone. It eliminates the need for any additional cables or software. With just a few simple steps, you can quickly have your favorite camera shots readily available on your iPhone, ready to be edited, shared, or stored securely.
Transferring Photos via Lightning to USB Cable
Another method for transferring photos from your camera to your iPhone is by using a Lightning to USB cable. This method allows you to establish a direct connection between your camera and iPhone, making it quick and convenient to transfer your cherished photos. Here’s a step-by-step guide on how to transfer photos via Lightning to USB cable:
Step 1: Check Camera Compatibility
Before starting the transfer process, ensure that your camera supports a USB connection. Many modern cameras are equipped with a USB port, typically referred to as a digital terminal or USB-C port. Make sure you have the appropriate USB cable that matches the port on your camera.
Step 2: Connect the Cable
Take one end of the Lightning to USB cable and connect it to your iPhone’s lightning port. The lightning port is located at the bottom of your iPhone. Ensure a secure connection by gently inserting the cable until it clicks into place. For cameras with a digital terminal or USB-C port, connect the other end of the cable to the corresponding port on your camera.
Step 3: Trust the Connected Device
After connecting the cable, your iPhone will display a prompt asking if you trust the connected device. This step is essential for ensuring a secure transfer between your camera and iPhone. Tap “Trust” on your iPhone’s screen to establish a trusted connection.
Step 4: Open the Photos App
Once the connection is established and the devices are trusted, your iPhone will automatically open the Photos app. The Photos app is the default application for managing and organizing your photos on your iPhone.
Step 5: Select and Import Photos
Within the Photos app, you will find an “Import” option at the top of the screen. Tap on the “Import” button to initiate the photo transfer. You can either choose to import all the photos from your camera or manually select the specific ones you want to transfer.
Step 6: Wait for the Transfer to Complete
Once you have selected the photos, the transfer process will commence. You will see a progress bar indicating the status of the transfer. Be patient and allow the transfer to complete. Afterward, you will find your imported photos in the “Imported” album within the Photos app.
Transferring photos via Lightning to USB cable provides a direct and reliable method for importing your camera photos to your iPhone. It offers a fast and convenient way to transfer your cherished memories without the need for additional accessories or wireless connectivity. With just a few simple steps, you can have your favorite camera shots readily available on your iPhone, ready to be edited, shared, or enjoyed on the go.
Selecting the Photos You Want to Transfer
When transferring photos from your camera to your iPhone, it’s important to have control over the selection process to ensure you only transfer the photos you want. Here are some tips on how to select the photos you want to transfer:
1. Preview on Camera: Before transferring any photos, take the time to preview them on your camera’s display. This will allow you to quickly scan through the images and identify the ones you want to transfer to your iPhone. Use the zoom function if needed to get a closer look at the details.
2. Delete Unwanted Photos: While previewing the photos on your camera, take the opportunity to delete any photos that you no longer wish to keep. This will save you time and storage space when it comes to transferring the photos to your iPhone. Be cautious and double-check before deleting to avoid accidentally deleting photos you want to keep.
3. Use Playback Mode: If your camera has a playback mode, utilize it to review your photos in a larger format. This mode allows you to scroll through the images one by one and determine which ones are worth transferring to your iPhone. Take note of the image quality, composition, and any flaws that may impact your decision.
4. Mark Favorites: Some cameras have a feature that allows you to mark specific photos as favorites. Take advantage of this feature to mark the photos you definitely want to transfer. Once marked, you can easily filter and select the favorites when transferring them to your iPhone.
5. Consider Storage Space: Before transferring photos to your iPhone, consider the available storage space. If your iPhone’s storage is limited, be selective and choose only the photos that are most important to you. You can always transfer additional photos at a later time or store them on an external storage device.
6. Transfer in Batches: If you have a large number of photos to transfer, consider transferring them in smaller batches. This will make the process more manageable and allow you to review and organize the transferred photos before moving on to the next batch.
By following these tips, you can ensure that you select the photos that hold the most value to you and transfer them seamlessly to your iPhone. Take your time, review your photos thoughtfully, and choose the ones that bring you the most joy and memories.
Importing Photos from Your Camera Roll
Once you have transferred your cherished photos from your camera to your iPhone, it’s time to import them into your Camera Roll for easy access and organization. The Camera Roll is where all the photos and videos captured by your iPhone’s camera are stored. Here’s how to import photos from your Camera Roll:
Step 1: Open the Photos App: Begin by opening the Photos app on your iPhone. You can usually find it on your home screen or in the dock at the bottom of your screen. The Photos app is represented by a flower icon.
Step 2: Tap on the “Albums” Tab: At the bottom of the Photos app, you will see several tabs. Tap on the “Albums” tab to access your photo albums.
Step 3: Select the “Camera Roll” Album: Within the Albums tab, you’ll find a list of various albums. Look for and tap on the “Camera Roll” album. This album contains all the photos and videos captured by your iPhone’s camera.
Step 4: Tap on the “Select” Button: Once you are in the Camera Roll album, tap on the “Select” button in the top-right corner of the screen. This will allow you to select multiple photos at once for importing.
Step 5: Choose Photos for Import: In the “Select” mode, tap on the photos you want to import from your Camera Roll. Selected photos will be highlighted with a blue checkmark. You can choose photos individually or tap “Select All” to import all the photos in your Camera Roll.
Step 6: Tap on the “Import” Button: After selecting the desired photos, tap on the “Import” button located at the bottom-right corner of the screen. This will initiate the import process and transfer the selected photos from your Camera Roll to your iPhone’s photo library.
Step 7: Wait for the Import to Complete: The Photos app will display a progress bar indicating the status of the import. Wait patiently for the import process to complete. The time it takes will depend on the number and size of the photos being imported.
Step 8: Access Imported Photos: Once the import is finished, you can find your imported photos directly in the Camera Roll album. They will be mixed with your existing photos and organized by the date they were imported. You can now view, edit, or share your imported photos as you please.
Importing photos from your Camera Roll ensures that all your precious memories captured by your iPhone’s camera are easily accessible and organized in one place. By following these simple steps, you can quickly import your photos into your iPhone’s photo library and enjoy them whenever you want.
Organizing Photos in the Photos App
Now that you have transferred and imported your photos to the Photos app on your iPhone, it’s time to organize them for easy access and enjoyable browsing. The Photos app offers various features and tools to help you efficiently organize and manage your photo collection. Here’s how to organize photos in the Photos app:
Create Albums: One way to organize your photos is by creating albums. Albums are like virtual folders that allow you to group related photos together. To create an album, tap on the “+” icon or the “Add” button in the Albums tab of the Photos app. Give your album a name, and then select and add the desired photos from your photo library. You can create albums based on themes, events, or any other organizational system that suits your preferences.
Add Photos to Existing Albums: If you already have albums created in the Photos app, you can add photos to them easily. Simply tap on the album, then tap on the “+” icon or the “Add” button. Select the photos you want to add from your photo library, and they will be included in the chosen album. This allows you to have photos organized into specific categories without duplication.
Use the “Favorites” feature: Marking certain photos as favorites is another way to organize and highlight your most treasured images. To mark a photo as a favorite, open the photo in the Photos app, tap on the heart icon, and it will be added to your Favorites album automatically. The Favorites album is a special album that stores all your favorite photos in one place, allowing for quick access and showcasing of your most beloved moments.
Sort Photos by Date: By default, the Photos app automatically organizes your photo library chronologically based on the date and time the photos were taken. This makes it easy to browse through your photos in the “Photos” tab, scrolling through memories in the order they were captured. You can also utilize the “Years” and “Months” views within the “Photos” tab to quickly jump to specific time periods for more focused browsing.
Search for Photos: The Photos app has a powerful search feature that allows you to find specific photos quickly. You can search by keywords, locations, people, and even objects that may appear in your photos. Simply tap on the search bar at the top of the Photos app and type in your search query. The app will then filter your photo library based on your search terms, making it easier to locate specific photos or memories.
Use Tags and Keywords: To further enhance the organization of your photos, consider adding tags or keywords to specific photos. This can be done by opening a photo, tapping on the “…” icon, and selecting “Add a Description or Hashtag.” You can then enter relevant keywords or create custom tags to help categorize and search for your photos more efficiently.
The Photos app offers a variety of tools and options to help you organize and manage your photo collection. By creating albums, utilizing the “Favorites” feature, sorting by date, and making use of search and tagging capabilities, you can ensure that your photos are organized in a way that makes them easy to find and enjoy. Take advantage of these features and personalize your photo library to suit your unique preferences and needs.
Sharing Your Photos on Social Media
Once you have organized and curated your photos in the Photos app on your iPhone, you may want to share them with friends, family, or the world through social media platforms. The Photos app offers seamless integration with various social media apps, allowing you to share your cherished moments and memories with just a few taps. Here’s how to share your photos on social media:
Select the Photo to Share: Open the Photos app and navigate to the desired album or folder containing the photo you want to share. Tap on the photo to open it.
Tap on the Share Button: Look for the “Share” button, which is represented by a square with an arrow pointing upward. Tap on this button to initiate the sharing options.
Choose a Social Media Platform: In the sharing options, you will see a list of available social media platforms installed on your iPhone. Tap on the social media platform of your choice, such as Facebook, Instagram, Twitter, or others.
Add Captions or Descriptions: Depending on the social media platform, you may have the option to add captions, comments, or descriptions to your photo before posting it. This allows you to provide context or share stories related to the photo.
Select Privacy Settings: Some social media platforms offer privacy settings that allow you to control who can see your shared photos. Depending on your preferences, you can set the visibility to public or limit it to just your friends or specific groups.
Post or Share the Photo: Once you have customized the caption, description, and privacy settings, tap on the “Post” or “Share” button to publish your photo on the chosen social media platform. The photo will now be visible to your selected audience.
Tag People or Add Location: On certain social media platforms, you may have the option to tag people who are present in the photo or add the location where the photo was taken. This can further enhance the sharing experience and allow others to connect and engage with your photo.
Engage with Comments, Likes, and Shares: Once your photo is shared, monitor the comments, likes, and shares it receives. Take the time to engage with your friends and followers by responding to comments and acknowledging their interactions. This will help create a sense of community and connection around your shared photos.
Sharing your photos on social media is a great way to showcase your photography skills, share memorable moments, and stay connected with others. By utilizing the sharing options within the Photos app, you can easily share your favorite photos to social media platforms and enjoy the reactions and interactions they generate.
Backing Up Your Photos
Your photos hold invaluable memories, and losing them due to device issues or accidents can be devastating. Therefore, it is crucial to back up your photos to ensure their safety and accessibility in case of any unforeseen circumstances. Here’s how you can back up your photos effectively:
1. iCloud Backup: One of the easiest ways to back up your photos is by utilizing iCloud. iCloud provides secure cloud storage for your photos, allowing you to access them from any device. To enable iCloud Backup, go to your iPhone’s Settings, tap on your name at the top, select “iCloud,” then “iCloud Backup.” Toggle on “iCloud Backup” and ensure that “Photos” is also turned on. Your photos will now be automatically backed up to iCloud.
2. Google Photos: If you prefer to use Google’s services, you can also back up your photos using Google Photos. Download the Google Photos app from the App Store, sign in with your Google account, and follow the on-screen instructions to enable backup. Google Photos offers free unlimited storage for photos at a slightly reduced resolution or provides an option to store them at original quality with limited free storage space.
3. External Hard Drive: To ensure a physical backup, you can connect an external hard drive to your computer and manually transfer your photos to it using the Photos app or a file explorer. This will provide an extra layer of protection outside of your iPhone or cloud storage. Make it a habit to regularly transfer and update your photos on the external hard drive.
4. Online Cloud Storage Services: There are numerous online cloud storage services available, such as Dropbox, OneDrive, or Amazon Drive. These services allow you to upload and store your photos on their servers, providing accessibility across devices. Install the relevant app, sign up for an account, and follow the instructions to upload your photos to the cloud storage service of your choice.
5. Automatic Syncing: The Photos app on your iPhone can be set up to automatically sync with your computer, ensuring that the photos on your iPhone are backed up to your computer as well. Connect your iPhone to your computer, open the Photos app (or iTunes on older versions), and enable the syncing option. This way, whenever you connect your iPhone to your computer, the new photos will be backed up automatically.
6. Multiple Backups: To further safeguard your photos, consider having multiple backup options in place. Relying on a single backup method can still pose risks. By having backups in multiple locations, such as iCloud, Google Photos, and an external hard drive, you can ensure redundancy and protect against any potential data loss.
By taking the time to back up your photos using these methods, you can have peace of mind knowing that your precious memories are safe and secure. Regularly check and maintain your backup systems to ensure that they are functioning properly. Remember, it’s always better to be proactive and prepared when it comes to preserving your cherished photos.