
Why Transfer Google Photos to iCloud
Google Photos and iCloud are both popular cloud storage services that allow users to store and access their photos and videos from anywhere. While Google Photos offers generous storage space and a range of features, you may find yourself wanting to transfer your Google Photos to iCloud for various reasons.
One of the main advantages of transferring your Google Photos to iCloud is the seamless integration with Apple devices. If you’re an iPhone or iPad user, utilizing iCloud Photos ensures that your entire photo library is automatically synchronized and accessible across all your Apple devices. This means you can easily view, edit, and share your photos without having to manually transfer them between devices.
Another reason to transfer your Google Photos to iCloud is to consolidate your data storage. By having all your photos and videos in one place, you can simplify your backup process and free up storage space on your device. iCloud offers different storage plans, allowing you to choose the one that best suits your needs and budget.
Additionally, by transferring your Google Photos to iCloud, you benefit from the advanced security measures provided by Apple. iCloud ensures that your data is encrypted both in transit and at rest, reducing the risk of unauthorized access. This added layer of protection can give you peace of mind knowing that your precious memories are kept safe and private.
Furthermore, transferring your Google Photos to iCloud simplifies the sharing process with other Apple users. With iCloud, you can easily share albums and individual photos with friends and family who also use Apple devices. This makes it convenient to collaborate on shared albums or reminisce about past events by browsing through shared memories.
Lastly, by transferring your Google Photos to iCloud, you align yourself more closely with the Apple ecosystem. If you heavily rely on Apple’s suite of productivity apps such as Pages, Numbers, and Keynote, having your photos on iCloud makes it seamless to incorporate them into your documents, presentations, and spreadsheets.
Step 1: Download Google Photos to Your Computer
Before you can transfer your Google Photos to iCloud, you’ll need to download them to your computer. Follow these steps to accomplish this:
- Open your preferred web browser on your computer and go to the Google Photos website.
- Sign in to your Google account if you haven’t already.
- Once you’re signed in, navigate to the “Photos” section.
- Decide whether you want to download individual photos or entire albums. To download individual photos, simply select the photos you want to transfer by clicking on them. To download entire albums, go to the “Albums” tab and select the album you want to download.
- After selecting the photos or albums, click on the three dots icon located at the top right corner of the screen.
- A dropdown menu will appear. Select the option that says “Download” or “Download All” depending on your selection.
- Your browser will then prompt you to choose a location on your computer to save the downloaded photos. Select a folder or create a new one to store the photos.
- Click “Save” to begin the download process.
- Wait for the download to complete. The time it takes will depend on the number and size of the photos you’re downloading.
- Once the download is finished, navigate to the folder where you saved the photos on your computer. You now have a local copy of your Google Photos.
By following these steps, you have successfully downloaded your Google Photos to your computer. This step is crucial as it allows you to have a local backup of your photos before proceeding to transfer them to iCloud.
Step 2: Export Google Photos to Your Device
After downloading your Google Photos to your computer, the next step is to export them to your device. This allows you to have the photos readily available for the transfer to iCloud. Follow these steps to export your Google Photos:
- Connect your device to your computer using a USB cable. Ensure that your device is recognized by your computer.
- Navigate to the folder where you saved your downloaded Google Photos.
- Select the photos you want to export to your device. You can do this by clicking and dragging your mouse to highlight multiple photos or by individually selecting them while holding down the Ctrl (Windows) or Command (Mac) key.
- Right-click on the selected photos and choose the option to “Copy” or “Cut” depending on your preference.
- Access your device through your computer’s file explorer or Finder. This will allow you to browse the contents of your device.
- Navigate to the folder or location on your device where you want to store the exported photos.
- Right-click on the destination folder and choose the option to “Paste” the copied or cut photos. Alternatively, you can use the keyboard shortcut Ctrl+V (Windows) or Command+V (Mac) to paste the photos.
- Wait for the copying process to complete. The time it takes will depend on the size and number of photos being exported.
- Once the copying is finished, disconnect your device from your computer. Your Google Photos are now stored on your device and ready for the transfer to iCloud.
By following these steps, you have successfully exported your Google Photos to your device. This step ensures that you have a local copy of your photos accessible directly from your device, enabling a smooth transfer process to iCloud in the next steps.
Step 3: Set Up iCloud Photos on Your Device
Before you can transfer your Google Photos to iCloud, you need to ensure that iCloud Photos is set up on your device. Follow these steps to set up iCloud Photos:
- Open the Settings app on your device.
- Scroll down and tap on your name or iCloud, depending on your device model.
- Select “iCloud” or “iCloud Storage” from the list of options.
- If prompted, enter your Apple ID and password to sign in to iCloud.
- Scroll down and tap on “Photos”.
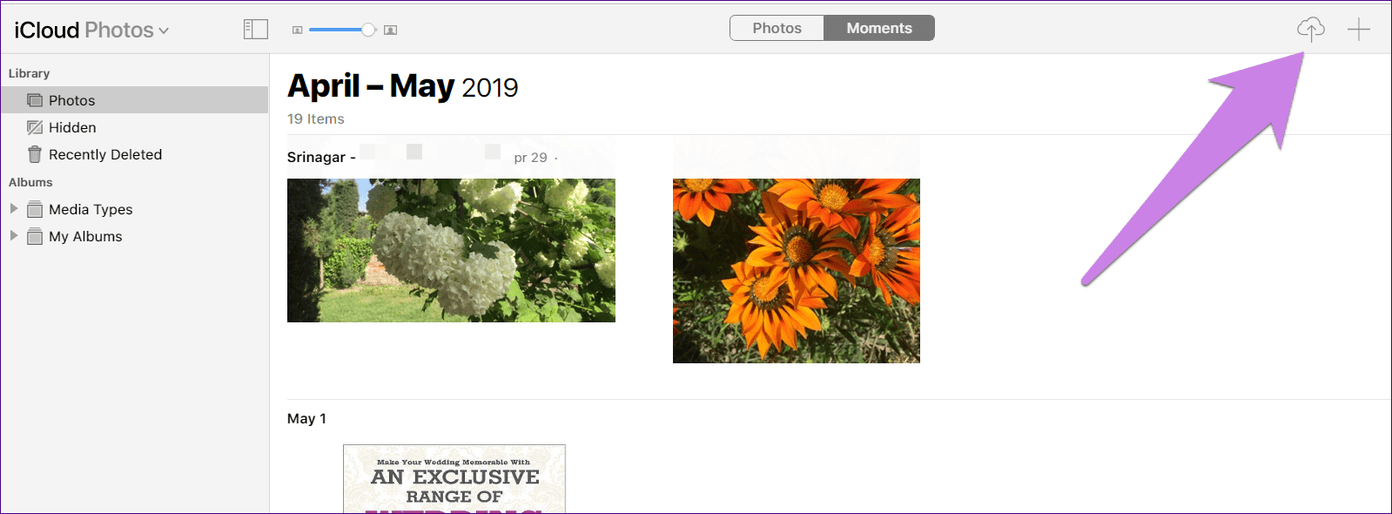
- Toggle on the switch for “iCloud Photos” or “Upload to iCloud” to enable the feature. This will automatically upload and sync your photos with iCloud.
- Choose whether you want to optimize device storage or download and keep original photos on your device. Optimize storage will save storage space on your device by storing lower-resolution versions of photos and videos, while the original option will keep the full-resolution files on your device.
- Wait for iCloud to sync your photos with the cloud. This may take some time, depending on the size of your photo library and your internet speed. Ensure that your device is connected to a stable Wi-Fi network and plugged in to avoid interruptions.
- Once the syncing is complete, you can access your iCloud Photos library from the Photos app on your device. Your Google Photos will be seamlessly integrated with your iCloud library.
By following these steps, you have successfully set up iCloud Photos on your device. This step is essential as it enables the synchronization of your photos between your device and iCloud, paving the way for the transfer of your Google Photos to iCloud in the next steps.
Step 4: Transfer Google Photos to iCloud on iPhone or iPad
Now that you have set up iCloud Photos on your iPhone or iPad, it’s time to transfer your Google Photos to iCloud. Follow these steps to complete the transfer:
- Open the Photos app on your iPhone or iPad.
- Navigate to the “Albums” tab at the bottom of the screen.
- Scroll down and locate the album or albums that contain your downloaded Google Photos.
- Tap on the album to open it and view the photos.
- Tap the “Select” button at the top right corner of the screen to enter selection mode.
- Choose the photos you want to transfer to iCloud by tapping on them. Selected photos will display a blue checkmark.
- Tap the Share button, usually represented by a square box with an arrow pointing upwards.
- In the share menu, you’ll have various options. Select “Add to iCloud Photos” or “Save to Files” (depending on your iOS version).
- If you choose “Add to iCloud Photos,” your selected Google Photos will be uploaded to iCloud. Make sure you are connected to a stable Wi-Fi network, as this may take some time based on the size and number of photos being transferred.
- If you choose “Save to Files,” you can select the folder within iCloud Drive where you want to save the photos. This will also transfer the photos to iCloud for easy access.
- Wait for the transfer process to complete. Once finished, the transferred Google Photos will be available in your iCloud Photos library.
By following these steps, you have successfully transferred your Google Photos to iCloud on your iPhone or iPad. Your photos are now seamlessly integrated into your iCloud Photos library and can be accessed from any Apple device linked to your iCloud account.
Step 5: Transfer Google Photos to iCloud on Mac
If you’re using a Mac, you can easily transfer your Google Photos to iCloud by following these steps:
- Open the Photos app on your Mac. You can find it in the Applications folder or by searching for “Photos” using Spotlight.
- In the Photos app, go to the “Albums” tab located in the sidebar on the left-hand side of the window.
- Scroll down and find the album or albums that contain your downloaded Google Photos.
- Click on the album to view its contents.
- Hold down the “Command” key on your keyboard and click on the photos you want to transfer to iCloud. Selected photos will be highlighted.
- After selecting the photos, go to the “File” menu at the top of the screen and choose the option to “Export” or “Export Unmodified Original for Photos”.
- In the export dialog box, you can choose the location on your Mac where you want to save the exported photos. Select a folder or create a new one to store the photos temporarily.
- Click on the “Export” button to initiate the export process.
- Once the export is complete, open the Photos app again and go to the “Photos” tab located in the sidebar.
- Drag and drop the exported photos from the folder where you saved them into the Photos app window.
- The imported photos will now appear in your Photos library.
- If you have iCloud Photos enabled on your Mac, the transferred Google Photos will automatically sync with iCloud. If not, you can go to the Apple menu, select “System Preferences,” and then choose “iCloud.” Toggle on the switch next to “Photos” to enable iCloud Photos.
By following these steps, you have successfully transferred your Google Photos to iCloud on your Mac. The photos will now be accessible across all your Apple devices linked to your iCloud account.
Step 6: Transfer Google Photos to iCloud on Windows
If you’re using a Windows computer, you can still transfer your Google Photos to iCloud by following these steps:
- Download and install the iCloud for Windows app on your computer. You can find it on the Apple website or in the Microsoft Store.
- Launch the iCloud for Windows app on your computer.
- Sign in to iCloud using your Apple ID and password.
- In the iCloud for Windows app, you’ll see different options like Mail, Contacts, Calendars, and Photos. Ensure that the box next to “Photos” is checked.
- Click on the “Options” button next to “Photos”.
- In the Photos Options dialog box, select the option to enable iCloud Photos.
- Choose whether you want to download new photos and videos to your PC or upload photos and videos from your PC to iCloud using the checkboxes.
- Click on the “Apply” button to save the settings.
- Next, open the file explorer on your Windows computer.
- Navigate to the folder where you saved your downloaded Google Photos.
- Select the photos you want to transfer to iCloud by clicking and dragging your mouse to highlight multiple photos or by holding down the Ctrl key and clicking on individual photos.
- Once you’ve selected the photos, right-click on them and choose the option to “Copy” or “Cut”.
- Open the iCloud Photos folder in your file explorer. It should be located under “This PC” or “My Computer”.
- Right-click inside the iCloud Photos folder and select “Paste” to transfer the Google Photos to iCloud.
- Wait for the transfer process to complete. The time it takes will depend on the size and number of photos being transferred.
- Once the transfer is finished, the Google Photos will be available in your iCloud Photos library, accessible on all your Apple devices linked to your iCloud account.
By following these steps, you have successfully transferred your Google Photos to iCloud on your Windows computer. You now have all your photos seamlessly integrated with your iCloud Photos library.
Step 7: Ensure Photos Are Synced to iCloud
After transferring your Google Photos to iCloud, it’s important to ensure that your photos are properly synced to iCloud. This will ensure that they are securely stored in the cloud and accessible across all your Apple devices. Follow these steps to confirm that your photos are synced to iCloud:
- On your iPhone, iPad, or Mac, open the Photos app.
- Verify that the transferred Google Photos are visible in your iCloud Photos library. You should be able to see them in the “Photos” or “Albums” tab, depending on the platform.
- Open a few photos to confirm that the full-resolution versions are available. If you selected the option to optimize device storage, some photos may be stored in a lower resolution on your device.
- Check if any new photos added to your device are automatically uploaded and synced to iCloud. Take a new photo with your device’s camera or save a photo from an app to see if it appears in your iCloud Photos library.
- Make sure that your device is connected to a Wi-Fi network and connected to power to allow for efficient syncing with iCloud.
- If you encounter any issues, such as photos not syncing or missing from your iCloud Photos library, check your internet connection and ensure that you’re signed in to iCloud with the same Apple ID on all your devices.
- On your iOS device, you can also go to the Settings app, tap on your name, and select “iCloud.” Then, tap on “Photos” to verify that the “iCloud Photos” option is toggled on.
- On your Mac, you can go to the Apple menu, select “System Preferences,” and choose “iCloud.” Make sure that the “Photos” checkbox is selected.
- Allow some time for the syncing process to complete, especially if you have a significant number of photos and videos in your library.
- Double-check by accessing your iCloud Photos library on other Apple devices. Ensure that all your devices have the same photos and that any edits or changes made to a photo are reflected across all devices.
By following these steps, you can rest assured that your photos are synced and securely stored in iCloud, easily accessible across all your Apple devices.
Step 8: Delete Google Photos from Your Device
Now that you have successfully transferred your Google Photos to iCloud, it’s time to clean up your device and remove the duplicate photos. Follow these steps to delete the Google Photos from your device:
- Launch the Photos app on your device.
- Navigate to the “Albums” or “Photos” tab, depending on your device.
- Locate the album or photos that belong to your Google Photos.
- Tap on “Select” or the option to select multiple photos.
- Select the Google Photos you want to delete by tapping on them. Selected photos will display a blue checkmark.
- Once you have selected the photos, tap on the trash can icon or the delete button to remove them.
- A confirmation message will appear. Select “Delete” to confirm the deletion of the selected photos.
- Repeat this process for any additional albums or individual photos that contain your Google Photos.
- After deleting the Google Photos, double-check to ensure that they are no longer visible in your Photos app.
- Empty the “Recently Deleted” album to permanently delete the photos from your device. This step will free up storage space on your device.
It’s important to note that deleting the Google Photos from your device does not affect the copies stored in your iCloud Photos library. The photos will still be accessible on other Apple devices linked to your iCloud account.
By following these steps, you have successfully removed the duplicate Google Photos from your device, freeing up storage space and ensuring a more streamlined photo library. Your photos are securely stored in iCloud and accessible whenever you need them.