
Using iCloud
iCloud is a convenient cloud storage service provided by Apple that allows you to effortlessly transfer photos from one iPhone to another. Here’s how you can use iCloud to transfer your precious memories:
1. Enable iCloud Photo Library: On both your old and new iPhones, go to Settings > [Your Name] > iCloud > Photos and make sure iCloud Photo Library is turned on. This will ensure that your photos are synced across all your devices.
2. Backup your old iPhone: Before transferring photos, it’s essential to create a backup of your old iPhone using iCloud. To do this, go to Settings > [Your Name] > iCloud > iCloud Backup and tap on “Back Up Now.” Wait for the backup process to complete.
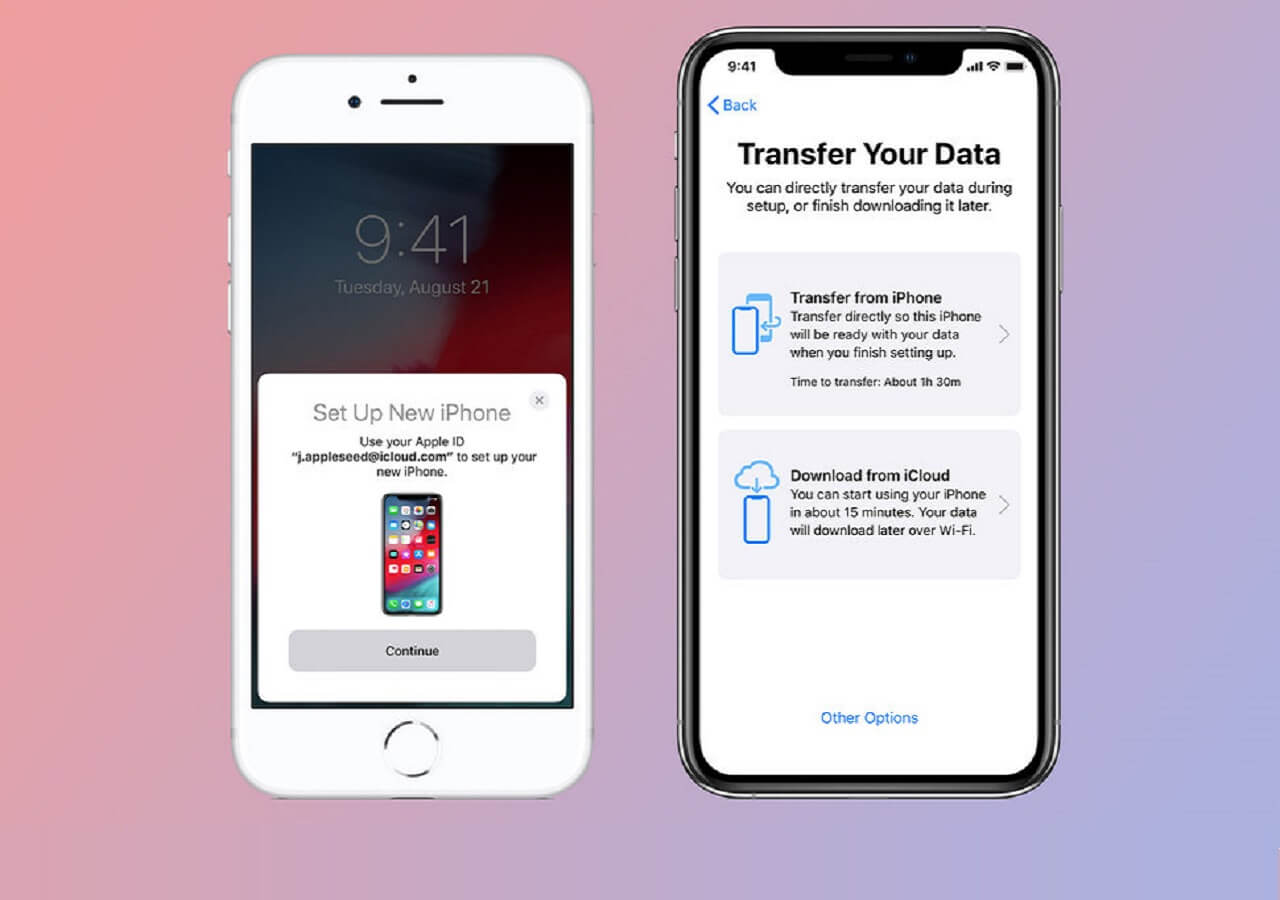
3. Set up your new iPhone: Start setting up your new iPhone and choose “Restore from iCloud Backup” when prompted. Sign in with your Apple ID and select the most recent backup from the list. This will transfer all your photos, including the ones stored in iCloud, to your new device.
4. Wait for synchronization: Once the setup is complete, your new iPhone will start syncing with iCloud. It may take some time, depending on the number of photos you have. Make sure the device is connected to a reliable Wi-Fi network and plugged into a power source during the process.
5. Check the photo library: Once the synchronization is finished, open the Photos app on your new iPhone and verify that all your photos from the old device are now available. You can also enable the “Optimize iPhone Storage” option in iCloud settings to save storage space on your new device.
Using iCloud to transfer photos between iPhones ensures a seamless transition and preserves the original quality of your images. It is worth noting that this method requires a stable internet connection and sufficient iCloud storage space to accommodate all your photos.
Remember to keep both devices connected to Wi-Fi and power sources throughout the process to avoid disruptions. Now, you can preserve your memories and access them effortlessly on your new iPhone with the help of iCloud.
Using AirDrop
AirDrop is a handy feature available on iPhones that lets you wirelessly transfer photos from one device to another. Follow these steps to use AirDrop for transferring your photos:
1. Enable AirDrop: On both your old and new iPhones, swipe up from the bottom of the screen to open Control Center. Tap on the AirDrop icon and select either “Contacts Only” or “Everyone” depending on your preference. This will enable AirDrop on both devices.
2. Open Photos app: Launch the Photos app on your old iPhone and select the photos you want to transfer. Tap on the Share icon, usually located at the bottom-left corner of the screen.
3. Select AirDrop: In the sharing options, you will see a list of available AirDrop users nearby. Locate your new iPhone in the list and tap on it to initiate the transfer. Alternatively, you can also choose to AirDrop to your own personal device and then transfer the photos to the new iPhone.
4. Accept the transfer: On your new iPhone, a notification will appear asking if you want to accept the incoming photos. Tap on “Accept” to proceed. The photos will be downloaded and saved to your new device’s Photos app.
5. Verify the transfer: Open the Photos app on your new iPhone and ensure that the transferred photos have been successfully saved. You can organize them into albums or delete any duplicates if necessary.
AirDrop offers a quick and convenient way to transfer photos between iPhones without relying on an internet connection. It utilizes Bluetooth and Wi-Fi to establish a direct connection between the devices, ensuring secure and high-speed transfers.
It’s important to note that both devices need to be within a reasonable range for AirDrop to work effectively. Additionally, make sure that AirDrop is enabled and set to “Contacts Only” or “Everyone” on both devices.
Using AirDrop, you can effortlessly share your cherished moments with friends and family or transfer photos to your new iPhone without the need for cables or external devices.
Using iTunes
If you prefer a wired and computer-based method to transfer photos from your old iPhone to a new one, iTunes can be a reliable option. Follow these steps to use iTunes for transferring your photos:
1. Connect your old iPhone: Launch iTunes on your computer and connect your old iPhone using a USB cable. If prompted, enter your device passcode and trust the computer.
2. Select your device: In iTunes, click on the device icon that appears in the upper left corner of the window. This will open the summary page for your iPhone.
3. Backup your old iPhone: Before transferring photos, it’s essential to create a backup of your old iPhone. Under the “Backups” section, select “This computer” and click on “Back Up Now.” Wait for the backup process to complete.
4. Disconnect your old iPhone and connect the new one: Once the backup is complete, disconnect your old iPhone from the computer and connect your new iPhone using the same USB cable.
5. Set up your new iPhone: If it’s a new iPhone, follow the on-screen instructions to set it up. If it’s not a new iPhone, select your device in iTunes and click on “Restore Backup.”
6. Choose the backup: In the pop-up window, select the most recent backup that you created for the old iPhone. iTunes will begin restoring the backup onto your new iPhone, including the photos.
7. Wait for the transfer to complete: The restoration process may take some time depending on the size of the backup and the speed of your computer. Ensure that both devices remain connected to the computer and avoid interrupting the process.
Using iTunes allows for a full device backup, including photos, settings, and other data. It provides a reliable and comprehensive method for transferring photos between iPhones.
However, it’s important to keep in mind that iTunes can be a bit more time-consuming compared to other methods. Additionally, it requires a computer with iTunes installed and a USB cable to establish the connection with the iPhones.
With these simple steps, you can use iTunes to transfer your beloved photos from your old iPhone to your new one, ensuring that your memories are preserved.
Using Google Photos
If you want to transfer photos from your old iPhone to a new one using a cloud storage service that works across different platforms, Google Photos is a great option. Follow these steps to use Google Photos for transferring your photos:
1. Install Google Photos: Download and install the Google Photos app from the App Store on both your old and new iPhones. Sign in to your Google account or create a new one if you don’t have an account already.
2. Upload photos from the old iPhone: Open the Google Photos app on your old iPhone and sign in with your Google account. Tap on the “Menu” icon (three horizontal lines), then select “Settings,” followed by “Backup & Sync.” Make sure the toggle switch is turned on for “Backup & Sync” to automatically upload your photos to the cloud.
3. Wait for the backup to complete: Depending on the speed of your internet connection and the number of photos, it may take some time for the photos to upload to the Google Photos cloud storage. Ensure that your device is connected to Wi-Fi and has sufficient battery during the process.
4. Sign in on the new iPhone: On your new iPhone, download and install the Google Photos app from the App Store if you haven’t already. Sign in with the same Google account used on your old iPhone.
5. Sync and access your photos: Open the Google Photos app on your new iPhone and wait for the syncing process to complete. Once synced, you will be able to access all your uploaded photos. The photos will now be available on your new iPhone, organized in the same way as on your old device.
Google Photos offers free unlimited storage for high-quality photos, and even allows you to store original quality photos with limited storage space. By using this cloud storage service, you can easily transfer your photos between iPhones without the need for a computer or cables.
Keep in mind that using Google Photos requires a stable internet connection for uploading and downloading photos. Additionally, if you have a large photo library, it may take some time to fully sync all your photos onto the new device.
With Google Photos, you can seamlessly transfer your cherished memories from your old iPhone to your new one, ensuring that your photos are safely stored in the cloud and easily accessible across devices.
Using a third-party app
If you are looking for alternative options to transfer photos from your old iPhone to a new one, using a third-party app can provide you with additional flexibility and features. Here’s how you can use a third-party app for transferring your photos:
1. Research and choose a reliable app: Take some time to research and choose a trusted and highly rated third-party app from the App Store. There are various apps available that specialize in photo transfers, such as PhotoSync, PhotoTransfer, or Dropbox.
2. Install the app on both devices: Download and install the chosen app on both your old and new iPhones from the App Store. Follow the app’s on-screen instructions to set up and grant necessary permissions.
3. Connect both devices to the same Wi-Fi network: Ensure that both iPhones are connected to the same Wi-Fi network. This will facilitate a smooth transfer of photos between the devices.
4. Follow the app’s transfer process: Each third-party app may have a different user interface and transfer process. Usually, you will need to select the photos you want to transfer on your old iPhone and choose the option to send or transfer them. Follow the instructions within the app to complete the transfer process.
5. Check the transferred photos: Once the transfer is complete, open the app on your new iPhone and verify that the transferred photos are successfully saved. You can organize them into albums or make any necessary adjustments within the app.
Using a reliable third-party app can provide additional features like selective transfers, transfer between different platforms, or even encryption for added security. However, it’s important to thoroughly research and choose a reputable app to ensure the safety and privacy of your photos.
Take note that different third-party apps may have varying levels of user-friendliness, transfer speed, and compatibility with different file formats. It’s recommended to read user reviews and app descriptions before making a choice.
Using a third-party app offers a versatile solution for transferring photos between iPhones, giving you more control and options compared to built-in methods or cloud services.
By following the steps provided and using a trusted third-party app, you can easily and securely transfer your treasured photos from your old iPhone to your new one.
Using a computer and a USB cable
If you prefer a direct and straightforward method to transfer photos from your old iPhone to a new one, using a computer and a USB cable is an effective approach. Here’s how you can use this method:
1. Connect your old iPhone to the computer: Take the USB cable that came with your iPhone and connect your old device to your computer’s USB port. If prompted on your iPhone, choose to “Trust” the computer to establish a secure connection.
2. Access your device on the computer: Once connected, your computer should recognize the iPhone and display it as a new device. On Windows, the iPhone will show up as a removable storage device. On Mac, it will appear in the Finder sidebar or on the desktop.
3. Transfer photos from the old iPhone: Open the device folder on your computer and navigate to the “DCIM” (Digital Camera Images) folder. Inside, you will find various sub-folders that contain your iPhone’s photos. Copy the desired photos and paste them into a designated folder on your computer, such as the desktop or a specific photo folder.
4. Disconnect the old iPhone and connect the new one: Safely disconnect the old iPhone from your computer and then connect your new iPhone using the same USB cable. Follow any prompts on your iPhone to trust the computer if necessary.
5. Transfer photos to the new iPhone: Open the folder where you stored the photos from the old iPhone on your computer. Select the photos you want to transfer and copy them. Then, navigate to your new iPhone’s folder on your computer and paste the photos into the “DCIM” folder or any other desired location.
6. Verify the transfer: Disconnect your new iPhone from the computer and open the Photos app. Ensure that the transferred photos are successfully saved and visible in your photo library on the new device.
Using a computer and a USB cable offers a direct and reliable method to transfer photos between iPhones. It allows for quick and easy transfers, especially when dealing with large photo libraries.
Keep in mind that this method requires a computer with a USB port and a compatible USB cable. Additionally, ensure that both iPhones are unlocked, and you trust the computer you are connecting them to.
By following these steps and utilizing a computer and a USB cable, you can efficiently transfer the photos from your old iPhone to your new one, preserving your precious memories.
Using email or messaging apps
If you want a quick and straightforward method to transfer a few photos from your old iPhone to a new one, using email or messaging apps can be a convenient option. Follow these steps to use email or messaging apps for transferring your photos:
1. Select the photos on your old iPhone: Open the Photos app on your old iPhone and choose the photos you want to transfer. Tap on the “Share” icon, usually denoted by a square box with an arrow pointing upward.
2. Choose the email or messaging app: From the sharing options, select either the email app or a messaging app installed on your iPhone, such as iMessage, WhatsApp, or Telegram.
3. Compose a new email or message: If you choose an email app, a new message window will open with the selected photos attached. Simply enter your email address as the recipient and send the email.
If you choose a messaging app, select a contact or create a new message thread with your own number. Attach the photos to the message and send it. You can also use this method to send the photos to another person and have them forwarded to your new iPhone.
4. Access the email or message on your new iPhone: Open the email app or messaging app on your new iPhone and access the email or message you sent. Download the attached photos to your new device.
5. Save the transferred photos to your new iPhone: Once the photos are downloaded, save them to your new iPhone’s Photos app or any desired location within the device.
Using email or messaging apps is a handy solution for transferring a small number of photos quickly and directly. However, keep in mind that this method may not be suitable for transferring a large number of images due to file size limitations. Additionally, it may require an active internet connection to send and receive the email or message.
By following these steps and utilizing email or messaging apps on both your old and new iPhones, you can easily transfer selected photos and preserve your favorite memories on your new device.
Using cloud storage services
If you want a convenient and versatile method to transfer and access your photos across different devices, using cloud storage services can be an excellent choice. Here’s how you can use cloud storage services to transfer your photos:
1. Choose a cloud storage service: There are several cloud storage services available, such as iCloud, Google Drive, Dropbox, or Microsoft OneDrive. Choose the one that suits your needs and preferences, and install the corresponding app on both your old and new iPhones.
2. Set up and sign in: Open the cloud storage app on your old iPhone and sign in with your account credentials. Follow the prompts to set up the app and customize your preferences, such as file organization or syncing options.
3. Upload photos to the cloud: In the cloud storage app, navigate to the location where you want to store your photos. Select the photos you want to transfer and choose the option to upload or sync them to the cloud. Wait for the upload process to complete, which may take some time depending on the file size and internet connection speed.
4. Access the cloud storage on your new iPhone: Open the cloud storage app on your new iPhone and sign in with the same account credentials used on your old device. Allow the app to sync and download the photos you uploaded from your old iPhone.
5. Verify the transfer and download: Once the synchronization is complete, you should see the transferred photos within the cloud storage app. From there, you can choose to download them to your new iPhone and save them to the Photos app or any desired location on the device.
Using cloud storage services offers the advantage of seamless syncing between multiple devices, allowing you to access your photos anytime, anywhere. Additionally, most cloud storage services provide options for automatic backups and additional storage space if needed.
Keep in mind that using cloud storage services for transferring photos requires a stable internet connection and sufficient storage space on your cloud account. It’s essential to monitor your storage quota and consider upgrading if necessary.
By following these steps and utilizing a cloud storage service, you can easily transfer your photos from your old iPhone to your new one, ensuring that your memories are securely stored and accessible across devices.