
Why Remove Links from a Watch Band
When it comes to wearing a watch, comfort is key. A well-fitting watch band not only enhances the overall look of your timepiece but also ensures a comfortable experience on your wrist. Sometimes, however, you might find that the watch band is too loose and requires adjustment to achieve the perfect fit. This is where removing links from the watch band comes into play.
There are several reasons why you might need to remove links from your watch band. Firstly, if you have a brand new watch and find that the band is too large, removing links is essential to achieve a snug fit. Similarly, you might have purchased a watch second-hand and need to resize the band to suit your wrist size. Additionally, weight loss or gain can also affect the fit of your watch band, requiring you to remove or add links accordingly.
Removing links from a watch band is a relatively straightforward process that can be done at home with the right tools and a little patience. By following a few simple steps, you can easily adjust your watch band to ensure a comfortable and secure fit that perfectly suits your wrist.
Not only does removing links from a watch band enhance the fit, but it also allows you to personalize your timepiece. Whether you prefer a snug and tailored fit or simply want to achieve a more fashionable look, resizing your watch band can help you achieve this. By removing the necessary links, you can customize the band to reflect your personal style and create an accessory that is unique to you.
In summary, removing links from a watch band is essential for achieving the perfect fit, comfort, and personalization. Whether it’s adjusting a new watch, resizing a second-hand timepiece, or accommodating changes in your wrist size, this simple process allows you to enjoy your watch to the fullest. So, grab your tools and get ready to personalize and optimize your watch band for a comfortable and fashionable experience.
Tools You Will Need
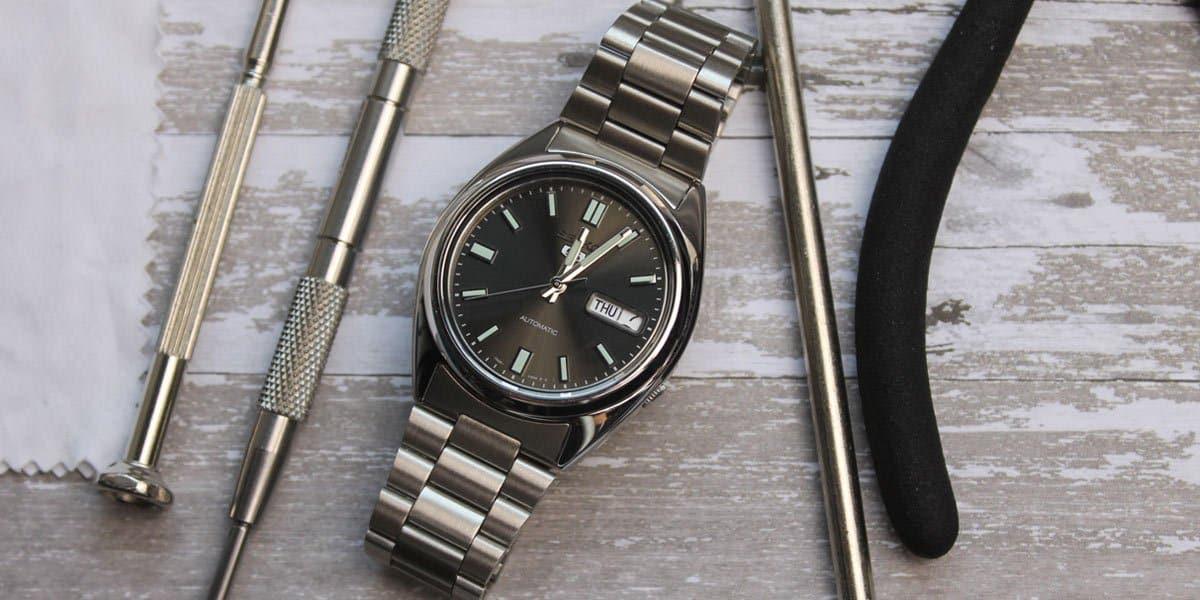
Before you begin removing links from your watch band, it’s important to gather the necessary tools. Having the right tools will make the process much easier and ensure that you don’t damage your watch in the process. Here are the essential tools you’ll need:
- A watch band link removal tool: This tool is specifically designed to push out the pins that hold the links together. It typically has a small handle and a pointed end to help remove the pins.
- A small hammer or mallet: This will be used in conjunction with the link removal tool to gently tap the pins out of the watch band.
- A soft cloth or mat: This will serve as a protective barrier between the watch and your work surface. It will prevent scratches or damage to the watch while you’re working.
- Tweezers: These will come in handy for handling small watch band components, such as pins or links, during the removal process.
- A magnifying glass or loupe: While not essential, a magnifying tool can be helpful for seeing small details or properly aligning the pins when reassembling the watch band.
- Spare pins: It’s always a good idea to have some spare pins on hand, just in case any get damaged or lost during the link removal process.
These tools are readily available at watch repair shops, jewelry stores, or online marketplaces. Make sure to acquire high-quality tools to ensure a smooth and successful link removal process. Once you have gathered all the necessary tools, you’ll be ready to start adjusting your watch band to achieve the perfect fit.
Step 1: Assess the Size
Before you start removing links from your watch band, it’s important to assess the size of your wrist and determine how many links need to be removed to achieve a comfortable fit. Here’s how you can do it:
- First, put on the watch and fasten it to your wrist as you normally would.
- Take note of how loose or tight the watch feels on your wrist. A well-fitting watch should sit comfortably without sliding up and down or feeling too tight.
- If the watch feels too loose, you’ll need to remove some links. If it feels too tight, you may need to add links or consider a different adjustment method.
- Next, determine how many links you need to remove by gently sliding the watch band up and down your wrist while noting the desired fit.
Remember that it’s better to remove fewer links initially and make further adjustments if needed. It’s easier to remove additional links later on than it is to add them back. Additionally, keep in mind that the number of links to be removed might be different on each side of the watch band to maintain symmetry.
Once you have assessed the desired fit and determined how many links to remove, you’re ready to move on to the next step: identifying the link type for removal.
Step 2: Identify the Link Type
After assessing the size of your watch band, the next step is to identify the type of links used in your watch band. This is important because different watch bands have different link designs and mechanisms for link removal. Here are the common types of watch band links:
- Screw-secured links: Some watch bands have individual links that are held together by small screws. These screws can be easily loosened or tightened using a small screwdriver.
- Pinned links: This is the most common type of watch band link. It consists of pins that hold the links together. These pins can be pushed out using a watch band link removal tool.
- Arrow-headed pins: Some watch bands have pins with arrow-shaped heads. These pins are typically found in more high-end watches and require a specialized tool for removal.
- Push-button or quick-release links: Certain watch bands have push-buttons or quick-release mechanisms that allow for easy link removal without the need for additional tools.
To identify the link type in your watch band, closely examine the links and look for any screws, pins, or unique mechanisms. If you’re unsure, consult the watch’s manual or contact the manufacturer for information specific to your watch model.
Once you’ve identified the link type, you’ll be better prepared for the next steps of removing the watch band and extracting the necessary links. In the following sections, we’ll cover the step-by-step process for removing links based on the most common pinned link design.
Step 3: Remove the Watch Band
With a clear understanding of the link type in your watch band, you’re ready to move on to removing the watch band itself. Follow these steps to safely detach the band from your watch:
- Locate the small spring bar or pin that connects the watch band to the watch case. This is typically found on the lugs of the watch, which are the metal protrusions on either side of the watch case.
- Using a spring bar tool or a small flathead screwdriver, press down on one end of the spring bar to release it from its notch.
- Once the spring bar is released, gently slide it out from the lug and repeat the process for the other side of the watch band.
- Keep the spring bars in a safe place, as you will need to reattach the watch band later.
At this point, the watch band should be detached from the watch case. Take a moment to inspect the band and identify the section where the links need to be removed. This is usually near the clasp or buckle end of the band, but it may vary depending on the design of your watch band.
With the watch band removed and the targeted section identified, you’re now ready to begin the link removal process. The next step will guide you on how to remove the pins holding the links together.
Step 4: Remove the Pin
Now that the watch band is detached from the watch case, you can proceed with removing the pin that connects the links. This process will vary depending on the type of pin used in your watch band. Here’s a general method to remove a pinned link:
- Place the watch band on a soft cloth or mat to protect it from scratches and provide stability.
- Locate the pin that needs to be removed. It will be the pin connecting the link or links that you have identified for removal.
- Take your watch band link removal tool and align the pointed end with the pin that needs to be pushed out.
- Apply gentle pressure on the tool, pushing against the pin in the direction indicated by the arrows on the link removal tool. This will release the pin from the link.
- Continue pushing until the pin pops out from the other side of the link. Be careful not to push it all the way through and lose it.
- Use your tweezers to catch the pin and carefully remove it from the link.
Repeat these steps for any additional pins that need to be removed to separate the desired links from the watch band. Be sure to keep the pins in a safe place, as you may need them if you want to reattach the removed links in the future.
With the pin successfully removed, you can proceed to the next step of removing the extra links from the watch band. This will involve separating the links and adjusting the length of the band to achieve a proper fit on your wrist.
Step 5: Remove the Extra Link(s)
Now that you have successfully removed the pin(s) holding the links together, it’s time to remove the extra link(s) from the watch band. Follow these steps to adjust the length of your watch band:
- Identify the link(s) you want to remove to achieve the desired fit. These may be the links closest to the clasp or buckle end of the watch band.
- Using your watch band link removal tool, line up the pointed end with the pinhole of the link you want to detach.
- Apply gentle pressure to push the pin out of the link, using the same technique as in Step 4. Repeat this process for each link you want to remove.
- Once the extra link(s) are detached, keep them in a safe place in case you need to reattach them in the future.
During this step, ensure that you remove the same number of links from each side of the watch band to maintain a balanced appearance. This will also help to ensure that the clasp or buckle can be properly positioned on your wrist.
It’s important to note that some watch bands may have additional features, such as micro-adjustment holes or removable segments, which allow for more precise adjustments. If your watch band has these features, make use of them to fine-tune the fit of your watch band.
With the extra link(s) removed, you’re closer to achieving the perfect fit for your watch band. The next step will guide you on how to reattach the watch band to the watch case and test the fit.
Step 6: Reattach the Watch Band
After removing the extra link(s) to achieve the desired fit, it’s time to reattach the watch band to the watch case. Follow these steps to securely reattach the band:
- Retrieve the spring bars that were previously removed and place one end of the spring bar into the lug of the watch case.
- Gently press down on the other end of the spring bar and slide it into the lug until it reaches the notch or hole.
- Repeat the above step for the other lug of the watch case.
- Ensure that the watch band is properly aligned with the case and that the spring bars are securely in place.
- Gently tug on the watch band to confirm that it is securely attached to the watch case.
It’s important to take your time during this step to ensure that the watch band is correctly reattached. If the spring bars are not properly inserted or secured, the watch band may become loose or detach from the watch case, potentially resulting in damage or loss of the timepiece.
Once you have reattached the watch band, give it a final inspection to confirm that it is aligned properly and securely fastened. The next step will guide you on testing the fit of your newly adjusted watch band.
Step 7: Test the Fit
Now that the watch band is reattached to the watch case, it’s time to test the fit and ensure that it feels comfortable on your wrist. Follow these steps to evaluate the fit of your adjusted watch band:
- Put the watch back on your wrist and fasten it to your desired tightness.
- Pay attention to how the watch sits on your wrist. It should feel secure without being overly tight or loose.
- Check for any discomfort or irritation caused by the watch band. It’s important that you can wear the watch comfortably for extended periods.
- Move your wrist around to ensure that the watch stays securely in place and doesn’t slide around excessively.
Take your time to evaluate the fit and make any necessary adjustments. If the watch band still feels too loose, you may need to remove an additional link. On the other hand, if the watch band feels too tight, you may need to consider adding a link back or exploring alternative adjustment options.
Remember, the goal is to have a watch band that fits comfortably and securely on your wrist, allowing you to wear your timepiece with confidence and enjoyment.
Once you have tested the fit and are satisfied with the comfort and security of your watch band, you can move on to the next step: adjusting the fit again if necessary.
Step 8: Adjust Again if Necessary
After testing the fit of your watch band, you may find that further adjustments are needed to achieve the perfect fit. Here’s what you can do if the watch band still requires fine-tuning:
- Assess the fit: Pay attention to any areas where the watch band feels too tight or loose. Identify the specific section of the band that needs adjustment.
- Repeat Steps 4 and 5: If the watch band is too loose, you can remove an additional link following the same process as in Step 4 and Step 5. Alternatively, if the band is too tight, consider adding a link back by reversing the link removal process.
- Make incremental adjustments: It’s a good idea to make small adjustments and test the fit after each modification. This way, you can avoid over- or under-adjusting the watch band.
- Ensure symmetry: If you remove or add links, make sure to maintain symmetry by adjusting an equal number of links on each side of the watch band. This will ensure a balanced appearance when worn.
Repeat these steps as necessary until you achieve the desired fit for your watch band. Remember to be patient and take your time to make precise adjustments for optimal comfort and appearance.
Once you have completed the fine-tuning process, proceed to the final step: cleaning the watch band to refresh its appearance and maintain its quality.
Step 9: Clean the Watch Band
After adjusting and securing the perfect fit for your watch band, it’s important to clean and maintain its appearance. Regular cleaning will help prolong the life of your watch band and keep it looking its best. Here’s how you can clean your watch band effectively:
- Prepare a cleaning solution: Fill a bowl with warm water and add a small amount of mild soap or watch cleaning solution. Mix the solution gently until it creates some foam.
- Dip a soft cloth or a toothbrush into the cleaning solution: Use the cloth or toothbrush to clean the surface of the watch band, paying special attention to any areas with dirt, residue, or grime. Be gentle to avoid scratching the band.
- For metal watch bands: If you have a metal watch band, you can also use a soft-bristled brush to reach crevices and remove stubborn dirt. Be cautious not to scrub too hard and damage the metal.
- For leather or fabric watch bands: If your watch band is made of leather or fabric, it’s best to use a mild leather cleaner or fabric-safe stain remover. Apply the cleaner according to the product’s instructions and use a soft cloth to gently remove any stains or dirt.
- Rinse and dry: After cleaning the watch band, rinse it thoroughly with clean water to remove any remaining soap or cleaning solution. Pat the band dry with a clean, lint-free cloth.
- Condition leather watch bands: If you have a leather watch band, consider applying a leather conditioner or moisturizer to keep the leather supple and prevent it from drying out. Follow the product’s instructions for application.
It’s important to note that not all watch bands are water-resistant or suitable for immersion in water. Take extra care when cleaning water-resistant watches to ensure that only the band comes into contact with water, while keeping the watch case and inner components protected.
By regularly cleaning and maintaining your watch band, you can keep it looking like new and extend its lifespan. Having a clean and well-maintained watch band enhances the overall appearance of your timepiece and ensures a pleasant wearing experience.
With the watch band now clean and fresh, you’re ready to enjoy your perfectly fitted and stylishly maintained timepiece.