
Tools Needed
Adjusting a metal watch band without pins requires a few essential tools. Having these tools handy will make the process much easier and help you achieve the desired fit for your watch. Here are the tools you’ll need:
- Flathead screwdriver or push pin
- Plastic tweezer or small needle-nose pliers
- Cleaning cloth
The flathead screwdriver or push pin will be used to remove the excess links from the watch band. Ensure that the screwdriver or push pin has a thin, flat head to fit into the link removal points. The plastic tweezer or small needle-nose pliers will come in handy for reattaching the clasp after the adjustment is made. These tools will allow you to grip and manipulate the small parts with precision.
Lastly, use a cleaning cloth to wipe down the watch band before and after making adjustments. This will help remove any dirt or residue that may have accumulated and ensure a polished final result.
With these tools ready, you can proceed to the next steps of adjusting your metal watch band without pins.
Step 1: Determine the Correct Size
Before adjusting your metal watch band, it’s crucial to determine the correct size to achieve a comfortable fit. Wearing a watch that is either too loose or too tight can be inconvenient and uncomfortable. Here’s how you can determine the correct size:
1. Measure your wrist: Use a flexible measuring tape or a piece of string to measure the circumference of your wrist. Make sure to measure it snugly but not too tight.
2. Add or subtract links: Most metal watch bands come with removable links, allowing you to customize the size. If the watch band is too loose, you will need to remove some links. If it’s too tight, you may need to add links from a spare band or take it to a professional.
3. Consider the style and preference: Besides the comfort, consider the desired look and feel of your watch. Some individuals prefer a looser fit for a casual look, while others prefer a snug fit for a formal appearance.
Once you have determined the correct size, you can proceed with adjusting your metal watch band without pins. Remember to take your time and follow each step carefully to avoid damaging your watch or the band.
Step 2: Locate the Link Removal Points
After determining the correct size for your metal watch band, the next step is to locate the link removal points. These are the areas where the links can be detached to adjust the length of the band. Here’s how you can find the link removal points:
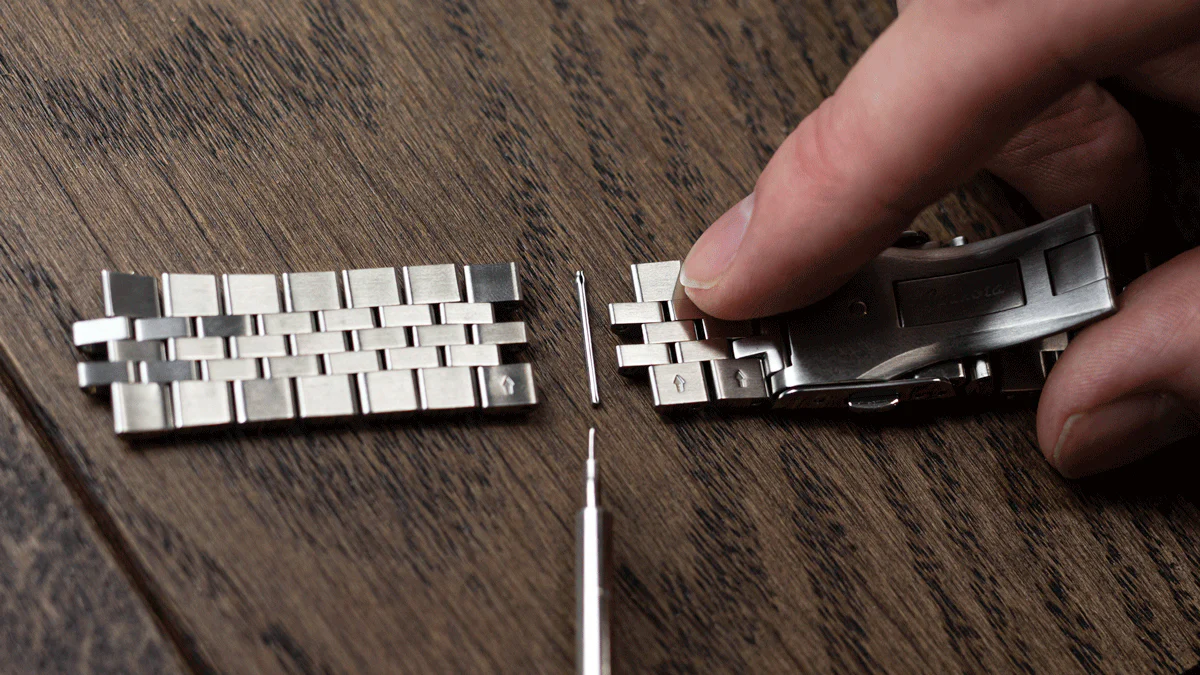
1. Examine the watch band: Carefully inspect the edges of the links on both sides of the band. Look for small arrows or indicators engraved on the inside of the links. These markings serve as a guide to locate the removable links.
2. Use a magnifying glass if necessary: Some link removal points may be quite small and difficult to see with the naked eye. If needed, use a magnifying glass or a smartphone camera with zoom functionality to get a closer view.
3. Count the number of links to be removed: Once you have located the removal points, count the number of links you need to remove based on the measurement you took earlier. It’s important to maintain symmetry by removing an equal number of links from both sides of the watch band.
Remember to be cautious while identifying the link removal points to avoid accidentally loosening or damaging the wrong links. Take your time to ensure you’re working on the correct ones. Once you have located the link removal points, you can proceed to the next step of adjusting your metal watch band without pins.
Step 3: Use a Flathead Screwdriver or Push Pin
With the link removal points located, it’s time to use a flathead screwdriver or push pin to remove the excess links from your metal watch band. These tools will help you detach the links and create a custom fit. Here’s how to proceed:
1. Position the watch band: Lay the watch band flat on a clean, stable surface to prevent any accidental slipping or damage to the watch. Ensure that the link removal points are facing upward and easily accessible.
2. Insert the tool: Take the flathead screwdriver or push pin and insert it into the hole of the link removal point. Apply gentle pressure and wiggle the tool slightly to loosen the pin or clasp that holds the links together. Be careful not to use excessive force to avoid damaging the band.
3. Push out the pin: Once you feel that the pin or clasp is loose, push it out in the direction indicated by the arrow or engraving on the link. You may need to repeat the process for each link you wish to remove. Keep the removed links aside for future use or safekeeping.
4. Maintain the integrity of the band: Be mindful of not scratching or scuffing the watch band during this step. If necessary, you can use a piece of cloth or a watch band holder to protect the band from any accidental damage caused by the tools.
By using a flathead screwdriver or push pin, you can safely and effectively remove the excess links from your metal watch band. Once the links are detached, you can proceed to the next step of adjusting the band to create the desired fit.
Step 4: Remove the Excess Links
After using a flathead screwdriver or push pin to loosen the link pins, it’s time to remove the excess links from your metal watch band. This step will help achieve the desired fit and ensure the watch sits comfortably on your wrist. Follow these steps to remove the excess links:
1. Separate the band: Gently pull apart the two ends of the watch band where you removed the link pins. This will create a gap and allow you to remove the necessary links without damaging the band.
2. Identify the excess links: Locate the links that you counted in Step 2 as the ones to be removed. These are the links that will create the perfect fit for your wrist.
3. Remove the excess links: Use your fingers or a pair of plastic tweezers to hold the excess links firmly. Wiggle the links slightly to loosen them from the band. Once loose, carefully pull the links out of the band. Set aside the removed links for safekeeping.
4. Reattach the band ends: After removing the excess links, bring the two ends of the watch band back together. Ensure that they align properly and fit snugly without any gaps or misalignment.
By removing the excess links, you are customizing the length of your metal watch band to fit your wrist perfectly. This allows for a comfortable and secure wearing experience. Once the excess links are removed, you can move on to the next step of adjusting the clasp.
Step 5: Reattach the Clasp
With the excess links removed, it’s time to reattach the clasp to secure your metal watch band. The clasp ensures that the watch stays securely in place on your wrist. Follow these steps to properly reattach the clasp:
1. Align the clasp pieces: Take a careful look at the clasp and identify the corresponding pieces that need to be attached. The clasp usually consists of two parts that fit together to create a secure closure.
2. Insert the pins: Gradually insert the link pins or screws into the holes provided on the clasp pieces. You may need to use a pair of plastic tweezers or small needle-nose pliers to help guide and position the pins accurately.
3. Secure the clasp: Once the pins are inserted, make sure they are fully pushed in and secure. Gently wiggle the clasp to ensure it is tight and doesn’t move around. This will help prevent accidental opening of the clasp while wearing the watch.
4. Double-check the alignment: Take a closer look at the reattached clasp to ensure that the alignment is correct. The clasp pieces should fit flush together without any visible gaps or misalignment.
By reattaching the clasp, you are ensuring that your metal watch band stays securely fastened and comfortable to wear. A properly attached clasp adds both functionality and aesthetics to your watch, giving it a polished and finished look.
Once the clasp is securely attached, you can proceed to the next step of testing the fit of your adjusted metal watch band.
Step 6: Test the Fit
After reattaching the clasp, it’s essential to test the fit of your adjusted metal watch band. This step ensures that the watch fits comfortably and securely on your wrist. Follow these steps to check the fit:
1. Put on the watch: Slide the metal watch band onto your wrist and fasten the clasp. Ensure that it is secure but not too tight, allowing for a comfortable fit.
2. Assess the fit: Pay attention to how the watch band feels on your wrist. It should not be too loose, as the watch may shift or slide around. It should also not be too tight, as this can restrict movement and cause discomfort.
3. Check the spacing: Examine the spacing between the watch band and your wrist. There should be a little room for movement without being overly loose. A properly fitted watch band allows for the insertion of one or two fingers between the band and your wrist.
4. Verify the comfort: Move your wrist around and perform common activities to ensure that the watch band remains comfortable and doesn’t pinch or irritate your skin. A well-fitted metal watch band should feel snug but not constricting.
By testing the fit, you can guarantee that your adjusted metal watch band provides the perfect balance of security and comfort. If the fit feels off, you may need to repeat the previous steps and make further adjustments by removing or adding links to achieve the desired fit.
Take your time to make any necessary modifications until you find the ideal fit that suits your wrist perfectly. Once you are satisfied with the fit, you can move on to the optional steps of cleaning and polishing your watch band for a polished appearance.
Step 7: Repeat if Necessary
After testing the fit of your adjusted metal watch band, you may find that further modifications are needed to achieve the desired comfort and fit. Don’t worry—adjusting a watch band is a process of trial and error, and it may require repeating certain steps. Here’s what to do if further adjustments are necessary:
1. Evaluate the fit: Pay attention to any areas of discomfort or looseness that you noticed during the fit test. Assess whether the watch band needs to be further tightened or loosened to provide a better fit.
2. Remove or add links: If the watch band feels too tight, you may need to remove additional links by repeating Steps 2, 3, and 4. On the other hand, if the band is too loose, you may need to add links from a spare band or seek the assistance of a professional.
3. Reattach the clasp: Once the necessary adjustments are made to the band length, ensure that the clasp is securely reattached following Step 5. Double-check the alignment and the tightness of the clasp to ensure it stays in place.
4. Retest the fit: Repeat Step 6 to test the fit once again. Slide the watch band onto your wrist and evaluate its comfort, security, and spacing. Make note of any further adjustments needed to achieve the perfect fit.
Remember, adjusting a metal watch band without pins may require multiple iterations to achieve the desired fit. Take your time, be patient, and make necessary adjustments until you are completely satisfied with the comfort and appearance of your watch.
Once you are confident with the fit, you can move on to the optional final step of cleaning and polishing the watch band to keep it looking its best.
Step 8: Clean and Polish the Watch Band
After adjusting your metal watch band without pins, it’s time to give it a clean and polished finish. Cleaning and polishing the watch band helps remove dirt, smudges, and fingerprints, restoring its shine and enhancing its overall appearance. Follow these steps to clean and polish your watch band:
1. Prepare a cleaning solution: Fill a small bowl or sink with warm water and add a mild soap or dish detergent. Stir the water gently to create a soapy solution.
2. Dip a cloth in the solution: Take a soft, lint-free cloth and dip it into the soapy water. Ensure the cloth is damp, but not dripping wet.
3. Clean the watch band: Gently wipe the entire surface of the watch band with the damp cloth, paying attention to any areas with visible dirt or marks. Use light, circular motions to clean the band thoroughly.
4. Rinse the band: Once the band is cleaned, rinse it under running water to remove any soap residue. Ensure that all soap is thoroughly washed off to prevent any potential damage to the band.
5. Dry the band: Use a clean, dry cloth to gently pat the watch band dry. Ensure that it is completely dry before continuing to the next step.
6. Apply a metal polish (optional): If your watch band is made of stainless steel, you can use a metal polish specifically designed for stainless steel to enhance its shine. Follow the instructions provided with the metal polish to apply and buff the polish onto the band.
7. Buff the band: Take a soft, lint-free cloth and gently buff the entire surface of the watch band in circular motions. This will help remove any remaining smudges and bring out the shine of the metal.
8. Inspect the band: Once you have cleaned and polished the band, examine it closely to ensure that it looks clean, shiny, and free of any residue or smudges.
By cleaning and polishing your watch band, you not only maintain its appearance but also extend its lifespan. Regular cleaning and maintenance will keep your watch looking its best and ensure that it continues to complement your style for years to come.