
Choose the Right Tools
When it comes to shortening a metal watch band, having the right tools is essential. With the correct equipment, the process can be smooth and straightforward. Here are the tools you’ll need to get the job done:
- Spring Bar Tool: This specialized tool is designed to remove and insert spring bars, which hold the watch band links together. Look for a spring bar tool that has a fine tip for precision and ease of use.
- Pliers: A pair of small, flat-nose pliers will come in handy for manipulating the pins and removing the required links from the watch band. Ensure that the pliers have a comfortable grip for better control during the process.
- Microfiber Cloth: It’s important to have a soft, lint-free cloth to protect the surface of the watch band and prevent scratches. The microfiber cloth will help you clean the watch band and keep it looking its best.
- Workspace: Find a well-lit area with enough space to comfortably work on the watch band. It’s advisable to use a clean surface, such as a table or desk, to avoid losing any small parts during the process.
Having these tools ready before you start will ensure that you can complete the task without any hiccups. It’s important to note that not having the right tools can make the process more challenging and increase the risk of damaging the watch band. Therefore, taking the time to gather the necessary tools beforehand will save you time, effort, and potential frustration.
Remove the Links
Once you have the necessary tools, it’s time to start removing the links from the metal watch band. Follow these steps to successfully remove the required links:
- Locate the Pins: Look for the spring bar pins that hold the links together. These pins are usually visible on the sides of the watch band. Use the magnifying glass if needed to ensure you don’t miss any pins.
- Position the Watch Band: Lay the watch band on a clean and flat surface with the clasp facing up. This position will make it easier to detach the links and ensure you don’t scratch the watch face.
- Loosen the Pins: Insert the fine tip of the spring bar tool into the pinhole located on the side of the first link you want to remove. Gently twist the tool to release the pressure and loosen the pin from its position.
- Remove the Required Links: Once the pin is loose, use the small, flat-nose pliers to pull out the pin from the link. Remove enough links to achieve the desired length, keeping in mind the desired fit of the watch on your wrist.
- Reattach the Clasp: Once you have removed the necessary links, it’s time to reattach the clasp. Align the remaining links with the clasp and insert the pins back into the pinholes. Use the spring bar tool to secure the pins in place.
It’s important to maintain caution and gentle force while removing the links to prevent any damage to the watch band or the pins. Take your time and ensure that each pin is properly inserted and secured, as a loose pin can cause the watch band to become loose or even fall off. By following these steps, you can successfully remove the required links and customize the watch band length to achieve the perfect fit.
Determine How Many Links to Remove
Before you begin removing links from your metal watch band, it’s important to determine how many links need to be removed to achieve the desired fit. Here’s how you can accurately determine the number of links to remove:
- Measure Your Wrist: Use a flexible measuring tape or a piece of string to measure the circumference of your wrist. Make sure the tape or string is snug but not too tight.
- Consider Sizing Guidelines: Most watch manufacturers provide sizing guidelines to help you determine the appropriate number of links to remove. These guidelines may be found in the watch’s instruction manual or on the manufacturer’s website. Take note of any specific recommendations.
- Test the Fit: Wrap the watch band around your wrist and secure it with the clasp. Check how the watch band feels on your wrist. Ideally, you want it to be snug but not uncomfortable. It should sit comfortably on the wrist without sliding around or leaving imprints.
- Adjust Gradually: If this is your first time shortening a watch band, it’s best to remove links gradually. It’s easier to remove more links later if needed, compared to adding them back. Start by removing one or two links and test the fit again. Repeat the process until you achieve the desired fit.
Keep in mind that everyone’s wrist size and personal comfort preferences vary. Some individuals prefer a looser fit, while others prefer a tighter fit. It’s important to find a balance that suits your preferences while ensuring the watch remains secure on your wrist.
By following these steps, you can accurately determine the number of links to remove from your metal watch band. Taking the time to carefully measure and adjust will result in a watch that fits comfortably and enhances your overall wearing experience.
Loosen the Pins
To successfully remove links from a metal watch band, you’ll need to loosen the pins that hold the links together. Follow these steps to loosen the pins effectively:
- Position the Watch Band: Lay the watch band on a clean and stable surface, ensuring that the clasp is facing up. This position allows for easier access to the pins and reduces the risk of scratching the watch face.
- Identify the Pinholes: Examine the sides of the watch band and locate the pinholes. These small holes indicate where the pins are inserted to connect the links.
- Use the Spring Bar Tool: Take the spring bar tool, which should have a fine tip, and insert it into the pinhole of the link you want to remove. Apply gentle pressure and twist the tool slightly to release the pin from its position.
- Repeat the Process: Move along the watch band, loosening one pin at a time for each link you plan to remove. Take your time and be careful not to exert excessive force to avoid damaging the pins or the watch band.
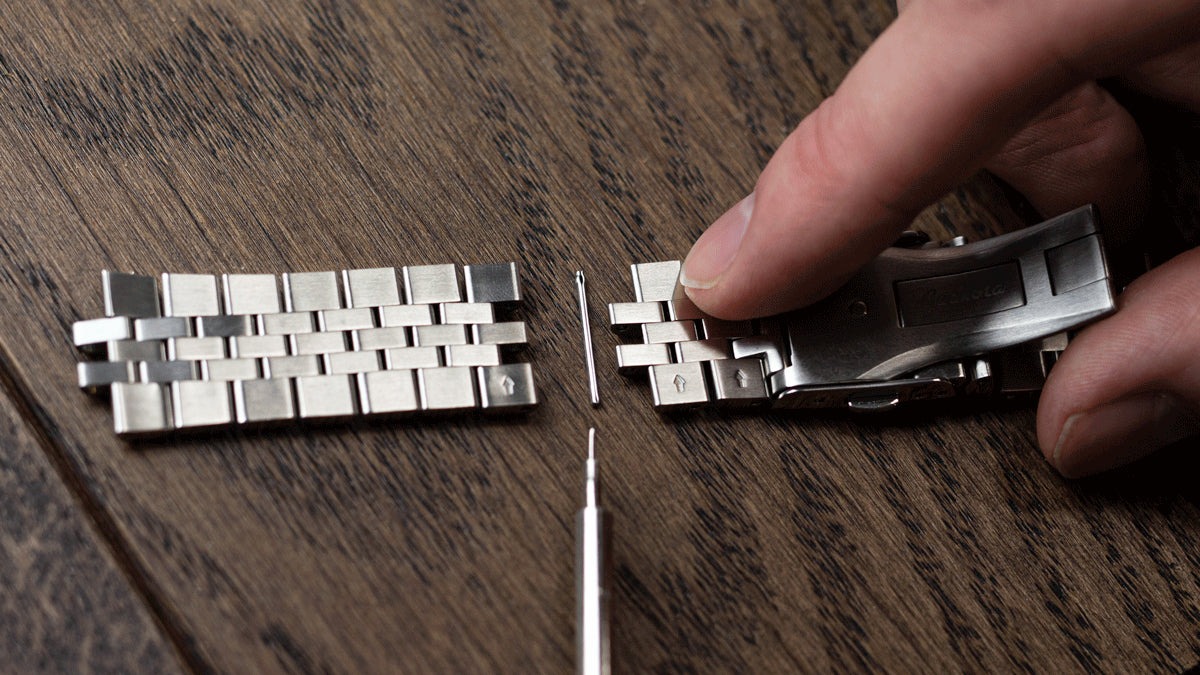
It’s important to note that some watch bands may have arrows or indicators on the backside to indicate the direction in which the pins should be pushed out. Pay attention to these indicators during the pin removal process.
In cases where the pins are tightly secured, applying a small amount of lubricant, such as silicone grease or watch oil, to the pinholes can facilitate easier pin removal. However, avoid using excessive lubrication, as it can attract dirt and debris, potentially affecting the performance of the watch band.
By following these steps, you’ll be able to loosen the pins in your metal watch band, making it easier to remove the necessary links. Remember to take your time and exercise caution throughout the process to minimize the risk of damage to the watch band or pins.
Remove the Required Links
Once you have loosened the pins in your metal watch band, it’s time to remove the required links to achieve the desired length. Follow these steps to successfully remove the links:
- Identify the Links: Determine the specific links that need to be removed based on your wrist size and the desired fit of the watch band. It’s important to consider both sides of the clasp to ensure a balanced length adjustment.
- Use the Pliers: Take the small, flat-nose pliers and grip the pin firmly that connects the link you want to remove. Gently pull the pin out of the pinhole, applying equal force on both sides until the link is detached from the watch band. Set the removed link aside.
- Repeat the Process: If multiple links need to be removed, repeat the process for each one. Take your time and be careful not to damage the watch band or the pins during this step.
It’s important to note that different watch bands may have variations in link design and pin types. Some watch bands may have split pins that require you to push them out from one side, while others may have solid pins that need to be fully pulled out. Ensure that you understand the specific mechanism of your watch band before attempting to remove the links.
If you encounter any difficulty while removing a pin or if it feels stuck, stop and reassess the situation. Applying excessive force or using improper techniques can lead to damage. It may be helpful to seek the assistance of a professional watchmaker or jeweler for challenging cases.
By following these steps and exercising patience and care, you can successfully remove the required links from your metal watch band. This adjustment will ensure a comfortable fit and enhance your wearing experience.
Reattach the Clasp
After removing the necessary links from your metal watch band, it’s time to reattach the clasp. Follow these steps to securely reattach the clasp:
- Arrange the Remaining Links: Align the remaining links of the watch band with the clasp. Ensure that the links are in the correct order and position for a symmetrical and balanced appearance.
- Insert the Pins: Take the pins that were removed earlier and insert them back into the pinholes of the links, starting from one side of the clasp. Hold the pin in place and gently insert it into the pinhole until it is securely seated. Repeat this process for each pin and link.
- Use the Spring Bar Tool: To properly secure the pins in place, use the spring bar tool. Insert the fine tip of the tool into the pinhole and gently push down or twist the tool to ensure the pin is fully inserted and locked in position. This will prevent the pins from coming loose during wear.
- Check for Security: Once you have reattached the clasp, check the links to ensure they are securely connected and there is no visible gap or movement. Give the watch band a gentle tug to confirm that it is well-fastened.
It’s important to note that precision and attention to detail are crucial during the reattachment process. Taking the time to properly align the links and securely insert the pins will ensure a sturdy and comfortable fit for your watch band.
If you find that the pins are not fitting securely, they may need to be adjusted or replaced. In such cases, it’s advisable to seek the assistance of a professional watchmaker or jeweler to ensure proper functionality.
By following these steps, you can reattach the clasp of your metal watch band, completing the process of shortening the band to achieve the desired fit. Take a moment to admire your work, and enjoy wearing your watch with the perfect length strap.
Check the Fit
After reattaching the clasp and completing the process of shortening your metal watch band, it’s crucial to check the fit to ensure that it’s comfortable and secure on your wrist. Here’s how you can assess the fit of your newly adjusted watch band:
- Wear the Watch: Fasten the clasp and wear the watch on your wrist. Pay attention to how it feels in terms of comfort and whether it sits snugly on your wrist without being too tight or too loose.
- Movement Test: Move your wrist and arm in various directions to see if the watch band stays in place. It should not slide around or feel unstable during normal movements.
- Skin Contact: Ensure there is no pinching, rubbing, or discomfort caused by the watch band on your skin. The watch should feel comfortable and not cause any irritation or soreness.
- Check Appearance: Examine the look and aesthetics of the watch band on your wrist. Ensure that it suits your style and satisfies your visual preferences.
If the fit feels too tight or too loose, you may need to make further adjustments by removing or adding additional links. Remember to remove links gradually to avoid shortening the watch band excessively.
It’s important to note that personal comfort and preferences vary. Some individuals prefer a looser or tighter fit. Ultimately, the perfect fit is subjective and depends on your own comfort level and style.
By thoroughly checking the fit of your metal watch band, you can ensure that it enhances your wrist and complements your overall look. It should feel comfortable, secure, and visually appealing. Don’t hesitate to make further adjustments until you achieve the perfect fit for your wrist.
Secure the Pins
After confirming that the fit of your metal watch band is comfortable and satisfactory, it’s important to take the necessary steps to securely fasten the pins. This will ensure that the links remain in place during daily wear. Follow these guidelines to properly secure the pins:
- Inspect the Pins: Double-check the inserted pins to ensure they are fully seated and aligned with the pinholes in the watch band links. Ensure there are no visible gaps or protruding pins.
- Apply Gentle Pressure: Use your fingers or the spring bar tool to apply gentle pressure on the pins to make sure they are securely in place. This will help prevent unexpected loosening or dislodging of the pins.
- Test the Watch Band: Give the watch band a gentle tug to determine if the pins are securely fastened. If the band feels stable and the links do not separate or move excessively, then the pins are properly secured.
- Regularly Inspect and Maintain: Periodically inspect the pins and links of your watch band for any signs of wear or potential issues. If you notice any loose pins or damaged links, it’s advisable to have them repaired or replaced by a professional to prevent further damage or loss.
It’s important to note that even with properly secured pins, regular maintenance and care are essential for the longevity of your watch band. Avoid excessive force or impacts that may put stress on the pins and links, as this can lead to premature wear or damage.
Additionally, it’s recommended to periodically clean your watch band using a soft, lint-free cloth to remove any dirt or residue. This will help maintain its appearance and prevent any potential build-up that could affect the performance of the pins and links.
By ensuring the pins are correctly secured and maintaining the watch band, you can enjoy your metal watch with confidence, knowing that it will stay in place and provide both comfort and style.