
Method 1: Using File Explorer Options
One of the simplest ways to show or hide hidden files and folders in Windows is through the File Explorer options. Follow these steps:
- Open File Explorer by pressing the Windows key + E or by clicking on the File Explorer icon on the taskbar.
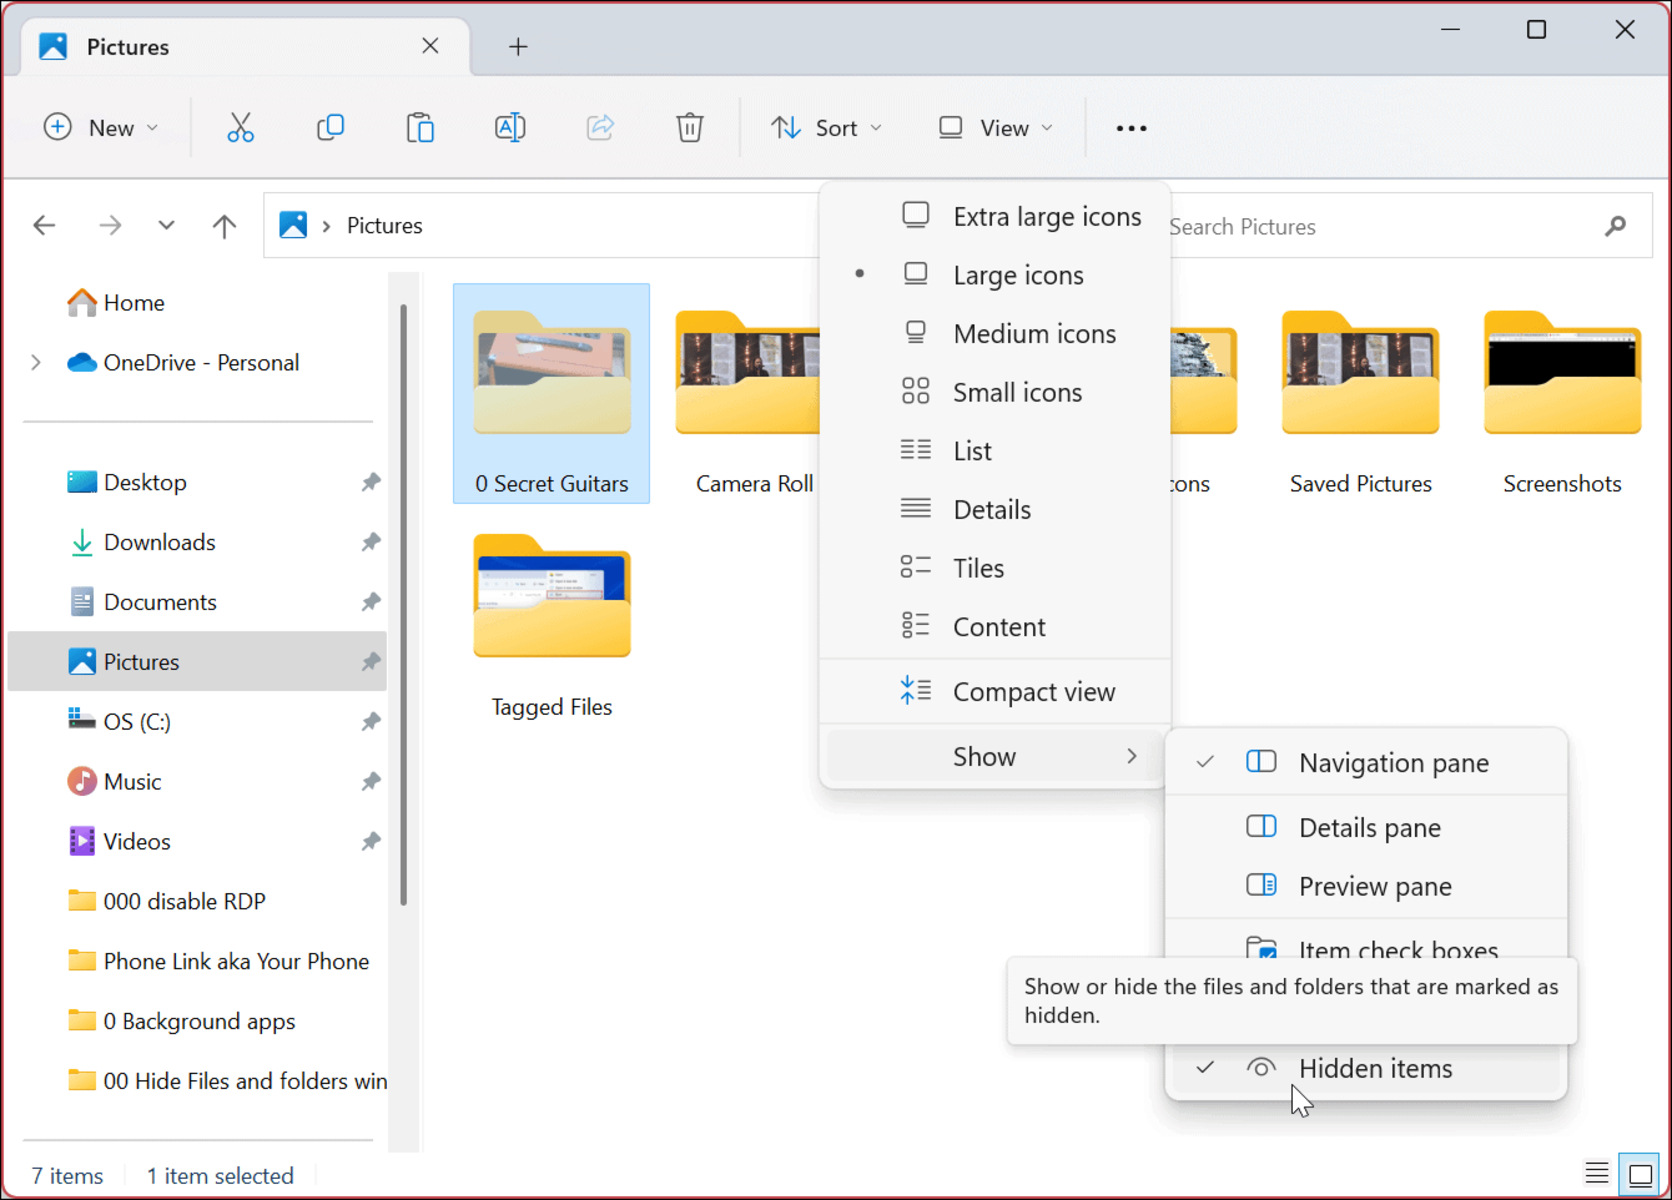
- Click on the “View” tab at the top of the File Explorer window.
- In the “Show/hide” section, check the box for “Hidden items”.
- If you want to hide the hidden files and folders again, simply uncheck the box for “Hidden items”.
Once you have checked the “Hidden items” box, you will be able to see any hidden files and folders in File Explorer. They will be displayed with a slightly faded or transparent icon to indicate their hidden status.
This method allows you to easily toggle the visibility of hidden files and folders, giving you control over what you see in File Explorer. It is especially useful when you need to access system files or folders that are typically hidden to prevent accidental modification or deletion.
By showing hidden files and folders, you can troubleshoot certain issues, customize your system, or perform advanced tasks that require access to hidden elements.
Keep in mind that revealing hidden files and folders should be done with caution, as modifying or deleting them could potentially cause system instability or security risks. It’s important to have a good understanding of what you are doing and proceed with caution.
Now that you know how to show or hide hidden files and folders using the File Explorer options, you can easily navigate through your system’s files and folders, even if they are marked as hidden.
Method 2: Using Command Prompt
If you prefer using the command line interface, you can also show or hide hidden files and folders in Windows using the Command Prompt. Here’s how:
- Open the Command Prompt by pressing the Windows key + R, typing “cmd”, and pressing Enter.
- In the Command Prompt window, navigate to the directory where you want to show or hide the hidden files and folders. You can use the “cd” command followed by the directory path to navigate.
- To show hidden files and folders, type
attrib -s -h *and press Enter. This command removes the “System” and “Hidden” attributes from all files and folders in the current directory. - To hide hidden files and folders again, type
attrib +s +h *and press Enter. This command adds the “System” and “Hidden” attributes back to all files and folders in the current directory.
Using the Command Prompt method gives you more control and flexibility over the process of showing or hiding hidden files and folders. You can apply the commands to specific directories or include additional parameters to modify the attributes of the files and folders.
This method is particularly useful if you need to automate the process of showing or hiding hidden files and folders, or if you prefer working with the command line interface instead of the graphical user interface.
Remember to exercise caution when using the Command Prompt, as any changes you make will directly affect the system files and folders. It is recommended to have a good understanding of the commands and their implications before proceeding.
Now that you know how to show or hide hidden files and folders using the Command Prompt, you can easily manage the visibility of these files and folders in your Windows system.
Method 3: Using Registry Editor
An alternative method to reveal or hide hidden files and folders in Windows is by utilizing the Registry Editor. However, please exercise caution when making changes to the registry as it can impact the stability and functionality of your system. Follow these steps:
- Open the Run dialog by pressing the Windows key + R and type “regedit” before hitting Enter. This will launch the Registry Editor.
- Navigate to the following registry key:
HKEY_CURRENT_USER\Software\Microsoft\Windows\CurrentVersion\Explorer\Advanced. - Look for a DWORD value called “Hidden” on the right-hand side pane. If it doesn’t exist, right-click on a blank space, select “New,” and choose “DWORD (32-bit) Value” to create it.
- Double-click on the “Hidden” value and set its data to “1” to show hidden files and folders or “2” to hide them.
- Click “OK” to save the changes.
By modifying the “Hidden” value in the registry, you can control the visibility of hidden files and folders throughout Windows Explorer.
It’s worth mentioning that any changes made to the registry take effect immediately, without the need to reboot the system. However, incorrect modifications to the registry can have serious consequences, so proceed with caution and create a backup of the registry before making any changes.
The Registry Editor method provides a more advanced level of control over hidden files and folders, allowing you to fine-tune their visibility to suit your preferences or requirements.
Now that you know how to show or hide hidden files and folders using the Registry Editor, you can easily customize the visibility of these items according to your needs.
Method 4: Using Group Policy Editor (Windows 10 Pro and Enterprise only)
If you are using Windows 10 Pro or Enterprise, you can utilize the Group Policy Editor to show or hide hidden files and folders with additional customization options. Follow the steps below:
- Press the Windows key + R to open the Run dialog, then type “gpedit.msc” and hit Enter. This will launch the Group Policy Editor.
- In the Group Policy Editor window, navigate to “User Configuration” > “Administrative Templates” > “Windows Components” > “File Explorer”.
- Locate the “Show hidden files and folders” policy on the right-hand side pane and double-click on it.
- Select the “Enabled” option to show hidden files and folders, or choose “Disabled” to hide them.
- Click “Apply” and then “OK” to save the changes.
The Group Policy Editor method provides a centralized way to manage hidden files and folders across multiple user accounts and computers in a network. It offers more granular control over the visibility of these items, allowing you to enforce specific settings for your organization or personal use.
Keep in mind that the Group Policy Editor is only available in Windows 10 Pro and Enterprise editions. If you are using Windows 10 Home or another edition, this method may not be applicable.
By leveraging the power of Group Policy Editor, you can easily control the visibility of hidden files and folders, ensuring that your system settings align with your organization’s policies or personal preferences.
Now that you know how to show or hide hidden files and folders using the Group Policy Editor, you can fully utilize this feature in Windows 10 Pro and Enterprise editions to meet your specific requirements.