
Choose the Right Version of Excel
Microsoft Excel is a versatile spreadsheet program that comes in various versions. While all versions offer basic spreadsheet functionality, there are key differences between them that can impact your sharing options. It’s important to choose the right version of Excel based on your specific needs and the intended recipients of the shared file.
For most users, the two main versions of Excel are Microsoft Excel for Windows and Microsoft Excel for Mac. These versions have similar core features but may have minor differences in terms of functionality and user interface. If you are sharing an Excel file with someone using a different operating system, make sure to consider compatibility issues and choose the appropriate version accordingly.
Additionally, there are different editions of Excel available, such as Excel Online, Excel for Microsoft 365, and Excel for Office Home & Student. These versions often offer collaboration features, cloud storage integration, and real-time editing capabilities, which can be beneficial when sharing files with multiple users.
When deciding on the right version of Excel, consider the following factors:
- Compatibility: Ensure that the recipient can access and work with the Excel version you choose.
- Collaboration: Determine if you need real-time collaboration features or if the file will be shared for viewing purposes only.
- Cloud Integration: Evaluate if you want to store the Excel file in the cloud for easy access and sharing.
- Advanced Features: Assess if you require specific advanced features that are only available in certain versions of Excel.
By selecting the right version of Excel, you can ensure compatibility and optimize the sharing experience for both you and the intended recipients. Take into account the specific needs and preferences of those involved to make an informed decision on the most suitable version of Excel for your sharing requirements.
Save Your Excel File in a Shareable Format
Before sharing an Excel file, it is essential to save it in a shareable format to ensure that others can open and view its contents without any compatibility issues. Here are some key steps to follow when saving your Excel file:
1. Choose the appropriate file format: Excel offers various file formats, such as .xlsx (default format), .xls (compatible with older versions), and .csv (comma-separated values). Consider the compatibility requirements of the recipients and select a format that suits their needs.
2. Remove external references: If your Excel file contains external references to other files or data sources, it may cause issues when shared. To avoid this, remove or update any external references to ensure that all the data remains self-contained within the file itself.
3. Check for hidden data: Hidden data, such as hidden sheets or cells, can inadvertently be shared with others. Prior to sharing, double-check your Excel file for any hidden elements and make sure to unhide or remove them if necessary.
4. Include headers and footers: If your Excel file contains important headers or footers, ensure that they are properly included when saving. This can provide context to the recipients and make the shared file more informative and user-friendly.
5. Optimize file size: Depending on the size and complexity of your Excel file, it may be beneficial to optimize the file size before sharing. You can do this by removing unnecessary formatting, reducing the number of calculations, or compressing images within the file.
6. Protect sensitive information: If your Excel file contains sensitive data, consider applying password protection or encryption to ensure that only authorized individuals can access and view the information. This adds an extra layer of security to your shared file.
7. Perform a final review: Before sharing your Excel file, take a moment to review the content, formulas, and formatting to ensure everything is accurate and error-free. This helps avoid any misunderstandings or confusion when the file is opened by others.
By following these steps and saving your Excel file in a shareable format, you can ensure that the intended recipients can easily open, view, and work with the file without encountering any compatibility issues or data loss. Taking the time to prepare your file for sharing will enhance the overall collaboration experience and make it more convenient for everyone involved.
Share an Excel File with OneDrive or SharePoint
One of the most convenient ways to share an Excel file is through Microsoft’s cloud-based storage and collaboration platforms, such as OneDrive and SharePoint. These platforms offer seamless file sharing, real-time collaboration, and version control capabilities. Here’s how you can share an Excel file using OneDrive or SharePoint:
1. Save the Excel file to OneDrive or SharePoint: If your Excel file is not already saved on OneDrive or SharePoint, you will need to upload it to one of these platforms. Simply open the Excel file and choose the option to save it to your desired location on OneDrive or SharePoint.
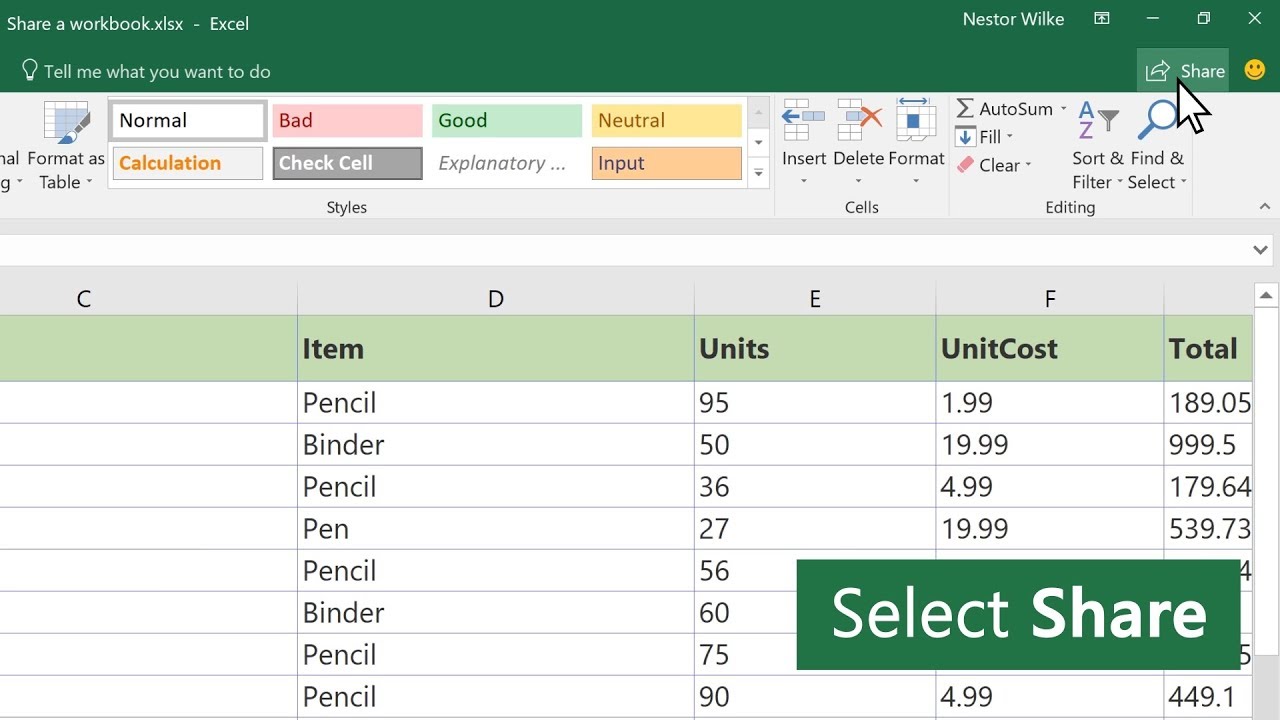
2. Open the sharing options: Once the Excel file is saved in OneDrive or SharePoint, navigate to the file and select the share button or right-click on the file and choose the “Share” option from the context menu.
3. Specify the recipients: Enter the email addresses of the individuals you want to share the file with. You can also specify whether they should have viewing or editing permissions. Optionally, you can add a message to provide additional context or instructions.
4. Customize sharing settings: OneDrive and SharePoint offer various options to customize the sharing settings. You can choose whether the recipients can edit the file, allow them to make a copy, set an expiration date for the shared link, and even enable password protection for an extra layer of security.
5. Send the sharing invitation: Once you have configured the sharing settings, click on the “Send” or “Share” button to send the sharing invitation to the specified recipients. They will receive an email notification with a link to the shared Excel file.
6. Collaborate in real-time: When the recipients open the shared Excel file, they can collaborate with you in real-time. They can make changes, add comments, and communicate with you directly within the Excel file. All changes will be synchronized and visible to all collaborators instantly.
7. Manage permissions: As the owner of the shared Excel file, you can easily manage the permissions of the recipients. You can revoke access, change the level of permission, or add new recipients to the sharing list as needed.
Sharing an Excel file with OneDrive or SharePoint offers a seamless and efficient way to collaborate with others. Whether you are working on a project with colleagues or sharing financial data with clients, leveraging the power of cloud storage and collaboration platforms can greatly enhance productivity and streamline the sharing process.
Share an Excel File via Email
Email remains one of the most commonly used methods for sharing files, including Excel files. It provides a quick and straightforward way to send files to recipients. Here’s how you can share an Excel file via email:
1. Compose a new email: Open your email client or webmail service and start composing a new email message.
2. Attach the Excel file: Look for the “Attach” or “Attach File” option in the email composition window. Click on it and navigate to the folder where your Excel file is saved. Select the file and click “Open” to attach it to the email.
3. Customize the email: Add the recipient’s email address in the “To” field. You can also add a subject line to provide a brief description of the attached Excel file. Additionally, you may want to include a message in the body of the email to provide instructions or context for the recipient.
4. Review and send: Before sending the email, double-check that the attached Excel file is correct and that all the other details are accurate. Once you are satisfied, click on the “Send” button to share the Excel file via email.
5. Consider file size limitations: Keep in mind that some email services have limitations on the file size that can be attached. If your Excel file exceeds the size limit, you may need to compress it or use a file-sharing service instead.
6. Follow up or track the email: If necessary, you can follow up with the recipient to ensure that they received the email and were able to download the attached Excel file successfully. You can also use read receipt or tracking features, depending on the capabilities of your email client, to monitor if the recipient has opened the email or accessed the attached file.
7. Encourage security practices: When sharing sensitive or confidential information through email, it’s important to encourage the recipient to follow good security practices. This includes using strong passwords, not forwarding the email or file to unauthorized parties, and deleting the email once they have downloaded and saved the Excel file.
While email is a widely used method for sharing Excel files, it may not be ideal for real-time collaboration or when multiple users need to work on the same file simultaneously. In those cases, utilizing collaboration platforms or file-sharing services may be more suitable.
Sharing an Excel file via email provides a simple and effective way to send files to recipients. By following these steps and considering the limitations and security aspects, you can ensure that your Excel file reaches the intended recipients efficiently and securely.
Share an Excel File through a Shared Network Drive
Sharing an Excel file through a shared network drive is a common method used within organizations to collaborate on files. A shared network drive allows multiple users to access and work on the same Excel file that is stored on a centralized server. Here’s how you can share an Excel file through a shared network drive:
1. Locate the shared network drive: You need to identify the network drive that has been set up for sharing files within your organization. This drive is typically mapped to a specific letter on your computer, such as “Z:” or “S:”. Contact your IT department if you are unsure where the shared network drive is located.
2. Navigate to the Excel file: Using your file explorer, navigate to the folder on the shared network drive where the Excel file is stored.
3. Copy or move the Excel file: If the Excel file is not in the designated folder, copy or move it to the appropriate location on the shared network drive so that other users can access it.
4. Notify collaborators: Inform the intended collaborators of the Excel file’s location on the shared network drive. You can send them a message or email with the file path or provide instructions on how to navigate to the file.
5. Access the Excel file: Other users who have access to the shared network drive can now open the Excel file directly from the shared folder. They can double-click on the file, and it will open in Microsoft Excel on their computer.
6. Collaborate on the Excel file: Users can make changes to the Excel file, add comments, and save their modifications. These changes are visible to all other users who have the file open, enabling real-time collaboration on the same file.
7. Resolve conflicts and save updates: In situations where multiple users make changes to the Excel file simultaneously, conflicts may arise. Microsoft Excel provides tools to resolve conflicts and merge changes. Ensure that all users save their updates to the file regularly to maintain updated versions.
Sharing an Excel file through a shared network drive is an effective way to collaborate within an organization. It provides a centralized location for file storage and enables multiple users to access and work on the same file concurrently. However, keep in mind that this method may have limitations when collaborating with external parties or when working remotely.
By following these steps, you can easily share an Excel file through a shared network drive, fostering collaboration and streamlining file management within your organization.
Share an Excel File with OneDrive for Business
OneDrive for Business is a cloud storage and collaboration platform offered by Microsoft specifically designed for businesses and organizations. It provides a secure and efficient way to share Excel files with colleagues and collaborators. Here’s how you can share an Excel file with OneDrive for Business:
1. Upload the Excel file to OneDrive for Business: If your Excel file is not already saved in your OneDrive for Business account, you will need to upload it. Open OneDrive for Business and navigate to the desired folder where you want to store the file. Click on the “Upload” button and select the Excel file from your computer to upload it to your OneDrive for Business.
2. Select the Excel file: Once the Excel file is uploaded, locate the file in your OneDrive for Business folder.
3. Click on the “Share” button: In OneDrive for Business, select the Excel file and click on the “Share” button located in the toolbar at the top of the page.
4. Enter recipient’s email address: In the sharing panel that appears, enter the email addresses of the individuals or groups you want to share the Excel file with. You can also customize their permissions, allowing them to view or edit the file.
5. Customize sharing settings: OneDrive for Business provides various options to customize sharing settings. You can choose whether recipients can edit the file, set an expiration date for the shared link, and even enable password protection for an additional layer of security.
6. Include a message (optional): In the sharing panel, you can include a message to provide context or additional instructions to the recipients. This message will be included in the email notification they receive.
7. Send the sharing invitation: Once you have configured the sharing settings and included a message, click on the “Send” button to send the sharing invitation to the specified recipients. They will receive an email notification with a link to access the shared Excel file.
8. Collaborate and track changes: When the recipients open the shared Excel file, they can collaborate with you and others in real time. They can make changes, add comments, and communicate within the Excel file. OneDrive for Business allows you to track changes, view version history, and revert to previous versions if needed.
OneDrive for Business provides a secure and efficient platform for sharing Excel files within a business or organizational setting. By following these steps, you can easily share Excel files with colleagues and collaborators, enabling seamless collaboration and document management.
Share an Excel File with Google Drive
Google Drive is a popular cloud storage and collaboration platform that offers a convenient way to share Excel files with others. Whether you are working on a project with colleagues or sharing data with clients, Google Drive provides a user-friendly interface and robust collaboration features. Here’s how you can share an Excel file with Google Drive:
1. Upload the Excel file to Google Drive: If your Excel file is not already saved in Google Drive, you will need to upload it. Open Google Drive and click on the “New” button. Then, select “File upload” and choose the Excel file from your computer to upload it to Google Drive.
2. Locate the Excel file: Once the Excel file is uploaded to Google Drive, locate it in the appropriate folder within your Google Drive.
3. Right-click on the Excel file: Right-click on the Excel file you want to share. This will open a context menu with various options.
4. Click on the “Share” option: In the context menu, click on the “Share” option to open the sharing settings for the Excel file.
5. Enter the email addresses: In the sharing settings, enter the email addresses of the individuals or groups you want to share the Excel file with. You can choose whether they have viewing or editing permissions.
6. Customize advanced settings: Google Drive allows you to customize advanced sharing settings such as allowing recipients to reshare the file, preventing them from downloading or copying the file, and setting an expiration date for the shared link.
7. Include a message (optional): If desired, you can include a message in the sharing settings to provide additional instructions or context to the recipients.
8. Send the sharing invitation: After configuring the sharing settings, click on the “Send” button to send the sharing invitation to the specified recipients. They will receive an email notification with a link to access the shared Excel file on Google Drive.
9. Collaborate and track changes: When the recipients open the shared Excel file, they can collaborate with you in real-time. Multiple users can make changes, add comments, and communicate within the Excel file, and the changes are synchronized and visible to all collaborators instantly. Google Drive also provides version history and allows you to revert to previous versions if needed.
Google Drive offers a secure and user-friendly platform for sharing Excel files. By following these steps, you can easily share Excel files with others and collaborate seamlessly, enhancing productivity and streamlining document management.
Grant Permissions to Edit or View an Excel File
When sharing an Excel file, it is important to carefully manage permissions to ensure that the intended recipients have the appropriate level of access. Granting permissions allows you to control whether someone can edit or view the Excel file. Here’s how you can grant permissions to edit or view an Excel file:
1. Determine the level of access: Identify whether you want to grant editing or viewing permissions to the recipients. Editing permissions enable the recipients to make changes to the Excel file, while viewing permissions restrict them to only view and comment on the file without making any modifications.
2. Access the file’s sharing settings: In the specific storage or collaboration platform you are using, such as OneDrive, Google Drive, or a shared network drive, access the sharing settings for the Excel file. This can usually be done by right-clicking on the file and selecting the “Share” or “Properties” option.
3. Invite collaborators: Enter the email addresses of the individuals or groups you want to grant permissions to. Each platform may have a designated field where you can add the recipients’ email addresses and specify their level of access.
4. Customize permissions: Most platforms allow you to customize the permissions for each recipient. You can choose to grant editing or viewing access individually or apply the same permissions to a group of recipients. Some platforms also come with advanced settings, such as allowing recipients to reshare the file or setting an expiration date for access.
5. Include a message (optional): If desired, you can include a message to provide additional context or instructions to the recipients. This can be useful in clarifying the purpose of the Excel file or specifying any specific guidelines for editing or viewing.
6. Send the sharing invitation: Once you have configured the permissions and included any additional messages, send the sharing invitation to the specified recipients. Depending on the platform, they will receive an email notification with a link to access the Excel file and any instructions you may have provided.
7. Manage permissions: As the owner or administrator of the Excel file, you can easily manage and modify the permissions granted to the recipients. If needed, you can revoke access, change the level of access, or add new recipients to the list of collaborators.
By carefully granting permissions to edit or view an Excel file, you can ensure that the recipients have the appropriate level of access to collaborate effectively while maintaining the integrity of the file. It is important to periodically review and update the permissions as needed to ensure the file remains secure and accessible by the intended individuals.
Set Password Protection for an Excel File
Password protection is an effective way to secure sensitive or confidential information in an Excel file. By setting a password, you can restrict unauthorized access and ensure that only those with the correct password can open and view the file. Here’s how you can set password protection for an Excel file:
1. Open the Excel file: Launch Microsoft Excel and open the Excel file that you want to protect with a password.
2. Access the “Save As” option: Click on the “File” tab in the Excel menu and select the “Save As” option. This will allow you to save a copy of the file with password protection without altering the original file.
3. Choose a save location: Select the location where you want to save the password-protected copy of the Excel file. It can be on your local computer or in a cloud storage service like OneDrive or Google Drive.
4. Access the advanced options: In the save dialog box, click on the “Tools” dropdown menu, usually located near the bottom of the window, and select “General Options”.
5. Set the password: In the General Options window, you will see two fields: “Password to open” and “Password to modify”. Enter a strong and unique password in the “Password to open” field. This password will be required every time someone tries to open the protected Excel file.
6. Verify the password: To ensure that you have entered the correct password, Excel will prompt you to re-enter the chosen password. This step prevents any typographical errors and ensures that you can remember the password in the future.
7. Save the password-protected file: Once you have set and verified the password, click on the “Save” button to save the password-protected copy of the Excel file. The file will now be secure and only accessible by those who know the password.
8. Test the password protection: To confirm that the password protection is working correctly, close the Excel file and attempt to reopen it. You should be prompted to enter the password before gaining access to the file.
It is crucial to choose a strong and memorable password to ensure the security of the Excel file. Avoid using easily guessable passwords and consider using a combination of uppercase and lowercase letters, numbers, and special characters.
By setting password protection for an Excel file, you can add an extra layer of security and keep sensitive information safe from unauthorized access. Remember to keep the password confidential and share it only with those who need to access the protected file.
Update and Consolidate Changes in an Excel File
When multiple individuals collaborate on an Excel file, it’s essential to update and consolidate their changes to maintain the accuracy and integrity of the data. Excel provides several tools and features that make it easier to track and incorporate changes from various contributors. Here’s how you can update and consolidate changes in an Excel file:
1. Enable track changes: To keep track of the changes made by collaborators, ensure that the “Track Changes” feature is enabled in Excel. This can usually be found in the “Review” tab or under the “Changes” group. Enabling this feature allows Excel to record changes made to the file.
2. Review and accept or reject changes: As collaborators make changes to the Excel file, you can review and accept or reject these changes using the “Accept” or “Reject” buttons provided in the “Changes” group. This ensures that only approved changes are incorporated into the final version of the file.
3. Merge changes from multiple files: If collaborators have made changes to separate copies of the same Excel file, you can use the “Compare and Merge Workbooks” feature in Excel. This feature allows you to merge the changes from multiple files into a single, consolidated file.
4. Use comments for clarification: Collaborators may add comments to the Excel file to provide additional information or explanations about their changes. Review these comments, respond if necessary, and make any required adjustments based on the information provided.
5. Analyze and validate formulas: When multiple users are working on an Excel file, it’s important to verify that the formulas are accurate and functioning correctly. Review the formulas used in the file, check for any errors or inconsistencies, and make necessary revisions.
6. Update data validations and formatting: Collaborators may have added or modified data validations and formatting rules within the Excel file. Review these changes and ensure that they align with the intended structure and format of the data. Make any adjustments as needed.
7. Communicate changes and updates: Once all changes have been consolidated and reviewed, communicate the updates to the collaborators. This ensures that everyone has the latest version of the Excel file and is aware of any modifications made to the data.
8. Save and share the updated Excel file: After incorporating the changes and updating the Excel file, save the updated version. Share the file with collaborators, ensuring that everyone is working with the most recent and consolidated version of the file.
Regularly updating and consolidating changes in an Excel file is crucial to maintain accuracy and integrity when collaborating with others. By following these steps, you can effectively manage and incorporate changes made by collaborators, resulting in a final Excel file that accurately reflects the collective input.
Track Changes in an Excel File
Tracking changes in an Excel file is an essential feature that allows you to monitor and review modifications made by collaborators. Excel provides tools to track changes, enabling you to maintain an audit trail and easily identify who made specific changes. Here’s how you can track changes in an Excel file:
1. Enable track changes: Open the Excel file that you want to track changes in and go to the “Review” tab in the Excel menu. Look for the “Track Changes” or “Changes” group, and click on the “Track Changes” or “Share Workbook” button to enable the feature.
2. Specify settings for tracking changes: When you enable track changes, a dialog box or options pane will appear, allowing you to specify the settings for tracking changes. You can choose to track changes made by specific users, decide which changes to track (e.g., cell formatting, formulas, or comments), and determine how changes are displayed in the worksheet.
3. Collaborators start making changes: Once track changes is enabled, collaborators can begin making changes to the Excel file. As they modify the data, Excel will automatically keep a record of the changes.
4. Review tracked changes: To review the tracked changes made by collaborators, go back to the “Review” tab and look for the “Track Changes” or “Show Changes” button. Click on it to display the tracked changes in the worksheet.
5. Accept or reject changes: As you review the tracked changes, you have the option to accept or reject each change individually. This allows you to control which changes are incorporated into the final version of the Excel file.
6. Review comments and notes: Collaborators may add comments or notes to provide additional context or explanations for their changes. Make sure to review these comments and respond if needed. This helps to maintain clear communication and understanding between collaborators.
7. Display changes graphically: In addition to the default change tracking view, Excel also provides options to display changes graphically. You can choose to view changes in a separate pane or in a visual markup mode, making it easier to identify modifications made to the Excel file.
8. Disable track changes (if necessary): Once you have reviewed and accepted or rejected the tracked changes, you may choose to disable the track changes feature. This prevents further changes from being tracked and provides a final version of the Excel file with the approved modifications incorporated.
Tracking changes in an Excel file allows you to maintain transparency and accountability when collaborating with others. By following these steps, you can effectively monitor modifications made by collaborators and ensure the accuracy and integrity of the Excel file.