
Safety Precautions
Making sure your environment is safe when setting up your Philips Hue Motion Sensor is crucial. Here are some important safety precautions to keep in mind before you begin the installation process:
- Read the instructions: Before you start setting up the motion sensor, thoroughly read the user manual and instructions provided by Philips. This will ensure you have a clear understanding of the installation process.
- Turn off the power: Before handling any electrical components, always turn off the power to the area where you will be installing the motion sensor. This will prevent any mishaps or accidents while working with the electrical wiring.
- Ensure proper wiring: If you are planning to mount the motion sensor to a wall or ceiling, make sure you have the necessary knowledge of wiring. If you are not confident in your electrical skills, consult a licensed electrician to help you with the installation.
- Avoid obstructions: When choosing the location for the motion sensor, make sure it is not obstructed by any objects or furniture that could interfere with its motion detection capabilities. This will ensure accurate and reliable performance.
- Keep away from water sources: Avoid installing the motion sensor in areas exposed to water, such as near sinks, showers, or outdoor areas without proper protection. Water can damage the sensor and pose a safety hazard.
- Regular maintenance: Periodically check the motion sensor for any signs of damage or wear. Replace batteries as needed and clean the sensor to ensure proper functioning.
Remember, safety should always be your top priority during the installation and maintenance of the Philips Hue Motion Sensor. By following these precautions, you can enjoy the benefits of automated lighting while ensuring the well-being of yourself and those around you.
What You Will Need
Before you begin setting up your Philips Hue Motion Sensor, make sure you have the following items ready:
- Philips Hue Bridge: The motion sensor requires a Philips Hue Bridge to communicate with your other Hue smart lights. If you already have a Hue Bridge set up in your home, you’re good to go. Otherwise, you will need to purchase one separately.
- Philips Hue Bulbs: The motion sensor works seamlessly with Philips Hue bulbs, allowing you to automate your lighting based on motion detection. Make sure you have at least one Philips Hue bulb installed and connected to the Hue Bridge.
- Smartphone or Tablet: You will need a smartphone or tablet to download and install the Philips Hue app. The app is available for both iOS and Android devices.
- Stable Internet Connection: To control your Philips Hue devices remotely and receive updates, ensure you have a stable internet connection at your home. This will allow you to access the app and control your motion sensor even when you’re away.
- Batteries: The motion sensor requires batteries to power its operation. Check the user manual for the specific battery type and quantity required. It’s always a good idea to have spare batteries on hand for future replacement.
- Mounting Hardware: Depending on the location you choose for the motion sensor, you may need mounting hardware such as screws and anchors to securely attach it to the wall or ceiling. Check the packaging or user manual to determine the specific mounting requirements.
By ensuring you have all the necessary items before starting the setup process, you can streamline the installation and start enjoying the convenience of automated lighting with the Philips Hue Motion Sensor.
Setting Up the Motion Sensor
Setting up the Philips Hue Motion Sensor is a straightforward process that can be completed in a few simple steps. Here’s a guide to help you get started:
Step 1: Choosing the Location
First, consider where you want to place the motion sensor. Ideally, it should be positioned in an area where it can monitor motion effectively. Common locations include entryways, hallways, or rooms where you frequently move around. Make sure to avoid placing the sensor near heat sources or direct sunlight, as they can affect its performance.
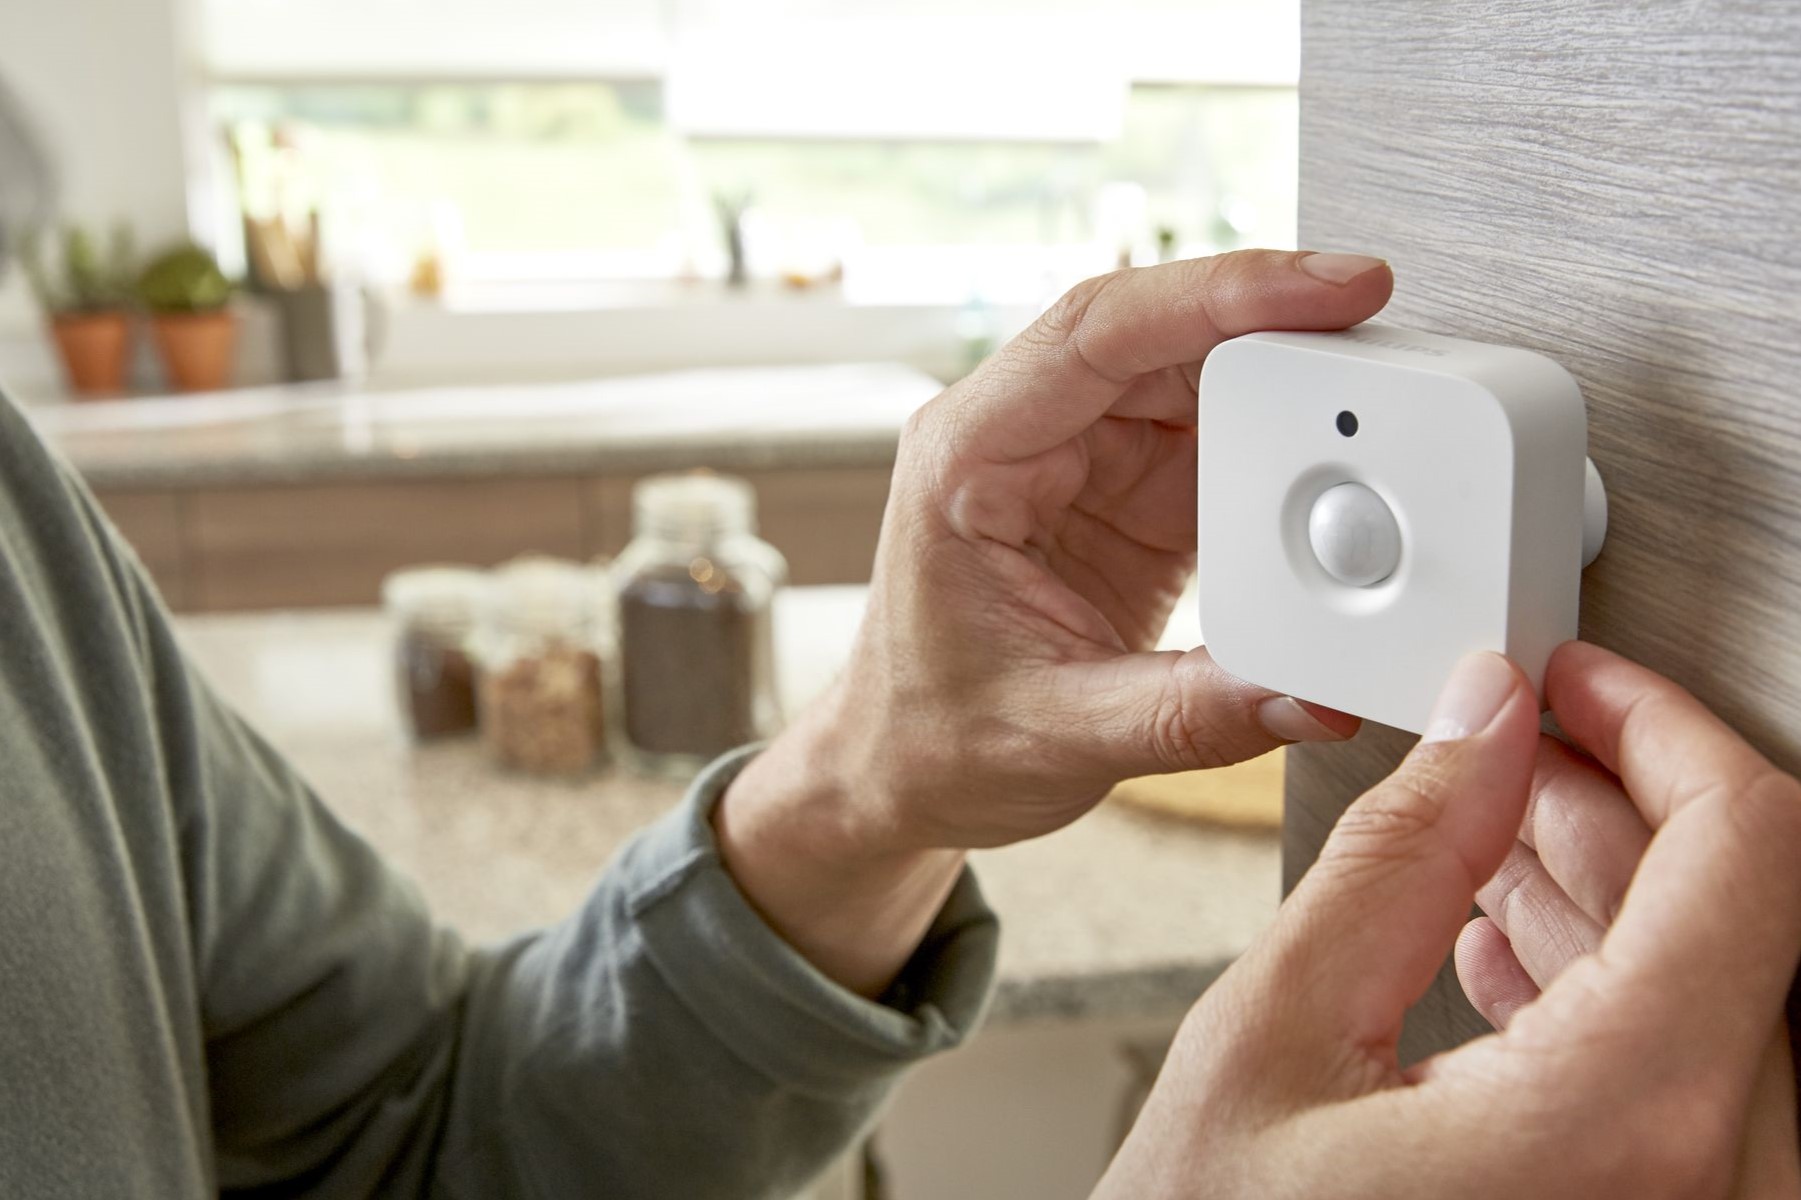
Step 2: Mounting the Sensor
Once you’ve chosen the location, it’s time to mount the motion sensor. Using the appropriate mounting hardware, such as screws and anchors, securely attach the sensor to the wall or ceiling. Ensure that it is positioned at a suitable height (typically around 6-7 feet above the ground) and angled towards the desired detection area.
Step 3: Inserting Batteries
Next, insert the required batteries into the motion sensor. Refer to the user manual for the specific battery type and quantity needed. It’s important to follow the correct polarity (positive and negative) when inserting the batteries to ensure proper functioning of the sensor.
Once the batteries are inserted, give the motion sensor a moment to power on and initialize.
Congratulations! You have successfully set up the Philips Hue Motion Sensor. However, there are a few more steps to complete to fully integrate it into your Hue setup.
Connecting the Motion Sensor to the Philips Hue Bridge
To enable communication between the motion sensor and your other Philips Hue devices, you need to connect it to the Philips Hue Bridge. Follow the instructions provided in the user manual or the Philips Hue app to pair the motion sensor with the Bridge. Once paired, the motion sensor will appear as a connected device in your Philips Hue system.
Configuring the Motion Sensor in the Philips Hue App
With the motion sensor connected, it’s time to configure its settings using the Philips Hue app. Here’s what you need to do:
- Step 1: Opening the App: Launch the Philips Hue app on your smartphone or tablet.
- Step 2: Adding the Motion Sensor: Navigate to the settings or devices section of the app and select “Add Device.” Follow the on-screen prompts to search for and add the motion sensor to your Hue system.
- Step 3: Customizing Sensor Settings: Once the motion sensor is added, you can customize its settings to suit your preferences. This includes adjusting the motion sensitivity, setting the duration of the lights’ activation, and selecting the desired light scene or color.
With the motion sensor now set up and configured, it will automatically detect motion and trigger your Philips Hue lights accordingly, enhancing both convenience and energy efficiency in your home.
# Step 1: Choosing the Location
Choosing the right location for your Philips Hue Motion Sensor is a crucial step to ensure its optimal functionality. Here are some tips to help you select the perfect spot:
1. Consider the Purpose: Think about the purpose of installing the motion sensor. Is it to provide lighting as soon as someone enters the room, or perhaps to activate the lights when walking down a hallway? Understanding the purpose will help you determine the best location.
2. Identify High Traffic Areas: Look for areas in your home that experience high foot traffic. Entryways, hallways, and common areas are excellent choices as they are frequently used and can benefit from automated lighting.
3. Ensure Coverage: Choose a location that allows the motion sensor to cover the desired area. Consider the detection range and angle provided by the sensor and position it accordingly to ensure it can detect motion effectively.
4. Avoid Obstructions: Make sure the chosen location is free from any obstructions that might hinder the motion sensor’s effectiveness. Keep the sensor away from furniture, curtains, or other objects that may obstruct the line of sight between the sensor and the desired detection area.
5. Temperature and Sunlight: Avoid placing the motion sensor in areas with extreme temperature variations or direct sunlight. Extreme temperatures can affect the sensor’s performance, and direct sunlight can cause false triggers. Choose a location that remains relatively stable and shaded.
6. Ceiling or Wall Mount: Determine whether it’s best to mount the motion sensor on the ceiling or wall, depending on the desired coverage area and the height at which you want the sensor to be positioned. Ceilings have a broader coverage range, while walls offer more focused detection.
7. Consider Pets: If you have pets, take their movements into account when choosing the location. Place the sensor where pets are less likely to trigger motion detection and unintended light activations.
8. Accessibility: Ensure easy access to the motion sensor for battery replacement and adjustments. It is essential to have easy accessibility for maintenance purposes.
Take your time to assess different areas in your home, considering these factors, before finalizing the location for your Philips Hue Motion Sensor. By choosing the right spot, you can maximize its functionality and enjoy the convenience and energy savings that automated lighting brings.
# Step 2: Mounting the Sensor
Mounting the Philips Hue Motion Sensor properly is crucial to ensure its stability and accurate motion detection. Follow these steps to securely mount the sensor:
1. Gather the Necessary Tools: Before you begin, gather the required tools for mounting, which may include screws, anchors, a drill, and a screwdriver. Refer to the user manual or packaging to determine the specific mounting requirements for your motion sensor.
2. Choose the Mounting Surface: Depending on the location you selected in step 1, determine whether you will be mounting the sensor on a wall or ceiling. Ensure that the surface is clean and free from any debris or moisture that could affect the mounting process.
3. Position the Sensor: Place the motion sensor in the desired location and adjust its angle to ensure proper coverage of the area. Use a pencil or marker to mark the spots where you will be drilling holes for the mounting screws.
4. Drill Pilot Holes: Using a drill bit appropriate for the mounting screws, drill pilot holes at the marked spots. Be careful not to drill too deep, especially if you’re drilling into drywall or plasterboard.
5. Install Anchors (if needed): Depending on the mounting surface, you may need to install anchors to provide additional support. Insert the anchors into the pilot holes to ensure a secure fit for the mounting screws.
6. Attach the Sensor: Holding the motion sensor firmly against the mounting surface, align the screw holes of the sensor with the pilot holes or anchors. Insert the mounting screws and tighten them until the sensor is securely fastened to the wall or ceiling.
7. Check Stability: After mounting the sensor, give it a gentle shake to ensure it is stable and firmly in place. If any wobbling or movement is detected, adjust the screws or anchors as needed to achieve a secure installation.
8. Conceal Wiring (if applicable): If your motion sensor requires wiring, take steps to conceal the wiring for a cleaner look. Use cable clips or conduits to secure and hide the wires along the wall or ceiling, keeping them out of sight.
By following these steps, you can mount your Philips Hue Motion Sensor securely and accurately position it for effective motion detection. A properly mounted sensor will enhance the performance of your automated lighting system and provide you with reliable and convenient lighting control.
# Step 3: Inserting Batteries
Once you have mounted the Philips Hue Motion Sensor, the next step is to insert the batteries to power its operation. Follow these instructions to ensure a successful battery installation:
1. Gather the Required Batteries: Check the user manual or the packaging of the motion sensor to determine the specific type and quantity of batteries needed. Make sure you have the correct batteries on hand before proceeding.
2. Open the Battery Compartment: Locate the battery compartment on the motion sensor. Depending on the model, the compartment may be on the front, back, or side of the sensor. Use a screwdriver or any provided tool to open the compartment.
3. Check the Battery Polarity: Take a close look at the battery compartment for markings indicating the correct polarity. In most cases, there will be labels or diagrams indicating which side of the batteries should face up or down.
4. Insert the Batteries: Insert the batteries into the compartment according to the polarity indications. Ensure that each battery is placed correctly, aligning the positive (+) and negative (-) ends with their corresponding markings.
5. Close the Battery Compartment: Once all the batteries are properly inserted, close the battery compartment securely. Use any provided latches, clips, or screw fastenings to ensure the compartment is tightly sealed.
6. Test for Power: After inserting the batteries, make sure to test the motion sensor to ensure it is receiving power. Activate the motion sensor by waving your hand or triggering motion in front of it. If the sensor successfully detects motion, it is powered and functioning correctly.
7. Replace Batteries as Needed: Keep track of the battery life of your motion sensor by regularly checking for any signs of battery drain. Typically, motion sensors can operate for several months to a year before requiring battery replacement. However, battery life may vary depending on usage.
Properly inserting the batteries is essential for the smooth operation of your Philips Hue Motion Sensor. By following these steps, you can ensure that the sensor has the necessary power to detect motion and trigger the desired lighting automation in your home.
Connecting the Motion Sensor to the Philips Hue Bridge
In order to fully integrate the Philips Hue Motion Sensor into your smart lighting system, you need to connect it to the Philips Hue Bridge. Follow these steps to establish the connection:
1. Ensure Power and Connectivity: Make sure that your Philips Hue Bridge is connected to a stable power source and has a reliable internet connection. This will ensure proper communication with the motion sensor and other Hue devices.
2. Open the Philips Hue App: Launch the Philips Hue app on your smartphone or tablet. If you don’t have the app installed, download it from the App Store (iOS) or Google Play Store (Android).
3. Access the Bridge Settings: Navigate to the settings or devices section of the app to access the configuration options for your Philips Hue Bridge.
4. Locate “Add Device” Option: Look for the “Add Device” or “Add Lights” option within the settings menu. This is where you will initiate the process of adding the motion sensor to your Hue system.
5. Follow the On-Screen Instructions: The app will guide you through the process of adding the motion sensor. This typically involves pressing a button on the motion sensor or following specific prompts to initiate the pairing process.
6. Wait for the Bridge to Detect the Motion Sensor: Give the Philips Hue Bridge a moment to scan for nearby devices. It will automatically detect and identify the motion sensor if it is within range and in pairing mode.
7. Confirm the Connection: Once the motion sensor is detected, the app will prompt you to confirm the connection. Follow the on-screen instructions to verify the pairing process.
8. Customize Sensor Settings (Optional): After successfully connecting the motion sensor to the bridge, you can customize its settings through the app. This includes adjusting motion sensitivity, setting the duration of the lights’ activation, and selecting specific scenes or colors to be triggered.
9. Test the Motion Sensor: To ensure that the connection is functioning properly, test the motion sensor by walking in front of it. If the lights respond accordingly, it is an indication that the motion sensor is successfully connected to the Philips Hue Bridge.
Connecting the motion sensor to the Philips Hue Bridge allows seamless integration with your existing Hue smart lighting setup. By following these steps, you can enjoy the convenience of automated lighting control based on motion detection in your home.
Configuring the Motion Sensor in the Philips Hue App
Once you have connected the Philips Hue Motion Sensor to the Hue Bridge, you can customize its settings through the Philips Hue app. Follow these steps to configure the motion sensor:
1. Open the Philips Hue App: Launch the Philips Hue app on your smartphone or tablet. Make sure your device is connected to the same network as the Philips Hue Bridge.
2. Access the Motion Sensor Settings: Navigate to the settings menu or the devices section within the app. Look for the motion sensor you have paired and tap on it to access its specific settings.
3. Explore Customization Options: Within the motion sensor settings, you will find various customization options to tailor the behavior of the sensor according to your preferences. These options may include:
- Motion Sensitivity: Adjust the level of sensitivity to motion detection. Increase the sensitivity for more responsiveness or decrease it to reduce false triggers.
- Light Duration: Set the duration for which the lights will stay on after motion is detected. Choose a suitable time interval that suits your needs.
- Light Scene/Color: Select a specific light scene or color scheme to be triggered when motion is detected. This allows you to create personalized lighting experiences in different areas of your home.
4. Save the Configuration: Once you have adjusted the settings to your liking, tap the save or apply button to save the changes made to the motion sensor configuration.
5. Test the Motion Sensor: To ensure that the configured settings are working correctly, walk in front of the motion sensor and observe how the lights respond. If they behave according to your desired settings, it indicates that the configuration has been successfully applied.
6. Fine-Tune the Settings (Optional): If you find that the initial configuration does not meet your expectations, feel free to experiment with different sensitivity levels, light durations, or light scenes until you achieve the desired results.
By configuring the motion sensor in the Philips Hue app, you have the flexibility to customize its settings according to your specific preferences and needs. Take the time to explore and fine-tune these settings to create a personalized and enjoyable lighting experience in your home.
# Step 1: Opening the App
In order to configure the Philips Hue Motion Sensor, the first step is to open the Philips Hue app on your smartphone or tablet. Follow the instructions below to access the app:
1. Launch the App: Locate the app’s icon on your device’s home screen. Tap on it to open the Philips Hue app. If you haven’t installed the app yet, you can download it from the App Store (iOS) or Google Play Store (Android).
2. Log In or Create an Account: If this is your first time using the Philips Hue app, you may need to create an account. Follow the on-screen prompts to register with your email address and create a password. If you already have an account, log in using your credentials.
3. Connect to the Bridge: Once you have logged in, the app will automatically search for the Philips Hue Bridge on your local network. Make sure your smartphone or tablet is connected to the same Wi-Fi network as the bridge. If the app cannot find the bridge, ensure that it is connected to a power source and that the network connection is stable.
4. Navigate to the Motion Sensor Settings: After successfully connecting to the bridge, tap on the settings or devices icon within the app. This will allow you to access different settings and options related to your Philips Hue devices, including the motion sensor.
5. Select the Motion Sensor: Look for the motion sensor device within the settings menu. Tap on it to open the configuration options and access detailed settings for the motion sensor.
6. Explore the App: Take some time to explore the various features and functions of the Philips Hue app. Familiarize yourself with the different customization options available for your motion sensor and other Hue devices.
7. Save and Apply Changes: After configuring the motion sensor settings to your liking, tap the save or apply button within the app to save the changes made. This ensures that the customized settings are applied to the motion sensor for optimal performance.
Opening the Philips Hue app is the first step towards configuring the motion sensor to suit your preferences. By following these instructions and familiarizing yourself with the app’s interface, you can take full control of your smart lighting system and enjoy the convenience and flexibility it offers.
# Step 2: Adding the Motion Sensor
After opening the Philips Hue app, the next step is to add the Philips Hue Motion Sensor to your smart lighting system. Follow the instructions below to successfully add the motion sensor:
1. Navigate to the App Menu: In the Philips Hue app, locate the menu icon (typically represented by three horizontal lines) in the top-left corner of the screen. Tap on the icon to open the app menu.
2. Go to the Device Setup: From the app menu, select the “Device Setup” or “Add Device” option. This will initiate the process of adding new devices to your Philips Hue system.
3. Choose the Motion Sensor: Within the device setup menu, look for the motion sensor option. It may be listed as “Motion Sensor,” “Smart Sensor,” or something similar. Tap on it to select and configure the motion sensor.
4. Follow the On-screen Prompts: The app will guide you through the process of adding the motion sensor to your Hue system. This typically involves pressing a button on the motion sensor itself or following specific prompts displayed on the app screen.
5. Put the Motion Sensor in Pairing Mode: To allow the motion sensor to be detected by the app, follow the instructions provided on the app screen to put the motion sensor into pairing mode. This may involve pressing and holding a button on the back or bottom of the sensor until a light flashes or a signal is received.
6. Wait for Detection: Once the motion sensor is in pairing mode, wait for the Philips Hue app to detect the device. This usually takes a few moments, during which the app scans for available devices in its vicinity.
7. Confirm the Connection: When the app successfully detects the motion sensor, it will prompt you to confirm the connection. Follow the on-screen instructions to verify that the correct sensor has been found and that you want to add it to your Hue system.
8. Name and Assign the Sensor: After confirming the connection, the app will allow you to assign a name and choose a room or location for the motion sensor. This step is optional but can help you easily identify and control the sensor within the app.
9. Save the Changes: Once you have named and assigned the motion sensor, tap the save or apply button within the app to save the changes. This ensures that the motion sensor is added and integrated into your Philips Hue system.
By following these steps, you can easily add the Philips Hue Motion Sensor to your smart lighting setup. The app will guide you through the process, making it convenient to set up and customize the motion sensor according to your preferences.
# Step 3: Customizing Sensor Settings
Once you have successfully added the Philips Hue Motion Sensor to your smart lighting system, the next step is to customize its settings. Follow these steps to tailor the sensor’s behavior and performance to your preferences:
1. Open the Philips Hue App: Launch the Philips Hue app on your smartphone or tablet. Ensure that your device is connected to the same network as the Philips Hue Bridge.
2. Access Motion Sensor Settings: Navigate to the settings or devices section within the app. Look for the motion sensor device that you have added and tap on it to access its specific settings.
3. Adjust Motion Sensitivity: One of the key customization options is adjusting the motion sensitivity of the sensor. You can increase the sensitivity for more responsiveness or decrease it to reduce false triggers. Experiment with different sensitivity levels to find the optimal setting for your specific space.
4. Set Light Activation Duration: Determine how long you want the lights to stay on after motion is detected. Most motion sensors allow you to customize the duration, typically ranging from a few seconds to several minutes. Choose a time interval that suits your needs and preferences.
5. Select Light Scene or Color: Depending on your Philips Hue setup, you can choose a specific light scene or color scheme to be activated when motion is detected. This allows you to create a personalized atmosphere or adjust the lighting based on the time of day or activity taking place in the room.
6. Configure Day/Night Sensing: Some motion sensors offer day and night sensing options, allowing you to customize the sensor’s behavior based on ambient light levels. You can set different motion sensitivity or light activation durations for day and night, ensuring optimal performance in various lighting conditions.
7. Save and Apply Changes: Once you have customized the sensor’s settings to your liking, tap the save or apply button within the app to save the changes. This ensures that the personalized settings are applied to the motion sensor for precise and efficient performance.
8. Test the Motion Sensor: After customizing the settings, walk in front of the motion sensor to ensure that the lights respond according to your configured preferences. Make any necessary adjustments to fine-tune the settings based on your observations.
Customizing the sensor settings in the Philips Hue app allows you to create a personalized lighting experience tailored to your needs. By following these steps, you can optimize the motion sensor’s behavior, ensuring it enhances convenience, energy efficiency, and the overall ambiance of your space.
Adjusting Light Sensitivity and Detection Range
One of the key features of the Philips Hue Motion Sensor is its ability to detect motion and activate the lights accordingly. To ensure optimal performance, you may need to adjust the light sensitivity and detection range of the motion sensor. Here’s how you can do it:
1. Open the Philips Hue App: Launch the Philips Hue app on your smartphone or tablet. Make sure your device is connected to the same network as the Philips Hue Bridge.
2. Access the Motion Sensor Settings: Navigate to the settings or devices section within the app. Look for the motion sensor device and tap on it to access its specific settings.
3. Adjust Light Sensitivity: Look for the light sensitivity or motion sensitivity setting within the motion sensor settings. This option allows you to adjust the level of sensitivity to motion detection. Increasing the sensitivity can make the motion sensor more responsive, while decreasing it can reduce false triggers. Experiment with different sensitivity levels to find the optimal setting for your space.
4. Modify Detection Range: Depending on the specific model of the motion sensor, you may have the ability to adjust the detection range. This allows you to define the distance at which the sensor can detect motion. Typically, the range can be extended or reduced based on your needs. Adjust the detection range to ensure the motion sensor covers the desired area while avoiding unnecessary detection in adjacent spaces.
5. Test the Adjustments: After making changes to the light sensitivity and detection range, test the motion sensor by walking in front of it. Observe how the lights respond and make any necessary adjustments based on your observations. This iterative process will help you fine-tune the sensor’s settings according to your specific requirements.
6. Save Changes: Once you are satisfied with the adjustments, tap the save or apply button within the app to save the changes made to the motion sensor’s settings. This ensures that the customized sensitivity and detection range settings are applied to the sensor for accurate and reliable motion detection.
Note: It’s important to strike a balance between sensitivity and reliability. A highly sensitive motion sensor may trigger false alarms, while an insufficiently sensitive one may not detect motion accurately. Regularly test and adjust the settings to achieve the desired results.
By adjusting the light sensitivity and detection range of the Philips Hue Motion Sensor, you can fine-tune its performance to match the specific requirements of your space. Take the time to experiment with different settings and observe how they enhance the automated lighting experience in your home.
Using the Motion Sensor with Other Philips Hue Products
The Philips Hue Motion Sensor is designed to seamlessly integrate with other Philips Hue products, allowing you to create a truly smart and interconnected lighting system. Here are some ways you can use the motion sensor in conjunction with other Hue devices:
1. Activate Multiple Lights: The motion sensor can trigger multiple Philips Hue lights simultaneously. By placing the motion sensor strategically, you can ensure that multiple lights in a room or area are activated, providing adequate illumination as you move around.
2. Create Lighting Zones: Use the motion sensor to establish different lighting zones in your home. For example, you can set up zones for different areas such as the living room, hallway, or staircase. Each zone can have its own motion sensor, allowing customized lighting control based on specific needs and preferences.
3. Sync with Hue Sync: Connect the motion sensor with the Philips Hue Sync app to synchronize your lighting with music, movies, or games. This creates an immersive experience where the lights change and react to the on-screen action, enhancing your entertainment setup.
4. Combine with Smart Switches and Dimmers: Pair the motion sensor with Philips Hue smart switches or dimmers to enjoy enhanced control over your lighting system. For example, using a dimmer switch, you can adjust the brightness of the lights activated by the motion sensor, creating a customized ambiance for different times of day or activities.
5. Schedule Lighting Routines: Use the Philips Hue app to schedule lighting routines that incorporate the motion sensor. This allows you to automate your lighting based on specific time periods, ensuring that the lights turn on or off according to your preferred schedule, even when no motion is detected.
6. Voice Control with Smart Assistants: Integrate the motion sensor with popular smart assistants such as Amazon Alexa, Google Assistant, or Apple HomeKit. This allows you to control your lighting with voice commands, including turning on or off lights triggered by the motion sensor or adjusting their brightness levels.
7. Expand to Outdoor Areas: Extend the use of the motion sensor to outdoor spaces by adding outdoor Philips Hue lights. This allows you to have automated lighting in your garden, patio, or driveway, enhancing security and convenience.
By combining the Philips Hue Motion Sensor with other Hue products and features, you can create a comprehensive and personalized smart lighting system that enhances convenience, comfort, and energy efficiency throughout your home.
Troubleshooting Tips
While the Philips Hue Motion Sensor is designed to provide seamless automation and reliable performance, you may encounter occasional issues. Here are some troubleshooting tips to help resolve common problems:
1. Check Sensor Placement: Verify that the motion sensor is properly mounted and positioned within the recommended detection range. Ensure that there are no obstructions, such as furniture or curtains, blocking the sensor’s line of sight.
2. Confirm Proper Power Connection: Double-check that the batteries are inserted correctly and have sufficient charge. If using a wired motion sensor, ensure that the wiring is connected securely and not damaged.
3. Adjust Sensitivity and Range Settings: Experiment with different sensitivity levels and detection ranges to find the optimal settings for your space. Increase sensitivity if the sensor is not detecting motion, or decrease it if there are frequent false triggers.
4. Ensure Proper Bridge Connection: Verify that the Philips Hue Motion Sensor is connected to the Philips Hue Bridge. Ensure that both devices are on the same network and that the bridge is powered and functioning correctly.
5. Check Firmware Updates: Ensure that both the motion sensor and the Philips Hue Bridge have the latest firmware updates installed. Outdated firmware can cause performance issues or compatibility problems.
6. Troubleshoot Connectivity: If the motion sensor is not responding or connecting to the bridge, try power cycling both the sensor and the bridge. Disconnect them from power for a few seconds, then reconnect and wait for them to reconnect to the network.
7. Reset Motion Sensor: If all else fails, you can perform a factory reset on the motion sensor. Consult the user manual or the Philips Hue website for specific instructions on how to reset your particular model.
8. Contact Philips Hue Support: If you continue to experience issues with your motion sensor and troubleshooting steps don’t resolve the problem, reach out to Philips Hue customer support for further assistance. They have resources and expertise to help you troubleshoot and resolve any issues you may encounter.
Remember, each troubleshooting situation may vary, and it’s essential to consult the user manual and support resources specific to your Philips Hue Motion Sensor model for detailed troubleshooting steps. By following these tips and seeking assistance when needed, you can overcome any challenges and enjoy the full benefits of your smart lighting system.