
What is Philips Hue?
Philips Hue is a line of smart lighting products that allows you to control the ambiance of your home with ease. It transforms the way you experience lighting by offering a wide range of customizable options to suit your mood, style, and daily activities. With Philips Hue, you can create and control various lighting scenes, bringing a unique and personalized touch to your living spaces.
At its core, Philips Hue is a system of LED light bulbs that can be wirelessly connected to a central bridge device via Wi-Fi or Bluetooth. This bridge acts as a hub, enabling communication between the lights and the Philips Hue app installed on your smartphone or tablet. Once the lights are connected, you can control them individually or group them together to create immersive lighting experiences.
The Philips Hue ecosystem goes beyond simple on/off control. It allows you to adjust the brightness, color, and temperature of the lights, giving you the ability to create a warm, cozy atmosphere for a relaxed evening or a vibrant, energetic environment for a party. You can also schedule your lights to turn on or off at specific times, making it seem like you’re home even when you’re away.
With Philips Hue, you can take automation to the next level by syncing your lights with various events or activities, such as music playback, movies, and even games. This synchronization adds an immersive layer to your entertainment experiences and brings your home to life.
The popularity of Philips Hue has also led to the creation of a vibrant community of users who share their lighting scenes. You can explore and import scenes created by others, further expanding the possibilities for your smart lighting setup.
In summary, Philips Hue is much more than just a set of smart light bulbs. It’s a comprehensive lighting system that offers endless possibilities for creating unique moods, enhancing your home’s ambiance, and revolutionizing the way you interact with your lighting. Whether you want to relax, entertain, or create a productive atmosphere, Philips Hue empowers you to do so with ease and style.
Setting Up Your Philips Hue Lights
Setting up your Philips Hue lights is a straightforward process that can be completed in a few easy steps. Whether you’re starting with a single bulb or a whole set of lights, here’s how you can get your Philips Hue lights up and running:
1. Install the Philips Hue Bridge: Begin by connecting the Philips Hue Bridge to your Wi-Fi router using the Ethernet cable provided. Ensure that the bridge is placed in a central location, allowing for optimal communication with your lights.
2. Power on the Lights: Screw in your Philips Hue light bulbs into the desired fixtures and turn them on. If you’re using Philips Hue lightstrips or other specialty lights, follow the manufacturer’s instructions to ensure proper installation and connection.
3. Download the Philips Hue App: Install the official Philips Hue app on your smartphone or tablet from the App Store or Google Play. The app is available for both iOS and Android devices.
4. Connect the Bridge to the App: Open the Philips Hue app and follow the on-screen instructions to connect your Philips Hue Bridge to the app. This will enable your smartphone or tablet to communicate with the lights.
5. Discover and Add Lights: Once the bridge is connected, the app will automatically search for and detect any Philips Hue lights within range. Confirm the lights you wish to add and they will be integrated into your setup.
6. Test and Customize: With your lights connected, you can now start exploring the features and capabilities of the Philips Hue app. Test your lights by turning them on/off, adjusting their brightness, and experimenting with different colors and scenes.
7. Optional: Sync with Voice Assistants or Smart Home Systems: If you have voice assistants such as Amazon Alexa or Google Assistant, you can enable integration with the Philips Hue lights. This allows you to control your lights using voice commands. Additionally, if you have a smart home system, you can integrate your Philips Hue lights for seamless automation and control.
That’s it! You’re now ready to enjoy the convenience and versatility of your Philips Hue lights. The setup process is user-friendly, and the app provides intuitive controls for managing your lights. Take your time to explore the different features and settings to fully personalize your lighting experience.
Understanding Scenes
Scenes are an essential aspect of the Philips Hue lighting system. They allow you to create predefined lighting setups that can be recalled with a single touch or voice command. A scene is essentially a combination of specific lights, colors, brightness levels, and effects that help you set the ambiance for different activities or moods.
When you set up a scene, you’re essentially capturing and saving the current state of your lights. Whether it’s a vibrant, energizing scene for a party or a relaxing, dimly lit scene for winding down before bed, scenes enable you to effortlessly switch between different lighting setups to suit your needs.
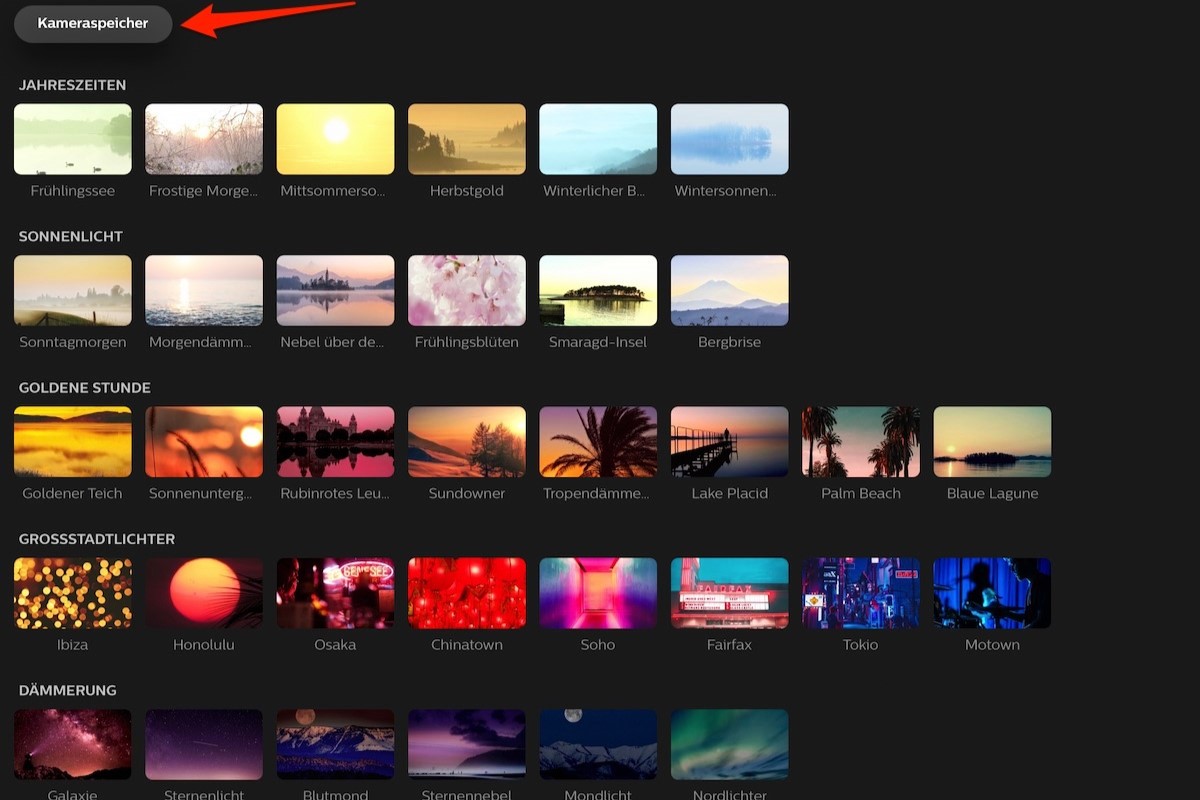
Scenes can be created and managed using the Philips Hue app, which provides a user-friendly interface for customization. You can start by choosing one of the preset scenes provided by Philips or create your own from scratch. Each scene can include individual lights or groups of lights, allowing you to customize the lighting for different areas of your home.
In addition to static scenes, Philips Hue also offers dynamic scenes that can bring your lighting to life. These dynamic scenes incorporate effects like color loops, color flows, and candle flickering to add movement and liveliness to your lighting setup. You can adjust the speed and intensity of these effects to further personalize your scenes.
Scenes are not only limited to specific colors and effects; you can also adjust the brightness and color temperature of your lights. This means you can create scenes that mimic natural daylight for a productive work environment during the day, and switch to warmer tones in the evening to promote relaxation and better sleep.
What makes scenes even more powerful is the ability to automate and schedule them. Using the scheduling feature in the Philips Hue app, you can program your lights to automatically switch to a specific scene at a certain time of the day. This is particularly useful for simulating a sunrise in the morning or creating a cozy evening setting without manual intervention.
With the growing popularity of Philips Hue, you can also explore and import scenes created by other users in the Philips Hue community. This allows you to discover unique and creative lighting setups designed by enthusiasts across the globe.
In summary, scenes are a versatile feature of the Philips Hue lighting system. They enable you to effortlessly switch between different lighting setups to customize the ambiance of your home for various activities and moods. By combining specific lights, colors, brightness levels, and effects, scenes allow you to create unique and personalized lighting experiences that enhance your daily life.
Creating Scenes Using the Philips Hue App
The Philips Hue app is your gateway to creating and managing scenes to customize your lighting experience. With its intuitive interface and robust features, you can easily create personalized scenes that reflect your unique style and preferences. Here’s a step-by-step guide on how to create scenes using the Philips Hue app:
1. Open the Philips Hue App: Launch the app on your smartphone or tablet and ensure that it is connected to your Philips Hue Bridge.
2. Navigate to the Scenes Tab: In the app’s main menu, select the “Scenes” tab to access the scene management screen.
3. Create a New Scene: Tap on the “Create” button to start creating a new scene. You will be prompted to give your scene a name.
4. Choose Lights: Select the lights or groups of lights that you want to include in the scene. You can toggle individual lights on or off, or select pre-existing groups to save time.
5. Adjust Colors and Brightness: Customize the colors and brightness levels of the lights within the scene. You can choose from a wide spectrum of colors or use the color picker tool to create a specific shade. Adjust the brightness to set the desired ambiance.
6. Add Effects (Optional): If you want to add dynamic effects to your scene, such as color loops or gradual transitions, you can explore the various effects available in the app. Experiment with different options to find the perfect effect for your scene.
7. Save the Scene: Once you are satisfied with the settings, tap on the “Save” or “Done” button to save the scene. It will now appear in your list of scenes within the app.
8. Test and Adjust: To test the scene, tap on its name in the scene list. This will activate the scene and apply the defined settings to your lights. Make any necessary adjustments to colors, brightness, or effects until the scene matches your desired outcome.
9. Edit or Delete Scenes: If you want to make changes to a scene or remove it altogether, you can easily do so within the app. Simply navigate to the scene list, select the desired scene, and choose the “Edit” or “Delete” option.
10. Activate Scenes: Once you have created and fine-tuned your scenes, you can activate them with a single tap in the app’s scene list. Alternatively, you can use voice commands if you have set up integration with voice assistants like Amazon Alexa or Google Assistant.
The Philips Hue app makes it easy to create, customize, and manage scenes, giving you complete control over your lighting setup. With just a few taps, you can transform the ambiance of your home and create immersive lighting experiences for any occasion.
Adjusting the Colors and Brightness in a Scene
One of the key features of Philips Hue is the ability to adjust the colors and brightness of your lights within a scene. This allows you to fine-tune the ambiance and create the perfect lighting environment for any setting. Here’s how you can easily adjust the colors and brightness in a scene using the Philips Hue app:
1. Open the Philips Hue App: Launch the app on your smartphone or tablet and ensure that it is connected to your Philips Hue Bridge.
2. Navigate to the Scenes Tab: In the app’s main menu, select the “Scenes” tab to access the scene management screen.
3. Select a Scene: Tap on the scene that you want to adjust the colors and brightness of. This will open the scene details page.
4. Adjust Colors: To change the colors in the scene, tap on the color icon or color palette within the scene details page. This will open the color picker, where you can choose from a wide range of colors or create a custom shade by dragging the color wheel.
5. Fine-tune Brightness: To adjust the brightness of the lights in the scene, use the brightness slider or buttons provided. Moving the slider to the right will increase the brightness, while moving it to the left will decrease it. You can also use buttons labeled “Brighten” and “Dim” for incremental adjustments.
6. Preview Changes: As you make adjustments to the colors and brightness, the app will dynamically update the scene preview. This allows you to see the changes in real-time and determine if further adjustments are required.
7. Save Changes: Once you are satisfied with the adjustments made to the colors and brightness, tap on the “Save” or “Done” button to save the changes to the scene.
8. Test the Scene: To test the scene with the adjusted colors and brightness, tap on its name in the scene list. The lights will update accordingly to reflect the new settings.
9. Fine-tune the Scene: If you feel that the scene still requires further adjustments, you can edit the scene and repeat the process. This allows you to refine the colors and brightness until you achieve the desired lighting effect.
By adjusting the colors and brightness within a scene, you have the power to customize the ambiance of your living spaces to suit your mood, preferences, or specific activities. Whether you want a vibrant, energizing atmosphere or a calm, cozy setting, the flexibility of Philips Hue allows you to create the perfect lighting experience for any occasion.
Customizing Scenes with Dynamic Effects
One of the exciting features of Philips Hue is the ability to customize scenes with dynamic effects. These effects add movement, liveliness, and an extra layer of immersion to your lighting setup. With a range of options to choose from, you can create truly unique and captivating scenes. Here’s how you can customize scenes with dynamic effects using the Philips Hue app:
1. Open the Philips Hue App: Launch the app on your smartphone or tablet and make sure it is connected to your Philips Hue Bridge.
2. Navigate to the Scenes Tab: In the app’s main menu, select the “Scenes” tab to access the scene management screen.
3. Select a Scene: Tap on the scene that you want to customize with dynamic effects. This will open the scene details page.
4. Add Dynamic Effects: Look for the option to add or edit effects within the scene details page. This may be labeled differently depending on the app version, such as “Effects” or “Dynamic Scenes.”
5. Choose an Effect: Explore the available dynamic effects and select the one that suits your desired scene. Philips Hue offers a variety of options, including color loops, color flows, candle flickering, and more.
6. Adjust the Effect Settings: Once you’ve chosen an effect, you may have the ability to customize its settings. For example, you can adjust the speed, intensity, or duration of the effect to fine-tune the desired outcome. Experiment with different settings to achieve the desired effect.
7. Save Changes: After customizing the dynamic effect, tap on the “Save” or “Done” button to save the changes to the scene.
8. Test the Scene: To experience the customized scene with the dynamic effect, tap on its name in the scene list. The lights will now showcase the dynamic effect, adding movement and excitement to your lighting setup.
9. Fine-tune and Explore: If you are not completely satisfied with the effect or want to try different options, you can always go back and make adjustments. This gives you the flexibility to create scenes that match your specific preferences and create truly immersive lighting experiences.
Customizing scenes with dynamic effects allows you to take your lighting setup to the next level. Whether you want to create a vibrant and energetic party scene or add a touch of magic to your living room, the Philips Hue app provides the tools to unleash your creativity. Be sure to explore the different dynamic effects and experiment with various settings to discover the perfect combination that enhances your home’s ambiance and captivates your senses.
Syncing Scenes with Music or Movies
Imagine your lights synchronized with the beat of your favorite music or the action-packed scenes of a movie. With Philips Hue, you can turn this imagination into reality by syncing your scenes with music or movies. The synchronized lighting adds an immersive and captivating element to your audio-visual experiences. Here’s how you can achieve this using the Philips Hue app:
1. Open the Philips Hue App: Launch the app on your smartphone or tablet and ensure that it is connected to your Philips Hue Bridge.
2. Navigate to the Entertainment Tab: In the app’s main menu, select the “Entertainment” tab to access the entertainment setup screen.
3. Set up Entertainment Areas: Follow the instructions in the app to set up an entertainment area. This involves selecting the lights that will be synchronized with the music or movie playback.
4. Connect Supported Apps: To sync your scenes with music or movies, you need to connect supported music or video streaming apps with the Philips Hue app. Popular options include Spotify, Apple Music, Netflix, and YouTube.
5. Choose an App: Select the music or video streaming app that you want to use for synchronization and follow the prompts to connect it to the Philips Hue app.
6. Start Playing Music or Video: Once you are connected, start playing your favorite music or video content from the supported app. Make sure the Philips Hue app is running in the background.
7. Select a Scene: While the music or movie is playing, open the Philips Hue app and select the scene you want to sync with the audio or video. The lights will automatically adjust their colors and brightness to match the mood and tone of the content.
8. Enjoy the Synchronization: Sit back, relax, and enjoy the mesmerizing experience as your lights dance in sync with the music beats or dynamically change to match the scenes of a movie. The synchronized lighting adds depth and immersion, enhancing your audio-visual enjoyment.
9. Fine-tune the Synchronization: If you want to further customize the synchronization, you can adjust the sensitivity or intensity of the lights’ response to the audio or video. Explore the settings within the particular entertainment area to find the configuration that suits your preferences.
Syncing scenes with music or movies elevates your entertainment experiences to new heights. Whether you’re hosting a party, having a cozy movie night, or simply enjoying your favorite tunes, the synchronized lighting adds a touch of magic and creates a truly immersive atmosphere. With the Philips Hue app and supported streaming services, you can effortlessly bring your audio-visual experiences to life with stunning, synchronized lighting effects.
Voice Control of Scenes Using Smart Assistants
Gone are the days of manually adjusting your lights or reaching for your smartphone to change scenes. With Philips Hue, you can effortlessly control your scenes using smart assistants like Amazon Alexa, Google Assistant, or Apple Siri. This convenient feature allows you to adjust the ambiance of your home with simple voice commands. Here’s how you can use smart assistants to control scenes with Philips Hue:
1. Set up your Smart Assistant: Begin by setting up your preferred smart assistant device, such as an Amazon Echo, Google Nest speaker, or Apple HomePod. Follow the manufacturer’s instructions for connecting and configuring the device.
2. Connect Philips Hue to your Smart Assistant: In the smart assistant’s mobile app, search for and enable the Philips Hue skill or integration. This will allow the smart assistant to communicate with your Philips Hue lights and scenes.
3. Discover Devices: Use the smart assistant’s mobile app or voice command to discover connected devices. The smart assistant will scan for and link with your Philips Hue lights and scenes.
4. Assign Scenes to Voice Commands: Within the smart assistant’s mobile app or settings, you can assign specific scenes to voice commands. For example, you can assign the command “Alexa, set the living room to Relax” to activate a cozy scene in your living room.
5. Trigger Scenes with Voice Commands: Once the scenes are assigned, simply use your voice to activate them. For example, say “Hey Google, activate the Party scene” to instantly transform your space for a festive gathering.
6. Customize Voice Commands: If desired, you can customize the voice commands for scenes to better suit your preferences. Check the smart assistant’s settings or app for options to create personalized voice commands.
7. Grouping and Controlling Multiple Lights: Smart assistants also allow you to group multiple lights and control them simultaneously. For example, you can create a group called “Upstairs Lights” and use voice commands to control all the lights in that group.
8. Combine Voice Commands with Other Functions: Take advantage of the smart assistants’ capabilities to combine controlling scenes with other functions. For example, you can schedule scenes to activate at specific times or create routines that include scene activations along with other tasks like adjusting thermostats or playing music.
9. Enjoy Hands-Free Control: With voice control of scenes using smart assistants, you can effortlessly change the ambiance of your home without lifting a finger. Whether you want to create a relaxing atmosphere, set the stage for a movie night, or brighten the room for work, voice commands make it quick and easy.
Using smart assistants with Philips Hue takes the convenience and control of your lighting to new heights. With a simple voice command, you can transform the mood, adjust the brightness, and set the scene, all without lifting a finger. Embrace the power of voice control with your smart assistant and experience a new level of effortless control over your Philips Hue scenes.
Automating Scenes with Philips Hue Sensors
Philips Hue sensors provide a convenient way to automate your scenes based on motion detection. By integrating sensors into your lighting setup, you can create a seamless and hands-free experience as your lights respond to your presence. This automation adds both convenience and energy efficiency to your home. Here’s how you can automate scenes with Philips Hue sensors:
1. Install Philips Hue Sensors: First, install the Philips Hue motion sensors in the desired locations around your home. These sensors are easy to mount and can be placed in areas where motion detection is needed, such as entryways, hallways, or rooms.
2. Connect Sensors to the Philips Hue Bridge: Follow the instructions provided with the sensors to connect them to your Philips Hue Bridge. This connection enables the sensors to communicate with your lights and scenes.
3. Set Up and Configure the Sensors: Using the Philips Hue app, set up and configure the sensors according to your preferences. This includes adjusting the motion sensitivity, duration of inactivity before the lights turn off, and other customizable settings. Ensure that you designate the appropriate lights or scenes to be activated when motion is detected.
4. Define Scenes for Motion Events: Within the Philips Hue app, create or select scenes that you want to activate when motion is detected. For example, you can set a scene that turns on specific lights and adjusts their brightness to a comfortable reading level when you enter the living room.
5. Customize Sensor Behavior: Depending on the sensor type, you may have additional options for customizing the behavior. For instance, some sensors have a daylight sensor that can prevent the lights from turning on during daylight hours.
6. Test and Fine-tune: Test the setup by walking within the sensor’s detection range. The lights should automatically turn on with the designated scene based on the motion. Fine-tune the settings as necessary to ensure the desired behavior.
7. Expand Automation with Multiple Sensors: You can expand the automation by installing multiple sensors throughout your home. This allows for a more comprehensive coverage and ensures that lights are activated in the appropriate areas as you move around.
8. Adjust Sensor Placement and Sensitivity: If you find that the sensors are triggering lights unnecessarily or not detecting motion accurately, consider adjusting the placement or sensitivity settings of the sensors. Experimenting with different configurations can help optimize the performance.
9. Energy Efficiency: Besides convenience, automating scenes with Philips Hue sensors promotes energy efficiency. The lights will only be activated when motion is detected, and they will automatically turn off after a period of inactivity. This helps to reduce energy consumption and lower utility bills.
By automating scenes with Philips Hue sensors, you can create a lighting setup that adapts to your presence and needs. Whether it’s entering a well-lit hallway, having lights automatically turn off in unoccupied rooms, or adjusting the ambiance as you move throughout the house, the motion sensors add a level of convenience and efficiency to your smart lighting system.
Sharing and Importing Scenes with Friends and Community
Philips Hue offers the ability to share and import scenes with your friends and the larger Philips Hue community. This feature allows you to discover new and creative lighting setups and easily share your own creations with others. Here’s how you can share and import scenes using the Philips Hue app:
1. Explore the scene sharing option: In the Philips Hue app, navigate to the scene management screen or the scene details page. Look for the option to share or export scenes.
2. Share scenes with friends: To share a scene with your friends, tap on the share or export button and choose the method of sharing, such as email, messaging apps, or social media platforms. Your friends will receive a link or file that allows them to import the scene into their own Philips Hue app.
3. Import scenes from others: If you receive a shared scene from a friend or come across scenes shared by the community, you can import them into your Philips Hue app for immediate use. Simply open the shared scene link or file and follow the prompts to import it.
4. Philips Hue online community: As a Philips Hue user, you can also join the online community and engage with other lighting enthusiasts. Platforms like the Philips Hue Reddit community, official forums, or social media groups allow you to connect with other users, share scenes, and gain inspiration for your own setups.
5. Use shared scenes as a starting point: When you import shared scenes, they will appear in your scene list alongside your existing scenes. You can further customize and adjust these scenes to suit your preferences and make them unique to your home.
6. Give credit and feedback: When sharing or importing scenes, it’s always appreciated to give credit to the original creator. If you enjoy a particular scene or find it inspiring, consider providing feedback or commenting on the shared platform. This fosters a positive and collaborative environment within the Philips Hue community.
7. Share your own scenes: Don’t hesitate to share your own scenes with the community. It’s a great way to showcase your creativity and potentially inspire others. Use the sharing options within the Philips Hue app to export your scenes and make them available to others.
8. Stay updated with scene collections: Philips Hue often releases special collections of scenes tied to holidays, events, or collaborations with renowned artists. Keep an eye out for these scene collections within the app or official announcements. You can import them with a single tap and experience curated lighting experiences.
Sharing and importing scenes with friends and the broader Philips Hue community expands your creative horizons and allows you to experience unique lighting setups beyond your own imagination. By embracing the collective creativity of the community, you can transform your home with stunning, shared scenes and contribute your own ideas to inspire others with the power of Philips Hue’s lighting versatility.
Tips and Tricks for Creating Unique and Immersive Scenes
Creating unique and immersive scenes with Philips Hue allows you to personalize your lighting setup and enhance the ambiance of your home. Here are some tips and tricks to help you unlock the full potential of Philips Hue and create stunning scenes:
1. Experiment with Color Combinations: Don’t be afraid to mix and match different colors to create unique lighting effects. Try combining warm and cool tones or contrasting colors to add depth and visual interest to your scenes.
2. Consider Color Psychology: Keep in mind that different colors evoke different emotions and moods. Use this knowledge to create scenes that align with the desired atmosphere. For example, cool blue and green tones promote relaxation, while vibrant red and orange hues create an energetic ambiance.
3. Play with Brightness Levels: Adjusting the brightness of your lights within a scene can significantly impact its overall effect. Experiment with different brightness levels to find the perfect balance that complements the mood you want to create.
4. Try Dynamic Effects: Dynamic effects like color loops, fades, or transitions can add movement and dynamism to your scenes. Explore these options in the Philips Hue app and fine-tune the settings to find the right balance between subtlety and liveliness.
5. Sync Scenes with Activities: Consider syncing your scenes with specific activities or events. For example, create a scene that automatically activates when you start a movie marathon or when you’re hosting a dinner party. This seamless integration enhances the overall experience and adds a layer of immersion.
6. Explore Third-Party Apps: Expand your creative options by exploring third-party apps that offer additional features and functionalities for Philips Hue. These apps often provide advanced scene customization options, more dynamic effects, and even interactive lighting experiences.
7. Use Lightstrip Extensions: If you have Philips Hue lightstrips, consider using extensions to cover a larger area or create unique lighting designs. These extensions can be connected to the existing lightstrip to provide more flexibility and versatility in scene creation.
8. Incorporate Dimmers and Switches: Philips Hue offers a range of dimmers and switches that can be integrated into your lighting setup. These physical controls provide a convenient way to adjust scenes without relying solely on a smartphone or voice commands.
9. Fine-Tune Transition Times: When creating scenes with dynamic effects or transitions, pay attention to the timing and duration of these changes. Experiment with shorter or longer transition times to achieve the desired visual impact.
10. Draw Inspiration from Nature and Art: Nature and art are great sources of inspiration for scene creation. Take cues from the changing colors of a sunset, the serene lighting of a forest, or the vibrant hues of an artwork. Use these influences to create captivating scenes that bring a touch of natural beauty or artistic expression to your home.
Remember to stay open-minded and have fun while creating scenes with Philips Hue. Don’t be afraid to think outside the box and let your creativity shine. Through experimentation and imagination, you can craft unique and immersive scenes that transform your living spaces into breathtaking environments.