
What are Facebook Trusted Contacts?
Facebook Trusted Contacts is a feature that allows you to choose close friends who can help you regain access to your Facebook account in case you ever get locked out. It is an additional layer of security designed to protect your account and provide you with peace of mind.
By selecting trusted contacts, you can ensure that you don’t lose access to your account permanently if you forget your password or if someone gains unauthorized access. Instead of relying solely on Facebook’s recovery options, which often involve answering security questions or confirming your identity through email or phone, Trusted Contacts allows you to reach out to trusted friends for assistance.
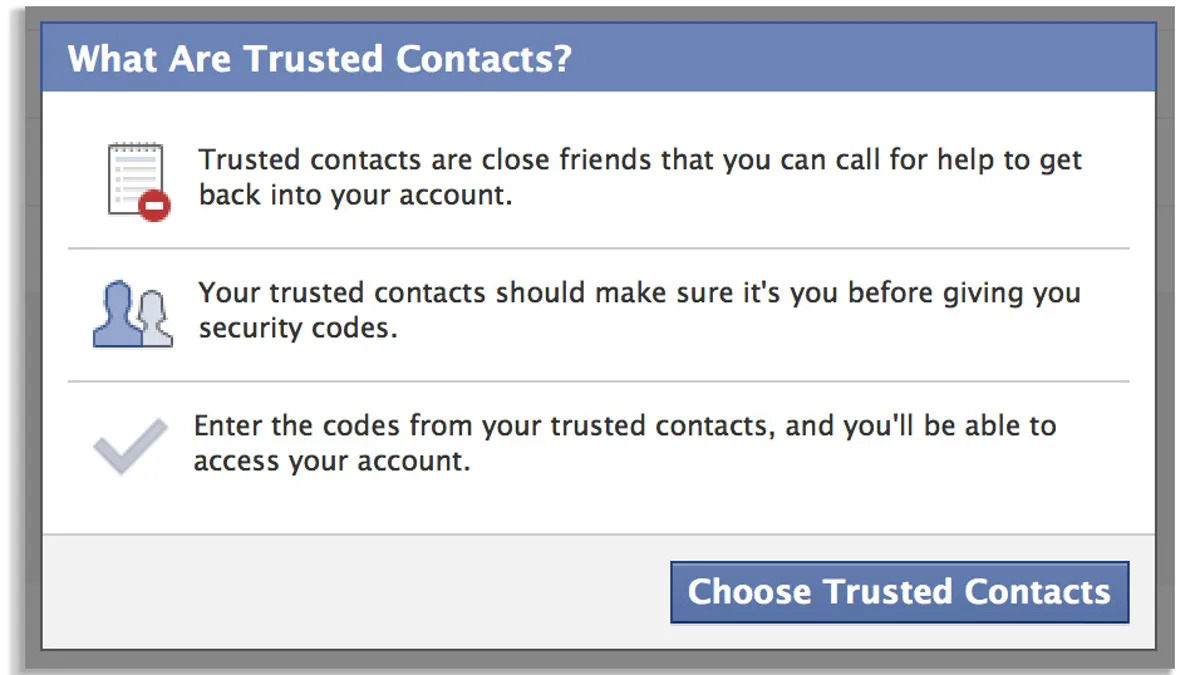
With this feature, you can choose three to five of your closest friends, family members, or trusted individuals to be your trusted contacts. These contacts will receive a special code that they can provide to you to help you regain access to your account. This code is essential to proceeding with the account recovery process.
One important thing to note is that your trusted contacts won’t have access to your account unless you specifically request their help. They won’t be able to view your private messages or posts, and they won’t have any other privileges associated with your account.
Facebook Trusted Contacts is a helpful feature, especially for those who want to secure their accounts and have a reliable backup plan in case of emergencies. It provides an additional layer of protection and empowers you to take control of your account recovery process.
By setting up Trusted Contacts, you can enjoy greater peace of mind and ensure that you never lose access to your Facebook account for an extended period.
How to Set Up Facebook Trusted Contacts
Setting up Facebook Trusted Contacts is a straightforward process that can be done in just a few simple steps. Follow the instructions below to ensure the security of your account:
Step 1: Go to your Facebook settings
First, log into your Facebook account and navigate to the settings page. You can access the settings by clicking on the inverted triangle icon in the top right corner of the Facebook homepage and selecting “Settings & Privacy” from the drop-down menu.
Step 2: Click on Security and Login
In the settings menu, you will see a list of options on the left-hand side. Click on “Security and Login” to access the security settings for your account.
Step 3: Scroll down to the section labeled “Setting up Extra Security”
Scroll down on the Security and Login page until you reach the “Setting up Extra Security” section. Here, you will find various options to enhance the security of your account.
Step 4: Click on “Choose 3 to 5 friends to contact if you get locked out”
In this section, you will see the option to set up your trusted contacts. Click on the link that says “Choose 3 to 5 friends to contact if you get locked out” to proceed.
Step 5: Select your trusted contacts
A new window will open, displaying a list of your friends. You can search for specific friends or scroll through the list to find the individuals you want to add as your trusted contacts. Select at least three and up to five friends to proceed.
Step 6: Confirm your trusted contacts
After selecting your trusted contacts, click on the “Confirm” button. Facebook will send a notification to your chosen friends to let them know that they have been added as your trusted contacts.
Step 7: Set up a recovery key
As an extra layer of security, Facebook will ask you to set up a recovery key. This key can be used to verify your identity in case you need to access your account without your trusted contacts’ assistance. Follow the prompts to set up your recovery key and complete the process.
Once you have set up Facebook Trusted Contacts, you will have an additional method to regain access to your account if you ever get locked out. This feature provides added peace of mind and ensures that you have trusted individuals to turn to in case of emergencies.
Step 1: Go to Your Facebook Settings
The first step to set up Facebook Trusted Contacts is to navigate to the settings page of your Facebook account. This is where you can access various features and options to customize your account settings.
To begin, log into your Facebook account using your credentials. Once logged in, you will see the Facebook homepage. Look towards the top-right corner of the page, where you will find an inverted triangle icon. Click on this icon to open a drop-down menu.
In the drop-down menu, you will see several options. Look for and select “Settings & Privacy” to proceed to the main settings page.
After clicking on “Settings & Privacy,” another drop-down menu will appear. From this menu, choose the “Settings” option. Clicking on “Settings” will take you to the main settings page of your Facebook account.
On the settings page, you will find a sidebar on the left-hand side. This sidebar organizes the settings into different categories. Look for and click on the “Security and Login” option, which is usually near the bottom of the sidebar.
By clicking on “Security and Login,” you will be taken to a page that displays various security settings for your Facebook account. This page allows you to manage your login preferences, enable two-factor authentication, and access other security-related features.
Take a moment to review the different sections and options available on the “Security and Login” page. It is always a good practice to familiarize yourself with the available security settings to ensure the safety of your Facebook account.
Once you have completed this step, you are ready to proceed to the next step in setting up Facebook Trusted Contacts. By navigating to your Facebook settings, you have taken the first important step towards enhancing the security of your account and preparing to add trusted contacts.
Step 2: Click on Security and Login
After navigating to the main settings page of your Facebook account, the next step in setting up Facebook Trusted Contacts is to access the “Security and Login” section. This section allows you to manage various security-related settings for your account.
To proceed, look for the sidebar on the left-hand side of the settings page. The sidebar organizes the settings into different categories, making it easier for you to find the options you need. Scroll down on the sidebar until you see the “Security and Login” option.
Click on “Security and Login” to open the section. This action will take you to a new page that specifically deals with the security features and login preferences of your Facebook account.
At the top of the “Security and Login” page, you will find an overview of your recent login activity, including information about the devices you have logged in from and the locations of those logins. This information can help you detect any unusual or unauthorized access to your account.
As you scroll down the page, you will start to encounter different settings and options related to security. These settings include options to enable two-factor authentication, control the way your account is protected, and set up trusted contacts.
Take a moment to review the various security settings available on the “Security and Login” page. Familiarize yourself with the options and consider enabling any additional security measures that are important to you.
By clicking on “Security and Login” and accessing this section, you are taking an important step towards enhancing the security of your Facebook account. The “Security and Login” page will allow you to proceed with configuring the settings necessary to set up your trusted contacts and ensure the safety of your account.
Step 3: Scroll down to the Section Labeled “Setting up Extra Security”
Once you have accessed the “Security and Login” section of your Facebook settings, the next step in setting up Facebook Trusted Contacts is to locate the specific section labeled “Setting up Extra Security.” This section contains the options and settings necessary to configure trusted contacts for your account.
Scroll down on the “Security and Login” page until you come across the section titled “Setting up Extra Security.” This section is usually found below the “Login Alerts” and “Two-Factor Authentication” settings.
The “Setting up Extra Security” section is designed to provide you with additional layers of protection for your Facebook account, including the option to set up trusted contacts. By choosing trusted contacts, you can ensure that you have a backup plan in case you ever get locked out of your account.
Take a moment to review the different options available in this section, as you may find other security measures that you want to enable or configure for your account.
Under the “Setting up Extra Security” section, you will typically find options such as setting up a recovery key, which is an extra method to verify your identity during the account recovery process, and the ability to choose friends as your trusted contacts.
Ensure that you are scrolling down on the “Security and Login” page until you locate the specific section labeled “Setting up Extra Security.” It may be helpful to use the page scrollbar or scroll indicator to navigate to the correct section.
By finding and accessing the “Setting up Extra Security” section, you are one step closer to setting up your trusted contacts. Take your time to proceed to the next steps, as configuring trusted contacts is an important measure to secure your Facebook account.
Step 4: Click on “Choose 3 to 5 friends to contact if you get locked out”
After scrolling down to the “Setting up Extra Security” section on the “Security and Login” page of your Facebook settings, the next step in setting up Facebook Trusted Contacts is to click on the link that says “Choose 3 to 5 friends to contact if you get locked out.”
This link is typically located within the “Setting up Extra Security” section and is designed to allow you to select specific friends who will serve as your trusted contacts in case you encounter any issues accessing your account.
Clicking on this link will open a new window or panel, enabling you to begin the process of choosing and confirming your trusted contacts. It’s important to note that Facebook requires you to select a minimum of three and a maximum of five friends as your trusted contacts for this feature.
Before proceeding, take a moment to think about which friends you trust the most and who you would turn to in case you need assistance with accessing your Facebook account. Friends or family members who are reliable, easily reachable, and familiar with how Facebook works can make excellent choices for your trusted contacts.
Once you click on the “Choose 3 to 5 friends to contact if you get locked out” link, Facebook will present you with a list of your friends. You can either search for specific individuals by typing their names in the search field or browse through your friends’ list to make your selections.
Keep in mind that when you select a friend as your trusted contact, they will receive a notification informing them of their new role. They will also be able to see that they have been chosen as a trusted contact when visiting their own account settings.
Take your time to carefully consider and choose your trusted contacts. Once you have made your selections, proceed to the next step in the setup process.
By clicking on “Choose 3 to 5 friends to contact if you get locked out,” you are taking another important step towards ensuring the security of your Facebook account and creating a backup plan in case you encounter any access issues in the future.
Step 5: Select Your Trusted Contacts
After clicking on the “Choose 3 to 5 friends to contact if you get locked out” link in the “Setting up Extra Security” section, you will be presented with a list of your Facebook friends. This step involves selecting your trusted contacts from this list.
Take your time to carefully consider the friends you trust the most and who you would feel comfortable reaching out to if you encounter difficulties accessing your Facebook account. Consider selecting friends who are responsive, reliable, and knowledgeable about how Facebook works.
You can search for specific individuals by typing their names in the search field provided. This can be helpful if you have a large number of friends or if you already have specific individuals in mind to be your trusted contacts. Alternatively, you can scroll through the list of friends to find the ones you wish to select.
Remember, Facebook requires you to select between three and five trusted contacts. Make sure you select the appropriate number based on your preferences and needs. If you accidentally select more or fewer contacts than required, you will be prompted to adjust your selection before proceeding.
Keep in mind that your chosen trusted contacts will receive a notification letting them know that they have been selected as your trusted contacts. They will also be able to see this information in their own account settings.
It’s important to remember that your trusted contacts will not have any special privileges or access to your account unless you specifically reach out to them for assistance. They cannot view your private messages, posts, or any other content on your Facebook account. Their role is solely to help you regain access to your account if you need their assistance.
Once you have selected your trusted contacts, double-check your choices to ensure they are the individuals you trust and want to rely on in case of account access issues. If you’re satisfied with your selection, proceed to the next step in the setup process.
By selecting your trusted contacts, you are adding an additional layer of security to your Facebook account and establishing a network of friends who can assist you if you ever get locked out or face a similar situation.
Step 6: Confirm Your Trusted Contacts
After selecting your trusted contacts in the previous step, it is vital to confirm your choices. Confirming your trusted contacts ensures that the individuals you have chosen are indeed the ones you want to rely on in case you encounter issues accessing your Facebook account.
Once you have finalized your selection of trusted contacts, click on the “Confirm” or “Save” button. Facebook will prompt you to confirm your decision, usually by asking you to re-enter your password or provide any additional necessary verification.
By confirming your trusted contacts, you are acknowledging that you trust and rely on these individuals to help you regain access to your Facebook account if needed. Note that once you confirm your trusted contacts, they will receive a notification from Facebook informing them of their new role in assisting you with account recovery.
It is essential to double-check your choices at this stage to ensure that you have selected the correct friends to be your trusted contacts. Take a moment to review the names of the individuals you have chosen and verify that they are the people you intended to select.
Remember, the role of trusted contacts is to provide assistance in case you ever get locked out of your account or encounter difficulties accessing it. It is crucial to trust these individuals and have confidence in their ability to help you regain control of your Facebook account.
Once you have confirmed your trusted contacts, Facebook will notify them, and they will have the knowledge that they can play a vital role in your account recovery process. They will understand that they may receive a request from you to provide a security code or other necessary information to help you regain access to your account.
With the confirmation of your trusted contacts, you have successfully completed another step in the setup process. Your Facebook account is now even more secure, and you can proceed to the next step knowing that you have reliable friends ready to help you if needed.
Step 7: Set Up a Recovery Key
As an additional layer of security, Facebook provides the option to set up a recovery key. This recovery key acts as another method to verify your identity in case you ever need to access your account without the assistance of your trusted contacts. Setting up a recovery key is the final step in the process of securing your Facebook account with Trusted Contacts.
After confirming your trusted contacts, Facebook will guide you through the process of setting up a recovery key. This recovery key is a unique code that is generated by Facebook and can be used as a backup method to regain access to your account.
To set up a recovery key, follow the prompts provided by Facebook. Typically, you will be asked to provide a valid email address or phone number where Facebook can send your recovery key. Make sure to enter the correct information, as it will be used to send you the recovery key when needed.
Once you have entered your email address or phone number, Facebook will send you a verification code. Enter this code into the designated field to verify your ownership of the email address or phone number.
After verifying your contact information, Facebook will generate and display your recovery key. It is crucial to keep this recovery key in a safe place, such as a password manager or a secure document, as it will be necessary if you ever need to access your account without the assistance of your trusted contacts.
Additionally, Facebook will provide you with instructions on how to use the recovery key if necessary. Make sure to familiarize yourself with these instructions, so you are aware of the steps involved in using the recovery key when the need arises.
By setting up a recovery key, you are securing an alternate method to regain access to your Facebook account. This key serves as a valuable backup solution in case you are unable to contact your trusted contacts or encounter any other issues with accessing your account.
With the completion of this step, you have successfully set up Facebook Trusted Contacts and a recovery key to safeguard your account, providing you with added peace of mind and an extra layer of protection to ensure the security of your Facebook account.
How to Use Facebook Trusted Contacts
Once you have set up Facebook Trusted Contacts, it’s important to understand how to utilize this feature in case you ever need it. Below, you will find step-by-step instructions on how to use Facebook Trusted Contacts in different scenarios.
Scenario 1: Getting locked out of your Facebook account
Step 1: Click on “Forgotten account?” on the Facebook login page
If you find yourself locked out of your Facebook account, go to the Facebook login page. Underneath the login fields, you will see a link that says “Forgotten account?”. Click on this link to initiate the account recovery process.
Step 2: Choose “Reveal My Trusted Contacts”
On the account recovery page, you will be presented with different recovery options. Look for and select the option that says “Reveal My Trusted Contacts.” This will initiate the process of contacting your trusted contacts for assistance.
Step 3: Contact your trusted friends
Once you have chosen the option to reveal your trusted contacts, Facebook will provide you with instructions on how to proceed. Follow these instructions to contact your trusted friends and let them know that you need their help in regaining access to your account.
Scenario 2: Helping a friend regain access to their Facebook account
Step 1: Go to the Facebook “Help a Friend” page
If a friend reaches out to you for assistance in regaining access to their Facebook account, you can help them through the “Help a Friend” page. Access this page by going to the Facebook website and searching for “Help a Friend” in the search bar.
Step 2: Enter your friend’s name or email address
On the “Help a Friend” page, enter your friend’s name or email address in the designated field. This will help Facebook locate the correct account that needs assistance.
Step 3: Follow the instructions to send recovery codes
Once you have identified your friend’s account, follow the instructions provided by Facebook to send recovery codes to their trusted contacts. These recovery codes will be necessary for your friend to regain access to their account.
It’s important to note that Facebook’s account recovery process may vary slightly over time. Make sure to follow the instructions displayed on the Facebook website or contact Facebook support directly for the most up-to-date information on utilizing the Trusted Contacts feature.
By understanding how to use Facebook Trusted Contacts in different scenarios, you can have peace of mind knowing that you have a backup plan in case you or a friend ever gets locked out of an account. Use this feature responsibly and reach out to your trusted contacts only when needed.
Scenario 1: Getting Locked Out of Your Facebook Account
It can be a frustrating experience when you find yourself locked out of your Facebook account. However, with Facebook Trusted Contacts, you have an additional method to regain access. Below are the step-by-step instructions on how to use Facebook Trusted Contacts in this scenario:
Step 1: Click on “Forgotten account?” on the Facebook login page
If you are unable to log in to your Facebook account, go to the Facebook login page. Below the login fields, you will see a link that says “Forgotten account?”. Clicking on this link will take you to the account recovery page.
Step 2: Choose “Reveal My Trusted Contacts”
On the account recovery page, you will be presented with various recovery options. Look for the option that says “Reveal My Trusted Contacts” and select it. This option allows you to use your chosen trusted contacts to regain access to your account.
Step 3: Contact your trusted friends
Once you have chosen to reveal your trusted contacts, Facebook will provide instructions on how to proceed. Typically, you will be given the option to send a recovery link to your trusted contacts.
Click on the link provided and reach out to your trusted friends either through email, messaging apps, or by other means. Inform them that you are locked out of your account and request their assistance in the account recovery process.
Your trusted contacts will receive a special security code from Facebook that they can then provide to you. Collect the security codes from each of your trusted contacts.
Step 4: Enter the recovery codes
Return to the account recovery page and enter the codes you received from your trusted contacts into the designated fields. These codes will confirm your identity and allow you to regain access to your account.
Follow any additional instructions provided by Facebook to complete the account recovery process.
By following these steps, you can use Facebook Trusted Contacts to regain access to your account when you are locked out. Make sure to choose trusted contacts who are reliable and whom you can reach out to in times of need. Exercise caution in sharing recovery codes and only provide them to your trusted contacts to maintain the security of your account.
Step 1: Click on “Forgotten account?” on the Facebook login page
If you find yourself unable to access your Facebook account, the first step towards recovering it is to click on the “Forgotten account?” link on the Facebook login page. This link is located below the login fields and is designed to assist users who have forgotten their login credentials or are locked out of their accounts.
When you click on “Forgotten account?”, you will be redirected to the account recovery page, where Facebook provides several options to help you regain access to your account. These options may include recovering your account through email, phone number, or using your trusted contacts.
By clicking on “Forgotten account?”, you are initiating the account recovery process. Facebook recognizes that you are experiencing difficulties and is ready to assist you in regaining access to your account.
On the account recovery page, Facebook may prompt you to enter the email address or phone number associated with your account, or provide other identifying information to verify your ownership of the account. Make sure to provide accurate information to help Facebook locate your account and proceed with the recovery process.
Important Note: It’s crucial to be cautious during the account recovery process and avoid falling victim to phishing attempts. Always ensure that you are on the official Facebook website and be wary of providing your login credentials or personal information on suspicious or untrusted websites.
If you are unsure whether the account recovery page you landed on is legitimate, you can manually type in “facebook.com” in your web browser’s address bar to be certain you are accessing the official Facebook website.
By clicking on “Forgotten account?” on the Facebook login page, you are taking the first step towards recovering access to your account. Next, you will need to follow the prompts and provide the necessary information to proceed with the account recovery process and regain control of your Facebook account.
Step 2: Choose “Reveal My Trusted Contacts”
After clicking on “Forgotten account?” on the Facebook login page and entering the necessary information, the next step in the account recovery process is to choose the option to “Reveal My Trusted Contacts.” This option is available on the account recovery page and aims to utilize your chosen trusted contacts to regain access to your Facebook account.
Upon selecting the “Reveal My Trusted Contacts” option, Facebook will present you with instructions on how to proceed. The process may vary slightly, but typically, you will be given the opportunity to send a recovery link or code to your trusted contacts.
By choosing to reveal your trusted contacts, you are essentially requesting their assistance in regaining access to your account. This can be particularly helpful if you are unable to reset your password or access your email or phone number associated with your Facebook account.
It’s important to note that only the trusted contacts you previously selected and confirmed will be able to assist you in this recovery process. Facebook will not disclose your account information or recovery options to anyone other than your designated trusted contacts.
Once you have chosen to reveal your trusted contacts, follow the instructions provided by Facebook to proceed with contacting them and requesting their assistance.
Be mindful of properly communicating with your trusted contacts, ensuring they understand you need their help in recovering your account. Provide them with any necessary information or instructions they may need, such as requesting them to check their email or messages for the recovery link or code.
Remember, your trusted contacts play a crucial role in the account recovery process. Make sure you have selected individuals you trust and have clear communication with them to smoothly navigate through this step.
By choosing the option to “Reveal My Trusted Contacts,” you are leveraging the support of these individuals to reclaim access to your Facebook account. Proceed to the next step of contacting your trusted contacts and requesting their assistance to move forward in the account recovery process.
Step 3: Contact Your Trusted Friends
Once you have selected the option to “Reveal My Trusted Contacts,” the next step in the account recovery process is to contact your trusted friends for assistance. These individuals, whom you have previously designated as your trusted contacts, will play a vital role in helping you regain access to your Facebook account.
Follow these steps to contact your trusted friends:
Step 1: Retrieve the contact information of your trusted friends
Before reaching out to your trusted contacts, ensure that you have their correct and up-to-date contact information. This may include email addresses, phone numbers, or other preferred methods of communication.
Step 2: Inform your trusted friends about the situation
Contact your trusted friends and inform them that you are undergoing the account recovery process and require their assistance. Clearly explain the situation and let them know that Facebook will be sending them a notification or code to aid in the recovery process.
Step 3: Request the security codes
Instruct your trusted friends to check their email accounts, messages, or other preferred communication channels for the security codes sent by Facebook. These codes are crucial for verifying your identity and regaining access to your Facebook account.
Step 4: Collect the security codes from your trusted friends
Once your trusted friends have received the security codes, instruct them to provide you with the codes as soon as possible. Collect the codes from each trusted friend and ensure they are entered accurately in the designated fields during the account recovery process.
Step 5: Follow any additional instructions provided by Facebook
Throughout the account recovery process, Facebook may provide specific instructions for utilizing the security codes provided by your trusted contacts. It is important to follow these instructions carefully to successfully regain access to your Facebook account.
Remember, the cooperation and prompt action of your trusted friends are essential for a smooth account recovery process. Maintain clear communication with them and express your gratitude for their assistance.
By effectively contacting your trusted friends and obtaining the necessary security codes, you are leveraging their support to regain access to your Facebook account. Moving forward, proceed to entering the security codes and following any remaining steps specified by Facebook to complete the account recovery process.
Scenario 2: Helping a Friend Regain Access to Their Facebook Account
As a trusted friend, you may be called upon to assist someone in regaining access to their Facebook account. If a friend reaches out to you for help, you can provide support by following these steps:
Step 1: Go to the Facebook “Help a Friend” page
To begin assisting your friend, visit the Facebook website and use the search bar to find the “Help a Friend” page. This page is designed specifically for helping individuals regain access to their Facebook accounts.
Step 2: Enter your friend’s name or email address
On the “Help a Friend” page, you will be prompted to enter your friend’s name or email address in the designated field. This information is needed to locate your friend’s Facebook account and initiate the account recovery process.
Step 3: Follow the instructions to send recovery codes
Once you have identified your friend’s Facebook account, follow the instructions provided by Facebook to send recovery codes to their trusted contacts. These recovery codes will help your friend regain access to their account.
Facebook may ask you to enter the email addresses or phone numbers of your friend’s trusted contacts. Make sure to enter this information accurately as it will be used to send the recovery codes.
Ensure that you have the consent of your friend before providing their trusted contacts’ information to Facebook. Respect their privacy and only proceed with their permission.
Important Note: It is crucial to prioritize your friend’s privacy and security during this process. Only provide their trusted contacts’ information to Facebook as instructed and avoid sharing it with anyone else.
By following these steps, you can act as a reliable support system for your friend in helping them regain access to their Facebook account. Facebook’s account recovery process may have slight variations over time, so make sure to carefully follow the instructions provided on the Facebook website or reach out to Facebook support for the most up-to-date information.
Remember, assisting a friend in regaining access to their account requires trust and confidentiality. Handle their personal information with care and ensure that you respect their privacy throughout the account recovery process.
Step 1: Go to the Facebook “Help a Friend” Page
If a friend reaches out to you for help in regaining access to their Facebook account, you can assist them by navigating to the Facebook “Help a Friend” page. This dedicated page is designed to provide support and guidance in the account recovery process.
To begin, open a web browser and visit the Facebook website. Once there, locate the search bar at the top of the page. Type in “Help a Friend” and hit enter or click on the search icon.
Look for the search result that corresponds to the “Help a Friend” page provided by Facebook. Click on the appropriate link to proceed to the dedicated page.
Ensure that you are on the official Facebook website and that the page you land on is authentic. Double-check the URL to confirm that it displays “facebook.com” to ensure the legitimacy of the page.
The “Help a Friend” page is specifically designed to assist users who are having trouble accessing their Facebook accounts. On this page, you will find the necessary tools and resources to support your friend through the account recovery process.
Important Note: The layout and features of the “Help a Friend” page may vary over time as Facebook updates its platform. Make sure to follow the instructions and prompts provided on the Facebook website to navigate to the correct page for assisting your friend.
By accessing the Facebook “Help a Friend” page, you are taking the initial step towards helping your friend regain access to their Facebook account. It is essential to approach this process with care, ensuring that you respect your friend’s privacy and follow the instructions provided to ensure a smooth account recovery experience.
Step 2: Enter Your Friend’s Name or Email Address
After accessing the Facebook “Help a Friend” page, the next step in assisting your friend in regaining access to their Facebook account is to enter their name or email address in the designated field. This information is crucial for Facebook to locate and identify your friend’s account for the account recovery process.
On the “Help a Friend” page, you will typically find a search field specifically designed for entering your friend’s name or email address. This field may be labeled as “Enter your friend’s name” or “Enter your friend’s email address.”
Option 1: Enter your friend’s name:
If you know your friend’s full name, simply type it into the designated search field. Facebook will automatically perform a search based on the name you provide and display any matching accounts. Select the appropriate account that belongs to your friend.
Option 2: Enter your friend’s email address:
If you have your friend’s email address, enter it into the search field. Facebook will conduct a search based on the email address provided and display any matching accounts associated with that email address. Choose the correct account that belongs to your friend.
Double-check the name or email address you entered to ensure its accuracy. Pay attention to any spelling errors or typos that may lead to an incorrect search result.
By entering your friend’s name or email address, you are allowing Facebook to locate their account and initiate the account recovery process. This step is crucial in the overall process of helping your friend regain access to their Facebook account.
After entering the necessary information, proceed to the next steps as instructed by Facebook on the “Help a Friend” page to provide further assistance to your friend and navigate the account recovery process successfully.
Step 3: Follow the Instructions to Send Recovery Codes
Once you have entered your friend’s name or email address on the Facebook “Help a Friend” page, the next step in assisting them with account recovery is to follow the instructions provided by Facebook to send recovery codes. These recovery codes are essential in helping your friend regain access to their Facebook account.
Facebook will present you with a set of instructions that may involve selecting from various recovery options or verifying your identity as the person aiding in the account recovery process.
Typically, you will be asked to select the option to send recovery codes to your friend’s trusted contacts. These trusted contacts are individuals your friend has previously chosen to assist them in accessing their account in case of emergencies.
Follow these steps to send recovery codes to your friend’s trusted contacts:
Step 1: Provide the necessary contact information
Enter the email addresses or phone numbers of your friend’s trusted contacts in the designated fields. Make sure to provide accurate and up-to-date information to ensure the successful delivery of the recovery codes.
Step 2: Confirm the contact information
Double-check the contact information you entered to ensure its accuracy and completeness. Verifying the information will help prevent any errors or delays in delivering the recovery codes to the trusted contacts.
Step 3: Submit the request to send recovery codes
After confirming the contact information, submit the request to send the recovery codes to the trusted contacts. Facebook will process the request and send the recovery codes via email or other appropriate communication channels.
It’s important to inform your friend about the steps you have taken and reassure them that the recovery codes are on their way to the trusted contacts they have designated.
By following the instructions provided by Facebook to send recovery codes to your friend’s trusted contacts, you are playing a crucial role in assisting them in regaining access to their Facebook account. Continue to communicate with your friend and offer support throughout the account recovery process.