
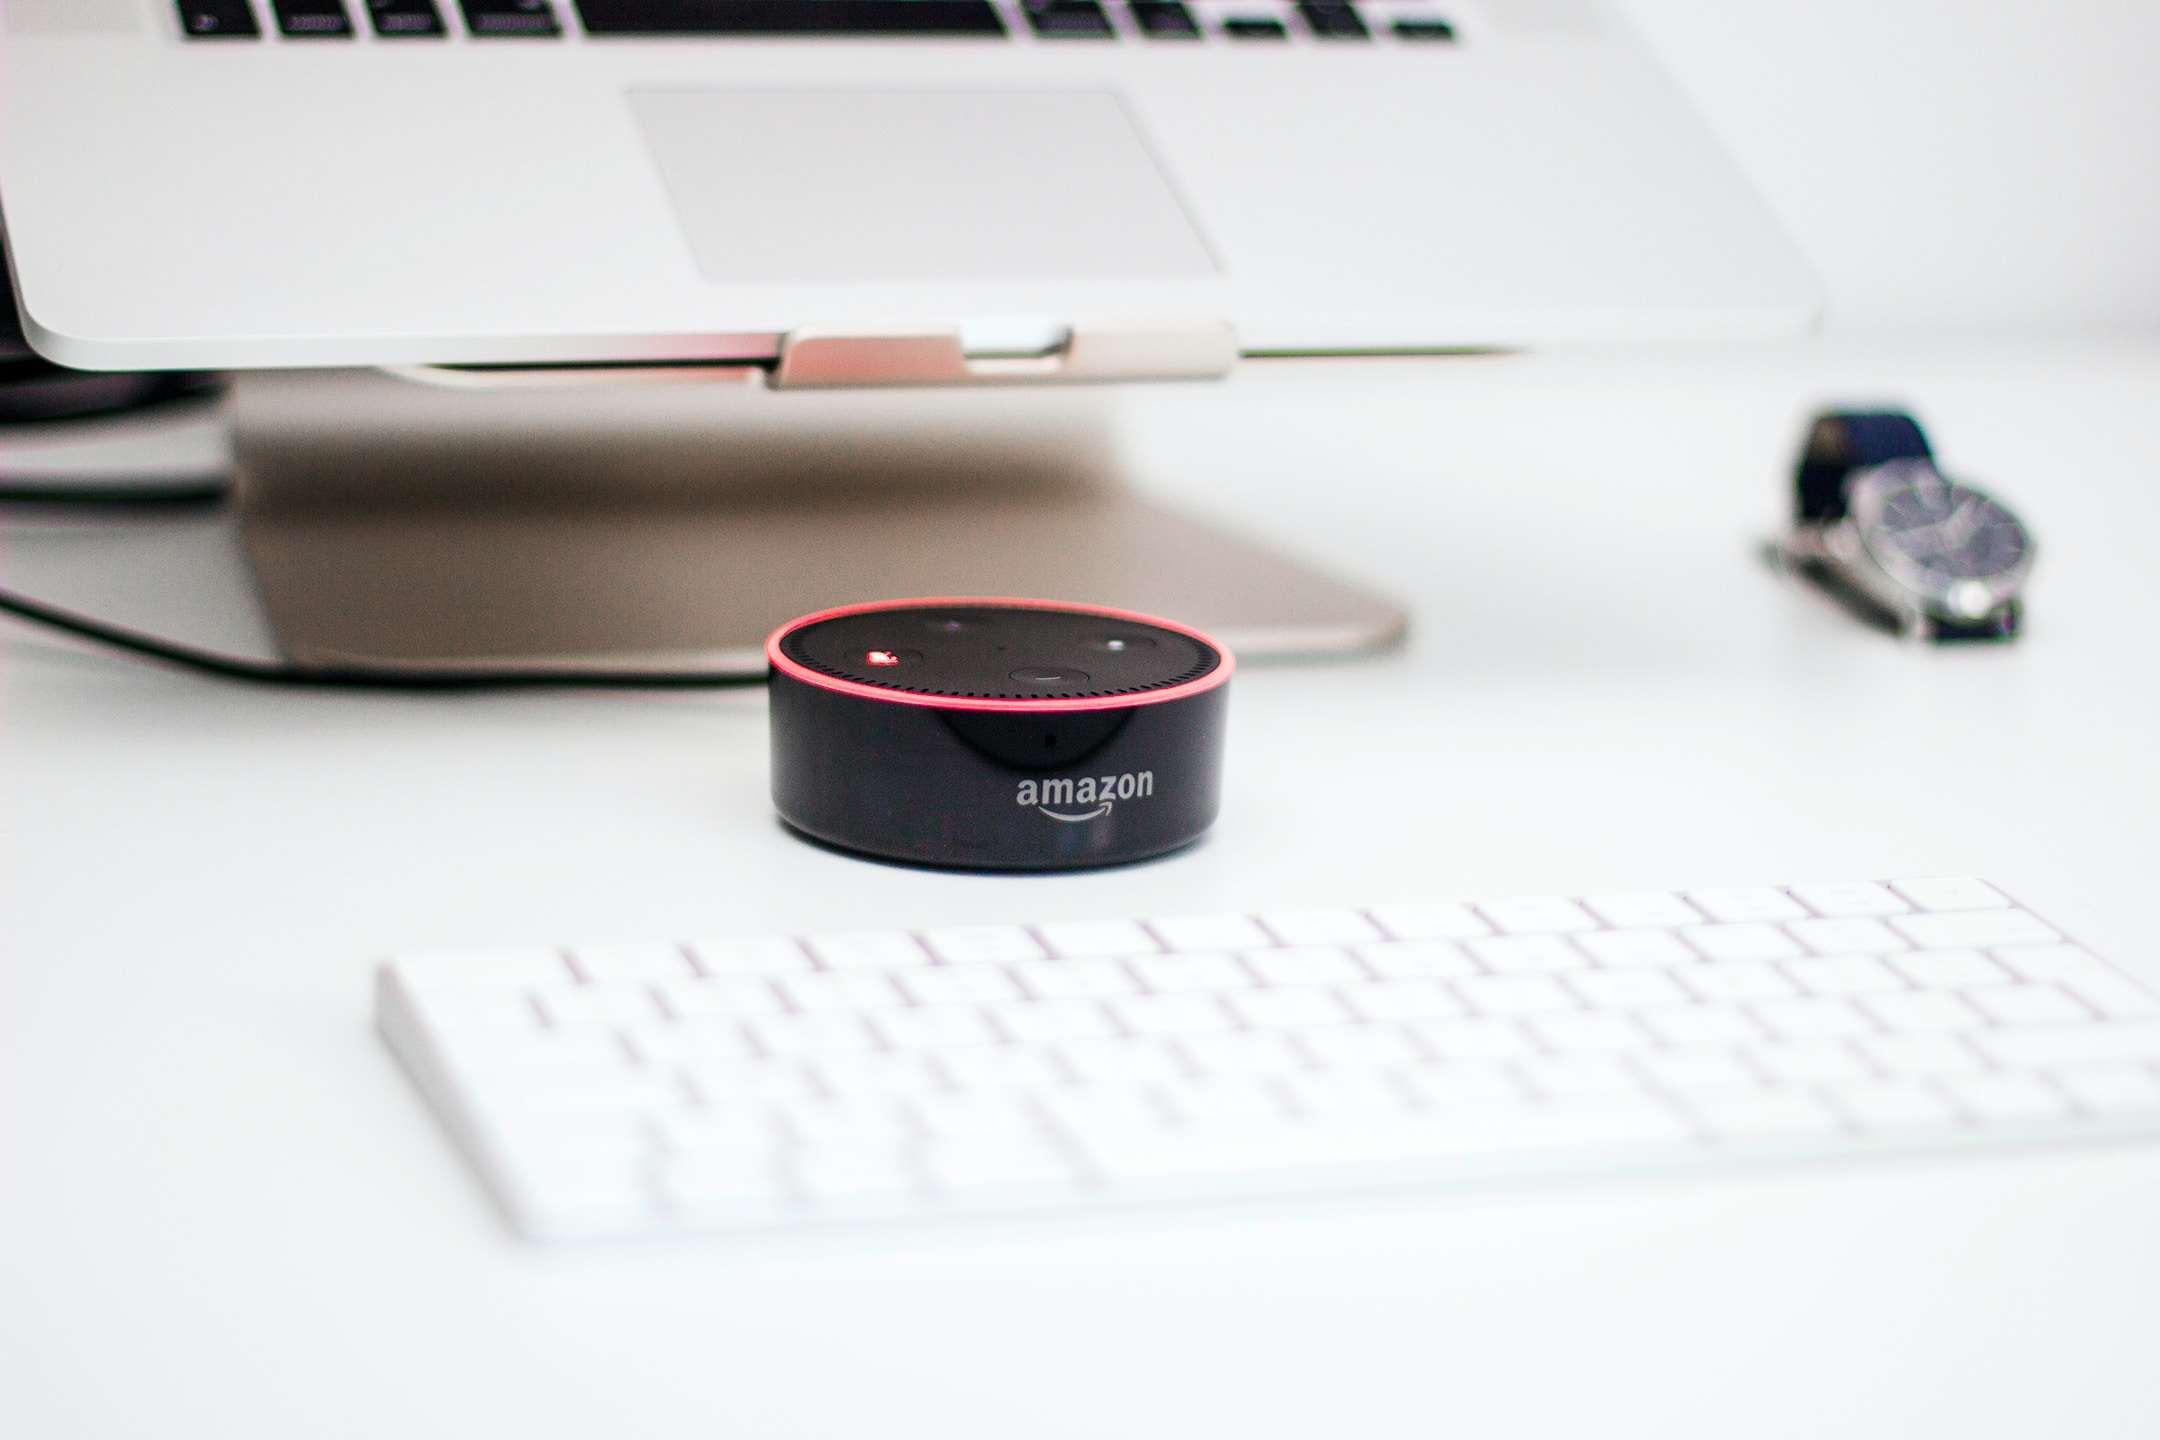
What is Amazon Echo?
Amazon Echo is a smart speaker developed by Amazon that features a virtual assistant named Alexa. It is designed to provide voice-controlled interactions and perform various tasks to make your everyday life easier. With its sleek design and advanced technology, Amazon Echo has become a popular household device.
Powered by Alexa, Amazon Echo can play music, set alarms, answer questions, provide weather updates, control smart home devices, and much more – all with just the sound of your voice. It uses far-field voice recognition, meaning it can hear you from across the room even when there is background noise.
The Echo device itself consists of a speaker, microphone array, and connection ports. It comes in different sizes and styles to suit different preferences and spaces in your home. Whether you choose the compact Echo Dot, the mid-sized Echo, or the powerful Echo Plus, each device offers the same core functionality with varying levels of audio quality and features.
The key feature of Amazon Echo is its integration with the Alexa voice assistant, which utilizes artificial intelligence and natural language processing to understand and respond to your commands. Alexa can perform numerous tasks, such as playing music from popular streaming services, setting timers and reminders, providing news updates, controlling compatible smart home devices, and even ordering products from Amazon.
One of the advantages of Amazon Echo is its expandability through skills. Alexa has a growing library of skills that you can add to enhance its capabilities. These skills enable you to do things like order a pizza, meditate, play interactive quizzes, or get a guided workout – all through voice commands.
Overall, Amazon Echo offers a convenient and hands-free way to interact with technology in your home. By simply asking Alexa, you can accomplish a wide range of tasks without having to lift a finger. With regular software updates and continuous improvements, Amazon Echo continues to evolve and provide new features to make your life more efficient and enjoyable.
What is Alexa?
Alexa is the virtual assistant that powers Amazon Echo and other compatible Amazon devices. It is a cloud-based intelligent assistant that utilizes artificial intelligence to understand and respond to voice commands. Alexa is designed to simplify your daily tasks, provide information, and control various smart home devices, among other capabilities.
With its advanced natural language processing and machine learning algorithms, Alexa can interpret and respond to a wide range of requests. You can ask Alexa to play music, read the news, tell jokes, set reminders, answer questions, provide weather updates, and much more. It is like having a personal assistant at your beck and call, ready to help whenever you need it.
Alexa is continuously learning and evolving. Amazon regularly introduces new features and improvements, expanding its functionality and making it smarter over time. It can understand context, remember your preferences, and adapt to your personal needs.
One of the strengths of Alexa is its versatility and compatibility with other devices and services. It can integrate with a variety of smart home devices, allowing you to control lights, thermostats, locks, and more using your voice. Additionally, Alexa can connect with popular third-party applications and services, enabling you to order food, book a ride, or even check your bank account balance.
To interact with Alexa, you simply say the wake word “Alexa” followed by your command. The microphones on the Echo device pick up your voice and transmit it to the cloud, where Alexa processes the request and provides a response. This communication happens quickly and seamlessly, allowing for a smooth user experience.
Privacy and security are of utmost importance when utilizing Alexa. Amazon has implemented various measures to protect your data and ensure that your interactions with Alexa are secure. You have control over what information is stored and can review and delete your voice recordings if desired.
Alexa’s capabilities can be expanded through the use of Alexa Skills. Skills are like apps for Alexa, allowing you to add new functionalities and services to enhance your Alexa experience. There are thousands of skills available, covering a wide variety of categories such as games, productivity, cooking, fitness, and more.
Choosing the Right Amazon Echo Device
When it comes to selecting the right Amazon Echo device for your needs, there are a few factors to consider. Each Echo device offers unique features and specifications, so it’s important to choose one that aligns with your preferences and requirements. Here are some things to consider when making your decision:
- Size and Design: Amazon Echo devices come in various sizes and designs. The Echo Dot is the smallest and most compact, making it perfect for smaller spaces or if you’re on a budget. The standard Echo offers a balance between size and audio quality, while the Echo Plus provides enhanced sound and a built-in smart home hub. Consider the aesthetics and space availability in your home when choosing.
- Audio Quality: If you’re an audiophile or love to listen to music, pay attention to the audio features of each device. The Echo Plus and Echo Studio offer premium sound quality with enhanced bass and stereo separation, while the Echo Dot and standard Echo deliver good sound in a smaller package. Consider your priorities in sound quality before making a decision.
- Smart Home Compatibility: If you have smart home devices or plan to integrate them in the future, ensure that the Echo device you choose is compatible with the brands and protocols you use. The Echo Plus has a built-in Zigbee hub, allowing for seamless integration with various smart home devices without the need for additional hubs or bridges.
- Budget: Consider your budget when selecting an Echo device. The Echo Dot is the most affordable option, followed by the standard Echo, and then the Echo Plus. Determine how much you are willing to spend and choose accordingly.
- Additional Features: Some Echo devices offer additional features that might be of interest to you. For instance, the Echo Show has a built-in display, which allows for visual information, video calling, and even streaming videos. Consider whether these extra features are important to you and if they justify the higher price tag.
It’s worth noting that all Echo devices provide the core Alexa experience, meaning they can perform tasks and answer questions in the same way. The main differences lie in audio quality, design, additional features, and compatibility with other devices.
To make an informed decision, take the time to research and compare the specifications and features of each device. Read customer reviews and consider personal recommendations. By weighing these factors against your own preferences and requirements, you can choose the perfect Amazon Echo device to bring the power of Alexa into your home.
Unboxing your Amazon Echo
Unboxing your new Amazon Echo is an exciting moment as you prepare to bring the power of Alexa into your home. Follow these steps to properly unbox and set up your Echo device:
- Verify Package Contents: Start by checking the package contents to ensure that you have all the components. The box should contain the Echo device, a power adapter, and any additional accessories that may have come with your specific model.
- Find a Suitable Location: Before unboxing, decide on the ideal location for your Echo device. It should be placed on a stable surface near a power outlet and within range of your Wi-Fi network. Keep in mind that the device will need to be within earshot for voice commands to be picked up accurately.
- Unbox the Device: Carefully open the packaging and remove the Echo device. Take note of any protective covers or plastic films that may need to be removed before use. Keep the packaging in case you need to return or store the device in the future.
- Connect the Power Adapter: Plug the power adapter into the Echo device and then insert the other end into a nearby power outlet. Make sure the device is securely connected.
- Power On the Device: The Echo device will automatically power on once it is connected to the power source. You will notice LED lights on the device indicating the power status.
- Wait for Initialization: Give the Echo device a few moments to initialize and connect to the Amazon servers. During this time, the LED lights will indicate the progress. When the lights turn blue or orange, it means the device is ready for setup.
- Prepare the Alexa App: To complete the setup process, you will need to have the Amazon Alexa app installed on your smartphone or tablet. If you haven’t done so already, download the app from the Apple App Store or Google Play Store and sign in with your Amazon account details.
- Follow the On-Screen Setup Instructions: Open the Alexa app and follow the on-screen instructions to set up your Echo device. It will guide you through the process of connecting your device to your Wi-Fi network and configuring basic settings.
- Test the Device: Once the setup is complete, issue a command to Alexa to test the device. Say “Alexa, play some music” or “Alexa, what’s the weather today?” to see if the Echo device responds appropriately and provides the desired information.
- Enjoy Your Amazon Echo: With the setup complete, you can now start exploring the various features and capabilities of your Amazon Echo device. Use voice commands to control music playback, set reminders, get news updates, and much more.
Unboxing and setting up your Amazon Echo is a straightforward process that will quickly have you enjoying the benefits of Alexa’s voice assistant. Take your time during the initial setup to ensure a smooth experience, and don’t hesitate to consult the user manual or online resources for additional guidance if needed.
Connecting Amazon Echo to Power
Before you can start using your Amazon Echo, you need to connect it to a power source. Follow these simple steps to ensure a safe and proper power connection:
- Locate the Power Adapter: In the box, you will find a power adapter specifically designed for your Echo device. Locate this adapter and ensure that it is in good condition.
- Identify the Power Input Port: On the back or bottom of your Echo device, you will find a power input port. It typically looks like a small round hole with pins or contacts inside. Take note of this port as you will be connecting the power adapter to it.
- Plug in the Power Adapter: Insert the plug of the power adapter into a nearby power outlet. Make sure the power outlet is easily accessible and not blocked by furniture or other objects.
- Connect the Power Adapter to your Echo Device: Take the other end of the power adapter and insert it into the power input port on your Echo device. Ensure that the connection is secure and the plug is fully inserted into the port.
- Verify the Power Status: Once connected to power, your Echo device will automatically turn on. Look for the LED lights on the device, which typically indicate the power status. Consult the user manual for your specific Echo model to understand the meaning of the different LED light colors.
- Ensure Stable Power Connection: To avoid any interruptions or issues, ensure that the power connection remains stable. Avoid repeatedly plugging and unplugging the power adapter and do not use any damaged or frayed cables.
- Position the Echo Device: After connecting your Echo device to power, position it in a suitable location. Ensure that it is placed on a stable surface and not obstructed by objects that may interfere with sound or microphone reception.
It is important to note that each Echo model may have slight variations in the power port design and LED indications. Therefore, it is recommended to refer to the specific user manual or online resources for your device to ensure correct and safe power connection.
By following these steps, you can easily connect your Amazon Echo to a power source and get ready to experience seamless voice interactions with Alexa. With a solid power connection, you can enjoy the full range of features and capabilities that your Echo device has to offer.
Connecting Amazon Echo to Wi-Fi
To unleash the full potential of your Amazon Echo, you need to connect it to your Wi-Fi network. Follow these steps to ensure a smooth and successful Wi-Fi connection:
- Prepare the Alexa App: Before you begin, make sure you have the Amazon Alexa app installed on your smartphone or tablet. If you haven’t done so already, download the app from the Apple App Store or Google Play Store. Sign in using your Amazon account credentials.
- Power on your Echo Device: Ensure that your Echo device is connected to the power source and powered on. The LED lights on the device should indicate that it is ready for setup. If the lights are not illuminated, check the power connection and make sure the device is turned on.
- Open the Alexa App: Launch the Alexa app on your mobile device. Tap on the “Devices” tab at the bottom of the screen and then select the “+” icon to add a new device.
- Select your Echo Device: Choose the type of Echo device you want to set up from the list provided in the app. If you don’t see your specific model, select the option that is closest in appearance and functionality to your device.
- Put your Echo Device in Setup Mode: Follow the on-screen instructions in the Alexa app to put your Echo device in setup mode. This typically involves pressing and holding a certain button on the device until the LED lights start flashing in a specific pattern. Refer to the user manual for your specific Echo model to know the correct setup mode procedure.
- Connect your Mobile Device to the Echo’s Wi-Fi: Once your Echo device is in setup mode, open the Wi-Fi settings on your mobile device. Look for a network name that starts with “Amazon-” followed by a series of characters. Select that network to connect your mobile device to the Echo’s Wi-Fi network.
- Return to the Alexa App: Switch back to the Alexa app, where you will see a prompt to continue the setup process. Tap “Continue” to proceed.
- Select your Home Wi-Fi Network: In the Alexa app, choose your home Wi-Fi network from the list of available networks. Enter the Wi-Fi network password when prompted. Make sure you enter the correct password to avoid any connection issues.
- Wait for Connection Confirmation: After entering the Wi-Fi network details, your Echo device will attempt to connect to your home network. It may take a few moments for the connection to establish. Once the connection is successful, you will receive a confirmation on the Alexa app that your Echo device is now connected to Wi-Fi.
- Renaming your Echo Device (Optional): If you have multiple Echo devices in your home, you may choose to give each one a specific name to easily differentiate them. In the Alexa app, you can assign a custom name to your Echo device for easy identification when issuing voice commands.
With your Echo device connected to Wi-Fi, you can begin enjoying all the features and capabilities that Alexa has to offer. Remember, a stable and reliable Wi-Fi connection is crucial for seamless voice interactions and access to a wide range of services and skills.
If you encounter any issues during the Wi-Fi setup process, ensure that you are within range of your Wi-Fi router, the correct Wi-Fi credentials are entered, and there are no Wi-Fi signal interruptions. Check your router settings if necessary or consult the Amazon support resources for further assistance.
Setting up the Amazon Alexa App
Before you can fully utilize the capabilities of your Amazon Echo device, you need to set up the Amazon Alexa app on your mobile device. The app serves as the control center for managing and customizing your Echo device. Follow these steps to set up the Amazon Alexa app:
- Download and Install the App: Visit the Apple App Store or Google Play Store on your smartphone or tablet. Search for the Amazon Alexa app and download it to your device. The app is available for both iOS and Android platforms.
- Launch the App: Once the installation is complete, locate the Amazon Alexa app on your device and tap on its icon to launch it.
- Sign in with your Amazon Account: To continue, you will need to sign in with your Amazon account credentials. If you don’t have an Amazon account, create one by following the prompts on the app.
- Grant Necessary Permissions: The app may request certain permissions to access features on your device, such as your location or microphone. Read through the permissions carefully and grant access as needed to enable full functionality.
- Set Up a New Device: Once you have signed in and granted the necessary permissions, the app will guide you through setting up a new device. Tap on “Set Up a New Device” and select the type of Echo device you own from the list provided.
- Follow the On-Screen Instructions: The Alexa app will provide step-by-step instructions to help you set up your Echo device. This may include putting your device in setup mode, connecting it to your Wi-Fi network, and configuring basic settings.
- Customize Your Device Settings: After the initial setup, you can further customize your Echo device by accessing the device settings within the Alexa app. Here, you can personalize various options such as the device name, language, time zone, and more.
- Explore Alexa Skills and Features: The Alexa app is also your gateway to discovering and enabling new skills for your Echo device. Skills are additional functionalities and services that can be added to Alexa. Browse through the skills available in the app and enable the ones that interest you.
- Manage Connected Smart Home Devices: If you have compatible smart home devices, you can connect and manage them using the Alexa app. Access the Smart Home section in the app to discover, connect, and control your devices with voice commands.
- Stay Updated with Notifications: The Alexa app also allows you to receive notifications and reminders from your Echo device. You can choose to enable or disable notifications for various categories, including weather updates, new skills, and more.
By following these steps, you can set up the Amazon Alexa app on your mobile device and have complete control over your Echo device. The app provides a seamless interface for managing your device settings, exploring new skills, and integrating with your smart home devices. Take your time to familiarize yourself with the app and customize the settings according to your preferences.
If you encounter any issues during the setup process or have questions about specific features, refer to the app’s help section or consult the Amazon support resources for further assistance.
Adding Skills to Alexa
One of the key features of Amazon Alexa is its ability to expand its capabilities through the use of skills. Skills are like apps for Alexa, enabling you to add new functionalities and services to enhance your Alexa experience. Here’s how you can add skills to Alexa:
- Open the Alexa App: Launch the Amazon Alexa app on your mobile device. If you haven’t already done so, sign in with your Amazon account credentials.
- Access the Skills Section: In the Alexa app, tap on the menu icon (usually three lines) located at the top left corner of the screen. From the menu that appears, select “Skills & Games.”
- Browse and Search Skills: In the Skills & Games section, you can browse through various categories or search for specific skills using the search bar. The categories make it easier to find skills based on your interests, such as Music & Audio, Smart Home, Productivity, and more.
- Select a Skill: Once you find a skill that interests you, tap on it to open the skill details page. Here, you can learn more about the skill, read user reviews and ratings, and see example commands or actions supported by the skill.
- Enable the Skill: To add the skill to your Alexa device, tap the “Enable” button on the skill details page. Some skills may require additional setup or authorization before they can be enabled. Follow the on-screen instructions to complete the process.
- Use the Skill: Once the skill is successfully enabled, you can start using it with your Alexa device. Depending on the skill, you may need to issue specific voice commands or interact with the skill using the Alexa app. Refer to the skill’s documentation or prompts for guidance on how to utilize it effectively.
- Manage Skills: In the Alexa app, you can manage your enabled skills by accessing the Skills & Games section. Here, you can disable or remove skills if you no longer need them or want to free up space on your device.
- Discover New Skills: To continually enhance your Alexa experience, regularly explore the Skills & Games section in the Alexa app. New skills are frequently added, allowing you to discover and expand the functionalities of your Alexa device.
Adding new skills to Alexa allows you to customize your device to suit your preferences and needs. Whether you want to listen to podcasts, control your smart home devices, play interactive games, or access specific services, there is likely a skill available for it.
Remember to read user reviews and ratings before enabling a skill to ensure that it meets your expectations. Experiment with different skills and discover the ones that enhance your daily routine and provide the most value to you.
If you encounter any issues with a skill or have questions about its features, consult the skill’s documentation or seek support from the skill’s developer or the Amazon Alexa support resources.
Customizing Alexa’s Settings
Customizing Alexa’s settings allows you to personalize your Amazon Echo device and tailor its behavior to your preferences. By accessing the Alexa app, you can fine-tune various settings to enhance your overall Alexa experience. Here’s how you can customize Alexa’s settings:
- Open the Alexa App: Launch the Amazon Alexa app on your mobile device. Sign in with your Amazon account credentials if you haven’t already done so.
- Access Device Settings: Tap on the menu icon (usually three lines) located at the top left corner of the screen. From the menu that appears, select “Devices.”
- Choose your Echo Device: In the Devices section, you will see a list of Echo devices associated with your account. Select the specific Echo device for which you want to customize the settings.
- Explore Device Settings: Within the device settings, you will find various options to customize Alexa’s behavior. These settings may include device name, language, time zone, volume control, equalizer settings, and more. Explore each option to determine which settings you want to modify.
- Adjust Language and Regional Settings: If you prefer Alexa to respond in a different language or want to set a specific time zone, click on the corresponding options within the device settings. You can select your preferred language and adjust regional settings to match your location.
- Manage Privacy Settings: Privacy settings are crucial for controlling how Alexa collects and uses your data. In the device settings, you can manage options such as voice recordings, device history, and personalized recommendations. Adjust these settings according to your comfort level and privacy preferences.
- Set Routine Preferences: Routines allow you to automate multiple actions with a single voice command. Within the device settings, you can create and manage routines. Customize your routines by selecting the actions you want to occur based on specific triggers or at scheduled times.
- Adjust Sound and Volume Settings: If you want to fine-tune the audio output of your Echo device, explore the sound and volume settings within the device settings. You can adjust the bass, treble, and mid-range levels to suit your audio preferences.
- Enable and Manage Skills: Skills are additional functionalities that you can add to Alexa. Within the device settings, you can access the Skills section to enable, disable, or manage the skills on your Echo device. Customize your enabled skills based on your interests and needs.
- Access and Modify Smart Home Settings: If you have connected smart home devices, you can control and manage them through the smart home settings within the device settings. Here, you can discover, connect, and organize your smart home devices for seamless integration with Alexa.
By customizing Alexa’s settings, you can personalize your Echo device to fit your preferences and needs. Take the time to explore each setting and tailor them to create a more personalized and efficient user experience.
Remember to revisit the settings periodically to ensure they align with any changes or updates you want to make. With the ability to customize Alexa’s settings, you can truly make your Echo device an integral part of your smart home ecosystem.
If you have any questions or encounter any issues while customizing the settings, refer to the Amazon Alexa support resources or seek assistance from the Amazon customer support team.
Linking Music Streaming Services
One of the great features of Amazon Echo is its ability to play music from various streaming services. By linking your preferred music streaming service to Alexa, you can effortlessly enjoy your favorite tunes with a simple voice command. Here’s how you can link music streaming services to your Amazon Echo:
- Open the Alexa App: Launch the Amazon Alexa app on your mobile device. Sign in with your Amazon account credentials if you haven’t already done so.
- Access the Settings Menu: Tap on the menu icon (usually three lines) located at the top left corner of the screen. From the menu that appears, go to “Settings.”
- Tap on “Music & Podcasts”: In the Settings menu, select “Music & Podcasts” to access the music streaming settings.
- Select “Link New Service”: Under the Music & Podcasts section, you will see a list of supported music streaming services. Tap on “Link New Service” to explore and link your desired service.
- Browse and Choose a Service: Scroll through the list of available music streaming services and select the one you want to link to Alexa. Popular services include Spotify, Apple Music, Amazon Music, Pandora, and TuneIn, among others.
- Authenticate and Link: After selecting a music streaming service, follow the on-screen instructions to authenticate your account and grant permission for Alexa to access your music library. This may involve signing in to your streaming service account or authorizing the Alexa app.
- Set a Default Music Service (Optional): If you have linked multiple music streaming services, you can set a default music service for Alexa to use. In the Music Settings, select “Default Services” and choose your preferred service from the list.
- Control Music with Voice Commands: Once your music streaming service is linked, you can now control it using voice commands. For example, say “Alexa, play some jazz on Spotify,” or “Alexa, play my favorite playlist from Apple Music.”
- Explore Advanced Music Features: Depending on the music streaming service you’ve linked, you can explore more advanced features. For example, for Spotify, you can create playlists, save songs to your library, and discover new music through personalized recommendations.
- Manage Linked Services: If you want to unlink or manage your linked music streaming services, you can do so within the Music & Podcasts settings. You can disable or remove services that you no longer use or want to have linked with Alexa.
Linking your preferred music streaming service to Amazon Echo enables you to enjoy a seamless music listening experience with just your voice. Whether you’re into jazz, rock, pop, or classical, you can easily access your favorite songs and playlists through Alexa.
Remember to consult the specific documentation or support resources for your streaming service if you encounter any issues during the linking process. Additionally, keep your music streaming service subscription up to date to ensure uninterrupted access to your music library through Amazon Echo.
By linking music streaming services to Alexa, you can create a personalized and enjoyable music experience in your home, all controlled with simple voice commands.
Connecting Smart Home Devices
With Amazon Echo, you can easily control and manage your smart home devices using just your voice. By connecting your smart home devices to Alexa, you can enjoy the convenience of controlling lights, thermostats, locks, and more, all from the comfort of your couch. Here’s how you can connect your smart home devices to Amazon Echo:
- Ensure Device Compatibility: Before getting started, confirm that your smart home devices are compatible with Alexa. Most popular smart home brands such as Philips Hue, TP-Link, and Ecobee are supported. Consult the manufacturer’s documentation or visit the Alexa website to check device compatibility.
- Prepare the Smart Home Devices: Each smart home device may have its own setup process. Follow the manufacturer’s instructions to ensure your devices are properly set up and connected to your home’s Wi-Fi network. Make sure you can control your smart devices using their respective mobile apps.
- Open the Alexa App: Launch the Amazon Alexa app on your mobile device. If you haven’t already done so, sign in with your Amazon account credentials.
- Access the Smart Home section: Tap on the menu icon (usually three lines) located at the top left corner of the screen. From the menu that appears, select “Smart Home.”
- Discover Devices: In the Smart Home section of the Alexa app, tap on “Devices” and select “Discover” to start scanning for compatible devices in your network. Alexa will automatically search for and detect any smart home devices that are compatible with its system.
- Follow on-screen Prompts: Alexa will guide you through the process of connecting your smart home devices. Follow the on-screen prompts, and, if necessary, perform any additional steps required by your specific devices, such as pressing a button on the device or entering account credentials.
- Grouping Devices: Once your devices are discovered and connected, you can create groups to control multiple devices simultaneously. For example, you can create a group called “Living Room Lights” that includes all the smart lights in your living room, allowing you to control them with a single voice command.
- Control Devices with Voice Commands: Now that your smart home devices are connected to Alexa, you can easily control them using voice commands. For example, say “Alexa, turn off the living room lights” or “Alexa, set the thermostat to 72 degrees.”
- Manage Devices and Groups: In the Alexa app, you can view, manage, and customize your connected devices and groups. You can rename devices, create new groups, adjust settings, and remove devices if needed. This allows you to organize and control your smart home devices more efficiently.
By connecting your smart home devices to Amazon Echo, you can effortlessly control and manage your home’s automation and create a more convenient and comfortable living environment. From adjusting your lighting to controlling your thermostat, the possibilities are endless.
Remember to consult the specific documentation or support resources for your smart home devices if you encounter any issues during the connection process. Additionally, ensure that your devices are kept up to date with the latest firmware to ensure optimal compatibility with Alexa.
With the power of Alexa and Amazon Echo, your smart home devices become even smarter and more accessible, providing you with enhanced control and convenience in managing your home.
Using Amazon Echo for Voice Commands and Information
Amazon Echo is designed to be a voice-controlled device, giving you easy access to a wide range of information and allowing you to perform tasks with just your voice. Here’s how you can use Amazon Echo for voice commands and information:
- Wake Word: To activate Amazon Echo, simply say the wake word “Alexa.” The blue ring on the Echo device will light up, indicating that Alexa is ready to hear your command.
- Request Information: You can ask Alexa for various types of information. For example, say “Alexa, what’s the weather?” to get the current weather forecast for your location. You can also ask for news updates, traffic conditions, sports scores, and much more.
- Manage Daily Schedule: Alexa can help you stay organized by managing your schedule. You can ask Alexa to set reminders, create calendar events, and even check your upcoming appointments. For example, say “Alexa, remind me to pick up groceries at 5 p.m.” or “Alexa, what’s on my calendar for tomorrow?”
- Control Smart Home Devices: If you have connected smart home devices, you can use Alexa to control them with voice commands. For example, say “Alexa, turn off the living room lights” or “Alexa, set the thermostat to 72 degrees.”
- Play Music and Media: Alexa can play your favorite music, podcasts, and audiobooks from various streaming services. Simply say “Alexa, play my workout playlist” or “Alexa, play the latest episode of my favorite podcast.”
- Make Hands-Free Calls and Send Messages: With compatible Echo devices, you can make hands-free calls and send messages to your contacts. Say “Alexa, call Mom” or “Alexa, send a message to John.”
- Get General Knowledge and Fun Facts: Use Alexa as a virtual assistant to answer your questions and provide general knowledge. Ask Alexa about historical facts, definitions, trivia, or even solve math problems. Say “Alexa, how tall is Mount Everest?” or “Alexa, tell me a joke.”
- Use Skills for Additional Functionality: Skills are like apps for Alexa, offering additional functionalities. Enable skills through the Alexa app to access specific services or perform specialized tasks. For example, enable a cooking skill for step-by-step recipe instructions or a meditation skill for guided relaxation sessions.
- Set Routines for Automation: Routines allow you to automate multiple actions with a single voice command. Customize routines in the Alexa app to have Alexa perform a series of tasks or actions based on specific triggers or at scheduled times. For instance, create a “Goodnight” routine to turn off lights, lock doors, and play relaxing music when you’re ready to sleep.
These are just a few examples of how you can use Amazon Echo for voice commands and information. With Alexa’s ever-expanding capabilities and the integration of various skills, the possibilities are vast. Experiment with different commands, explore new skills, and make the most out of Amazon Echo’s voice-controlled convenience.
Remember, if you ever need help or aren’t sure what to ask, say “Alexa, help” to get guidance on the available commands and features. Enjoy the hands-free convenience and efficiency that Amazon Echo brings to your everyday life.
Syncing Your Calendar and Email
Amazon Echo offers the convenience of syncing your calendar and email accounts, allowing you to stay organized and up-to-date with your appointments, events, and emails. By syncing your calendar and email, you can effortlessly access and manage your schedule and messages with just your voice. Here’s how you can sync your calendar and email with Amazon Echo:
- Open the Alexa App: Launch the Amazon Alexa app on your mobile device. Sign in with your Amazon account credentials if you haven’t already done so.
- Access the Settings Menu: Tap on the menu icon (usually three lines) located at the top left corner of the screen. From the menu that appears, select “Settings.”
- Select “Calendar & Email”: In the Settings menu, choose “Calendar & Email” to access the calendar and email settings.
- Connect Your Calendar: Under the Calendar section, select your preferred calendar service and follow the on-screen instructions to connect it to Alexa. For example, you might choose Google Calendar or Microsoft Outlook, sign in with your account details, and grant permission for Alexa to access your calendar.
- Connect Your Email: In the Email section, choose your email service and follow the prompts to connect it with Alexa. You may need to enter your email account details and authorize Alexa to access your emails.
- Calendar Commands: Once your calendar is synced, you can ask Alexa about your upcoming appointments, add events to your calendar, and even check the availability of specific dates. For example, say “Alexa, what’s on my calendar for today?” or “Alexa, add a meeting with John at 3 p.m. tomorrow.”
- Email Commands: With your email connected, you can ask Alexa to read your latest emails, compose and send emails, and perform simple email management tasks. For example, say “Alexa, read my emails” or “Alexa, send an email to Jane with the subject ‘Meeting Reminder’.”
- Manage Calendar and Email Settings: In the Alexa app, you can manage your calendar and email settings, such as selecting the calendars you want to sync, customizing notifications, and adjusting synchronization frequency. Access these settings through the “Calendar & Email” section in the Alexa app.
- Privacy and Security: Amazon takes privacy and security seriously. Rest assured that your calendar events and email content are protected and only accessed by Alexa when necessary to perform the requested tasks. You can review and manage your data privacy preferences in the Privacy & Security section of the Alexa app.
Syncing your calendar and email with Amazon Echo helps you stay organized and allows you to manage your schedule and communications more efficiently. Keep in mind that the specific commands and functionalities may vary depending on the calendar and email services you use, as well as region-specific features.
If you encounter any issues during the sync process or have questions about specific commands or settings, consult the documentation or support resources for your calendar and email services, or refer to the Amazon Alexa support for further assistance.
Enjoy the convenience of voice-controlled calendar and email management with Amazon Echo, keeping you in control and connected with just a few simple voice commands.
Making Calls with Amazon Echo
Amazon Echo provides a convenient way to make hands-free calls using just your voice. By connecting your Amazon Echo device with your smartphone, you can easily make and receive calls using supported calling services. Whether you need to make a quick call or want to have a hands-free conversation, here’s how you can make calls with Amazon Echo:
- Connect and Enable Calling Services: Before you can make calls with Amazon Echo, you need to connect and enable a compatible calling service, such as Amazon’s own calling and messaging service, or supported third-party services like Skype. In the Alexa app, access the Communication section to set up and enable the service of your choice.
- Ensure Smartphone Compatibility: To use the calling feature, make sure your smartphone is connected to the same Wi-Fi network as your Amazon Echo. Also, ensure that your smartphone has an active internet connection and the corresponding calling app is installed and signed in.
- Invoke Alexa: To activate Amazon Echo and start a call, simply say the wake word “Alexa.” The blue ring on the Echo device will light up, indicating that Alexa is ready to listen to your command.
- “Call” Command: To make a call, say “Alexa, call [contact name].” Alexa will make the call for you using the connected calling service. For example, say “Alexa, call Mom” or “Alexa, call John’s mobile.”
- Mobile and Landline Calls: You can use Amazon Echo to make calls to both mobile numbers and landline numbers. Alexa will use the calling service you have enabled to initiate the call. For landline numbers, you may need to have a subscription or credits for your chosen calling service.
- Answering Calls: If someone calls your Echo device, Alexa will announce the incoming call and ring the device. You can answer by saying “Alexa, answer” or “Alexa, pick up.” The call will be automatically connected, and you can have a hands-free conversation using your Echo device’s built-in microphone and speaker.
- Muting and Ending Calls: During a call, you can use voice commands to control the call. Say “Alexa, mute” to mute your microphone, “Alexa, unmute” to unmute, or “Alexa, hang up” to end the call.
- Drop In (Echo-to-Echo Calling): If you have multiple Echo devices within your household, you can use the “Drop In” feature for instant two-way communication between Echo devices. It’s like an intercom system. Say “Alexa, drop in on [device name]” to initiate a Drop In call.
- Privacy and Security: Amazon prioritizes user privacy and security when it comes to calling features. Rest assured that calls made using Amazon Echo are encrypted and secure. Configurable privacy settings are available in the Alexa app, allowing you to control who can call you or Drop In on your Echo devices.
By leveraging the calling features of Amazon Echo, you can enjoy hands-free calling and easily communicate with your friends, family, or colleagues using just your voice. Keep in mind that specific calling features and options may vary depending on the calling service you have enabled and the region-specific features available to you.
If you encounter any issues during the setup or usage of the calling feature, consult the documentation or support resources for your specific calling service, or refer to the Amazon Alexa support for further assistance. Enjoy the convenience of hands-free calling with your Amazon Echo device.
Setting Up Routines with Alexa
Routines are a powerful feature of Amazon Alexa that allow you to automate multiple actions with a single voice command or a scheduled time. By setting up routines, you can streamline your daily tasks, create personalized experiences, and make your smart home even smarter. Here’s how you can set up routines with Alexa:
- Open the Alexa App: Launch the Amazon Alexa app on your mobile device. Sign in with your Amazon account credentials if needed.
- Access the Routines Section: Tap on the menu icon (usually three lines) located at the top left corner of the screen. From the menu that appears, select “Routines.”
- Create a New Routine: In the Routines section, tap on the “+ (plus)” icon to create a new routine. You can also edit existing routines or duplicate and customize pre-configured routines to better suit your needs.
- Set a Routine Name and Trigger: Give your routine a name that represents the action it performs. Next, choose a trigger for the routine, such as a specific phrase, time of day, or when a certain device or sensor is activated.
- Add Actions and Conditions: In the routine setup, you can add various actions and conditions to customize the behavior. Actions can include controlling smart home devices, playing music, sending notifications, and more. Conditions allow you to add requirements for the routine to activate, such as specific days of the week or device availability.
- Configure Multiple Actions: Within a routine, you can set up multiple consecutive actions to occur when triggered. For example, you can create a morning routine that turns on the lights, starts your favorite playlist, and reads out the day’s weather forecast.
- Enable and Test the Routine: Once you have configured the actions and conditions, enable the routine. You can then test it by saying the trigger phrase or waiting for the specified time of day. Alexa will execute the routine, performing all the actions you have configured.
- Manage and Customize Routines: In the Routines section of the Alexa app, you can view, edit, and manage your existing routines. Make changes to the actions, triggers, or conditions as needed to further customize and optimize their functionality.
- Discover Pre-configured Routines: If you’re new to routines or looking for inspiration, the Alexa app offers pre-configured routines tailored for different scenarios. Explore these pre-configured routines and customize them to suit your preferences and smart home setup.
Routines provide a convenient way to automate tasks and create a more personalized experience with Alexa and your smart home devices. Whether it’s starting your day with a customized morning routine or winding down at night with a relaxing routine, the possibilities are endless with Alexa’s routine feature.
Experiment with different triggers, actions, and conditions to create routines that suit your lifestyle and preferences. You can always revisit and modify your routines in the Alexa app to fit any changes or new requirements that may arise. Enjoy the simplicity and automation that routines bring to your everyday interactions with Alexa.
Troubleshooting Common Issues
While Amazon Echo is designed to be user-friendly, you may occasionally encounter common issues that can disrupt its functionality. Here are some troubleshooting steps to help you resolve common issues with your Amazon Echo:
- Check Power and Internet Connection: Ensure that your Echo device is properly connected to power and that the power source is working. Also, verify that your device is connected to a stable internet network. Unplug and replug your device, and check if other devices are able to connect to the internet.
- Confirm Wake Word: Make sure you are using the correct wake word (“Alexa” by default) when giving voice commands. If Alexa is not responding, try saying the wake word louder and ensure there are no background noises that may affect voice recognition.
- Restart Echo Device: Restart your Echo device by unplugging it from the power source, waiting for a few seconds, and then plugging it back in. This can help resolve temporary issues or bugs that may be affecting its performance.
- Update Alexa App and Firmware: Check for available updates for both the Alexa app and your Echo device’s firmware. Keeping both up to date ensures that you have access to the latest features, improvements, and bug fixes.
- Reset Wi-Fi Connection: If your Echo device is having trouble connecting to Wi-Fi, you can try resetting the Wi-Fi connection. In the Alexa app, go to the device settings for your Echo device, select “Change” next to the Wi-Fi network, and follow the prompts to reconnect it to your network.
- Disable Skills: If you suspect that a specific skill is causing issues, try disabling that skill temporarily to see if it resolves the problem. In the Alexa app, navigate to “Skills & Games,” find the skill that may be causing issues, and toggle the enable/disable switch.
- Reset Echo Device: As a last resort, you can perform a factory reset on your Echo device. Keep in mind that this will remove all device settings and personal preferences. In the Alexa app, go to the device settings for your Echo device, select “Factory Reset,” and follow the on-screen instructions.
- Contact Amazon Customer Support: If you have exhausted all troubleshooting steps and are still experiencing issues with your Echo device, it is recommended to reach out to Amazon customer support for further assistance. They can provide specialized guidance and troubleshooting based on your specific situation.
Remember that some issues may require specific solutions based on your device model, firmware version, and network setup. If you need more advanced troubleshooting or encounter complex issues, refer to the Amazon support resources or contact their customer support directly.
By following these troubleshooting steps, you can address common issues and ensure a smooth and uninterrupted experience with your Amazon Echo.
Tips and Tricks for Using Amazon Echo
Amazon Echo is a versatile device that can do much more than just play music and answer questions. Here are some tips and tricks to help you make the most out of your Amazon Echo:
- Customize Alexa’s Voice: Did you know that you can change Alexa’s voice? In the Alexa app, go to the settings for your Echo device and navigate to “Alexa’s Voice.” Here, you can choose from different language options and even toggle the celebrity voice option for a fun and unique experience.
- Drop In between Echo Devices: If you have multiple Echo devices in your household, you can use the “Drop In” feature to instantly communicate between devices, similar to an intercom system. Simply say “Alexa, drop in on [device name]” to initiate a two-way conversation.
- Make Use of Alexa Guard: Activate Alexa Guard mode to enhance your home security. Alexa will listen for specific sounds like smoke alarms or breaking glass and send alerts to your smartphone. Say “Alexa, I’m leaving” to activate Guard mode and “Alexa, I’m home” to disable it.
- Create Shopping and To-Do Lists: Keep track of items you need to buy or tasks you need to complete by asking Alexa to add items to your shopping or to-do lists. Say “Alexa, add milk to my shopping list” or “Alexa, add “buy a birthday gift” to my to-do list.”
- Control Amazon Fire TV with Voice: If you have an Amazon Fire TV device, you can control it with your Echo device using voice commands. Pair your Echo device with your Fire TV in the Alexa app’s settings, and then you can ask Alexa to play shows, pause playback, or launch apps by saying “Alexa, play [show/movie] on Fire TV.”
- Use Alexa as an Intercom: Drop In can also be used as an intercom between Echo devices within your household. Create groups in the Alexa app and say “Alexa, drop in on [group name]” to broadcast your message to all devices in the group.
- Discover and Enable New Skills: Explore the Skills & Games section in the Alexa app to discover new skills that add functionality to your Echo device. Enable skills that interest you to access specialized services or perform specific tasks. Say “Alexa, open [skill name]” to utilize a skill once enabled.
- Set Up Alexa Guard Plus: Upgrade to Alexa Guard Plus for enhanced home security features. Subscribing to Alexa Guard Plus provides features like smart alerts for specific sounds, emergency helpline connectivity, and more. Enable and configure Alexa Guard Plus in the Alexa app settings.
- Create Multi-Room Music Groups: If you have multiple Echo devices, you can create multi-room music groups. In the Alexa app, go to the “Devices” section, select the “+” icon, and follow the prompts to create a group. This allows you to play synchronized music across multiple rooms simultaneously.
These tips and tricks will help you maximize your use of Amazon Echo and enhance your overall experience with Alexa. Continually explore new features, services, and skills to discover the full potential of your Echo device.
Remember to check for firmware and app updates regularly to ensure that you always have access to the latest features and improvements offered by Amazon Echo. Enjoy the convenience and smart capabilities that Alexa brings into your home!