
Turn On Automatic Replies in Outlook
Automatic replies, also known as out-of-office messages, are a convenient feature in Microsoft Outlook that allows you to inform your contacts about your absence. Whether you’re going on vacation, attending a conference, or simply need some uninterrupted time, setting up automatic replies ensures that people who email you are aware of your unavailability and can adjust their expectations accordingly.
To turn on automatic replies in Outlook, follow these steps:
- Open Microsoft Outlook on your computer.
- Click on the “File” tab in the top-left corner of the window.
- Select the “Automatic Replies (Out of Office)” option.
- In the Automatic Replies window, check the “Send automatic replies” box.
- Specify the date and time range for which you want the automatic replies to be sent. This ensures that your contacts are aware of your absence during that period.
- Compose your message in the provided text box. This message will be sent as an automatic reply to anyone who emails you during the specified time range.
- If desired, you can set different automatic replies for people inside your organization and those outside of it. Simply check the respective boxes and customize the messages accordingly.
- Click on the “OK” button to save your settings and activate the automatic replies.
Once you have turned on the automatic replies, Outlook will begin sending out the predefined message to anyone who sends you an email. Keep in mind that this feature only works when your computer is turned on and connected to the internet with Outlook running.
Now that you have successfully turned on automatic replies in Outlook, you can enjoy your time away from the office with peace of mind. Your contacts will be informed of your absence, allowing them to adjust their expectations and communication accordingly.
Set Up Automatic Replies in Outlook for Windows
If you’re using Microsoft Outlook on a Windows computer, setting up automatic replies is a straightforward process. Whether you’re using Outlook 2019, Outlook 2016, or an older version, you can easily configure automatic replies using the following steps:
- Open Outlook on your Windows computer.
- Click on the “File” tab located in the top-left corner of the window.
- Select the “Automatic Replies (Out of Office)” option.
- In the Automatic Replies window, check the “Send automatic replies” box.
- Specify the date and time range during which you want the automatic replies to be sent. This ensures that your contacts are aware of your unavailability.
- Enter the message you want to be sent as an automatic reply in the provided text box. Consider including details like the dates of your absence, alternative contacts, and when you will be available again.
- Customize the automatic replies for recipients inside your organization and those outside of it. You can have different messages for each group by checking the respective boxes.
- After customizing your automatic replies, click on the “OK” button to save your settings. Outlook will then activate and start sending the automatic replies during the specified time range.
It’s important to note that automatic replies will only be sent if your Outlook application remains open and your computer is connected to the internet. If your computer is turned off or has no internet connection, the automatic replies will not be sent until you’re back online.
Setting up automatic replies in Outlook for Windows allows you to inform your contacts about your unavailability and provide them with relevant information. Whether you’re on vacation, attending a conference, or need focused time for work, automatic replies ensure that your contacts are aware of your absence and can adjust their expectations accordingly.
By following the steps outlined above, you can easily configure automatic replies in Outlook for Windows and enjoy your time away from the office without worrying about missing important email communications.
Set Up Automatic Replies in Outlook for Mac
If you’re using Microsoft Outlook on a Mac computer, setting up automatic replies can help you effectively communicate your absence to your contacts. Whether you’re using Outlook for Mac 2019, Outlook for Mac 2016, or a different version, configuring automatic replies is a simple process. Just follow the steps below:
- Launch Outlook on your Mac computer.
- Click on the “Tools” tab in the top menu bar.
- Select the “Out of Office” option from the Tools menu.
- In the Out of Office window, check the “Send Out of Office messages” box.
- Specify the date and time range during which you want the automatic replies to be sent.
- Compose the message you want to be sent as an automatic reply, providing details about your absence and any alternative contacts if necessary.
- Customize the automatic replies for recipients inside your organization and those outside of it, if desired.
- Click on the “OK” button to save your settings and activate the automatic replies.
Once enabled, Outlook for Mac will send the specified automatic reply message to anyone who emails you during the specified time range. It’s important to note that your Mac computer must be on and connected to the internet, with Outlook running, for the automatic replies to be sent.
Setting up automatic replies in Outlook for Mac allows you to effectively communicate your unavailability to your contacts. Whether you’re on vacation, attending a conference, or need focused time to work, automatic replies ensure that your email senders are informed of your absence and can adjust their expectations accordingly.
By following the steps outlined above, you can easily configure automatic replies in Outlook for Mac and enjoy your time away from the office while maintaining clear communication with your contacts.
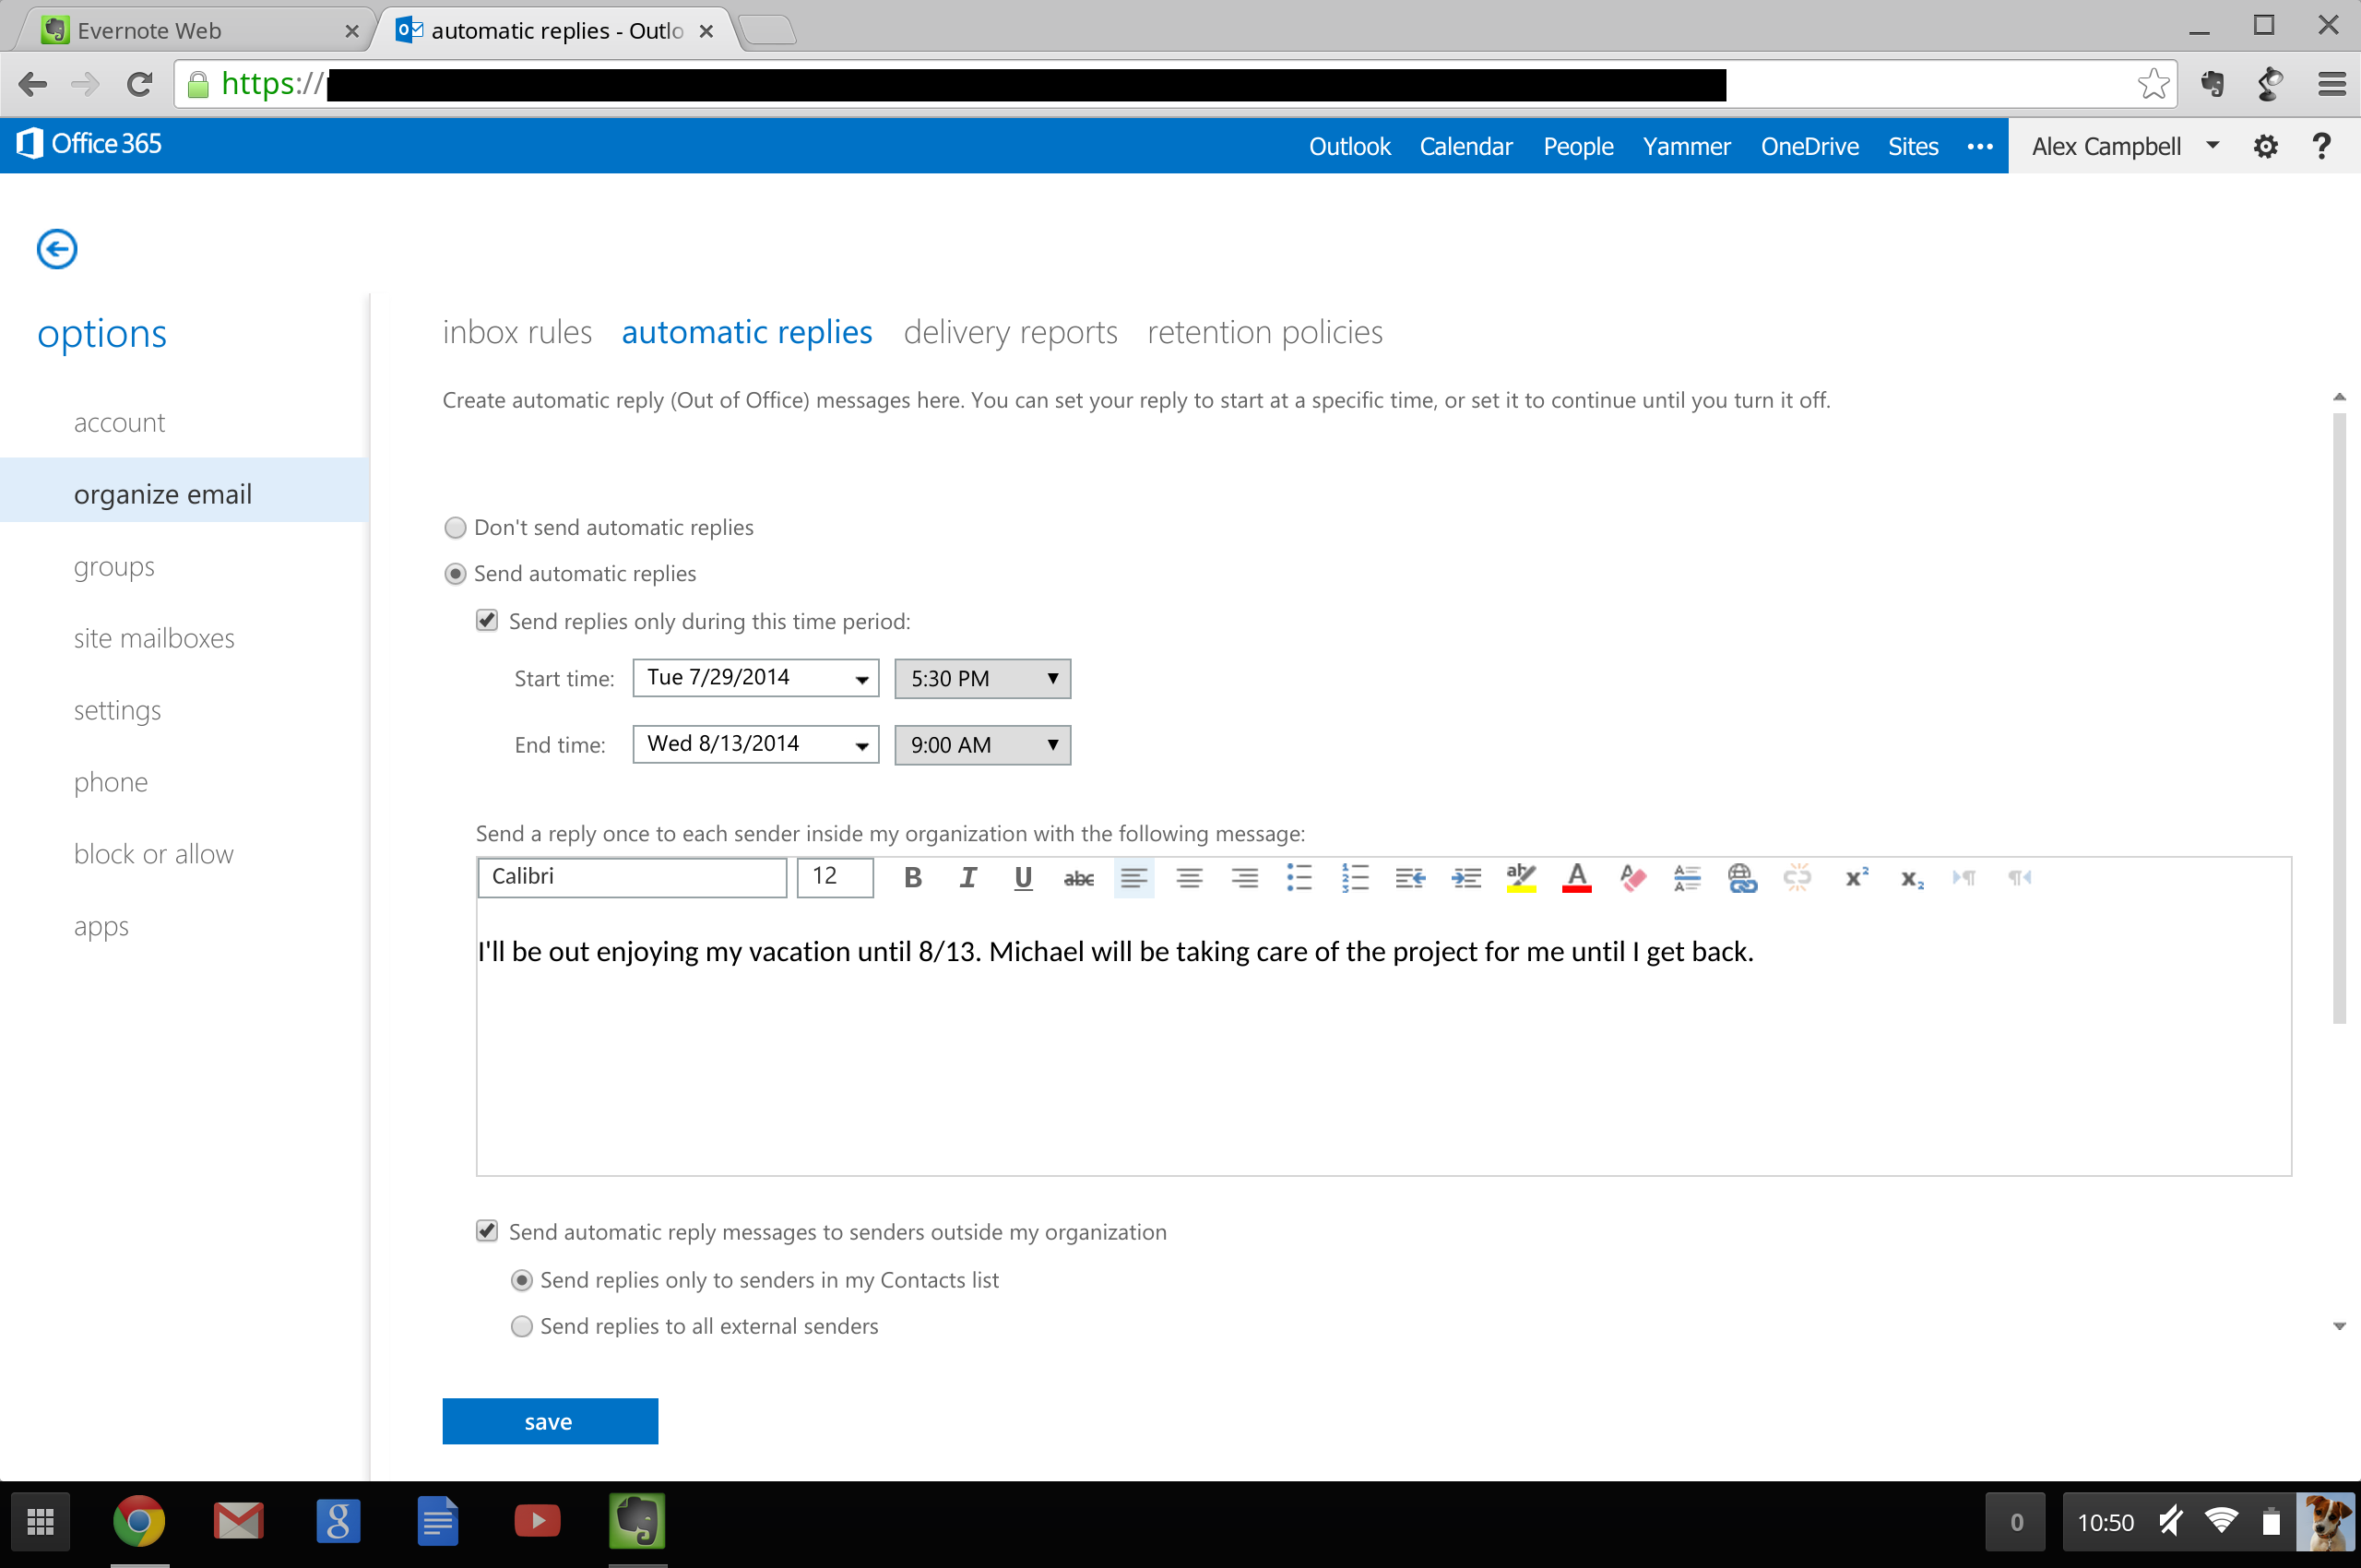
Set Up Automatic Replies in Outlook for Web
If you primarily use the web version of Microsoft Outlook, known as Outlook for Web or Outlook on the Web, setting up automatic replies is a breeze. Whether you’re using Outlook.com, Office 365, or another web-based version of Outlook, here’s how you can configure automatic replies:
- Open your preferred web browser and navigate to the Outlook for Web website.
- Sign in to your Outlook account using your email address and password.
- Click on the gear icon in the top-right corner of the Outlook window to access the settings menu.
- In the settings menu, locate and click on the “View all Outlook settings” option.
- In the Settings pane, select “Mail” and then click on the “Automatic replies” tab on the left side of the screen.
- Toggle the “Automatic replies” switch to turn it on.
- Specify the date and time range during which you want the automatic replies to be sent.
- Compose the message you want to be sent as an automatic reply in the provided text box. Include relevant details about your absence and alternative contacts if necessary.
- If desired, you can set different automatic replies for people inside your organization and those outside of it by toggling the respective switches.
- Once you have customized your automatic replies, click on the “Save” button to save your settings and activate the automatic replies.
After enabling automatic replies in Outlook for Web, it will start sending out the predefined message to anyone who emails you during the specified time range. It’s important to note that automatic replies will only be sent if your web browser remains open and connected to the internet.
Setting up automatic replies in Outlook for Web allows you to effectively communicate your unavailability to your contacts. Whether you’re on vacation, attending an event, or need focused time for work, automatic replies ensure that your email senders are aware of your absence and can adjust their expectations accordingly.
By following the steps outlined above, you can easily configure automatic replies in Outlook for Web and enjoy your time away from the office while maintaining clear communication with your contacts.
Schedule Automatic Replies in Outlook
In addition to setting up automatic replies based on a specific date and time range, you can also schedule them in advance to ensure that your absence is communicated effectively. Microsoft Outlook provides the flexibility to schedule automatic replies for future events or vacations, allowing you to plan ahead. Here’s how you can schedule automatic replies in Outlook:
- Open Outlook on your computer.
- Click on the “File” tab in the top-left corner of the window.
- Select the “Automatic Replies (Out of Office)” option.
- In the Automatic Replies window, check the “Send automatic replies” box.
- Click on the “Add Rule” button to create a new rule for scheduling your automatic replies.
- Specify the date and time when the automatic replies should begin and end.
- Enter the message you want to be sent as an automatic reply during the specified time range.
- Customize the automatic replies for recipients inside your organization and those outside of it, if desired.
- Click on the “OK” button to save your rule and activate the scheduled automatic replies.
By scheduling your automatic replies in Outlook, you can effectively communicate your unavailability for future events or vacations, ensuring that your contacts are aware of your absence in advance. This feature is especially useful if you know about upcoming conferences, holidays, or other planned periods of absence.
Remember that for the scheduled automatic replies to be sent, your computer must be turned on and connected to the internet with Outlook running during the specified time range.
By utilizing the scheduling feature in Outlook, you can conveniently set up automatic replies for future events or vacations, maintaining professional communication and setting appropriate expectations with your contacts.
Set Different Automatic Replies for Internal and External Emails in Outlook
Microsoft Outlook allows you to create different automatic replies for internal contacts within your organization and external contacts outside of it. This feature is especially useful if you want to provide specific information to colleagues while conveying a different message to clients or external partners. Here’s how you can set different automatic replies for internal and external emails in Outlook:
- Open Outlook on your computer.
- Click on the “File” tab in the top-left corner of the window.
- Select the “Automatic Replies (Out of Office)” option.
- In the Automatic Replies window, check the “Send automatic replies” box.
- Under the automatic replies box, check the “Inside My Organization” box to set the message for internal contacts.
- Customize the automatic reply text specifically for your colleagues and coworkers within your organization. Include details such as who to contact in your absence, relevant internal procedures, and alternative means of communication.
- Check the “Outside My Organization” box to set the message for external contacts.
- Compose a different automatic reply text tailored to external contacts, such as clients or business partners. Include relevant information such as when you’ll be back, who to contact in urgent matters, and any key points you want to convey.
- Click on the “OK” button to save your settings and activate the different automatic replies.
By setting different automatic replies for internal and external emails in Outlook, you can effectively manage communication within your organization and provide appropriate information to external contacts. This feature allows you to ensure that internal colleagues receive the information they need while conveying a professional message to external contacts.
Remember to keep your automatic replies concise and informative, ensuring that both internal and external contacts are aware of your unavailability and can adjust their expectations accordingly.
Utilizing this feature in Outlook allows you to maintain clear communication within your organization while effectively managing external contacts during your absence.
Turn Off Automatic Replies in Outlook
Once you no longer need to use automatic replies in Outlook, it’s important to turn them off to ensure that your contacts receive your regular email correspondence. Here’s how you can disable automatic replies in Outlook:
- Open Outlook on your computer.
- Click on the “File” tab in the top-left corner of the window.
- Select the “Automatic Replies (Out of Office)” option.
- In the Automatic Replies window, uncheck the “Send automatic replies” box.
- Review the settings and ensure that any scheduled time ranges for automatic replies are cleared or adjusted as needed.
- Click on the “OK” button to save the changes and turn off automatic replies.
Once you have disabled automatic replies in Outlook, your contacts will no longer receive the predefined automatic reply message when they email you. It’s important to consider the timing of turning off automatic replies to ensure that you resume regular email communication seamlessly.
By turning off automatic replies in Outlook, you can resume your regular email activity without the need for automated responses. This is especially important when you return from a vacation, conference, or any other period of absence.
Remember to always monitor your inbox after turning off automatic replies to promptly respond to any emails that may have been received during your absence.
Disabling automatic replies in Outlook allows you to resume regular email communication with your contacts, ensuring efficient and timely responses to their messages.