
Things to Know Before Sending XVG to Ledger Nano S
If you are planning to send your Verge (XVG) cryptocurrency to your Ledger Nano S, there are a few important things to consider before proceeding. These tips will help ensure a smooth and secure transaction:
- Double Check Your Device: Make sure that your Ledger Nano S is genuine and purchased directly from the official Ledger website or an authorized reseller. Counterfeit devices can pose a security risk and compromise the safety of your funds.
- Backup Your Seed Phrase: Before sending any XVG to your Ledger Nano S, it is crucial to have a backup of your 24-word recovery seed phrase. This phrase is the key to restoring your wallet in case your device gets lost, stolen, or damaged.
- Keep Your Firmware Updated: Regularly check for firmware updates for your Ledger Nano S. Installing the latest firmware ensures that your device is up to date with the latest security features and bug fixes.
- Use Official Ledger Live Software: To manage your XVG and perform transactions, make sure to use the official Ledger Live software provided by Ledger. This software offers a user-friendly interface and integrates seamlessly with your Ledger Nano S.
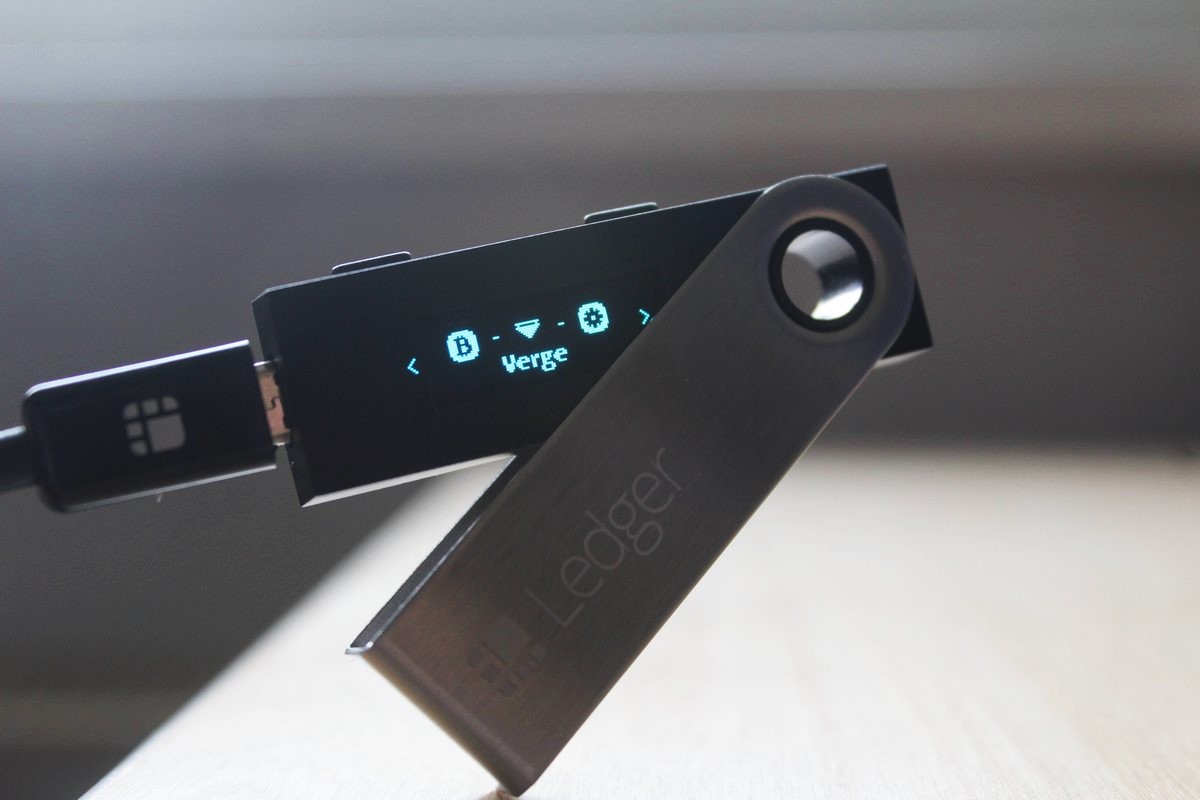
- Ensure Verge App Compatibility: Install the Verge app on your Ledger Nano S through the Ledger Live Manager. This ensures that your device recognizes Verge (XVG) and allows you to send and receive it securely.
- Verify Transaction Fees: Before sending XVG to your Ledger Nano S, check the current transaction fees associated with the Verge network. This will help you estimate the cost of the transaction and ensure that you have enough funds to cover the fees.
- Confirm Supported XVG Versions: Ensure that the version of Verge you are sending is supported by your Ledger Nano S. Check if any specific version or protocol changes are required to avoid compatibility issues.
- Double-Check the Address: Before initiating the transaction, carefully verify the XVG recipient address on your Ledger Nano S. A single character error can lead to irreversible loss of funds, so take the time to cross-check the address.
By following these essential steps, you can confidently send your Verge (XVG) cryptocurrency to your Ledger Nano S wallet, knowing that you have taken the necessary precautions to ensure the security and integrity of your funds.
Step 1: Set Up Your Ledger Nano S
Before you can send Verge (XVG) to your Ledger Nano S, you need to set up the device properly. Follow the steps below to get started:
- Unbox and Connect: Start by unboxing your Ledger Nano S and connect it to your computer using the provided USB cable. The device should power on automatically.
- Configure as a New Device: On the device screen, you will see the message “Configure as new device.” Press both buttons simultaneously to start the setup process.
- Create a PIN: Use the physical buttons on the Ledger Nano S to navigate and set up a PIN code. Remember to choose a PIN that is secure and something you can easily remember.
- Backup Your Seed Phrase: After setting up the PIN, the device will generate a 24-word recovery seed phrase. Write down these words in the correct order and keep them in a safe place. This seed phrase is crucial for recovering your wallet if your device is lost or damaged.
- Confirm Seed Phrase: Once you have written down the seed phrase, the Ledger Nano S will ask you to confirm the words in a random order. This step ensures that you have correctly recorded the seed phrase.
- Install Ledger Live: To manage your Verge (XVG) and other cryptocurrencies, download and install the Ledger Live software from the official website. Ledger Live provides a secure and user-friendly interface for managing your assets.
- Update Firmware: Connect your Ledger Nano S to the computer and open Ledger Live. If there are any firmware updates available, follow the on-screen instructions to install them. Keeping your device firmware up to date is essential for security.
- Set Up Verge App: Open the Ledger Live Manager and install the Verge app on your Ledger Nano S. This app is necessary for interacting with the Verge (XVG) blockchain.
Once you have set up your Ledger Nano S and installed the necessary apps and firmware updates, you are ready to securely send and receive Verge (XVG) using your Ledger hardware wallet.
Step 2: Install Verge App on Ledger Live
In order to send and receive Verge (XVG) on your Ledger Nano S, you need to install the Verge app on your Ledger Live software. Follow the steps below to install the Verge app:
- Open Ledger Live: Ensure that your Ledger Nano S is connected to your computer and launch the Ledger Live software.
- Access the Manager: Click on the “Manager” tab located at the top of the Ledger Live interface. This will allow you to manage the various apps installed on your Ledger Nano S.
- Connect and Unlock: Follow the on-screen instructions to connect and unlock your Ledger Nano S using your PIN code. Make sure to confirm any prompts that appear on the device screen.
- Search for Verge: In the search bar of the Ledger Live Manager, type “Verge” and look for the Verge app in the results.
- Install Verge App: Click on the “Install” button next to the Verge app. Ledger Live will prompt you to review the permissions and storage requirements of the app. Confirm the installation when ready.
- Wait for Installation: Ledger Live will download and install the Verge app onto your Ledger Nano S. The installation process may take a few minutes, so be patient and do not disconnect your device during this time.
- Installation Complete: Once the installation is complete, you will see a notification in Ledger Live confirming that the Verge app has been successfully installed on your Ledger Nano S.
With the Verge app installed on your Ledger Nano S, you now have the necessary software to securely manage your Verge (XVG) transactions directly from your hardware wallet. Proceed to the next steps to learn how to send XVG to your Ledger Nano S.
Step 3: Launch Verge App and Connect Ledger Nano S
After installing the Verge app on your Ledger Live software, the next step is to launch the Verge app on your Ledger Nano S and establish a connection. Follow these instructions to begin:
- Unlock Your Ledger Nano S: Plug your Ledger Nano S into your computer using the provided USB cable. Enter your PIN code on the device to unlock it.
- Access the Verge App: On your Ledger Nano S, navigate through the options using the physical buttons until you find the Verge app. Press both buttons simultaneously to open the app.
- Allow Ledger Live Connection: When you launch the Verge app, you will see a prompt asking you to allow Ledger Live to manage your Verge account. Press the right button on your Ledger Nano S to confirm the connection.
- Confirm Connection on Ledger Live: Switch to the Ledger Live software on your computer. If everything is set up correctly, you should see a notification that your Ledger Nano S is connected and ready to use with the Verge app.
By connecting your Ledger Nano S to the Verge app and allowing Ledger Live to manage your Verge account, you establish a secure connection between your hardware wallet and the Verge blockchain. This connection is necessary for sending and receiving XVG from your Ledger Nano S.
Step 4: Verify Public Address on Ledger Nano S
Before sending any Verge (XVG) to your Ledger Nano S, it is crucial to verify the public address displayed on your device. This step ensures that you are sending your XVG to the correct wallet and avoids the risk of losing your funds. Follow these instructions to verify your public address:
- Open the Verge App: Connect your Ledger Nano S to your computer and launch the Verge app on your device by navigating to it using the physical buttons and pressing both buttons to open it.
- Check the Public Address: Once the Verge app is open, you will see a screen displaying your Verge wallet’s public address. Take note of this address or compare it to the one displayed on your Ledger Live software.
- Verify on Ledger Live: Switch to your Ledger Live software on the computer and navigate to the Verge account. Confirm that the public address displayed in Ledger Live matches the one on your Ledger Nano S.
- Physical Verification: To ensure the address on your Ledger Nano S is correct, physically compare the first and last few characters of the public address displayed on the device with the one shown in Ledger Live. They should match perfectly.
- Verify on an Independent Source: For an extra layer of security, you can cross-check the public address using an independent source, such as a reputable blockchain explorer. Enter your public address in the explorer to confirm its validity.
By carefully verifying the public address displayed on your Ledger Nano S and comparing it to the one shown in Ledger Live, you can safeguard against potential errors or scams. This step ensures you are sending your Verge (XVG) to the intended wallet, giving you peace of mind during the transaction process.
Step 5: Send XVG from Exchange or Wallet to Ledger Nano S
Once you have verified the public address on your Ledger Nano S, you can proceed to send Verge (XVG) from your exchange account or wallet to your hardware wallet. Follow these steps to complete the transaction:
- Access Your Exchange or Wallet: Log in to your cryptocurrency exchange account or open your Verge wallet.
- Locate the Withdraw or Send Option: Navigate to the withdrawal or send section of the exchange or wallet platform.
- Enter the Recipient Address: Paste the Verge (XVG) public address from your Ledger Nano S into the recipient address field. It is recommended to double-check the address for accuracy.
- Specify the Amount to Send: Enter the amount of XVG you wish to send to your Ledger Nano S. Make sure to consider any network fees associated with the transaction.
- Confirm the Transaction: Review the transaction details, including the recipient address and the amount, to ensure they are correct. Follow the platform’s instructions to confirm and initiate the transfer.
- Wait for Confirmation: After initiating the transfer, you will need to wait for the transaction to be confirmed on the Verge blockchain. The time it takes for confirmation can vary depending on network congestion.
- Verify on Ledger Live: Once the Verge transaction is confirmed, switch to your Ledger Live software and navigate to the Verge account. You should see the received XVG reflected in your account balance.
It is important to note that transaction times and fees can vary, so it’s a good practice to check the specific requirements and fees of the exchange or wallet you are using to ensure a smooth transfer of Verge (XVG) to your Ledger Nano S.
Step 6: Confirm XVG Transaction on Ledger Nano S
After sending Verge (XVG) to your Ledger Nano S, it is essential to confirm and authorize the transaction on your hardware wallet. This step ensures that the transaction is legitimate and adds an extra layer of security. Follow these steps to confirm your XVG transaction:
- Access the Verge App on Ledger Nano S: Connect your Ledger Nano S to your computer and navigate to the Verge app using the device’s physical buttons. Press both buttons to open the app.
- Transaction Details: Once the Verge app is open, you will see the transaction details, including the amount of XVG being sent and the recipient address.
- Verify Transaction Details: Carefully review the transaction details on your Ledger Nano S to ensure they match the information you entered when sending the XVG.
- Confirm the Transaction: If the transaction details are accurate, press the right button on your Ledger Nano S to confirm and authorize the transaction. If you want to cancel the transaction, press the left button.
- Wait for Confirmation: After confirming the transaction on your Ledger Nano S, you may need to wait for the confirmation on the Verge blockchain. The time it takes for confirmation can vary depending on network congestion.
- Check Ledger Live: Once the XVG transaction is confirmed on the Verge network, switch to your Ledger Live software and navigate to the Verge account. You should see the transaction reflected in your account activity.
By confirming and authorizing the XVG transaction on your Ledger Nano S, you have ensured that the transfer is legitimate and securely executed. This provides peace of mind knowing that your Verge (XVG) has been safely sent to the desired recipient address.
Step 7: Check Verge Transaction on the Blockchain
After confirming the Verge (XVG) transaction on your Ledger Nano S, it is recommended to verify the transaction on the Verge blockchain. Checking the transaction on the blockchain provides transparency and ensures that the transaction has been successfully recorded. Follow these steps to check your Verge transaction:
- Access a Verge Blockchain Explorer: Open a web browser and search for a Verge blockchain explorer. There are several reliable options available that allow you to search for and view Verge transactions.
- Enter Transaction Details: On the blockchain explorer, enter the transaction hash or the recipient’s public address to search for the transaction you just made.
- Verify Transaction Details: Once the search results appear, review the transaction details to ensure that the XVG amount, the sender’s address, and the recipient’s address match the information you expect.
- Check Confirmation Status: Look for the confirmation status of the Verge transaction on the blockchain explorer. A confirmation indicates that the transaction has been successfully added to the Verge blockchain.
- Note Transaction ID: Make a note of the transaction ID or hash, as it serves as a unique identifier for the transaction and can be useful for future reference.
Checking the Verge transaction on the blockchain gives you confidence that the XVG transfer has been properly recorded and confirmed by the Verge network. This step provides an additional level of verification and ensures the integrity and transparency of your transaction.
Step 8: Safely Storing Your Ledger Nano S
After completing the Verge (XVG) transaction on your Ledger Nano S, it is crucial to securely store your hardware wallet to protect your cryptocurrencies from loss, theft, or damage. Follow these guidelines to ensure the safe storage of your Ledger Nano S:
- Create a Backup: Make a backup of your Ledger Nano S by writing down the 24-word recovery seed phrase provided during the initial setup. Store this backup phrase in a secure location separate from your hardware wallet.
- Use a Secure Storage Solution: Consider using a fireproof and waterproof safe or a similarly secure storage box to protect your Ledger Nano S from physical damage and potential theft.
- Avoid Public Exposure: Keep your Ledger Nano S away from public view and the reach of unauthorized individuals. Avoid discussing or displaying your hardware wallet in public places.
- Keep it Offline: When not in use, disconnect your Ledger Nano S from your computer and store it offline. This minimizes the risk of remote attacks or unauthorized access to your wallet.
- Consider a Secondary Backup: It is advisable to create a secondary backup of your Ledger Nano S recovery seed phrase. Store this backup securely in a different location from the original backup.
- Keep Firmware Updated: Regularly check for firmware updates for your Ledger Nano S. Keeping the firmware up to date ensures that your device has the latest security features and bug fixes.
- Be Careful with Digital Copies: If you choose to keep a digital copy of your recovery seed phrase, ensure it is encrypted and stored in a secure, password-protected environment.
- Handle with Care: Treat your Ledger Nano S with care, avoiding dropping it or exposing it to extreme temperatures, moisture, or physical pressure.
- Test Recovery Process: It is recommended to periodically test the recovery process of your Ledger Nano S using your backup seed phrase. This ensures that you can regain access to your wallet if needed.
By securely storing your Ledger Nano S and keeping your backup seed phrase safe, you minimize the risk of losing your cryptocurrencies. These precautions protect your Verge (XVG) and other digital assets, providing you with peace of mind and ensuring that you have control over your funds.