
What is Kin?
Kin is a digital currency that operates on a decentralized blockchain platform. It was created by the team behind the popular messaging app, Kik, with the aim of providing a new way for people to interact and transact within digital communities. Unlike traditional currencies like the US dollar or the Euro, Kin is specifically designed to be used within various online ecosystems.
Kin brings a new level of innovation to the digital world by bridging the gap between digital services and transactions. It enables users to seamlessly earn and spend Kin within supported platforms, giving them the ability to engage in a variety of activities such as tipping content creators, purchasing digital goods, and even participating in community-driven initiatives.
With the rise of social media and the increasing importance of digital communities, Kin offers a unique solution to the challenges faced by users and content creators. By providing a means of rewarding and incentivizing engagement, Kin aims to create a more inclusive and sustainable digital economy.
One of the key features of Kin is its accessibility. Unlike traditional cryptocurrencies, which can often be complex and intimidating for beginners, Kin is designed to be user-friendly and easy to use. This makes it an ideal currency for anyone, regardless of their level of technical knowledge or experience with cryptocurrencies.
Furthermore, Kin operates on a blockchain platform, which ensures the security and transparency of transactions. Through the use of cryptographic technology, Kin transactions are verified and recorded on the blockchain, making them tamper-proof and resistant to fraud.
Overall, Kin represents a new era in digital currencies, where users have greater control over their online interactions and transactions. By harnessing the power of blockchain technology, Kin is redefining the way people engage with digital communities, opening up new possibilities for collaboration, creativity, and economic empowerment.
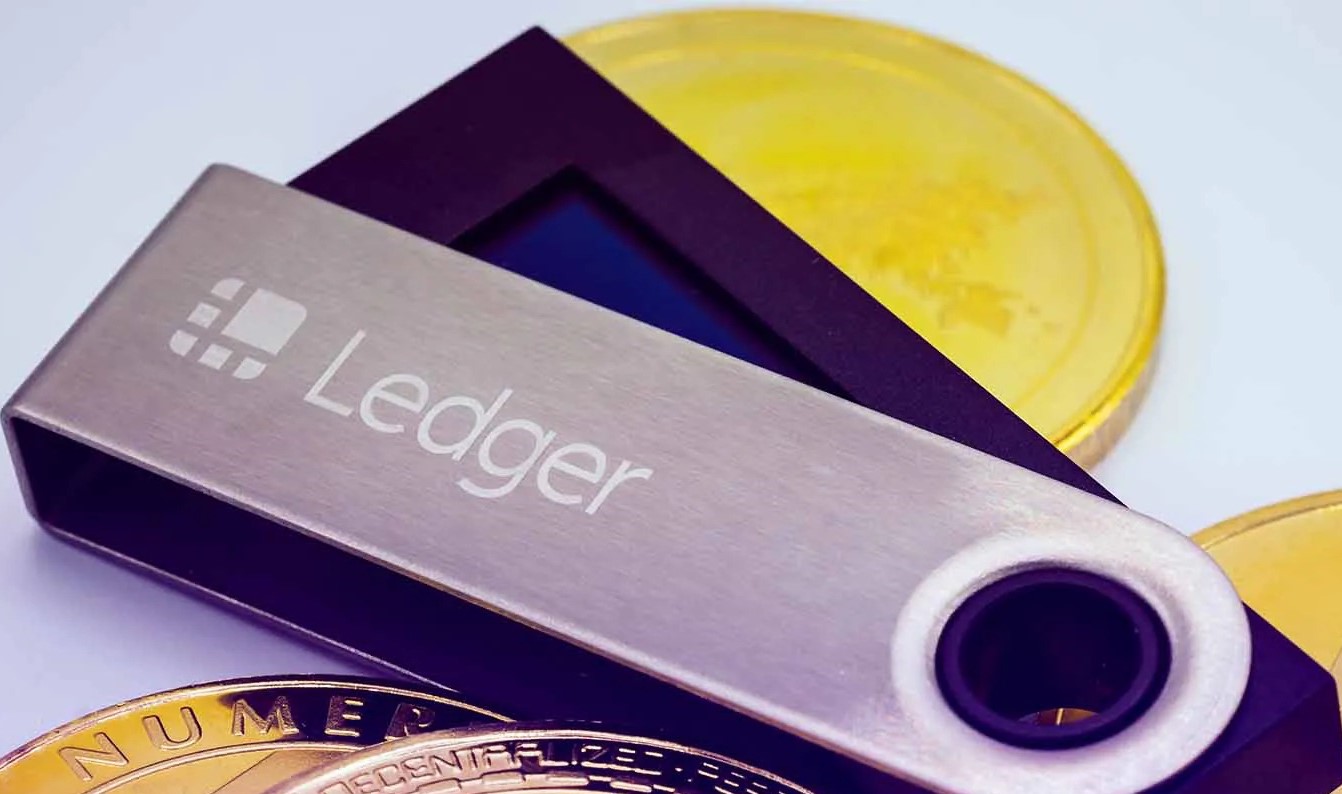
What is Ledger Nano S?
The Ledger Nano S is a hardware wallet designed to securely store and manage cryptocurrencies. It offers a convenient and secure way for users to keep their digital assets safe from hacks and thefts. The Nano S is one of the most popular hardware wallets in the market, known for its robust security features and user-friendly interface.
At its core, the Ledger Nano S is a USB device that connects to your computer or mobile device. It features a small screen and buttons for convenient navigation and transaction verification. The device uses a secure element chip to store private keys and perform cryptographic operations, ensuring that sensitive information never leaves the wallet.
One of the key advantages of using Ledger Nano S is that it provides an offline storage solution, also known as cold storage. This means that your private keys are stored on the device itself, disconnected from the internet and any potential cybersecurity threats. This significantly reduces the risk of your cryptocurrencies being compromised.
In addition to its security features, the Ledger Nano S is compatible with a wide range of cryptocurrencies, including Kin. This means that you can safely store your Kin tokens on the device, knowing that they are protected by the highest level of security.
Setting up and using the Ledger Nano S is also a straightforward process. The device comes with a simple and intuitive interface that guides you through the setup and operation. You can easily manage your Kin holdings, view transaction history, and even initiate transactions directly from the device.
With its combination of robust security, broad compatibility, and user-friendly interface, the Ledger Nano S is an excellent choice for anyone looking to securely store and manage their Kin tokens. By keeping your cryptocurrencies offline and under your control, you can have peace of mind knowing that your digital assets are safe.
Why use Ledger Nano S to store Kin?
The Ledger Nano S offers several compelling reasons why it is the ideal choice for storing your Kin tokens securely. Let’s explore why using a Ledger Nano S is highly recommended for Kin holders.
1. Enhanced Security: Security is a top priority when it comes to storing digital assets, and the Ledger Nano S excels in this aspect. With its tamper-proof hardware design and secure element chip, your private keys are safely stored offline on the device, providing protection against online threats, hacks, and phishing attacks. The Ledger Nano S ensures that your Kin tokens are kept safe from any potential vulnerabilities that exist in software or online wallets.
2. Cold Storage Solution: The Ledger Nano S offers offline storage, also known as cold storage. This means that your private keys and sensitive information are kept completely disconnected from the internet, minimizing the risk of unauthorized access or loss due to online vulnerabilities.
3. Compatibility: The Ledger Nano S is compatible with a wide range of cryptocurrencies, including Kin. This means that you can conveniently store your Kin tokens alongside other supported cryptocurrencies on a single device, eliminating the need for multiple wallets.
4. User-Friendly Interface: Despite being a highly secure hardware wallet, the Ledger Nano S is designed with a user-friendly interface. It features a small screen and buttons that make navigation and transaction verification straightforward. Even if you’re new to hardware wallets, you can easily set up and operate the Ledger Nano S to store your Kin tokens.
5. Flexibility and Portability: The Ledger Nano S is a compact device that can be easily carried in your pocket or bag. This allows you to conveniently access and manage your Kin tokens wherever you go, without compromising security or convenience.
6. Secure Backup and Recovery: The Ledger Nano S provides an easy and secure way to back up and recover your Kin tokens. During the initial setup, you’ll be guided to create a recovery phrase, which can be used to restore your funds in case of loss, theft, or device damage.
7. Peace of Mind: By using the Ledger Nano S to store your Kin tokens, you can have peace of mind knowing that your digital assets are protected by a highly secure and reputable hardware wallet. You can confidently engage in transactions and manage your Kin holdings, knowing that your investments are safeguarded.
Step 1: Set up your Ledger Nano S
Before you can start using your Ledger Nano S to store your Kin tokens, you’ll need to go through the initial setup process. Follow these steps to set up your Ledger Nano S:
- Unbox and connect: Start by unboxing your Ledger Nano S and connecting it to your computer using the provided USB cable. Make sure to connect it to a trusted and secure device.
- Configure as a new device: On the Ledger Nano S screen, navigate through the options using the buttons to select “Configure as a new device.”
- Choose a PIN code: You’ll be prompted to set up a PIN code to secure your device. Use the buttons to select your desired PIN code. Be sure to choose a PIN code that is unique and not easily guessable. Confirm your PIN code when prompted.
- Backup and recovery: Next, you’ll be provided with a recovery phrase. This is a crucial step in securing your funds. Carefully write down the 24-word recovery phrase on the provided sheet of paper. Make sure to keep this phrase in a safe and secure location, as it can be used to recover your funds if your Ledger Nano S is lost, stolen, or damaged.
- Confirm the recovery phrase: In the next step, you’ll be required to confirm your recovery phrase. This is done to ensure that you have accurately written down the words in the correct order. Follow the instructions on the screen to verify your recovery phrase.
- Install Ledger Live: To manage your Kin tokens and perform transactions, you’ll need to install the Ledger Live software. Visit the official Ledger website and download the Ledger Live application for your operating system. Install and launch the Ledger Live application on your computer.
- Update firmware and install Kin app: Once the Ledger Live application is installed, connect your Ledger Nano S to your computer again. Follow the instructions in the Ledger Live application to update the firmware of your device to the latest version. After the firmware update, install the Kin app on your Ledger Nano S using the Ledger Live application.
After completing these steps, your Ledger Nano S is set up and ready to securely store your Kin tokens. You can now proceed to the next steps to transfer your Kin to your Ledger Nano S and start managing your digital assets with peace of mind.
Step 2: Install Kin app on your Ledger Nano S
Now that your Ledger Nano S is set up, the next step is to install the Kin app on your device. Follow these instructions:
- Unlock your Ledger Nano S: Connect your Ledger Nano S to your computer using the provided USB cable. Enter your PIN code on the device to unlock it.
- Open the Ledger Live application: Launch the Ledger Live application on your computer.
- Access the Manager: In the Ledger Live application, navigate to the “Manager” section. This is where you can manage the apps installed on your Ledger Nano S.
- Connect your Ledger Nano S: If your Ledger Nano S is not already connected, connect it to your computer now.
- Install the Kin app: In the Manager section, search for the Kin app. Once you find it, click on the “Install” button next to the Kin app. Follow the on-screen instructions to proceed with the installation.
- Confirm installation on your Ledger Nano S: On your Ledger Nano S device, you will be prompted to confirm the installation of the Kin app. Use the device’s buttons to navigate and select the “Confirm” option when prompted.
- Wait for installation: The Ledger Live application will now install the Kin app on your Ledger Nano S. This may take a few moments. Please wait for the installation to complete.
- Installation complete: Once the installation is finished, you will see a notification on the Ledger Live application confirming that the Kin app has been installed on your Ledger Nano S.
With the Kin app installed on your Ledger Nano S, you now have the necessary software to manage your Kin tokens securely. In the next steps, we will guide you through the process of preparing to send Kin from your Ledger Nano S.
Step 3: Prepare to send Kin
Before you can send Kin from your Ledger Nano S, there are a few preparations you need to make. Follow these steps to ensure a smooth and successful transaction:
- Ensure sufficient Kin balance: Check that you have enough Kin tokens in your Ledger Nano S wallet to make the desired transaction. It’s important to have a balance greater than the transaction amount, as there may be network fees involved.
- Choose a recipient: Decide on the recipient’s address to which you want to send the Kin. Make sure you have the correct address and verify it to avoid any mistakes or potential loss of funds.
- Determine the transaction amount: Decide on the specific amount of Kin you want to send. Double-check that the amount is accurate and take into account any network fees associated with the transaction.
- Consider the network fees: Take into consideration the network fees required to complete the transaction. These fees may vary depending on the current network congestion and the type of transaction you wish to perform (regular transfer, priority transfer, etc.). It’s recommended to use an up-to-date fee estimation tool or consult the Ledger Live application for guidance on the appropriate fee to include with your transaction.
- Ensure a reliable internet connection: Make sure you have a stable and reliable internet connection when performing the transaction. Unstable or weak connections can lead to errors or delays in the transaction process.
- Have your Ledger Nano S and computer ready: Ensure that both your Ledger Nano S device and your computer are powered on and in good working condition. Keep your Ledger Nano S connected to your computer via the USB cable throughout the transaction process.
- Keep your Ledger Live application open: Ensure that the Ledger Live application is open and ready to use on your computer. This will allow you to directly interact with your Ledger Nano S and manage the transaction.
By following these preparation steps, you can ensure a smooth and successful transaction when sending Kin from your Ledger Nano S. Once you have completed these preparations, you are ready to proceed with connecting your Ledger Nano S to your computer and initiating the Kin transaction.
Step 4: Connect your Ledger Nano S to your computer
To send Kin from your Ledger Nano S, you need to connect it to your computer and establish a secure connection. Follow these steps:
- Ensure your Ledger Live application is open: Launch the Ledger Live application on your computer if it’s not already open.
- Unlock your Ledger Nano S: Using the USB cable provided, connect your Ledger Nano S to an available USB port on your computer. Enter your PIN code on the device to unlock it.
- Access the Kin app on your Ledger Nano S: On the Ledger Nano S device, navigate to the app dashboard by using the buttons. Locate and open the Kin app. You should see the Kin logo displayed on the device screen.
- Open the Kin account in Ledger Live: In the Ledger Live application, navigate to the “Accounts” section. Click on the “Add account” button and select “Kin” from the list of supported assets.
- Choose the account type: On the Ledger Nano S, select the account type you want to use for the Kin transaction. You may have multiple accounts associated with your Ledger Nano S. Use the device’s buttons to navigate and confirm your selection.
- Verify the account on Ledger Live: After choosing the account type, the Ledger Live application will automatically detect and display the Kin account associated with your Ledger Nano S. Verify that the correct account is selected and click on the “Add account” button.
- Wait for synchronization: The Ledger Live application will now synchronize with the Kin blockchain network to retrieve the account information and transaction history. This synchronization process may take some time, depending on the network speed and the amount of data to retrieve.
- Transaction verification: Once the synchronization is complete, you can verify the account details, including the Kin balance and transaction history, on the Ledger Live application. Ensure that the account information aligns with your expectations before proceeding with the transaction.
By connecting your Ledger Nano S to your computer and accessing the Kin app through the Ledger Live interface, you establish a secure and reliable connection for managing your Kin transactions. Now that your Ledger Nano S is connected, you can proceed to the next steps to initiate the Kin transaction.
Step 5: Open the Kin app on your Ledger Nano S
To send Kin from your Ledger Nano S, you need to open the Kin app on your device. Follow these steps to access the Kin app:
- Ensure your Ledger Nano S is unlocked: Connect your Ledger Nano S to your computer using the provided USB cable. Enter your PIN code on the device to unlock it.
- Navigate to the app dashboard: On the Ledger Nano S device, use the buttons to navigate to the app dashboard. This is the main screen where you can access different apps installed on your Ledger Nano S.
- Locate the Kin app: Scroll through the app dashboard on your Ledger Nano S until you find the Kin app. You will see the Kin logo displayed on the device screen.
- Open the Kin app: Once you have located the Kin app, press the button on your Ledger Nano S to open it. The app will launch, and you should see the Kin app interface on the device screen.
- Keep your Ledger Nano S connected: Ensure that your Ledger Nano S remains connected to your computer throughout the transaction process. This will maintain the secure connection between your device and the Ledger Live application.
- Verify the Kin app on your Ledger Live: On your computer, open the Ledger Live application. Verify that the Kin app is displayed as active or connected on the Ledger Live interface. This confirms that the Kin app on your Ledger Nano S is ready for use.
By opening the Kin app on your Ledger Nano S, you are preparing the device for Kin transactions. The secure connection between your Ledger Nano S and the Ledger Live application ensures that your Kin transactions are protected and processed securely. With the Kin app opened and verified, you can proceed to the next steps to access the Kin app on your computer and initiate the transaction.
Step 6: Access Kin app on your computer
Now that the Kin app is open on your Ledger Nano S, it’s time to access the Kin app on your computer through the Ledger Live application. Follow these steps to proceed:
- Keep your Ledger Nano S connected: Ensure that your Ledger Nano S remains connected to your computer via the USB cable throughout the process.
- Launch the Ledger Live application on your computer: If the Ledger Live application is not already open, locate and launch it on your computer.
- Verify connection with Ledger Nano S: The Ledger Live application will automatically detect your connected Ledger Nano S device. Verify that the device is correctly identified and select it to proceed.
- Navigate to the Kin account: In the Ledger Live application, navigate to the “Accounts” section. Locate and click on the Kin account that is associated with your Ledger Nano S device.
- View your Kin balance and transaction history: After selecting the Kin account, you’ll be able to view your current Kin balance and transaction history on the Ledger Live interface. Take a few moments to verify that the information displayed aligns with your expectations.
- Perform desired Kin transaction: Depending on your specific needs, you can initiate various Kin transactions through the Ledger Live application. This may include sending Kin tokens to another address, receiving Kin tokens, or interacting with Kin-related smart contracts or dApps.
- Confirm transaction details: Before finalizing the transaction, carefully review the transaction details, including the recipient address, the amount of Kin being sent, and any associated transaction fees. Ensure that everything is accurate and as intended.
- Authorize the transaction on your Ledger Nano S: Once you have reviewed and confirmed the transaction details on your computer, your Ledger Nano S will prompt you to verify and authorize the transaction. Follow the instructions on your device’s screen to validate the transaction.
- Wait for transaction confirmation: After authorizing the transaction on your Ledger Nano S, the Ledger Live application will process the transaction and broadcast it to the Kin network. Wait for the transaction to be confirmed, which usually takes a few moments.
- Review transaction status: Once the transaction is confirmed, you can review the status of the transaction on your computer through the Ledger Live application. This will provide you with peace of mind and assurance that the transaction was successful.
By accessing the Kin app on your computer through the Ledger Live application, you can conveniently manage and initiate Kin transactions while leveraging the security features of your connected Ledger Nano S. Now that you have accessed the Kin app on your computer, you can proceed to the next steps to select the specific account from which you want to send Kin and enter the recipient’s address.
Step 7: Select the Kin account you want to send from
When sending Kin from your Ledger Nano S, you may have multiple accounts associated with your device. In this step, you’ll need to select the specific Kin account you want to send from through the Ledger Live application. Follow these steps:
- Ensure your Ledger Nano S is connected: Make sure your Ledger Nano S is connected to your computer via the USB cable and unlocked using your PIN code.
- Open the Ledger Live application: Launch the Ledger Live application on your computer if it’s not already open.
- Access the “Accounts” section: In the Ledger Live application, navigate to the “Accounts” section. This is where you can manage and view your different cryptocurrency accounts.
- Locate your Kin accounts: Look for your Kin accounts listed in the “Accounts” section. Each Kin account will have its own unique name or identifier.
- Select the desired Kin account: Identify the Kin account from which you want to send Kin. Click on the corresponding account to select it.
- Verify the account information: After selecting the Kin account, review the account details displayed in the Ledger Live application. Check that the account name and balance match your expectations.
- Confirm the account selection: Once you have verified that the correct Kin account is selected, proceed to the next steps in order to enter the recipient’s address and specify the amount of Kin to send.
By selecting the appropriate Kin account within the Ledger Live application, you ensure that the Kin transaction is initiated from the intended account on your Ledger Nano S. Take a moment to carefully choose the correct account, as selecting the wrong one may result in the Kin being sent from an unintended source. With the Kin account selected, you can now proceed to enter the recipient’s address and specify the amount of Kin to send in the following steps.
Step 8: Enter recipient’s address
When sending Kin from your Ledger Nano S, you will need to enter the recipient’s address to ensure that the tokens are correctly delivered. Follow these steps to enter the recipient’s address:
- Ensure your Ledger Nano S is connected: Make sure your Ledger Nano S is connected to your computer via the USB cable and unlocked using your PIN code.
- Open the Ledger Live application: Launch the Ledger Live application on your computer if it’s not already open.
- Access the Kin account: In the Ledger Live application, navigate to the Kin account from which you want to send Kin. Ensure that the correct account is selected.
- Initiate the transaction: Look for the option to send Kin within the selected Kin account in the Ledger Live application. Click on the “Send” or “Transfer” button to start the transaction process.
- Enter the recipient’s address: In the transaction form, you will find a field to input the recipient’s address. Carefully enter the correct address of the intended recipient.
- Verify the recipient’s address: Double-check the entered recipient’s address to ensure its accuracy. A single mistake in the address can result in the funds being sent to the wrong destination, leading to loss of the Kin tokens.
- Confirm the recipient’s address: Once you are certain that the recipient’s address is correct, proceed to the next steps to specify the amount of Kin to send and confirm the transaction details.
By accurately entering the recipient’s address, you ensure that the Kin tokens are sent to the intended recipient’s wallet or address. Take your time to verify the address before confirming the transaction. With the recipient’s address entered, you are ready to proceed to the next step and specify the amount of Kin to send in the transaction.
Step 9: Enter the amount of Kin you want to send
Once you have entered the recipient’s address, the next step in sending Kin from your Ledger Nano S is to specify the amount of Kin you want to send. Follow these steps to enter the desired amount:
- Ensure your Ledger Nano S is connected: Make sure your Ledger Nano S is connected to your computer via the USB cable and unlocked using your PIN code.
- Open the Ledger Live application: Launch the Ledger Live application on your computer if it’s not already open.
- Access the Kin account: In the Ledger Live application, navigate to the specific Kin account from which you want to send Kin. Confirm that the correct account is selected.
- Initiate the transaction: Look for the option to send Kin within the selected Kin account in the Ledger Live application. Click on the “Send” or “Transfer” button to start the transaction process.
- Enter the amount of Kin: In the transaction form, you will find a field to enter the amount of Kin you want to send. Carefully input the desired amount, ensuring it aligns with the available balance in your Kin account.
- Verify the transaction amount: Double-check the entered amount of Kin to ensure accuracy. Make sure it matches the intended transaction and that you are not sending more or less than intended.
- Confirm the transaction amount: Once you are certain of the entered amount, proceed to the next steps to review the transaction details, including fees, and confirm the transaction.
By entering the correct amount of Kin that you wish to send, you ensure that the intended quantity of tokens is transferred. Take extra care to review the entered amount to avoid any sending errors. With the amount specified, you are ready to proceed to the next step and confirm the transaction details before finalizing the transfer of Kin from your Ledger Nano S.
Step 10: Confirm the transaction
After entering the recipient’s address and the amount of Kin you want to send, it’s important to review and confirm the transaction details before proceeding with the final step. Follow these steps to confirm the transaction:
- Ensure your Ledger Nano S is connected: Make sure your Ledger Nano S is connected to your computer via the USB cable and unlocked using your PIN code.
- Open the Ledger Live application: Launch the Ledger Live application on your computer if it’s not already open.
- Access the Kin account: In the Ledger Live application, navigate to the Kin account you selected for the transaction. Verify that the correct account is still selected.
- Initiate the transaction: Look for the option to send Kin within the selected Kin account in the Ledger Live application. Click on the “Send” or “Transfer” button to proceed.
- Review the transaction details: Take a moment to carefully review the transaction details displayed on the screen. Double-check the recipient’s address, the amount of Kin, and any associated transaction fees.
- Confirm the transaction: Once you have verified the transaction details and are ready to proceed, click on the “Confirm” or “Send” button in the Ledger Live application to initiate the transaction.
- Authorize the transaction on your Ledger Nano S: Your Ledger Nano S device will display the transaction details and prompt you to verify and authorize the transaction. Check that the details displayed on your device screen match those on your computer screen, then confirm the transaction using the device’s buttons.
By confirming the transaction, you are giving your final approval to send the specified amount of Kin to the designated recipient. Take your time to review the transaction details to ensure accuracy and prevent any potential mistakes. With the transaction confirmed, you are ready to proceed to the next step, where you will verify the transaction on your Ledger Nano S device.
Step 11: Verify the transaction on your Ledger Nano S
After confirming the transaction on your computer, it’s important to verify the transaction details on your Ledger Nano S device before finalizing the transaction. Follow these steps to verify the transaction:
- Ensure your Ledger Nano S is connected: Make sure your Ledger Nano S is connected to your computer via the USB cable and unlocked using your PIN code.
- Wait for transaction verification: Once you confirm the transaction on your computer, the Ledger Live application will process the transaction and send the details to your Ledger Nano S device for verification.
- Transaction confirmation on your Ledger Nano S: On your Ledger Nano S device, navigate to the transaction verification screen. Review the details displayed on the device screen, including the recipient’s address, the amount of Kin, and any associated fees.
- Ensure transaction details match: Carefully compare the transaction details shown on your Ledger Nano S device with those displayed on your computer screen. Verify that the details are consistent and accurate.
- Approve the transaction: If the transaction details on your Ledger Nano S device match the ones on your computer screen and you are certain about the accuracy, proceed to approve and verify the transaction on your Ledger Nano S by following the on-screen instructions.
- Finalize the transaction: Once you have approved and verified the transaction details on your Ledger Nano S, wait for the Ledger Live application to finalize the transaction and broadcast it to the Kin blockchain network.
By verifying the transaction on your Ledger Nano S device, you ensure that the transaction details shown on your computer match those displayed on your device. This additional verification step adds an extra layer of security, confirming that the transaction being executed is consistent with your intentions. With the transaction verified on your Ledger Nano S, you can proceed to the next step and wait for the transaction to be confirmed on the Kin blockchain network.
Step 12: Wait for the transaction to be confirmed
After verifying the transaction on your Ledger Nano S, the next step is to patiently wait for the transaction to be confirmed on the Kin blockchain network. It typically takes some time for the network to validate and process the transaction. Follow these steps:
- Keep your Ledger Nano S connected: Ensure that your Ledger Nano S remains connected to your computer via the USB cable throughout the transaction confirmation process.
- Monitor the transaction status: Open the Ledger Live application on your computer and navigate to the transaction history or activity section. Look for the recent transaction involving your Kin transfer and monitor its status.
- Be patient: Transactions on the blockchain require a certain amount of time to be confirmed, depending on network congestion and other factors. The length of time can vary, with some transactions being confirmed in minutes, while others may take longer.
- Avoid unnecessary actions: During this confirmation period, resist the urge to repeat the transaction or make any changes. Making additional transactions or modifications may lead to confusion and potential issues with your Kin transfer.
- Monitor for transaction confirmations: Keep an eye on the Ledger Live application to see when the transaction status changes to “Confirmed” or “Success.” This indicates that the Kin transfer has been successfully validated by the network.
- Check the recipient’s wallet: Once the transaction has been confirmed, you can check the recipient’s wallet or address on the Kin blockchain explorer to ensure that the Kin tokens have been successfully received.
Waiting for the transaction to be confirmed may require some patience, but it is an essential step in ensuring the successful transfer of your Kin tokens. By monitoring the transaction status through the Ledger Live application and checking the recipient’s wallet address, you can stay informed about the progress of the transaction. Once the transaction is confirmed, you can proceed with confidence, knowing that your Kin transfer has been successfully processed on the blockchain.
Step 13: Transaction confirmed!
Congratulations! Your Kin transaction has been successfully confirmed on the blockchain. This final step confirms that the recipient has received the specified amount of Kin. Here’s what you can do:
- Verify the recipient’s wallet: Double-check the recipient’s wallet or address on the Kin blockchain explorer to ensure that the Kin tokens have indeed been received.
- Review the transaction history: In the Ledger Live application, navigate to the transaction history or activity section. Look for the recent transaction involving your Kin transfer and ensure that it is marked as “Confirmed” or “Success.”
- Keep track of your records: It’s essential to maintain accurate records of your transactions. You can take note of the transaction details, including the date, time, recipient’s address, and the amount of Kin sent, for future reference.
- Ensure wallet security: Remember to keep your Ledger Nano S and all related information secure. Safely store your device, PIN code, and recovery phrase in separate and secure locations to prevent unauthorized access.
- Consider confirming with the recipient: If necessary, you can reach out to the recipient of your Kin transfer to ensure that they have indeed received the tokens and that everything is in order.
- Continue managing your Kin holdings: Now that the transaction has been confirmed, you can continue using your Ledger Nano S and the Ledger Live application to manage your Kin holdings. Monitor your balance, track transactions, and perform any other necessary actions.
With the confirmation of your Kin transaction, you can have peace of mind knowing that the Kin tokens have been successfully transferred to the intended recipient. By verifying the transaction on the blockchain and reviewing the details in the Ledger Live application, you can ensure the accuracy and successful completion of your Kin transfer. Maintain good security practices and keep track of your records to stay organized and secure in your cryptocurrency transactions.