What is Avast Internet Security Boot Scan?
Avast Internet Security is a robust antivirus program that offers comprehensive protection against various online threats. One of its powerful features is the Boot Scan, an advanced security measure designed to detect and eliminate deeply embedded malware that may be hidden within your computer’s operating system. Unlike regular scans that run during your computer’s normal operation, the Boot Scan dives into the core files and system components to identify and remove stubborn malware that may be causing persistent issues.
The Boot Scan feature is especially useful when you suspect that your computer has been infected with malware that is difficult to detect or remove using regular antivirus scans. It can help you tackle those stubborn threats that may be evading traditional scanning methods, ensuring that your system is fully cleaned and protected.
During a Boot Scan, Avast Internet Security checks all files and processes that are loaded during the early stages of your computer’s startup, before the operating system is fully activated. This allows it to detect and eliminate malware that may be hidden in system areas that are typically inaccessible during normal scans.
By running a Boot Scan, you can ensure that your computer is thoroughly checked for malware, including rootkits, which are malicious software that can gain unauthorized access to your system and remain undetected by regular antivirus scans. The Boot Scan provides an extra layer of security, ensuring that your computer is protected from deep-seated threats that might compromise your personal data and the overall performance of your system.
With Avast Internet Security’s Boot Scan feature, you can have peace of mind knowing that your computer is safeguarded against the most advanced and stubborn forms of malware. By regularly running a Boot Scan, you can maintain a clean and secure system, free from hidden threats that could potentially cause irreparable damage.
Why should you run a Boot Scan?
Running a Boot Scan with Avast Internet Security is a crucial step in your overall computer security routine. While regular antivirus scans are effective in detecting and removing a wide range of malware, certain types of malicious software can evade detection and embed themselves deep within your computer’s operating system. Here are a few reasons why you should incorporate Boot Scans into your security practices:
1. Detection of Hidden and Persistent Malware: Boot Scans have the ability to identify and remove malware that may be hiding within critical system files or using advanced tactics to evade regular scans. By running a Boot Scan, you can ensure that even the most deeply embedded threats are detected and eliminated.
2. Removal of Rootkits: Rootkits are particularly insidious forms of malware that are designed to gain unauthorized access to your system and remain undetected. Boot Scans effectively target and remove rootkits, ensuring that your computer is fully protected from sophisticated and persistent threats.
3. Enhanced System Performance: Malware can subtly degrade the performance of your computer, causing it to slow down, crash, or freeze. By performing regular Boot Scans, you can identify and eliminate any malware that might be negatively impacting the performance and stability of your system.
4. Protection from Advanced Threats: Some malware is specifically designed to circumvent regular antivirus scans and can only be detected during the boot process. Running a Boot Scan allows Avast Internet Security to thoroughly inspect files and processes that are loaded during startup, providing an additional layer of defense against advanced and evolving threats.
5. Peace of Mind: Knowing that you have taken comprehensive measures to protect your computer can provide you with peace of mind. By regularly running Boot Scans, you can be confident that your system is thoroughly checked for hidden threats, ensuring the security and privacy of your personal data.
Incorporating Boot Scans into your computer security routine is essential for maintaining a safe and secure system. By utilizing Avast Internet Security’s Boot Scan feature regularly, you can detect and remove deeply embedded malware, protect against advanced threats, and enjoy a faster and more stable computing experience.
How to Access the Boot Scan Feature in Avast Internet Security
Avast Internet Security provides a straightforward and simple process for accessing the Boot Scan feature. Follow the steps below to enable and run a Boot Scan on your computer:
Step 1: Open Avast Internet Security
To begin, locate the Avast Internet Security application on your computer and open it. You can usually find the Avast icon in your system tray or by searching for it in the Start menu.
Step 2: Navigate to the Scan Section
Once Avast Internet Security is open, navigate to the “Protection” or “Scan” section of the application. The exact location of this section may vary depending on the version of Avast you are using, but it is typically easily accessible from the main dashboard.
Step 3: Select Boot-time Scan
In the Scan section, you will find a list of different scan options. Look for the option labeled “Boot-time scan” or “Full system scan.” This is the option you need to select to perform a Boot Scan. Click on it to proceed.
Step 4: Configure Scan Settings
After selecting the Boot-time scan option, you may have the option to configure the scan settings. You can choose whether to scan all hard drives, perform a quick or thorough scan, or enable additional scan options. Customize the settings according to your preference or leave them at the default settings.
Step 5: Customize Scan Preferences
Next, you can customize scan preferences such as scheduling the Boot Scan to run automatically at a specific time or on specific days. You can also choose to scan archives, packed files, or other types of files that are typically targeted by malware. Adjust these preferences as needed.
Step 6: Start the Boot Scan
Once you have configured the scan settings and preferences, click on the “Start” or “Scan” button to initiate the Boot Scan. Avast Internet Security will prompt you to restart your computer to begin the scan process. Save any unsaved work and proceed with the restart.
Step 7: Review Scan Results
During the boot process, Avast Internet Security will perform a thorough scan of your system, including critical files and processes. Once the scan is complete, Avast will display the results, indicating whether any threats were detected. Take note of any identified malware and follow Avast’s recommended actions to remove or quarantine the threats.
By following these simple steps, you can access and utilize the powerful Boot Scan feature in Avast Internet Security to ensure the comprehensive security of your computer.
Step 1: Open Avast Internet Security
To begin the process of running a Boot Scan using Avast Internet Security, you will first need to open the application on your computer. Follow the steps below to access Avast Internet Security:
1. Locate the Avast Icon
The Avast icon is typically located in the system tray at the bottom right corner of your screen. Look for the orange Avast logo or the letter “A” on a blue background. If you don’t see the icon in the system tray, it may be hidden. In that case, click on the arrow icon to reveal hidden icons, and you should find the Avast icon there.
2. Open Avast Internet Security
Right-click on the Avast icon in the system tray. A context menu will appear, displaying a list of options related to Avast. Locate and click on the option that says “Open Avast UI,” “Open Avast Internet Security,” or a similar option. This will open the Avast Internet Security application.
3. Enter Avast Internet Security
After clicking on the appropriate option, Avast Internet Security will launch, displaying the main dashboard. This is the central hub where you can access all the features and settings of Avast.
4. Ensure Avast is Up-to-Date
Once you have opened Avast Internet Security, it is important to ensure that your antivirus program is up-to-date. Check for any available updates and install them if necessary. Having the latest version of Avast will ensure that you have access to all the latest security features and enhancements.
Opening Avast Internet Security is the first step in the process of running a Boot Scan to thoroughly check your computer for malware. With Avast’s user-friendly interface, accessing the application is a simple and straightforward task, allowing you to proceed with the necessary steps to perform a Boot Scan and ensure the security of your system.
Step 2: Navigate to the Scan Section
After opening Avast Internet Security, the next step in running a Boot Scan is to navigate to the Scan section. Follow the steps below to find the Scan section in Avast:
1. Look for the Scan Option
Within the main dashboard of Avast Internet Security, you will find a menu or navigation bar on either the top or side of the window. Scan options are typically located in this menu, often represented by a magnifying glass icon or a label such as “Protection” or “Scan.”
2. Select the Scan Option
Click on the Scan option in the menu to proceed. This will open a dedicated area within Avast Internet Security where you can access various scanning features and settings.
3. Explore the Scan Section
Once you are in the Scan section, you will see a list of different types of scans, including the option for a Boot-time scan or Full system scan. Take a moment to familiarize yourself with the scan options available. These options may vary depending on the version of Avast you are using, but they generally include a Boot-time scan or a similar option that specifically targets the boot process.
4. Understand the Scan Settings
While in the Scan section, you may also notice the availability of scan settings. These settings allow you to customize the scanning process according to your preferences. You can configure which areas of your computer will be scanned, the type of scan (quick or thorough), and other options such as detecting potentially unwanted programs (PUPs) or optimizing the scan speed.
5. Familiarize Yourself with Additional Scan Features
As you navigate through the Scan section, you may come across additional scan features that Avast offers. These could include specific scans for certain areas of your computer, scanning removable media, or scanning specific folders or files. Exploring these additional features can provide you with more options for efficiently scanning and protecting your system.
By following these steps, you can easily navigate to the Scan section within Avast Internet Security. This will allow you to access the necessary scan options and settings, including the Boot-time scan feature, which is essential for running a thorough security scan on your computer.
Step 3: Select Boot-time Scan
Once you have navigated to the Scan section in Avast Internet Security, the next step in running a Boot Scan is to select the Boot-time scan option. Follow the steps below to choose the Boot-time scan feature:
1. Scan Options
Within the Scan section, you will see a list of different scan options available. Look for the option labeled “Boot-time scan” or “Full system scan.” This is the specific scan option designed to target the boot process and thoroughly check your computer for any hidden or persistent malware.
2. Click on Boot-time Scan
Click on the Boot-time scan option to select it. Typically, this can be done by clicking on the checkbox next to the option or by clicking on the name of the scan itself. Avast Internet Security may also provide a brief description or explanation of what the Boot-time scan does to help you understand its purpose.
3. Optional Settings
Depending on the version of Avast you are using, additional settings or options may be available for the Boot-time scan. These settings can include the ability to customize the scan parameters, such as choosing to scan all hard drives, enable heuristic analysis, or scan inside archives. Take a moment to review and adjust these settings according to your preferences.
4. Save Changes (if applicable)
If you have made any changes to the Boot-time scan settings, make sure to save your changes before proceeding. Look for a “Save” or “Apply” button within the scan settings section, and click on it to confirm your selections.
5. Verify Boot-time Scan Selection
After selecting the Boot-time scan option and making any necessary adjustments, it’s important to verify that the Boot-time scan is indeed the chosen option. Double-check that the checkbox next to “Boot-time scan” or the selected option remains selected.
By following these steps, you can easily select the Boot-time scan feature within Avast Internet Security. This step is crucial in setting up the scan to target the boot process and thoroughly scan your computer for any hidden or persistent malware threats.
Step 4: Configure Scan Settings
After selecting the Boot-time scan option in Avast Internet Security, the next step is to configure the scan settings to ensure that the scan runs according to your preferences. Follow the steps below to customize the scan settings:
1. Choose Scan Scope
One of the first settings you may encounter is the scan scope. You can typically choose between scanning all hard drives or selecting specific drives or partitions to include or exclude from the scan. Consider your requirements and select the appropriate option.
2. Optimize Scan Speed
Avast Internet Security may also offer options to optimize the scan speed. You might have the choice between a quick scan, which scans critical areas for known threats, or a thorough scan, which thoroughly checks all files and processes on your system. Decide which scan speed is suitable for your needs.
3. Enable Heuristic Analysis
Heuristic analysis is a technique used by antivirus software to detect previously unknown malware based on behavioral patterns. Look for an option to enable heuristic analysis during the Boot-time scan. Enabling this feature can provide added protection against emerging threats.
4. Scan Archive Files
If you suspect that malware may be hiding inside archived files, enable the option to scan archive files. This setting will ensure that Avast Internet Security thoroughly checks compressed files, such as .zip or .rar archives, during the Boot-time scan.
5. Customize Additional Settings
Depending on the version of Avast you are using, there may be additional settings or options available to further customize the scan. These settings could include ignoring or scanning specific file types, detecting potentially unwanted programs (PUPs), or adjusting the sensitivity of the scan. Take the time to review and adjust these settings according to your preferences.
6. Save Changes (if applicable)
If you have made any changes to the scan settings, ensure that you save your changes before proceeding. Look for a “Save” or “Apply” button within the scan settings section, and click on it to confirm your selections.
By following these steps, you can easily configure the scan settings in Avast Internet Security to align with your needs and preferences. Customizing the scan settings allows you to optimize the scan according to the level of thoroughness, speed, and specific requirements you have for your Boot-time scan.
Step 5: Customize Scan Preferences
After configuring the general scan settings in Avast Internet Security, the next step is to customize the scan preferences according to your specific needs and preferences. Follow the steps below to tailor the scan to your requirements:
1. Schedule the Boot Scan
If you prefer to run the Boot Scan at specific times or on specific days, Avast Internet Security allows you to schedule the scan. Look for an option to set a schedule and choose the desired frequency and time for the Boot Scan. This can be particularly useful if you want the scan to run automatically during periods when you’re less likely to be using your computer.
2. Skip Safe Files
During the Boot Scan, Avast may encounter files that are known to be safe and do not require scanning. To optimize the scanning process and reduce scan time, enable the option to skip safe files. This will exclude files that are deemed safe from the scan, focusing only on potentially malicious files.
3. Scan for Potentially Unwanted Programs (PUPs)
Avast Internet Security has the capability to detect and remove potentially unwanted programs (PUPs), such as adware or browser toolbars. Enable the option to scan for PUPs during the Boot Scan if you want Avast to include these types of programs in its scan and removal process.
4. Adjust Action Preferences
Avast provides options for the actions to be taken when a virus or malware is found during the scan. You can customize these action preferences based on your desired level of control and response. Options may include automatically moving threats to the Virus Chest, deleting infected files, or asking for your permission before taking action. Review and adjust these settings according to your preferences.
5. Save Preferences (if applicable)
If you have made any changes or customization to the scan preferences, make sure to save your preferences before proceeding. Look for a “Save” or “Apply” button within the scan preferences section, and click on it to confirm your selections.
By following these steps, you can easily customize the scan preferences in Avast Internet Security to align with your specific requirements and preferences. Customizing these preferences allows you to have greater control over the scanning process, ensuring that the Boot Scan is optimized to meet your needs and provide effective malware detection and removal.
Step 6: Start the Boot Scan
After you have customized the scan settings and preferences in Avast Internet Security, you are now ready to initiate the Boot Scan. Follow the steps below to start the scan process:
1. Save Any Unsaved Work
Before starting the Boot Scan, it’s important to save any unsaved work and close any open applications or documents. The scan will require a restart of your computer, and any unsaved work may be lost during the process.
2. Initiate the Scan
Once you have prepared your computer, click on the “Start” or “Scan” button within the Scan section of Avast Internet Security. This will start the Boot Scan process.
3. Restart Your Computer
Avast Internet Security will prompt you to restart your computer in order to initiate the Boot Scan. Click on the “Restart” or “OK” button to proceed with the restart. Your computer will shut down and reboot, starting the Boot Scan process during the boot-up sequence.
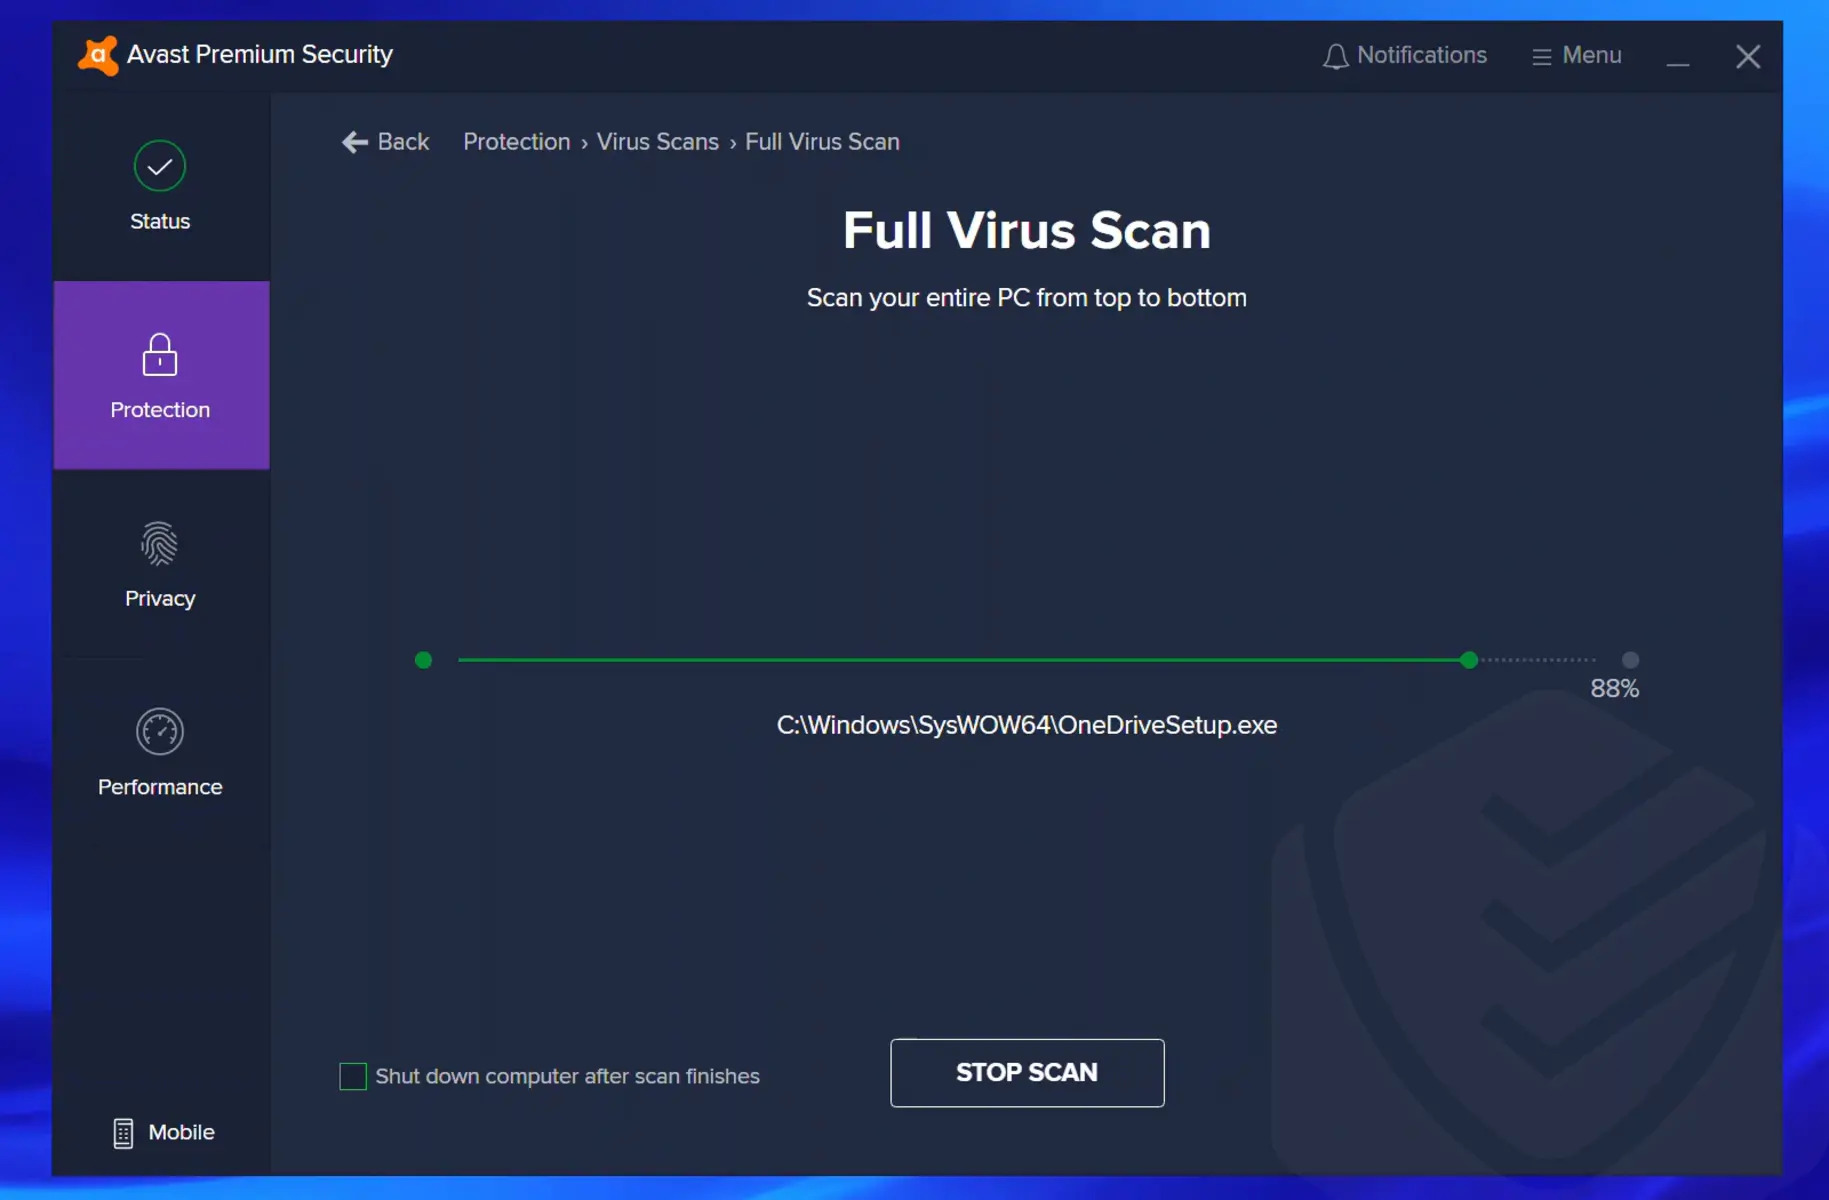
4. Monitor the Scan Progress
As your computer restarts and the Boot Scan begins, Avast Internet Security will display the progress of the scan. Monitor the scan progress to ensure that it is running smoothly and to get an idea of the estimated time remaining for the scan to complete. This can vary depending on the size of your hard drives and the number of files being scanned.
5. Do Not Interrupt the Scan
It is important to allow the Boot Scan to run to completion without interruption. Avoid using your computer or performing any other tasks while the scan is in progress. This will ensure that the scan is thorough and effective in identifying and removing any malware present on your system.
6. Review the Scan Results
After the Boot Scan is complete, Avast Internet Security will display the scan results. This includes a summary of any threats detected, as well as the actions taken by Avast to address those threats. Take the time to review the scan results and make a note of any identified malware or suspicious files.
By following these steps, you can easily start the Boot Scan in Avast Internet Security and monitor the scan progress. Allowing the scan to run uninterrupted ensures a comprehensive and effective scan of your system, helping to detect and remove any malware that may be present on your computer.
Step 7: Review Scan Results
After the Boot Scan has completed in Avast Internet Security, the next step is to review the scan results. This allows you to understand the outcome of the scan and take any necessary actions. Follow the steps below to review the scan results:
1. Navigate to the Scan Results
Within Avast Internet Security, locate and click on the section or tab that provides access to scan results. This is typically labeled as “Scan Results,” “Threats Detected,” or a similar name. Clicking on this section will display the details of the scan.
2. Analyze Detected Threats
Once in the scan results section, you will see a list of any threats or suspicious files that were detected during the Boot Scan. Take the time to carefully review each item and its corresponding details. Avast provides information such as the name, severity level, location, and recommended action for each detected threat.
3. Decide on Actions
Based on the information provided by Avast, you need to decide on the appropriate actions to take for each detected threat. Avast may suggest actions such as moving the threat to the Virus Chest, quarantining the file, or deleting the infected file altogether. Consider the severity level and potential impact of the threat, then choose the most suitable action for each item.
4. Take Necessary Actions
After deciding on the actions for each detected threat, click on the corresponding buttons or checkboxes to execute the chosen actions. Avast may provide options to apply the same action to all items or apply individual actions to each threat. Follow the prompts provided by Avast to complete the removal or quarantine process.
5. Verify Successful Actions
Once the chosen actions have been executed, Avast Internet Security will provide confirmation messages or summaries of the actions taken. Verify that the threats have been successfully removed, quarantined, or deleted. If any actions were unsuccessful, make note of the items that require further attention.
6. Take Additional Security Measures
After reviewing and addressing the scan results, consider taking additional security measures to further protect your computer. This may include updating your antivirus software, enabling real-time protection, regularly updating your operating system and software, and practicing safe browsing habits.
By following these steps, you can effectively review the scan results in Avast Internet Security and take the necessary actions to mitigate any detected threats. This ensures that your computer remains secure and free from malware that could potentially compromise your data and system performance.
Tips for a Successful Boot Scan
Running a Boot Scan in Avast Internet Security is a powerful way to detect and remove hidden and persistent malware from your computer. To ensure a successful Boot Scan, consider the following tips:
1. Keep Avast Updated
Regularly update Avast Internet Security to ensure you have the latest virus definitions and security enhancements. This ensures that Avast can effectively detect and remove the latest malware threats during the Boot Scan.
2. Schedule Regular Boot Scans
Set a schedule to perform Boot Scans on a regular basis. This can be weekly, monthly, or as per your preference. Regular scans help to proactively detect and eliminate hidden malware, keeping your computer secure.
3. Consider Running Boot Scans in Safe Mode
Running a Boot Scan in Safe Mode can enhance its effectiveness. Safe Mode boots your computer with a minimal set of drivers and services, allowing Avast to focus on scanning for malware without interference from other processes.
4. Close Unnecessary Applications
Prior to initiating a Boot Scan, close all unnecessary applications and programs running on your computer. This frees up system resources and allows Avast to thoroughly scan the system files and processes without interruptions.
5. Keep Your Computer Plugged In
Ensure your laptop or desktop computer is plugged into a power source during the Boot Scan. This prevents any interruptions due to a drained battery, ensuring that the scan can complete without issues.
6. Avoid Interruptions
Once the Boot Scan is in progress, avoid using your computer for other tasks. Interrupting the scan can compromise its effectiveness, potentially missing or incomplete removal of malware. Allow the scan to complete without interruptions.
7. Review and Address Detected Threats
After the Boot Scan completes, carefully review the scan results and take appropriate actions for any detected threats. Follow Avast’s recommendations for removing, quarantining, or deleting the identified malware to ensure your computer remains secured.
8. Maintain Regular System Maintenance
Perform regular system maintenance tasks, such as updating your operating system and software, running regular antivirus scans, and practicing safe internet browsing habits. These actions help to prevent malware infections and maintain a secure computing environment.
By following these tips, you can maximize the effectiveness of Boot Scans in Avast Internet Security and ensure a successful scan that detects and removes hidden malware threats. Regular scanning and practicing good computing habits contribute to a secure and smooth-running computer system.