
Preparing Your Kindle Fire
Before you start the process of rooting your Kindle Fire, it’s important to make sure you have everything you need and that your device is properly prepared. This section will guide you through the necessary steps to ensure a smooth rooting process.
1. Ensure that your Kindle Fire is fully charged or has at least 50% battery life remaining. Rooting your device may take some time, and you don’t want it to die halfway through the process.
2. Back up all of your important data. While rooting itself won’t erase any data, there is a slight risk of data loss during the process. It’s better to be safe than sorry, so make sure to back up any photos, documents, or other files that you don’t want to lose.
3. Disable any security features, such as passcodes or fingerprint recognition, on your Kindle Fire. These features can interfere with the rooting process and may cause unexpected issues. You can re-enable them after the rooting process is complete.
4. Make sure you have a stable internet connection. Some of the tools and files needed for rooting may need to be downloaded during the process, so a reliable internet connection is crucial to avoid any interruptions.
5. Enable installation of apps from unknown sources. To do this, go to your device’s settings, select “Security,” and enable the “Unknown sources” option. This will allow you to install the necessary tools and applications for rooting.
By following these steps, you will ensure that your Kindle Fire is properly prepared for the rooting process. Taking the time to prepare your device will help minimize any potential issues or complications that may arise during the rooting process.
Enabling USB Debugging
USB debugging is a crucial step in the rooting process as it allows your computer to communicate with your Kindle Fire and execute commands. In this section, we will guide you through enabling USB debugging on your device.
1. On your Kindle Fire, go to the settings menu by swiping down from the top of the screen and tapping the gear icon.
2. Scroll down and select “Device Options” or “Device” (depending on your device model).
3. Tap on “Developer Options.” If you don’t see this option, you may need to unlock it first. To do so, go to “About” and tap on the device’s serial number seven times until a message appears, confirming that you are now a developer.
4. Once in “Developer Options,” toggle the switch to enable “USB Debugging.”
5. A prompt will appear asking if you trust the computer you connect your Kindle Fire to. Tick the checkbox labeled “Always allow from this computer” and tap “OK.”
6. Connect your Kindle Fire to your computer using a USB cable. Make sure the cable is capable of data transfer and not just charging.
7. On your computer, open the command prompt or terminal window. You will need to have Android Debug Bridge (ADB) installed on your computer for this step. If you haven’t installed it yet, refer to our guide on installing ADB and Fastboot.
8. In the command prompt or terminal, type “adb devices” and press Enter. This command will list the connected devices, and you should see your Kindle Fire listed.
Once you have successfully enabled USB debugging and connected your Kindle Fire to your computer, you are ready to proceed with the next steps in the rooting process. This step is crucial for establishing a connection between your device and your computer, allowing you to execute the necessary commands to root your Kindle Fire.
Installing ADB and Fastboot
ADB (Android Debug Bridge) and Fastboot are essential tools for interacting with your Kindle Fire and executing commands from your computer. In this section, we will guide you through the process of installing ADB and Fastboot on your computer.
1. Begin by downloading the ADB and Fastboot package for your specific operating system from the official Android developers website.
2. Once the download is complete, extract the contents of the zip file to a folder on your computer. It’s recommended to create a dedicated folder for ADB and Fastboot for easier access in the future.
3. Next, navigate to the folder where you extracted the ADB and Fastboot files. On Windows, hold down the Shift key and right-click within the folder. Select “Open PowerShell window here” or “Open Command Prompt here” from the context menu.
4. In the command prompt or PowerShell window, type “adb devices” and press Enter. This command will check if ADB is properly installed and if your Kindle Fire is connected and recognized by your computer. You should see the device ID listed if everything is set up correctly.
5. To confirm that Fastboot is working, type “fastboot devices” in the command prompt or PowerShell window and press Enter. This command will display the connected devices in Fastboot mode, and your Kindle Fire should be listed.
6. If you encounter any errors or if your Kindle Fire is not recognized, you may need to troubleshoot the drivers for your device. Check the official Amazon support website or XDA Developers forum for specific drivers for your Kindle Fire model.
By installing ADB and Fastboot, you are equipping your computer with the necessary tools to communicate with your Kindle Fire and execute commands during the rooting process. These tools provide the foundation for the subsequent steps in unlocking the full potential of your device.
Unlocking the Bootloader
Unlocking the bootloader of your Kindle Fire is a crucial step in the rooting process. It allows you to install custom recoveries and ROMs, giving you greater control over your device. Follow the steps below to unlock the bootloader of your Kindle Fire.
1. Ensure that you have enabled USB debugging and connected your Kindle Fire to your computer.
2. Open the command prompt or terminal window on your computer.
3. In the command prompt or terminal, navigate to the folder where you have installed ADB and Fastboot.
4. Type the following command: adb reboot bootloader. Press Enter to execute the command.
5. Your Kindle Fire will reboot into bootloader mode. Use the volume keys to navigate and the power button to select options.
6. In bootloader mode, use the volume keys to navigate to “Unlock the Bootloader” or a similar option. Press the power button to select the option. Note that this step may vary depending on your specific Kindle Fire model. Refer to the documentation or the XDA Developers forum for device-specific instructions.
7. A warning message will appear on your Kindle Fire’s screen. Read the warning carefully, as unlocking the bootloader will erase all data on your device. Use the volume keys to select “Yes” and press the power button to confirm.
8. The bootloader unlocking process will begin. Wait for it to complete, and then your Kindle Fire will reboot.
Unlocking the bootloader of your Kindle Fire allows you to take full control of your device’s software, enabling customizations and optimizations that are not otherwise possible. Proceed to the next step to install a custom recovery on your Kindle Fire.
Flashing a Custom Recovery
Flashing a custom recovery on your Kindle Fire is an essential step in the rooting process. It allows you to create and restore backups, install custom ROMs, and perform other advanced operations. Follow the steps below to flash a custom recovery on your Kindle Fire.
1. Make sure your Kindle Fire’s bootloader is unlocked and that it is connected to your computer via a USB cable.
2. Open the command prompt or terminal window on your computer.
3. Navigate to the location where you have installed ADB and Fastboot.
4. Type the command adb reboot bootloader and press Enter. Your Kindle Fire will reboot into bootloader mode.
5. Once in bootloader mode, use the volume keys to navigate to the “Recovery” option and press the power button to select it. This will boot your Kindle Fire into recovery mode.
6. With your device in recovery mode, download the custom recovery image file for your Kindle Fire model. Ensure that you download it from a reputable source.
7. Copy the downloaded recovery image file to the folder where you have installed ADB and Fastboot.
8. In the command prompt or terminal window, type the command fastboot flash recovery [filename].img, replacing “[filename]” with the name of the recovery image file. Press Enter to execute the command.
9. Wait for the custom recovery to be flashed onto your Kindle Fire. Once the process is complete, type the command fastboot reboot and press Enter to reboot your device.
10. Your Kindle Fire will now reboot with the newly installed custom recovery. You can navigate the recovery menu using the volume and power buttons.
With a custom recovery installed on your Kindle Fire, you’ll have access to a variety of advanced features and functionalities. This opens up a world of possibilities for customization and optimization of your device. Next, we’ll move on to the final step in the rooting process: rooting your Kindle Fire.
Rooting Your Kindle Fire
Rooting your Kindle Fire gives you administrative access to the operating system, allowing you to customize and optimize your device further. Here are the steps to root your Kindle Fire.
1. Ensure that your Kindle Fire’s bootloader is unlocked, and it is connected to your computer via a USB cable.
2. Open the command prompt or terminal window on your computer.
3. Navigate to the folder where you have installed ADB and Fastboot.
4. Type the command adb reboot bootloader, and press Enter. Your Kindle Fire will reboot into bootloader mode.
5. Once in bootloader mode, use the volume keys to navigate to the “Recovery” option and press the power button to select it. This will boot your Kindle Fire into recovery mode.
6. In recovery mode, navigate to the “Install” option and select it.
7. Locate the root package file that you have downloaded from a trusted source and select it to begin the installation.
8. Once the installation is complete, go back to the recovery menu and select “Reboot system now” to restart your device.
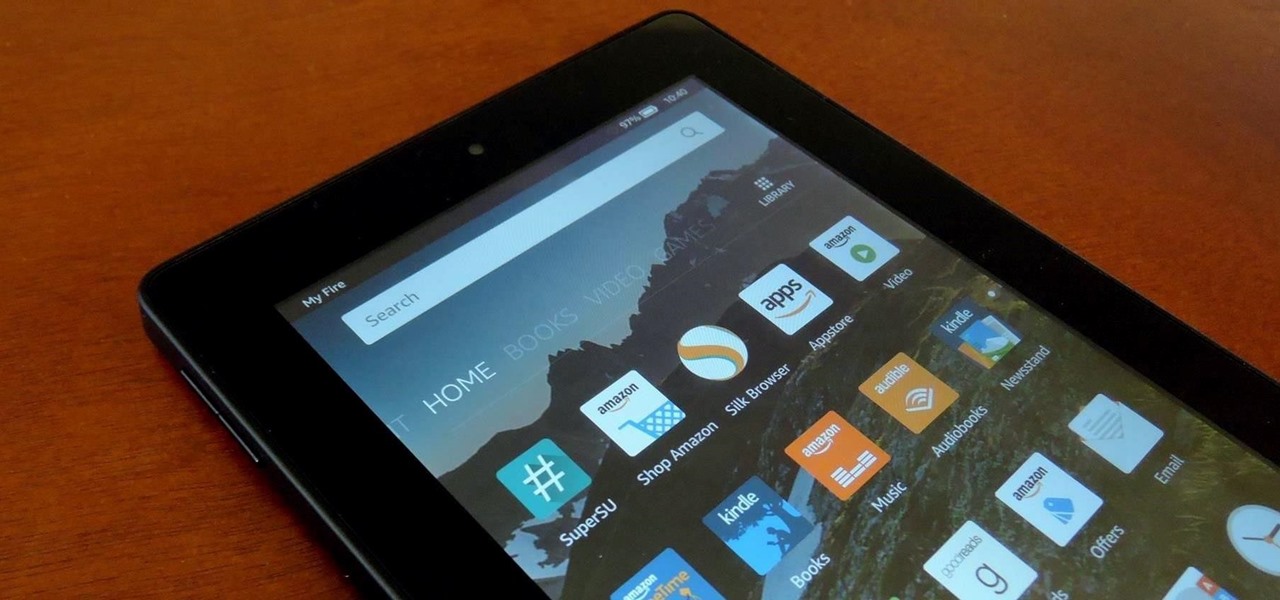
9. After your Kindle Fire has rebooted, check for the presence of a root management application such as SuperSU or Magisk on your device. This indicates that your Kindle Fire is successfully rooted.
Congratulations! You have successfully rooted your Kindle Fire. With root access, you can now install and use apps that require root permissions, remove bloatware, customize system settings, and enjoy other advanced features and functionalities.
Finally, it’s important to note that rooting your Kindle Fire voids the manufacturer’s warranty. However, you can always unroot your device and restore it to its original state if needed. Enjoy exploring the endless possibilities and customization options that rooting brings!
Verifying Root Access
After successfully rooting your Kindle Fire, it’s essential to verify that root access has been granted. This ensures that you have full administrator privileges and can take advantage of all the benefits that come with rooting. Here’s how you can verify root access on your Kindle Fire.
1. Open the app drawer on your device and look for a root management application such as SuperSU or Magisk. These apps are typically installed during the rooting process and serve as indicators of successful root access.
2. Launch the root management app and check for any prompts to grant or deny root access to other applications. This confirms that your device is rooted and that the root management app is functioning correctly.
3. Alternatively, you can download and install a root verification app from the Google Play Store, such as Root Checker or Root Validator. Run the app and follow the on-screen instructions to determine if root access has been properly granted.
4. Root verification apps usually provide a simple “Rooted” or “Not Rooted” message, along with additional details about the root status of your Kindle Fire. If the app confirms that your device is rooted, then you can be confident in your successful rooting process.
5. To further confirm root access, you can also try running apps or performing tasks that require root permissions. For example, you can use an app like Titanium Backup to back up system apps or remove pre-installed bloatware, which are actions only possible with root access.
By verifying root access, you can be certain that your Kindle Fire is fully rooted and that you have the necessary privileges to customize and optimize your device even further. Make sure to exercise caution when granting root permissions to ensure the security and stability of your device.
Enjoy exploring the vast array of root-enabled apps, custom ROMs, and other possibilities that come with having root access on your Kindle Fire!