
Check Network Status
Before attempting any troubleshooting steps, it’s important to check the status of your home network. This will help identify if the issue is specific to the router or if there are other factors affecting the network. Here are a few steps to follow to check the network status:
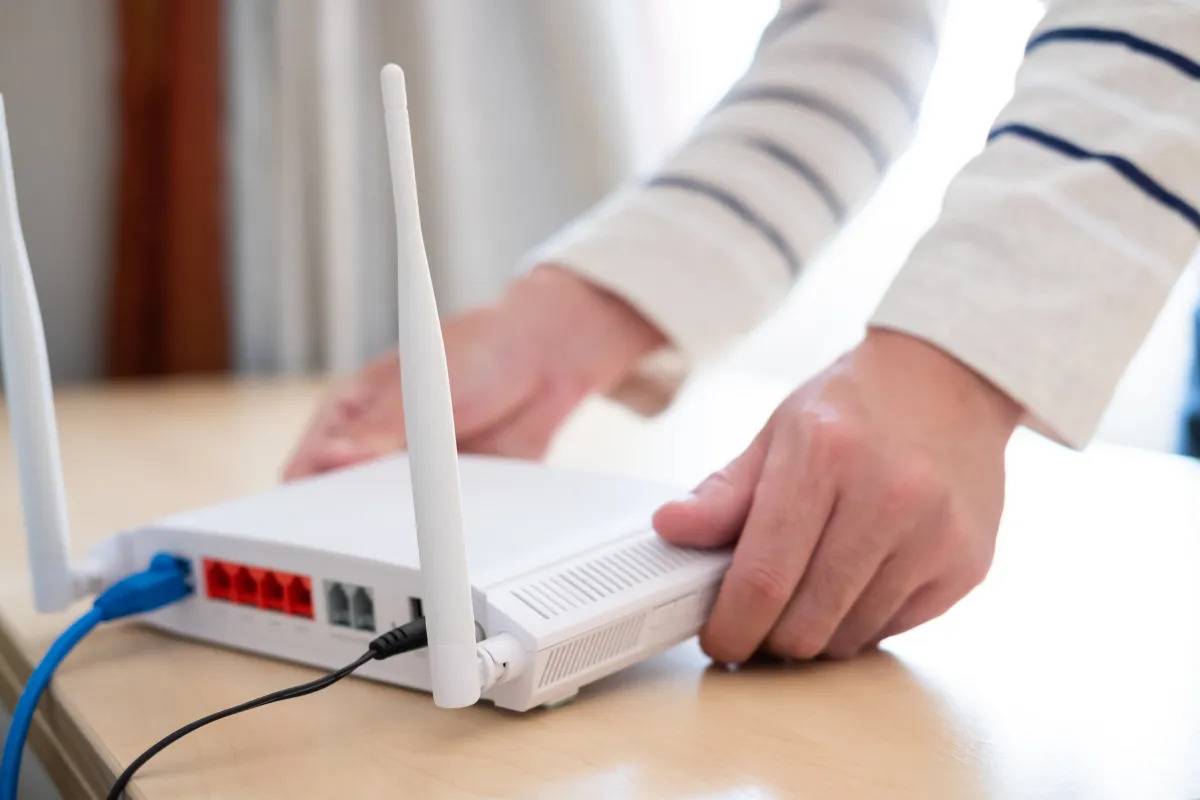
- Check the power and connectivity: Ensure that the router is plugged into a power source and all necessary cables are connected securely. Verify that the modem, if separate, is also connected properly. Check if the lights on the router indicate a stable connection.
- Test internet connectivity: Connect a device, such as a computer or smartphone, directly to the modem using an Ethernet cable. Check if you can access the internet. If the internet connection is working fine, it indicates that the router might be the source of the problem.
- Restart devices: Turn off all devices connected to the network, including computers, smartphones, and smart home devices. After a few seconds, power them back on. Sometimes, restarting devices can resolve minor network issues.
- Check other devices: Verify if other devices on the network are experiencing similar connectivity problems. If multiple devices are affected, it suggests a router issue rather than a specific device problem.
- Inspect physical components: Examine the router and its cables for any visible damage or loose connections. Faulty hardware can disrupt network connectivity.
By checking the network status, you can determine whether the problem lies with the router or if there are other underlying issues affecting your home network. This initial step will guide you in the troubleshooting process and help fix the problem effectively.
Power Cycle the Router
Power cycling the router is a simple yet effective troubleshooting step that can resolve many connectivity issues. By power cycling, you essentially turn off the router, wait for a few seconds, and then turn it back on. This process helps in clearing any temporary glitches or conflicts that might be causing the router to malfunction. Here’s how you can power cycle your router:
- Turn off the router: Locate the power button on your router and press it to turn the device off. If your router does not have a dedicated power button, you can unplug it from the power source instead.
- Disconnect power source: Once the router is turned off, unplug it from the power source. This ensures a complete shutdown and allows any residual electricity to dissipate.
- Wait for a few seconds: Give the router some time to reset and cool down. Waiting for about 10 to 15 seconds is usually sufficient.
- Reconnect power source: Plug the router back into the power source, ensuring a secure connection. If there is a power button, press it again to turn the router back on.
- Wait for the router to restart: Allow the router a few minutes to boot up and establish a stable connection with the devices on your network.
- Test the network: Once the router has restarted, check if the network connectivity has been restored by trying to access the internet on your devices. If the issue persists, proceed to the next troubleshooting step.
Power cycling the router often resolves temporary network issues caused by software glitches or conflicts. It is a quick and simple method to try before advancing to more advanced troubleshooting steps. By restarting the router, you give it a fresh start and a chance to establish a stable connection with your devices.
Perform a Soft Reset
If power cycling the router didn’t solve the connectivity issue, performing a soft reset can be the next step in troubleshooting. A soft reset involves restarting the router to its default settings without erasing any custom configurations. Here’s how you can perform a soft reset:
- Locate the reset button: Look for a small reset button on the back or bottom of the router. It is often labeled as “Reset” or identified by a small hole.
- Press and hold the reset button: Use a paperclip or a small, pointed object to press and hold the reset button for about 10-15 seconds. Make sure to apply steady pressure during this process.
- Release the reset button: After holding the reset button for the specified time, release it. The router will start the reset process.
- Wait for the router to restart: Give the router a few minutes to complete the reset process. During this time, the lights on the router may blink or change, indicating that the reset is in progress.
- Reconfigure the router: Once the router has restarted, you will need to reconfigure some settings, such as the Wi-Fi network name (SSID) and password. Use the router’s administration interface or the manufacturer’s instructions to set up the router again.
- Test the network: After completing the reconfiguration, check if the network connectivity has been restored. Connect your devices to the network and try accessing the internet. If the soft reset didn’t resolve the issue, move on to the next troubleshooting step.
Performing a soft reset can help resolve more persistent network issues that are not resolved by power cycling alone. It allows the router to reset its internal settings and establish a fresh connection with the devices on your network. Remember to reconfigure the router after the soft reset to ensure proper functionality and security.
Restore Factory Settings
If the previous troubleshooting steps didn’t resolve the network issue, restoring the router to its factory settings can be a more comprehensive solution. This process will reset the router to its original setup, erasing all custom configurations and settings. Here’s how you can restore the factory settings:
- Locate the reset button: Look for a small reset button on the back or bottom of the router. It might be labeled as “Reset” or indicated by a small hole.
- Press and hold the reset button: Use a paperclip or a small, pointed object to press and hold the reset button for about 15-20 seconds. Keep the pressure steady throughout this process.
- Release the reset button: After holding the reset button for the specified time, release it. The router will initiate the factory reset process.
- Wait for the router to reset: Give the router a few minutes to restore its factory settings. The lights on the router may blink or turn on and off during this process.
- Reconfigure the router: Once the factory reset is complete, you will need to reconfigure the router from scratch. Follow the manufacturer’s instructions or access the router’s administration interface to set up the network name (SSID), password, and any other necessary settings.
- Test the network: After reconfiguring the router, connect your devices to the network and check if the connectivity issue has been resolved. Attempt to access the internet and ensure that all devices are able to connect properly.
Restoring the router to its factory settings can be effective in resolving complex network issues that persist even after previous troubleshooting attempts. However, keep in mind that performing a factory reset will erase all custom settings, so make sure to have any necessary information and configurations saved before proceeding with the reset.
Update Firmware
Updating the firmware of your router is a crucial step in maintaining its optimal performance and security. Firmware is the software that runs on the router, controlling its functionality and features. By updating the firmware, you can ensure that your router has the latest bug fixes, security patches, and performance improvements. Follow these steps to update the firmware:
- Check for available updates: Visit the manufacturer’s website or access the router’s administration interface to check if there are any firmware updates available for your specific router model. Look for a “Firmware” or “Software Update” section.
- Download the firmware update: If a new firmware version is available, download it onto your computer or device. Ensure that you are downloading the correct firmware for your specific router model.
- Access the router’s administration interface: Open a web browser on a computer connected to the router. Type the router’s IP address in the address bar and press Enter. You may need to enter a username and password to log in. Refer to the router’s documentation or manufacturer’s instructions to find the default login credentials.
- Navigate to the firmware update section: Within the router’s administration interface, locate the firmware update section. This can usually be found under the “Advanced” or “Maintenance” tab.
- Select the firmware file: Click on the option to browse or choose the firmware file that you downloaded in step 2. Once selected, click on the “Update” or “Upgrade” button to initiate the firmware installation process.
- Wait for the update to complete: The firmware update process may take a few minutes. Do not turn off or unplug the router during this time. The router will restart automatically once the update is complete.
- Verify the firmware update: After the router restarts, check the firmware version in the router’s administration interface. Ensure that it matches the updated version you downloaded. This confirms that the firmware update was successful.
Regularly updating the firmware of your router ensures that it remains secure, stable, and equipped with the latest features. It’s recommended to check for firmware updates periodically and install them as they become available.
Change Router Password
Changing the router password is an essential step in maintaining the security of your home network. By setting a strong and unique password, you can protect your router from unauthorized access and potential security breaches. Here’s how you can change the router password:
- Access the router’s administration interface: Open a web browser on a computer connected to the router. Type the router’s IP address in the address bar and press Enter. You may need to enter a username and password to log in. Refer to the router’s documentation or manufacturer’s instructions to find the default login credentials.
- Navigate to the password change section: Within the router’s administration interface, look for the “Administration” or “Settings” tab. Within this section, locate the option to change the password.
- Enter the current password: To change the router password, you will need to provide the current password. Enter it accurately in the designated field.
- Create a new password: Choose a strong password that includes a combination of uppercase and lowercase letters, numbers, and special characters. Avoid using common or easily guessable passwords. Type the new password in the appropriate field.
- Confirm the new password: To ensure that you have entered the new password correctly, retype it in the confirmation field.
- Save the changes: Once you have entered the new password and confirmed it, click on the “Save” or “Apply” button to save the changes.
- Log in with the new password: After saving the changes, you will need to log back into the router’s administration interface using the new password. Use the updated credentials to access the router settings.
Changing the router password is a crucial step in protecting your network from unauthorized access. It is recommended to change the password periodically and choose a strong password that is unique and not easily guessable. By implementing strong password practices, you can enhance the security of your home network.
Enable/Disable DHCP
The Dynamic Host Configuration Protocol (DHCP) is responsible for assigning IP addresses to devices on a network. By default, most routers have DHCP enabled, which allows them to automatically assign IP addresses to connected devices. However, there may be situations where you need to enable or disable DHCP manually. Here’s how you can do it:
- Access the router’s administration interface: Open a web browser on a computer connected to the router. Type the router’s IP address in the address bar and press Enter. Enter the login credentials to access the router settings.
- Navigate to the DHCP settings: Within the router’s administration interface, look for the “Network,” “LAN,” or “IP Configuration” section. Here, you will find the DHCP settings.
- Enable DHCP: If DHCP is currently disabled and you want to enable it, locate the DHCP option and click on the corresponding checkbox or switch. Save the changes to enable DHCP functionality.
- Disable DHCP: If DHCP is currently enabled and you want to disable it, locate the DHCP option and uncheck the corresponding checkbox or switch. Save the changes to disable DHCP. Note that disabling DHCP means you will need to manually assign IP addresses to devices on your network. You may also need to provide other network settings manually, such as DNS servers and gateway information.
Enabling DHCP simplifies the process of connecting devices to your network, as IP addresses are automatically assigned. It is suitable for most home networks where plug-and-play convenience is desired. On the other hand, disabling DHCP gives you more control over IP address allocation and network configuration but requires manual setup for each device.
Consider your specific network needs and the devices connected to decide whether enabling or disabling DHCP is the right choice for your setup.
Enable/Disable MAC Filtering
MAC (Media Access Control) filtering is a feature that allows you to control access to your network based on the MAC addresses of devices. Each device has a unique MAC address, and by enabling MAC filtering, you can specify which devices are allowed or blocked from connecting to your network. Here’s how you can enable or disable MAC filtering on your router:
- Access the router’s administration interface: Open a web browser on a computer connected to the router. Enter the router’s IP address in the address bar and press Enter. Log in using the administrator credentials.
- Navigate to the MAC filtering settings: Within the router’s administration interface, look for the “Wireless,” “Security,” or “Access Control” section. Here, you will find the MAC filtering settings.
- Enable MAC filtering: If MAC filtering is currently disabled and you want to enable it, click on the corresponding checkbox or switch to turn it on. Save the changes to enable MAC filtering.
- Add allowed or blocked devices: Once MAC filtering is enabled, you will need to add the MAC addresses of the devices you want to allow or block. Some routers allow you to manually enter the MAC addresses, while others provide a list of connected devices for you to select from. Consult the router’s documentation or the administration interface for specific instructions.
- Disable MAC filtering: If MAC filtering is currently enabled and you want to disable it, simply uncheck the corresponding checkbox or switch. Save the changes to disable MAC filtering.
Enabling MAC filtering adds an extra layer of security to your network, as only devices with authorized MAC addresses can connect. This is particularly useful when you want to restrict access to specific devices or prevent unauthorized devices from connecting to your network. However, it can be tedious to manage and update the list of allowed or blocked devices, especially if you frequently add or remove devices from your network. Disabling MAC filtering allows unrestricted access to any device within range of your router, which can be more convenient for home networks with trusted devices.
Consider your specific network security needs and the number of devices you have before deciding whether to enable or disable MAC filtering on your router.
Check Firewall Settings
A firewall is a crucial component of your router’s security system. It helps protect your network by monitoring and controlling incoming and outgoing network traffic. Checking and adjusting the firewall settings can help ensure that your network is properly protected. Here’s how you can check the firewall settings on your router:
- Access the router’s administration interface: Open a web browser on a computer connected to the router. Enter the router’s IP address in the address bar and press Enter. Log in using the administrator credentials.
- Navigate to the firewall settings: Within the router’s administration interface, look for the “Security,” “Firewall,” or “Advanced” section. This is where you will find the firewall settings.
- Configure firewall settings: Review the available options and settings related to the firewall. Common firewall settings include enabling or disabling the firewall, adjusting security levels, managing port forwarding, and setting up certain firewall rules.
- Enable the firewall: If the firewall is currently disabled, enable it by clicking on the corresponding checkbox or switch. Enabling the firewall adds an additional layer of protection to your network.
- Adjust security levels: Some routers provide different security levels for the firewall, such as low, medium, or high. Choose a security level that suits your needs and offers the desired level of protection without overly restricting network traffic.
- Review and modify firewall rules: Firewall rules allow you to customize which types of network traffic are allowed or blocked. Review the existing rules and modify them if necessary to reflect your network requirements. You can also add new rules to further refine the firewall’s behavior.
Regularly checking and adjusting your firewall settings helps ensure that your network is protected against unauthorized access and malicious activities. It is recommended to enable the firewall and use appropriate security levels and firewall rules to strike a balance between security and network functionality.
Keep in mind that the firewall settings may vary depending on the router model and manufacturer. Refer to the router’s documentation or consult the manufacturer’s website for specific instructions on configuring the firewall settings on your particular router.
Troubleshoot Network Issues
If you are still experiencing network issues after going through the previous troubleshooting steps, it’s time to dive deeper into the problem and troubleshoot specific network-related issues. Here are some common network troubleshooting techniques:
- Check cable connections: Ensure that all cables connecting your router, modem, and devices are securely plugged in. A loose or damaged cable can cause network connectivity problems.
- Restart devices: Power off and then power back on all devices connected to your network, including computers, smartphones, and smart home devices. This helps refresh the network connections and resolves temporary glitches.
- Update network drivers: If you are experiencing issues with a specific device, such as a computer, update its network drivers. Outdated drivers can cause network problems. Visit the manufacturer’s website or use driver update software to ensure you have the latest drivers installed.
- Perform a network reset: Some operating systems offer a network reset option, which clears network settings and restores them to default. This can help fix network configuration issues and restore connectivity.
- Disable antivirus or firewall temporarily: Sometimes, antivirus or firewall software can interfere with network connections. Temporarily disable these security programs and check if your network issues are resolved. Remember to re-enable them once troubleshooting is complete.
- Check for signal interference: If you are experiencing Wi-Fi connectivity issues, verify if there are any devices or appliances nearby that may be causing signal interference. Move your router away from such devices or switch to a less crowded Wi-Fi channel.
- Reset the modem: If your network issues seem to be specific to the internet connection, try resetting the modem. Locate the reset button or power cycle the modem to refresh the connection with your internet service provider.
- Contact your internet service provider (ISP): If none of the above steps resolve the network issues, it may be an issue with your internet service. Contact your ISP to check for any potential outages or problems on their end.
Troubleshooting network issues can be a process of trial and error. Start with the most basic steps and progress to more advanced techniques. Keep in mind that network issues can be caused by a variety of factors, so be patient and thorough in your troubleshooting efforts to identify and resolve the problem.