
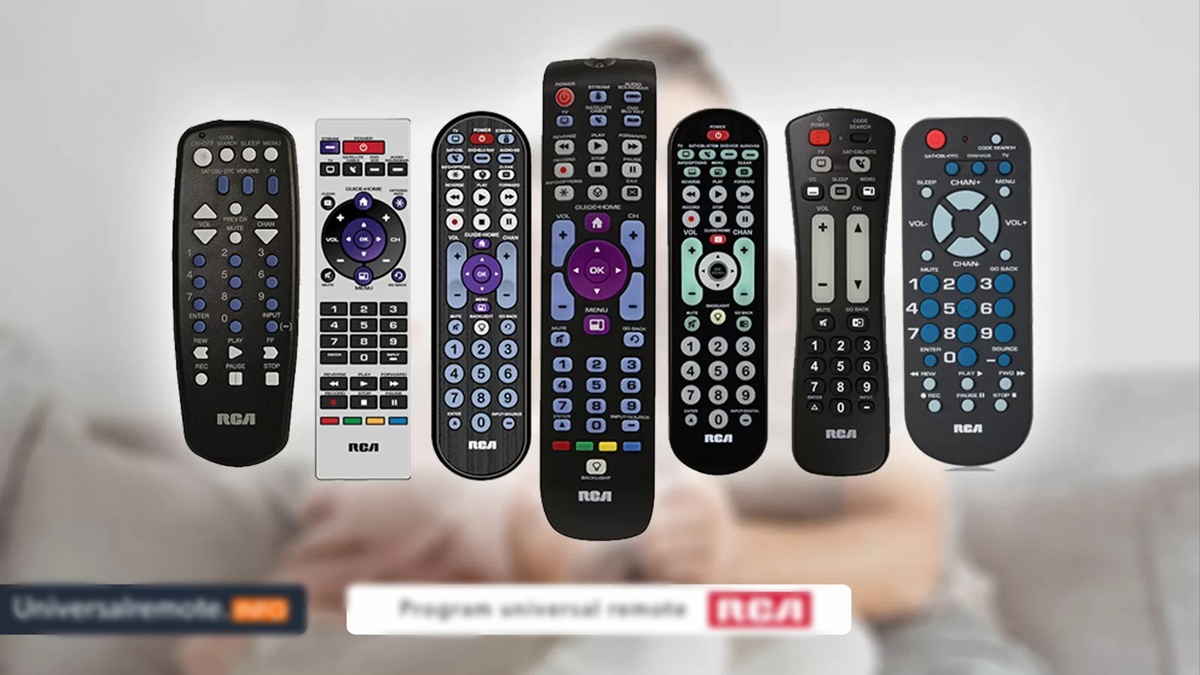
What is an RCA Universal Remote?
An RCA Universal Remote is a versatile device that allows you to control multiple electronic devices using a single remote control. Whether you want to operate your TV, DVD player, cable box, or any other compatible device, an RCA Universal Remote can simplify your entertainment experience by eliminating the need for multiple remotes cluttering your living room.
Unlike traditional remotes that are specific to one device, an RCA Universal Remote is designed to work with a wide range of brands and models. It acts as a universal remote control, providing you with the convenience of controlling all your devices from one place.
RCA, which stands for Radio Corporation of America, is a renowned brand in the consumer electronics industry. With a long history of innovation and high-quality products, RCA has become synonymous with reliability and convenience. Their universal remotes are designed with user-friendly features and compatibility in mind, making them a popular choice among consumers.
One of the key advantages of an RCA Universal Remote is its ability to simplify your entertainment setup. Instead of juggling multiple remotes and struggling to remember which remote controls which device, you can streamline your experience by using a single remote control to operate them all.
Setting up an RCA Universal Remote is typically a straightforward process. You’ll need to gather the necessary materials, such as the remote control itself, batteries, and a list of device codes, which we will explore in further detail in the subsequent steps.
Once you have everything you need, you can proceed to find the remote codes specific to the devices you want to control. These codes act as a language that enables the remote control to communicate with your devices. Fortunately, RCA provides a comprehensive code list to make the setup process as seamless as possible.
After finding the correct remote codes, you can turn on the device you wish to control and press and hold the corresponding device button on your RCA Universal Remote. This step ensures that the remote control is synced with the device.
Next, enter the device code using the remote’s numerical keypad. This code identifies the specific make and model of your device and allows the remote control to establish a connection with it.
Once the code is entered, it’s essential to test the remote control to ensure that it successfully operates the device. If the device responds to the commands, you can move on to the final step.
The final step involves storing the codes in the remote control’s memory. This allows you to retain the programmed codes even if the batteries are replaced or die. By storing the codes, you can avoid the hassle of reprogramming the remote control every time you need to use it.
With your RCA Universal Remote set up and functioning correctly, you can now enjoy the convenience and efficiency of controlling all your devices with just one remote control. Whether you’re watching your favorite TV show, playing a DVD, or switching between various audiovisual sources, the RCA Universal Remote simplifies the process and enhances your overall entertainment experience.
Remember to consult the user manual that comes with your RCA Universal Remote for detailed instructions specific to your model. Additionally, if you encounter any issues during the setup process, RCA provides customer support to assist you in troubleshooting and resolving any problems.
Step 1: Gather the materials needed
Before you begin programming your RCA Universal Remote, it’s important to gather all the necessary materials. Having everything on hand will make the setup process smoother and more efficient. Here are the essential items you’ll need:
- RCA Universal Remote: Ensure that you have the correct RCA Universal Remote model for your devices. Consult the user manual or check the RCA website to confirm compatibility.
- Batteries: Most RCA Universal Remotes require two AAA batteries. Make sure you have a fresh set of batteries to power your remote control.
- List of device codes: RCA provides a comprehensive code list that contains the specific remote codes for various devices. This list allows you to program your remote control to operate your specific brands and models. Check the RCA website or refer to the user manual for the code list.
- Device user manuals: It’s helpful to have the user manuals for the devices you want to control with the universal remote. These manuals provide information on the device’s make, model, and other specifications that may be necessary during the programming process.
- Pen and paper: Keeping a pen and paper handy will allow you to jot down any important information, such as device codes or troubleshooting steps, during the programming process.
Once you have gathered all the materials, find a comfortable and well-lit area to begin setting up your RCA Universal Remote. Having a clutter-free workspace will make it easier to keep track of the process and prevent any distractions that may hinder the programming process.
It’s important to note that not all RCA Universal Remotes may require the same materials. Some newer models may come with preloaded codes or simplified setup processes, eliminating the need for manual code entry. However, to ensure a smooth and successful programming experience, it’s always a good idea to have these materials on hand, as they can be helpful in troubleshooting or providing additional information if needed.
By gathering all the necessary materials before you start, you’ll save time and frustration during the setup process. With everything in place, you’ll be ready to move on to the next step of finding the remote codes specific to the devices you want to control.
Step 2: Find the remote codes
Once you have gathered all the necessary materials, the next step in programming your RCA Universal Remote is to find the remote codes specific to the devices you want to control. These codes act as a universal language that allows your remote control to communicate with your devices. To find the remote codes, follow these steps:
- Consult the code list: RCA provides a comprehensive code list that contains the specific remote codes for various devices. This list is typically included in the user manual or can be found on the RCA website. Identify the make and model of the device you want to control, and then locate the corresponding code in the list.
- Try the code search method: If you cannot find the specific code for your device in the code list, you can use the code search method. This method allows the remote control to cycle through all the programmed codes until it finds the one that works with your device. Refer to the user manual for instructions on how to perform the code search method on your RCA Universal Remote.
- Use the auto code search feature: Some RCA Universal Remotes come with an auto code search feature. This feature simplifies the setup process by automatically searching and programming the correct code for your device. Consult the user manual or RCA website to see if your remote control model has this feature and follow the instructions to activate it.
- Consider using online code databases: In addition to the official RCA code list, several online code databases are available that provide remote codes for a wide range of devices. These databases can be helpful if you cannot find the code you need in the official RCA list. Simply search for your device make and model in the online database, and it will provide you with the corresponding remote code.
It’s important to note that not all codes may work with your specific device, even if they are listed in the code list. In such cases, it may require further troubleshooting or attempting alternative codes. Additionally, if you have multiple devices of the same brand, you may need to find different codes for each device, as the codes can vary even within the same brand.
By finding the correct remote codes for your devices, you ensure that your RCA Universal Remote can communicate and control them effectively. Once you have identified the remote codes, you can proceed to the next step of turning on the device you want to control.
Step 3: Turn on the device you want to control
After finding the remote codes for your devices, the next step in programming your RCA Universal Remote is to turn on the specific device you want to control. Whether it’s your TV, DVD player, or any other compatible device, make sure it’s powered on before proceeding with the programming process. Here’s how to turn on your device:
- Locate the power button: Look for the power button on your device. It’s usually located on the front panel or the top of the device. If you can’t find the power button, refer to the device’s user manual for specific instructions on how to turn it on.
- Press the power button: Once you have located the power button, press it to turn on the device. Depending on the device, you may need to press and hold the power button for a few seconds to activate it.
- Ensure the device is in a usable state: Some devices, like TVs or cable boxes, may require additional steps to fully power on. For example, a cable box may need to start up and establish a connection with the cable service provider. Make sure your device is in a state where it’s ready to receive remote control signals.
It’s essential to have the device turned on during the programming process so that the RCA Universal Remote can establish a connection with it. If the device is powered off or in standby mode, the remote control may not recognize it, and the setup process will not be successful.
During this step, it’s also a good idea to ensure that the device is set to the correct input or source, especially if you have multiple devices connected to your TV. For example, if you want to control your DVD player, make sure your TV is set to the appropriate HDMI input or AV channel that corresponds to the DVD player.
By turning on the device you want to control and ensuring it’s in a usable state, you’re ready to move on to the next step, which involves pressing and holding the corresponding device button on your RCA Universal Remote.
Step 4: Press and hold the corresponding device button
Once you have turned on the device you want to control, the next step in programming your RCA Universal Remote is to press and hold the corresponding device button on the remote control. This step ensures that the remote control can be synced with the device and signals can be transmitted effectively. Follow these steps to proceed:
- Identify the device button: Look for the device button on your RCA Universal Remote that corresponds to the device you have turned on. The device buttons are typically labeled with names like “TV,” “DVD,” “VCR,” “Cable,” etc. Choose the appropriate button based on the device you want to control.
- Press and hold the device button: Press and hold down the device button you have identified. Keep it pressed until the indicator light on the remote control begins to flash. The flashing light indicates that the remote control is in programming mode and ready to receive the device code.
- Make sure to aim the remote at the device: While holding the device button, aim the remote control towards the device you want to control. Ensure that there are no obstructions between the remote control and the device, as this could interfere with the signals.
It’s important to note that different models of RCA Universal Remotes may have slight variations in how long you need to hold the device button or how the indicator light behaves during the programming mode. Consult the user manual or refer to the RCA website for specific instructions related to your remote control model.
By pressing and holding the corresponding device button on your RCA Universal Remote, you are establishing a connection between the remote control and the device. This step prepares the remote control to receive the device code, which we will enter in the next step.
With the device button held down and the indicator light flashing, you are now ready to proceed to the next step, which involves entering the device code into the remote control.
Step 5: Enter the device code
After pressing and holding the corresponding device button on your RCA Universal Remote, the next step in programming is to enter the device code. The device code is a specific numerical sequence that corresponds to the make and model of the device you want to control. Follow these steps to enter the device code:
- Locate the numerical keypad: On your RCA Universal Remote, find the numerical keypad, which is typically located towards the center or bottom of the remote control. The keypad will have numbers from 0 to 9, as well as additional buttons like “Enter” or “OK” button.
- Enter the device code: Using the numerical keypad, enter the specified device code for your device. The device code can be found in the code list provided by RCA. Enter the code carefully, as a wrong entry may result in the remote control not functioning correctly with your device.
- Press the “Enter” button: After entering the device code, press the “Enter” or “OK” button on the remote control. This confirms the entry and signals the remote control to transmit the code to the device you want to control.
- Observe the indicator light: Pay attention to the indicator light on your RCA Universal Remote. The indicator light will typically blink or flash to indicate that the code has been transmitted successfully to the device.
It’s important to note that not all RCA Universal Remotes require manual code entry. Some newer models have simplified setup processes where the remote control can automatically detect and program the correct code for your device. If your remote supports this feature, refer to the user manual or the RCA website for instructions on how to activate and use it.
Remember, the device code is unique to each make and model. If you have multiple devices of the same brand, you may need to enter different codes for each device, as the codes can vary.
By entering the correct device code into your RCA Universal Remote, you establish a communication link between the remote control and the device you want to control. This step ensures that the remote control can transmit the appropriate commands to your device.
With the device code entered and the transmission completed, you’re now ready to move on to the next step, which is to test the remote control with your device.
Step 6: Test the remote control
After entering the device code into your RCA Universal Remote, it’s crucial to test the remote control to ensure that it successfully operates the device you want to control. Testing allows you to verify that the code you entered is correct and that the remote control can communicate with and command the device effectively. Follow these steps to test the remote control:
- Aim the remote at the device: Make sure you are pointing the RCA Universal Remote directly at the device you want to control. Ensure that there are no obstacles blocking the line of sight between the remote control and the device.
- Press a function button: Choose a function button on the remote control that corresponds to a command you want to give to the device. For example, if you want to change channels on your TV, press the “Channel +” or “Channel -” button.
- Observe the device’s response: Pay close attention to how the device responds to the command from the remote control. If the device changes channels, adjusts the volume, or performs any other desired action, it indicates that the remote control is working correctly.
- Test additional functions: Repeat the previous step with other function buttons on the remote control, such as power, input/source selection, or playback controls. Ensure that all the necessary functions you want to control on the device are working correctly.
If the device does not respond to the commands from the remote control, try the following troubleshooting steps:
- Recheck the device code: Double-check the device code entered into the remote control. Make sure it matches the make and model of your device. If there was an error in the code entry, repeat the process and ensure the correct code is used.
- Confirm batteries are properly inserted: Check that the batteries in the remote control are properly inserted and have sufficient charge. Replace the batteries if necessary.
- Verify line of sight and range: Ensure that there are no obstructions blocking the remote control’s signal and that you are within the effective range of the remote control (usually around 15-20 feet).
- Try power cycling the device: Power off the device, wait a few seconds, and then power it back on. This can help refresh the device’s connection and allow it to respond to the remote control.
- Consult the user manual or customer support: If you have followed all the steps and troubleshooting tips and the remote control still doesn’t work, consult the user manual for further instructions or reach out to RCA customer support for assistance.
By testing the remote control and ensuring that all the necessary functions work, you can be confident that the programming process was successful and that you can control your device conveniently using your RCA Universal Remote.
If the test was successful, you can proceed to the final step, which involves storing the codes in the remote control’s memory for future use.
Step 7: Store the codes
Once you have successfully tested your RCA Universal Remote with the device you want to control, the final step in the programming process is to store the codes in the remote control’s memory. Storing the codes ensures that the remote control retains the programmed codes even if the batteries are replaced or die. Follow these steps to store the codes:
- Locate the code storage button: On your RCA Universal Remote, find the code storage button. This button may be labeled as “Setup,” “Code Search,” or have a similar designation. Additionally, some models may require a specific combination of buttons to enter the code storage mode. Refer to the user manual or RCA website for specific instructions related to your remote control model.
- Press the code storage button: Press the code storage button and hold it down. Typically, you will need to hold it for a few seconds until the indicator light on the remote control blinks or turns solid, indicating that the remote control is in code storage mode.
- Release the code storage button: Once the remote control enters code storage mode, release the code storage button. The indicator light should remain solid, indicating that the remote control is ready to store the codes.
- Press the device button: Press the device button that corresponds to the device you just programmed. For example, if you programmed the TV, press the “TV” button. The indicator light may blink or turn off momentarily and then come back on, indicating that the remote control has saved the code for that device.
Repeat the above steps if you have programmed codes for multiple devices. After storing the codes for all the devices, you can now use the remote control to conveniently control each device without having to reprogram it every time.
It’s important to remember that if the batteries in the remote control are removed or die, the stored codes may be lost. In such cases, you will need to reprogram the remote control using the steps mentioned earlier and then store the codes again.
Congratulations! By storing the codes, you have completed the programming process for your RCA Universal Remote. You can now enjoy the convenience of controlling your devices with a single remote control.
If you encounter any issues with the stored codes or need to program additional devices in the future, consult the user manual or reach out to RCA customer support for assistance.
Additional Tips and Troubleshooting
Programming an RCA Universal Remote can be a straightforward process, but sometimes issues may arise. Here are some additional tips and troubleshooting steps to help you along the way:
- Ensure correct code entry: Double-check that you have entered the correct device code for your make and model. A single digit or character error can prevent the remote control from functioning correctly.
- Reset the remote control: If you are encountering persistent issues, try resetting the remote control to its factory settings. Refer to the user manual or manufacturer’s website for instructions on how to perform a reset.
- Try alternative codes: If the device does not respond to the entered code, try alternative codes for the same device make and model. Some codes may work better than others, so experimenting can be helpful.
- Use the code search method: If you cannot find the specific code for your device, try the code search method. This method allows the remote control to cycle through all the programmed codes until it finds the one that works with your device.
- Battery replacement: If the remote control becomes unresponsive or weak, replace the batteries with new ones. Weak batteries can impact the remote control’s performance.
- Keep the remote control clean: Regularly clean the remote control to prevent buildup of dirt or dust that could obstruct the signals. Use a soft, lint-free cloth to wipe the remote control’s surface.
- Test from different angles: If the device is not responding to the remote control, try testing it from different angles to ensure that the infrared signal is reaching the device’s sensor.
- Update firmware: Check if there are any firmware updates available for your RCA Universal Remote. Firmware updates can improve performance and address any known issues.
- Consult user manuals and customer support: Refer to the user manual for your specific remote control model for detailed instructions and troubleshooting tips. If you still encounter difficulties, contact RCA customer support for further assistance.
Remember, patience and persistence are key when programming your RCA Universal Remote. With proper code entry, troubleshooting, and testing, you can successfully control your devices and enjoy the convenience of a single remote control.
By following these additional tips and troubleshooting steps, you can overcome common issues and ensure a smooth and successful programming experience with your RCA Universal Remote.