
Why Move Time Machine to a New Backup Drive?
Time Machine is an essential tool for backing up your data on macOS. It provides an added layer of security and peace of mind, ensuring that your important files and documents are protected. However, as your backup drive starts to fill up, you may find the need to move your Time Machine to a new backup drive. There are several reasons why you might choose to do this:
- Increase Storage Space: As you use your Mac, the amount of data that needs to be backed up grows over time. If your current backup drive is running out of space, moving Time Machine to a new drive with a larger capacity is a practical solution.
- Upgrade to a Faster Drive: Technology evolves rapidly, and newer backup drives often offer faster transfer speeds and improved performance. Migrating Time Machine to a new drive can help you take advantage of these advancements, enabling quicker backups and restores.
- Replace a Faulty Drive: If your current backup drive is malfunctioning or showing signs of failure, moving Time Machine to a new drive ensures that your data remains safe and accessible. It’s crucial to address any drive issues promptly to avoid permanent data loss.
- Consolidate Multiple Drives: Sometimes, you might find yourself using multiple backup drives for Time Machine backups. Consolidating these drives into a single new backup drive simplifies the backup process and makes it easier to manage and restore your data.
Regardless of the reason, moving Time Machine to a new backup drive is a straightforward process that ensures the continuity and reliability of your backups. With the right tools and steps, you can seamlessly transfer your Time Machine data to a new drive without losing any of your valuable files.
What You Will Need
Before you begin the process of moving Time Machine to a new backup drive, it’s important to gather a few essential items. Here’s what you’ll need:
- New Backup Drive: Choose a backup drive with sufficient storage capacity to accommodate your current and future backup needs. Consider factors like connection type (USB, Thunderbolt, or network-attached storage), speed, and reliability. Ensure that the new drive is compatible with your Mac.
- Time Machine Enabled Mac: You will need a Mac computer that is compatible with Time Machine. Time Machine is built into macOS, so it should be available on most Mac models.
- macOS Time Machine Software: Verify that your Mac is running the latest version of macOS that supports Time Machine. This ensures compatibility and access to the tools necessary to move Time Machine to a new drive.
- Data Transfer Cable (Optional): Depending on the type of new drive you choose, you may need a data transfer cable. This is typically required for transferring data from an older drive to a newer one using a USB or Thunderbolt connection.
- Backup Drive Format: It’s important to format the new backup drive in the correct format for Time Machine to recognize it. Macs typically use the macOS Extended (Journaled) format, so make sure to format the new drive accordingly.
- Time: Moving Time Machine to a new backup drive is not a time-consuming process, but it still requires some time for the transfer and verification process. Set aside enough time for the entire process to complete uninterrupted.
By gathering these items before you begin, you’ll have everything you need for a smooth and successful transfer of your Time Machine data to a new backup drive.
Step 1: Prepare the New Backup Drive
Before you can transfer your Time Machine backups to a new drive, you need to prepare the new backup drive. Follow these steps to get started:
- Connect the New Drive: Plug in your new backup drive to your Mac using the appropriate connector (USB, Thunderbolt, or network connection). Ensure that the drive is properly recognized and mounted on your computer.
- Format the Drive: Open Disk Utility from your Applications/Utilities folder. In the Disk Utility window, select your new backup drive from the sidebar. Click on the “Erase” tab and choose the macOS Extended (Journaled) format. Provide a name for the newly formatted drive and click on “Erase” to begin the formatting process. Note that formatting will erase any existing data on the drive, so make sure you have a backup if necessary.
- Partition the Drive (Optional): If you prefer to use a specific partition size or have multiple partitions on your new backup drive, you can set this up in Disk Utility. Simply select the newly formatted drive and click on the “Partition” tab. From there, you can adjust the partition size, add additional partitions, and customize the layout as desired. Once you’re satisfied with the partition setup, click on “Apply” to save the changes.
- Eject the Drive: Once the drive is formatted and partitioned (if necessary), eject it from your computer to ensure a clean disconnect. This will prevent any potential data loss or corruption when it’s time to transfer your Time Machine backups.
With the new backup drive prepared and formatted, you’re ready to move on to the next step: setting up the new drive for Time Machine backups.
Step 2: Set Up the New Backup Drive
Now that you have prepared the new backup drive, it’s time to set it up for Time Machine backups. Follow these steps to get started:
- Connect the New Drive: Plug in the newly prepared backup drive to your Mac using the appropriate connector (USB, Thunderbolt, or network connection).
- Open Time Machine Preferences: Go to the Apple menu and select “System Preferences.” From the System Preferences window, click on the Time Machine icon.
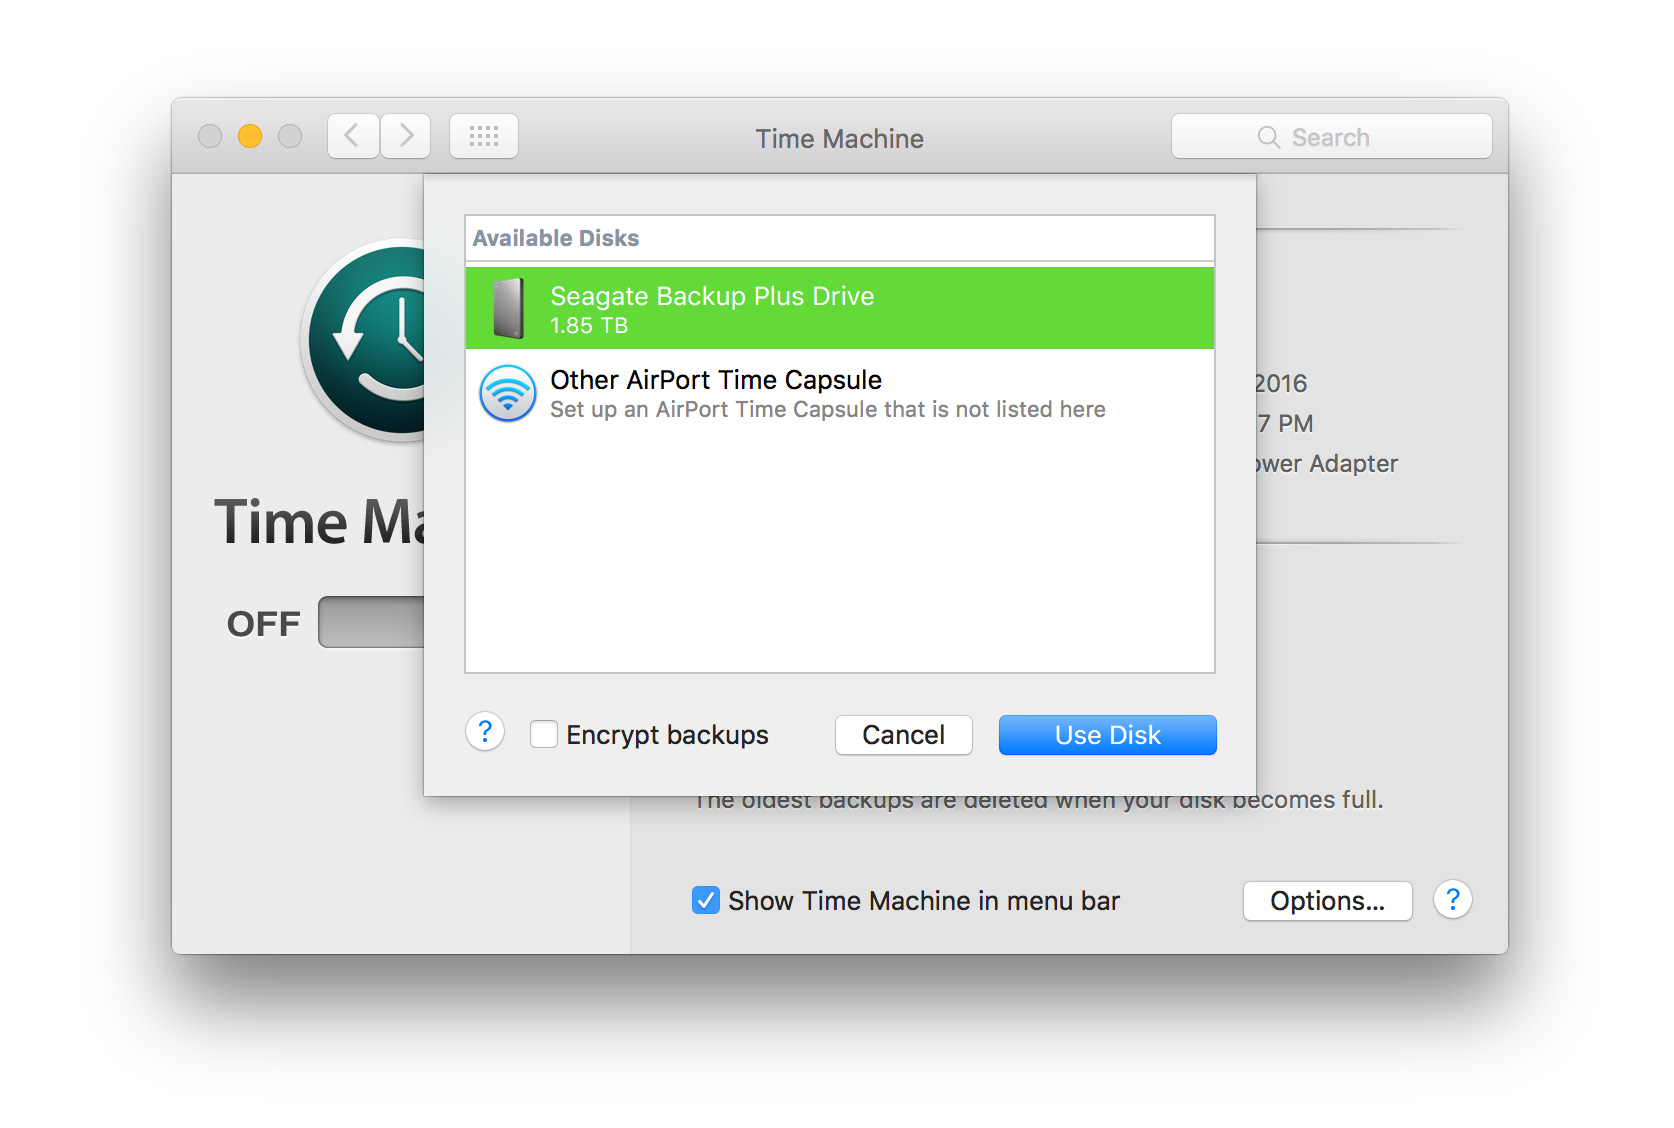
- Select and Enable the New Drive: In the Time Machine preferences window, you will see a list of available drives. Locate the new backup drive and select it as the new Time Machine backup destination. Click on the “Use Disk” or “Select Disk” button to confirm your choice.
- Enable Time Machine: Make sure the Time Machine toggle switch is set to “On.” This ensures that Time Machine will automatically back up your data to the new drive at regular intervals.
- Exclude Items (Optional): If there are specific files or folders that you do not want to include in your Time Machine backups on the new drive, you can click on the “Options” button in the Time Machine preferences window. From there, you can add items to the exclusion list.
- Start the First Backup: Once you have selected the new drive and enabled Time Machine, the initial backup will begin automatically. This may take some time, depending on the amount of data being backed up. It’s important to keep your Mac powered on and connected to the new backup drive during this process.
- Monitor Backup Progress: You can monitor the progress of the backup in the Time Machine preferences window. It shows the time of the last successful backup and provides a progress bar for the current backup.
Setting up the new backup drive for Time Machine ensures that your data will be backed up regularly and securely. Once the initial backup is complete, Time Machine will automatically perform incremental backups, capturing any changes or additions to your files.
Step 3: Exclude Old Backup Drive
After setting up your new backup drive for Time Machine, it’s important to exclude the old backup drive from future backups. By doing so, you can ensure that Time Machine focuses on backing up to the new drive and avoids any confusion between the two. Follow these steps to exclude the old backup drive:
- Open Time Machine Preferences: Go to the Apple menu and select “System Preferences.” From the System Preferences window, click on the Time Machine icon.
- Click on “Options”: In the Time Machine preferences window, click on the “Options” button. This will open a new window where you can manage the Time Machine exclusion list.
- Add the Old Backup Drive: In the “Exclude these items from backups” section of the Time Machine options window, click on the “+” button. Locate and select the old backup drive from the available drives and click on “Exclude.” This ensures that Time Machine will no longer include the old drive in future backups.
- Confirm Exclusion: After adding the old backup drive to the exclusion list, click on “Save” to confirm the changes and close the Time Machine options window.
By excluding the old backup drive, you prevent Time Machine from wasting storage space by duplicating backups on both drives. This also allows Time Machine to exclusively focus on backing up to the new drive, ensuring that your data is adequately protected.
Step 4: Transfer Time Machine to the New Drive
Now that you have prepared the new backup drive and excluded the old drive, it’s time to transfer your existing Time Machine backups to the new drive. Follow these steps to complete the transfer:
- Connect Both Drives: Connect both the old and new backup drives to your Mac using the appropriate connectors (USB, Thunderbolt, or network connections).
- Open Time Machine Preferences: Go to the Apple menu and select “System Preferences.” From the System Preferences window, click on the Time Machine icon.
- Click on “Select Disk”: In the Time Machine preferences window, click on the “Select Disk” button. This will open a window displaying the available Time Machine backup disks.
- Select the Old Drive: Locate and select the old backup drive from the list of disks.
- Click on “Remove Disk”: After selecting the old drive, click on the “Remove Disk” button. This will disassociate the old drive from Time Machine backups.
- Select the New Drive: In the Time Machine preferences window, click on the “Select Disk” button again. This time, select the newly prepared backup drive as the Time Machine backup destination.
- Start the Transfer: Once you have selected the new drive, Time Machine will ask if you want to use the existing backup on the old drive. Click on the “Use both” button to initiate the transfer process.
- Monitor the Transfer: Time Machine will begin transferring the existing backups from the old drive to the new drive. You can monitor the progress in the Time Machine preferences window or through the Time Machine icon in the menu bar.
- Wait for Completion: Depending on the size of your backups, the transfer process may take some time. It’s important to keep your Mac powered on and both drives connected during this process.
By following these steps, you can successfully transfer your Time Machine backups from the old drive to the new drive. Once the transfer is complete, Time Machine will start using the new drive for future backups, ensuring the ongoing protection of your valuable data.
Step 5: Verify the Backup
After transferring your Time Machine backups to the new drive, it’s important to verify that the backup process was successful. Verifying the backup ensures that your data is securely stored and can be easily restored when needed. Follow these steps to verify your Time Machine backup:
- Open Time Machine Preferences: Go to the Apple menu and select “System Preferences.” From the System Preferences window, click on the Time Machine icon.
- Check Backup Status: In the Time Machine preferences window, you will see information about the last successful backup, including the date and time. Make sure that the latest backup on the new drive was completed successfully.
- Navigate Backup History: Click on the Time Machine icon in the menu bar and select “Enter Time Machine.” This will open the Time Machine interface, allowing you to navigate through your backup history.
- Restore Files: Browse through the different snapshots or backup dates to ensure that your files and folders are intact. You can select files or folders and click on the “Restore” button to restore them to their original location on your Mac.
- Test File Accessibility: Open a few files from different backup dates to verify their accessibility. Ensure that the files open correctly and that you can access all the necessary data.
- Confirm Backup Frequency: Check that Time Machine is still performing regular backups to the new drive. The backup status in the Time Machine preferences window should indicate the date and time of the next scheduled backup.
By following these steps to verify your Time Machine backup, you can have confidence in the integrity of your data and the reliability of the new backup drive. Regularly checking the backup status and file accessibility ensures that you have a reliable backup solution in place to safeguard your important files and documents.
Step 6: Delete Old Backup Drive (Optional)
Once you have successfully transferred your Time Machine backups to the new drive and verified their accessibility, you may choose to delete the old backup drive. This step is optional but recommended if you no longer need the old drive for backups. Follow these steps to delete the old backup drive:
- Ensure Data Transfer Completion: Before proceeding with deleting the old backup drive, it’s crucial to ensure that the transfer process to the new drive is complete and all data has been successfully copied.
- Eject the Old Drive: In the Finder, locate the icon of the old backup drive on your desktop or in the sidebar. Right-click on the icon and select “Eject” to safely disconnect the old drive from your Mac.
- Disconnect the Old Drive: Once the old drive is ejected, physically disconnect it from your Mac by unplugging the USB or Thunderbolt cable or turning off the network connection.
- Format the Old Drive (Optional): If you plan to repurpose the old backup drive or give it to someone else, it’s advisable to format it and erase all data. Use Disk Utility, which can be found in the Applications/Utilities folder, to format the old drive using the appropriate file system format.
- Store or Dispose of the Old Drive: Depending on your needs, you can choose to store the old drive in a safe place as a secondary backup or properly dispose of it according to local electronic waste regulations.
Deleting the old backup drive, if you no longer require it, helps declutter your workspace and ensures that backups are consolidated on the new drive. However, exercise caution when deleting the old drive and double-check that all necessary data has been transferred and verified on the new drive.