
Why Upgrade to SegWit?
Bitcoin’s scalability issues have been a topic of concern among users and developers alike. As the popularity of Bitcoin continues to grow, the demand for faster and cheaper transactions has become increasingly urgent. This is where Segregated Witness, or SegWit, comes into play.
SegWit is a proposed improvement to the Bitcoin network, aimed at addressing some of the limitations of the current system. It separates the transaction data, or signature, from the transaction itself, resulting in a smaller size for each transaction. This reduction in size allows for more transactions to be included in each block, thereby increasing the capacity of the Bitcoin network.
One of the key benefits of upgrading to SegWit is improved transaction speed. With smaller transaction sizes, more transactions can be processed within a given block, resulting in faster confirmation times. This is especially important during periods of high network congestion, where transaction fees and confirmation times tend to skyrocket.
Another advantage of SegWit is reduced transaction fees. By separating the transaction data from the signature, the size of each transaction is reduced, resulting in lower fees. This is particularly beneficial for users who frequently make Bitcoin transactions or engage in trading activities, as it saves them money in the long run.
Furthermore, SegWit introduces a new transaction format that allows for the implementation of second-layer solutions, such as the Lightning Network. The Lightning Network enables instant, low-cost transactions by creating payment channels off the main Bitcoin blockchain. By upgrading to SegWit, users gain access to these innovative solutions that enhance the overall scalability and efficiency of the Bitcoin network.
Lastly, by upgrading to SegWit, you contribute to the overall health and stability of the Bitcoin network. With increased transaction capacity and improved scalability, the network becomes more resilient to congestion and better equipped to handle the growing number of users and transactions.
Step 1: Check Your Current Wallet Version
Before you can upgrade to SegWit on your Ledger Nano S, it’s important to check the current version of your wallet software. This step ensures that you have the necessary compatibility to proceed with the upgrade.
To check your wallet version, follow these simple steps:
- Connect your Ledger Nano S device to your computer using the USB cable.
- Unlock your Ledger Nano S by entering your PIN code.
- Open the Ledger Live application on your computer, if you haven’t installed it yet, refer to Step 3.
- In the Ledger Live application, click on the “Manager” tab at the top.
- You will see a list of available apps and their respective versions. Look for the app that corresponds to your Bitcoin wallet. If you can’t find it, try searching for “Bitcoin” in the search bar.
- Take note of the version number next to the Bitcoin wallet app. Make sure it is at least version 1.3.1 or higher to proceed with the SegWit upgrade.
- If your wallet version is below 1.3.1, you will need to update the app before continuing. Click on the “Update” button next to the Bitcoin wallet app, and follow the on-screen instructions to complete the update process.
It is crucial to have the latest version of the wallet app to ensure compatibility with SegWit. Updating your wallet app not only enhances the security and functionality of your Ledger Nano S, but it also prepares you for the next steps of the SegWit upgrade process.
Step 2: Make Sure Your Ledger Nano S is Updated
Before proceeding with the SegWit upgrade, it is essential to ensure that your Ledger Nano S device’s firmware is up to date. Keeping your firmware updated provides you with the latest security features and ensures compatibility with the SegWit upgrade process.
To check for firmware updates and update your Ledger Nano S, follow the steps below:
- Connect your Ledger Nano S device to your computer using the USB cable.
- Unlock your Ledger Nano S by entering your PIN code.
- Open the Ledger Live application on your computer if it’s not already open.
- In the Ledger Live application, click on the “Manager” tab at the top.
- Click on the “Firmware” section.
- If there’s a firmware update available, the application will prompt you to update your device. Click on the “Update” button and follow the on-screen instructions to complete the update process.
- During the update process, make sure not to disconnect your Ledger Nano S or close the Ledger Live application.
It’s crucial to have the latest firmware version to ensure the smooth execution of the SegWit upgrade and to benefit from the best security practices provided by Ledger. Firmware updates often include bug fixes, stability improvements, and security enhancements, so it’s essential to keep your device up to date.
By ensuring that your Ledger Nano S firmware is updated, you can proceed confidently with the SegWit upgrade and enjoy the enhanced security and features that come with it.
Step 3: Install the Ledger Live Application on Your Computer
In order to continue with the SegWit upgrade process for your Ledger Nano S, you must have the Ledger Live application installed on your computer. The Ledger Live application is the official software provided by Ledger, designed to manage and interact with your Ledger Nano S.
To install the Ledger Live application, follow these steps:
- Open your preferred web browser and go to the official Ledger Live website: https://www.ledger.com/ledger-live/download.
- Choose the appropriate version of the Ledger Live application for your operating system (Windows, macOS, or Linux) and click on the download button.
- Once the download is complete, locate the installation file on your computer and run it.
- Follow the on-screen instructions to install the Ledger Live application. Make sure to read and agree to the terms and conditions before proceeding.
- Once the installation is complete, launch the Ledger Live application.
With the Ledger Live application installed, you now have a user-friendly interface to interact with your Ledger Nano S. The Ledger Live application will be instrumental in the remaining steps of the SegWit upgrade process, allowing you to manage your Bitcoin transactions and monitor your SegWit account.
It’s important to always download the Ledger Live application from the official Ledger website to ensure that you have the genuine and most up-to-date version. This will help protect your funds and ensure a smooth upgrade process for your Ledger Nano S.
Step 4: Open the Ledger Live Application and Connect Your Ledger Nano S
Now that you have installed the Ledger Live application, it’s time to open it and connect your Ledger Nano S device. By connecting your device to the application, you will be able to manage and perform the necessary actions for the SegWit upgrade.
Follow these steps to open the Ledger Live application and connect your Ledger Nano S:
- Locate and open the Ledger Live application on your computer.
- Ensure that your Ledger Nano S device is connected to your computer using the USB cable.
- Unlock your Ledger Nano S by entering your PIN code.
- On the Ledger Live application, click on the “Get Started” button if you’re launching the application for the first time or follow the on-screen prompts if you have already set up the application previously.
- Once in the dashboard, click on the “Manager” tab at the top of the application.
- The Ledger Live application will now search for your connected Ledger Nano S device. Make sure to approve any verification requests that may appear on your Ledger Nano S screen.
- Once your Ledger Nano S device is successfully connected, you will see the device information displayed on the Ledger Live application.
Now that your Ledger Nano S is successfully connected to the Ledger Live application, you have established a secure and encrypted connection. This allows you to safely manage your Bitcoin wallet and continue with the following steps of the SegWit upgrade process.
Remember to always verify the integrity and authenticity of the Ledger Live application to protect your funds and personal information. Additionally, keep your Ledger Nano S device updated with the latest firmware versions to ensure optimal performance and security.
Step 5: Add a New Account in Ledger Live
After connecting your Ledger Nano S to the Ledger Live application, the next step in the SegWit upgrade process is to add a new account. This account will be specifically set up for your SegWit transactions.
To add a new account in Ledger Live, follow these instructions:
- In the Ledger Live application, click on the “Accounts” tab at the top.
- Click on the “Add Account” button.
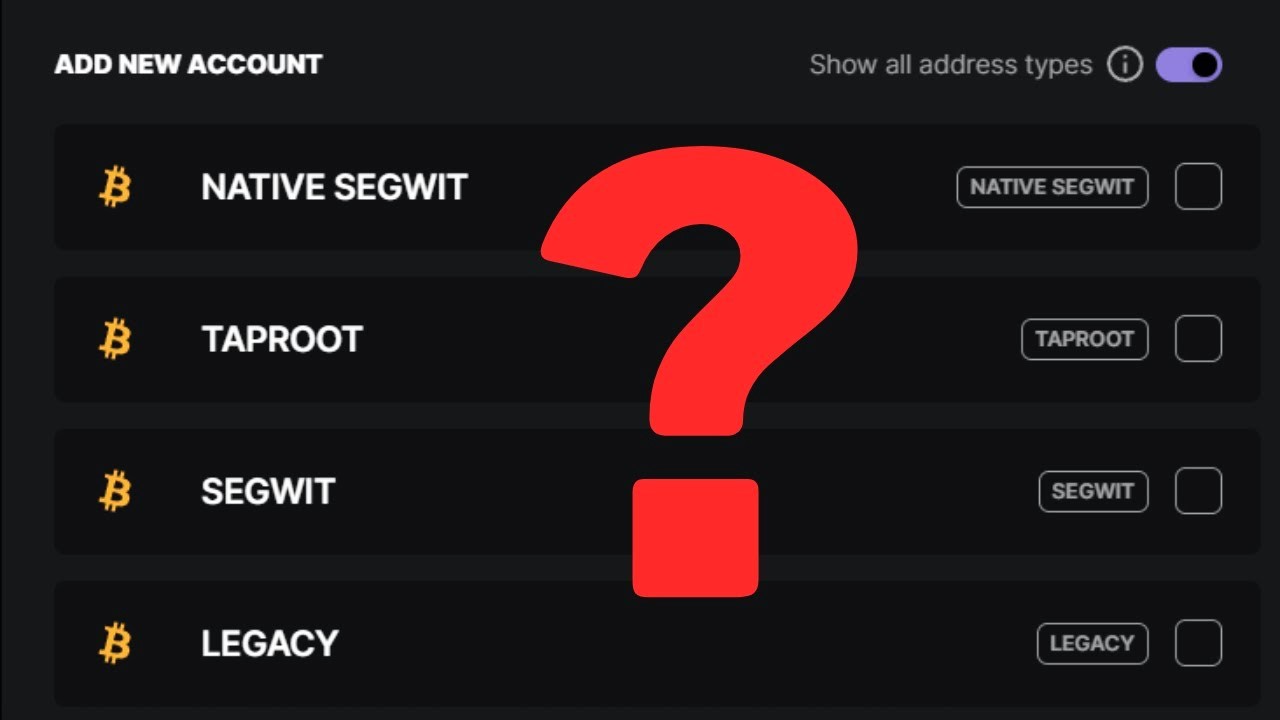
- A list of supported cryptocurrencies will appear. Select Bitcoin from the list.
- Choose the option for a “SegWit account”.
- Click on the “Continue” button.
- Your Ledger Nano S device will display a prompt asking for confirmation. Verify the information on the device’s screen and accept the request.
- The Ledger Live application will then generate a Bitcoin SegWit account for you.
- Once the account is created, it will appear in the accounts list on the Ledger Live application.
By adding a new SegWit account in Ledger Live, you are now ready to send your funds from your Legacy wallet to the newly created SegWit account. This will facilitate the transition to using SegWit transactions and allow you to take advantage of the benefits it offers, such as improved transaction speed and reduced fees.
Ensure that you have completed the previous steps in the SegWit upgrade process, including checking your wallet version, updating your Ledger Nano S firmware, and connecting your device to the Ledger Live application. These steps are essential to ensure a smooth and secure upgrade process.
Step 6: Send Your Funds from the Legacy Wallet to the SegWit Account
Now that you have set up a new SegWit account in Ledger Live, it’s time to transfer your funds from your Legacy wallet to this new account. This step is crucial to begin using SegWit transactions and benefiting from its advantages.
Follow these steps to send your funds from the Legacy wallet to the SegWit account:
- In the Ledger Live application, go to the “Accounts” tab if you’re not already there.
- Locate your Legacy Bitcoin account in the accounts list.
- Click on the account to select it.
- Click on the “Send” button at the bottom of the screen.
- Enter the amount of Bitcoin you want to transfer from the Legacy wallet to the SegWit account.
- Click on the drop-down menu and select your SegWit account as the destination account.
- Review the transaction details and ensure everything is correct.
- Click on the “Send” button to initiate the transaction.
- Unlock your Ledger Nano S device and verify the transaction details on its screen.
- If everything looks accurate, confirm the transaction on your Ledger Nano S by pressing the appropriate button.
- The Ledger Live application will now process your transaction and broadcast it to the network.
Once the transaction is confirmed and included in a block, your funds will be successfully transferred from the Legacy wallet to the SegWit account. This enables you to enjoy the benefits of SegWit, such as faster and more cost-effective transactions.
Remember, it is important to double-check all transaction details before confirming, as once a transaction is processed, it cannot be reversed. Take the time to verify the addresses and amounts to minimize any potential errors or risks.
Proceed to the next step to verify the transaction on the blockchain to ensure its successful completion.
Step 7: Confirm the Transaction on Your Ledger Nano S
After sending your funds from the Legacy wallet to the SegWit account, the next step is to confirm the transaction on your Ledger Nano S device. This step adds an extra layer of security and ensures that you have full control over your transactions.
To confirm the transaction on your Ledger Nano S, follow these instructions:
- On your Ledger Nano S device, navigate to the Bitcoin app and launch it.
- Scroll through the options on the device’s screen until you find the “Verify” option.
- Select the “Verify” option and choose the transaction you want to verify.
- Review the transaction details displayed on the device’s screen, including the recipient address and the amount being sent.
- If the details match what you initiated in the Ledger Live application, confirm the transaction by pressing the appropriate button on your Ledger Nano S.
- Wait for the device to display a confirmation message indicating that the transaction has been successfully verified.
By confirming the transaction on your Ledger Nano S, you are ensuring that the transaction details align with your intentions and that you have authorized the transfer of funds. This helps protect against unauthorized or incorrect transactions.
Remember, it is crucial to verify all transaction details before providing your confirmation. Take the time to review the recipient address, the amount, and any additional information to prevent any errors or potential fraud.
With the transaction confirmed on your Ledger Nano S, you can proceed to the next step to verify the transaction on the blockchain and ensure its successful completion.
Step 8: Verify the Transaction on the Blockchain
After confirming the transaction on your Ledger Nano S, the next step is to verify the transaction on the blockchain. Verifying the transaction ensures that it has been successfully processed and recorded in the public ledger, providing you with peace of mind and confirmation of its completion.
To verify the transaction on the blockchain, follow these steps:
- Open your preferred web browser and navigate to a blockchain explorer such as Blockchair or Blockchain.com Explorer.
- In the search bar of the blockchain explorer, enter the recipient address or the transaction ID of the transaction you want to verify.
- Press the enter key or click on the search button to initiate the search.
- The blockchain explorer will display information about the transaction, including the transaction hash, block height, and the number of confirmations.
- Verify that the details of the transaction match what you initiated, such as the correct recipient address and the correct amount sent.
- Check the number of confirmations to ensure that the transaction has been included in several blocks. The more confirmations, the more secure and irreversible the transaction becomes.
By verifying the transaction on the blockchain explorer, you can confirm that your transaction has been successfully processed and recorded on the Bitcoin network. It provides you with transparent visibility into the transaction’s status and ensures that all the details align with your expectations.
Keep in mind that it may take some time for the transaction to be confirmed and fully visible on the blockchain explorer, especially during periods of high network activity. Patience is key, and regularly checking the status of the transaction can help you stay informed.
If you see any discrepancies or encounter any issues while verifying the transaction on the blockchain, it is recommended to contact Ledger Support or consult the Ledger community for assistance.
Step 9: Monitor Your SegWit Account in Ledger Live
Once the transaction from your Legacy wallet to the SegWit account has been completed and verified, it’s important to monitor your SegWit account within the Ledger Live application. This will allow you to keep track of your funds and manage future transactions.
Follow these steps to monitor your SegWit account in Ledger Live:
- In the Ledger Live application, click on the “Accounts” tab at the top.
- Locate your SegWit Bitcoin account in the accounts list. It should be the account you created for SegWit transactions in Step 5.
- Click on the SegWit account to select it.
- You will see an overview of your SegWit account, including the balance and transaction history.
- Monitor your account to keep track of incoming and outgoing transactions, as well as your current balance.
- You can click on each transaction to view additional details, such as the transaction hash and the number of confirmations.
- Use the filters and sorting options in Ledger Live to customize the view of your transactions and to reconcile your records if needed.
Monitoring your SegWit account in Ledger Live provides you with real-time visibility into your transaction history and current balance. It allows you to easily track the progress of your transactions and manage your funds accordingly.
By regularly monitoring your SegWit account, you can stay informed about the status of your transactions, quickly detect any discrepancies or issues, and make informed decisions about future transactions.
Remember to always keep your Ledger Live application updated with the latest version to ensure optimal functionality and security. Additionally, it’s important to protect your Ledger Nano S device and backup your recovery phrase to safeguard your funds.
Step 10: Benefits of Using SegWit
By upgrading to Segregated Witness (SegWit) on your Ledger Nano S, you unlock several benefits that enhance your Bitcoin experience. Let’s explore some of the key advantages of using SegWit:
- Increased Transaction Capacity: SegWit separates the transaction data from the transaction signature, resulting in a smaller transaction size. This allows for more transactions to be included in each block, increasing the capacity of the Bitcoin network and reducing network congestion.
- Faster Transaction Confirmation: With smaller transaction sizes, SegWit enables faster confirmation times. This is particularly beneficial during periods of high demand on the network, as it helps reduce the time you have to wait for your transactions to be confirmed.
- Reduced Transaction Fees: By reducing the size of transactions, SegWit effectively reduces the fees associated with each transaction. This is especially valuable for frequent users or traders who make numerous Bitcoin transactions, as it helps save costs over time.
- Compatibility with Second-Layer Solutions: SegWit introduces a new transaction format that enables the implementation of second-layer solutions, such as the Lightning Network. These solutions enhance the scalability of the Bitcoin network by facilitating instant and low-cost transactions off-chain.
- Improved Network Security: SegWit enhances the security of the Bitcoin network by introducing a stronger transaction validation process. This makes it more difficult for potential attackers to manipulate transaction data and provides a more robust defense against certain types of attacks.
- Support for Future Upgrades: Upgrading to SegWit is a forward-thinking step that prepares you for future upgrades and developments within the Bitcoin ecosystem. It ensures compatibility with upcoming features and improvements, allowing you to take advantage of new functionalities as they become available.
Overall, upgrading to Segregated Witness on your Ledger Nano S offers multiple benefits that improve the efficiency, speed, and cost-effectiveness of your Bitcoin transactions. It aligns with the goal of creating a scalable and secure network for users to enjoy.
By keeping your wallet and Ledger Nano S device up to date and taking advantage of technologies like SegWit, you position yourself at the forefront of innovation within the cryptocurrency space.