Choose a Location for Your Snowman
When it comes to building a snowman in Animal Crossing: New Horizons, the first step is to find the perfect spot. While you may be tempted to build your snowman wherever you please, there are a few factors to consider in order to ensure a successful and visually appealing creation.
Firstly, take into account the size and shape of the area where you plan to build your snowman. Look for a relatively flat surface with enough space to accommodate the three snowballs needed for the snowman’s body. Avoid areas with slopes or uneven terrain, as this can make the rolling and stacking of snowballs difficult.
Additionally, think about the overall aesthetic and theme of your island. Are you aiming for a festive winter wonderland, or do you want your snowman to be a focal point in a specific area? Consider placing your snowman near other winter-themed decorations, such as snowflake patterns or festive lights, to create a cohesive and visually pleasing scene.
Another crucial aspect to consider is accessibility. Make sure your snowman is easily accessible for both your character and other players visiting your island. This will allow them to interact with the snowman and enjoy the winter fun. Avoid placing the snowman too close to obstacles or buildings that could hinder movement and interaction.
Lastly, keep in mind the future melting of the snowman. Although it’s a temporary creation, you may want to capture screenshots or show off your snowman to friends before it melts away. Choose a location that will preserve your snowman’s existence for a decent amount of time without interfering with the overall aesthetics of your island.
By taking these factors into consideration, you can choose the perfect location for your snowman in Animal Crossing: New Horizons. Remember, the joy of building a snowman lies not only in the creation process but also in the enjoyment it brings to you and your fellow players as you explore and share your virtual winter wonderland.
Gather Snowballs
Once you’ve chosen the ideal location for your snowman in Animal Crossing: New Horizons, it’s time to gather the necessary snowballs. Snowballs serve as the building blocks for your snowman’s body, so it’s important to gather them before they melt away.
To find snowballs, take a leisurely stroll around your island, paying close attention to areas with snow-covered ground. Typically, you can find snowballs near trees, rocks, or open spaces. They will appear as round piles of snow, often blending in with the surrounding environment.
Look for two snowballs of different sizes. The first one you find will be the largest and will serve as the snowman’s base. The second snowball, slightly smaller than the base, will be used for the snowman’s head. Approach the snowballs and press the “A” button to roll them up, increasing their size as you go.
Rolling the snowballs requires a bit of finesse and strategy. Be mindful of objects and terrain obstacles that can alter the shape and size of the snowballs. If a snowball hits an object, it may break apart or become smaller, requiring you to start the rolling process from scratch.
Try to roll the snowballs in a straight path, avoiding sudden turns that could cause the snowball to fall apart. As you roll, the snowball will gradually increase in size until it reaches its maximum size. Ensure that both snowballs are well-rounded and large enough to create a proportionate snowman.
Remember to work quickly as snowballs can melt over time. If you become distracted or take too long to gather the snowballs, you may have to wait for new ones to appear. Keeping an eye on the in-game time and weather can help you plan the snowman building process more efficiently.
With your snowballs successfully gathered, you’re one step closer to creating the perfect snowman. Roll up those snowballs, and get ready to bring your snowman to life in Animal Crossing: New Horizons.
Roll Snowballs to the Desired Size
After gathering the necessary snowballs for your snowman in Animal Crossing: New Horizons, it’s time to roll them to the desired size. Rolling the snowballs not only adds a fun element to the building process but also ensures that your snowman has the perfect proportions.
To begin, position yourself near the larger snowball, which will serve as the base of the snowman. Press the “A” button and your character will start pushing the snowball, gradually increasing its size. Roll the snowball across the snow-covered ground, aiming for a circular shape.
As you roll the snowball, pay attention to its size indicator. The snowball will become larger with each roll, so be careful not to lose control or let it collide with any obstacles. Rolling the snowball in a straight line will help maintain its shape and prevent it from breaking apart.
Once you’re satisfied with the size of the base snowball, it’s time to move on to the smaller snowball, which will become the snowman’s head. Repeat the same process, pushing the snowball across the ground until it reaches the desired size. Aim for a smaller, round shape that is proportionate to the base snowball.
It’s essential to ensure that both snowballs are similar in shape and size to achieve a well-balanced snowman. Take a moment to compare the two snowballs before proceeding to the next step. If necessary, make adjustments by rolling the snowballs a bit more or redistributing the snow to create an even surface.
Remember that rolling the snowballs too much or colliding with objects can cause them to break apart or lose size. Take your time and be patient to avoid any mishaps during the rolling process. If a snowball breaks, don’t worry; you can always find more in your island’s snowy areas.
With the snowballs rolled to the desired size, you’re now ready to move on to the next step: stacking the snowballs to create your snowman in Animal Crossing: New Horizons.
Move the Snowballs to the Designated Spot
Once you’ve rolled the snowballs to the desired size for your snowman in Animal Crossing: New Horizons, the next step is to move them to the designated spot where you want your snowman to be displayed. This step ensures that your snowman is properly positioned and ready for the stacking process.
Begin by positioning your character near the larger snowball, which serves as the base of the snowman. Face the direction where you want your snowman to be placed. Press and hold the “A” button, and your character will start pushing the snowball, slowly moving it towards the designated spot.
It’s important to be patient and careful when moving the snowballs. The snowy ground in Animal Crossing: New Horizons can be slippery, and the snowballs can easily roll out of control. Make slight adjustments to your character’s movement to ensure a smooth and controlled transfer.
As you move the snowball, keep an eye on its position and alignment. Aim to place the snowball in the desired spot without colliding with any obstacles or disturbing the surrounding environment. This will help create a visually appealing and well-integrated snowman in your island landscape.
Once the larger snowball is in place, repeat the same process for the smaller snowball, which will become the snowman’s head. Move it carefully to the designated spot, aligning it on top of the base snowball. Adjust the positioning as needed to ensure that the head sits securely on the base.
Take a step back and examine the placement of the snowballs. Make any necessary adjustments to ensure that the snowman is positioned exactly where you want it. This is your chance to fine-tune the display and make any last-minute improvements before moving on to the final step.
With the snowballs successfully moved to the designated spot, you’re now ready to proceed with the stacking process. This will transform the snowballs into a delightful snowman that adds a touch of winter magic to your Animal Crossing: New Horizons island.
Stack the Snowballs to Form the Snowman
After moving the snowballs to the designated spot, it’s time to stack them together to form your snowman in Animal Crossing: New Horizons. This step brings your snowman to life and adds a whimsical touch to your island landscape.
Start by positioning your character near the larger snowball, which serves as the base of the snowman. Face the snowball, and press the “A” button to initiate the stacking process. Your character will lift the smaller snowball, representing the snowman’s head, and place it on top of the base.
Aim to align the head snowball to the center of the base to create a symmetrical and balanced snowman. Take your time to adjust the position, ensuring that the head sits firmly on the base without wobbling or toppling over.
The stacking process requires a delicate touch to maintain the integrity of the snowman’s structure. Be mindful of the height and proportion of the snowman, aiming for a well-balanced and visually pleasing result. Don’t hesitate to make adjustments as needed to achieve the desired appearance.
If you accidentally knock the head snowball off the base while attempting to stack them, don’t worry. Simply pick up the head snowball and try again. With practice, you’ll become more skilled at stacking the snowballs effortlessly.
Once the snowballs are neatly stacked to form the snowman, take a moment to appreciate your creation. Admire the adorable character that now stands proudly in your Animal Crossing: New Horizons island. This snowman adds a delightful touch of winter charm and creates a festive atmosphere.
Feel free to walk around your snowman, examining it from different angles, and appreciating the details. Take screenshots or invite fellow players to enjoy the sight of your newly constructed snowman. It’s a delightful feature that adds personality and whimsy to your island.
With the snowballs successfully stacked, you’ve completed a crucial step in bringing your snowman to life. The next step is to add accessories and custom designs to enhance the character and make your snowman truly unique.
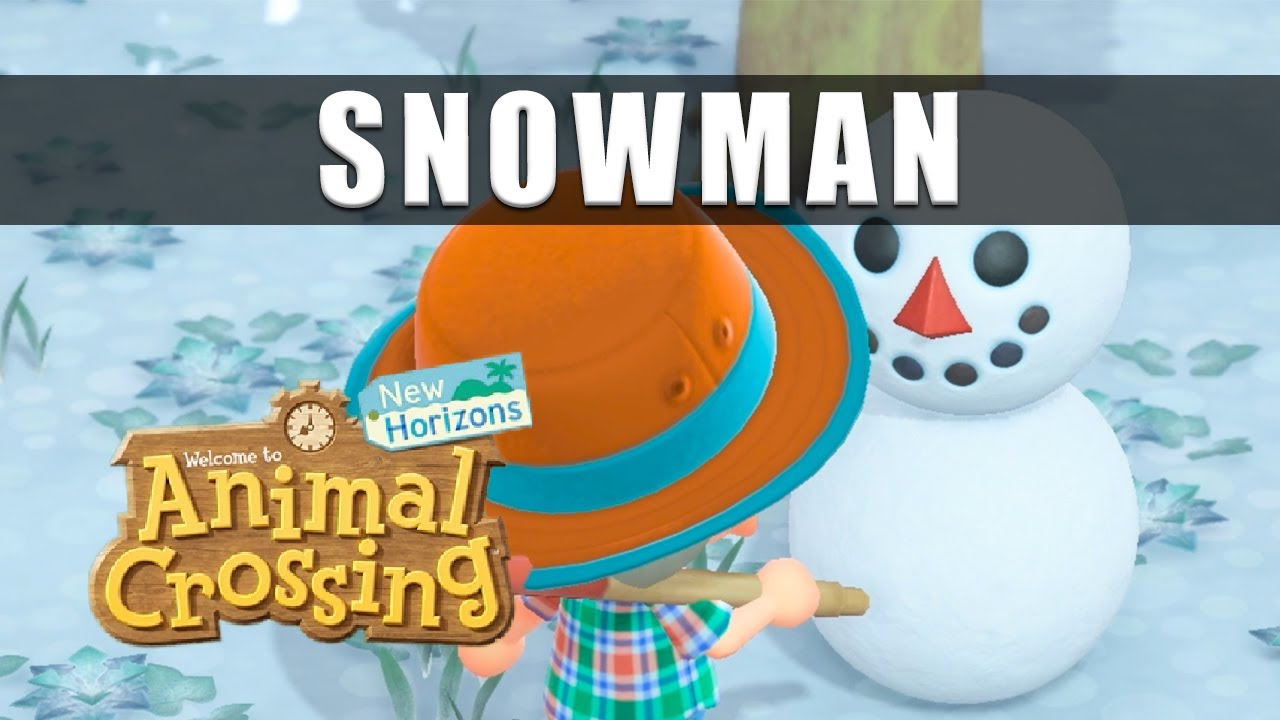
Add Accessories to Your Snowman
Once you’ve successfully stacked the snowballs to form your snowman in Animal Crossing: New Horizons, it’s time to add some accessories to enhance its appearance and give it a personal touch. Adding accessories allows you to customize your snowman and make it stand out in your island’s winter landscape.
Begin by selecting the accessories you want to incorporate into your snowman’s design. These can include items such as hats, scarves, glasses, or even fruit to create a unique look. You can obtain accessories by purchasing them from the Able Sisters’ shop, receiving them as gifts from villagers, or participating in seasonal events.
Approach your snowman and press the “A” button to interact with it. This will allow you to customize the snowman’s appearance by adding accessories. A menu will appear, displaying the available slots for accessories. Select the desired accessory and watch as it magically appears, instantly transforming your snowman’s appearance.
Get creative and experiment with different combinations of accessories. Mix and match hats, scarves, and other items to create a unique and festive look for your snowman. You can change the accessories as often as you like, giving your snowman a fresh and updated appearance to match the current season or holiday.
Don’t forget to consider the theme or style of your island when selecting accessories for your snowman. If your island has a specific aesthetic, choose accessories that match or enhance that theme. For example, if your island has a beachy vibe, you can add sunglasses and a tropical hat to your snowman.
Accessories not only add charm and personality to your snowman but also provide an opportunity for creativity and self-expression. Feel free to experiment with different combinations and accessories that reflect your unique style and taste. Your snowman can become a true representation of your creativity and imagination.
Take a moment to step back and admire your snowman with its newly added accessories. Appreciate how the accessories elevate its appearance and make it a standout feature in your Animal Crossing: New Horizons island.
Remember that you can always change the accessories or remove them altogether if you want a simpler and more minimalistic look for your snowman. The choice is yours, and it’s part of the joy of customizing and personalizing your virtual winter wonderland.
With the accessories added, your snowman is now complete and ready to delight both you and your fellow islanders in Animal Crossing: New Horizons.
Create Custom Designs for Your Snowman’s Face
Now that you’ve built your snowman and added some accessories to give it personality, take your customization a step further by creating custom designs for your snowman’s face in Animal Crossing: New Horizons. This allows you to put your artistic skills to use and add a unique touch to your snowy creation.
To create custom designs, you’ll need to activate the Custom Design app on your NookPhone. Open the app and select the “Pro Designs” option. From there, choose the “Face” category to access the tools for designing your snowman’s face.
Once you’re in the Face category, you can experiment with various design elements to create the perfect expression for your snowman. The tools available include shapes, colors, and patterns that you can use to craft eyes, a mouth, a nose, and any additional features you desire.
Get creative and let your imagination run wild. Consider the personality and character you want to portray through your snowman’s expression. Do you want it to have a cheerful smile, a mischievous smirk, or an adorable surprised expression? Play around with different combinations until you achieve the desired look.
If you’re feeling confident in your artistic abilities, you can create your own designs from scratch. Alternatively, you can browse through the vast gallery of player-created designs available online. Many talented players share their snowman face designs, providing inspiration and a wide range of options for you to choose from.
Using designs created by other players is as simple as accessing the Custom Design Portal at the Able Sisters’ shop or the kiosk in the Resident Services building. Connect to the internet and search for snowman face designs using specific keywords or creator codes. Once you find a design you like, download it and apply it to your snowman’s face using the Custom Design app.
Remember that you can always experiment and refine your snowman’s face design. If you’re not satisfied with the initial result, don’t be afraid to make adjustments or try different designs until you achieve the perfect expression.
Once you’re satisfied with your custom snowman face, take a moment to appreciate your creativity and celebrate your artistic skills. Admire the unique design you’ve created or the carefully curated design you’ve chosen from the player-created designs available online.
With the custom face added, your snowman now has a distinct personality and a one-of-a-kind appearance. It’s a delightful feature that showcases your artistic abilities and makes your snowman truly special in Animal Crossing: New Horizons.
Snowman Set DIY Recipes
In Animal Crossing: New Horizons, you can obtain DIY recipes for a variety of snowman-themed items. These DIY recipes allow you to craft furniture, decorations, and other items that complement your snowman creation and create a charming winter atmosphere on your island.
The Snowman Set DIY recipes are primarily obtained by building snowmen and receiving Snowman Series items as rewards. Snowmen can give you recipes for various items, including the Snowman Table, Snowman Chair, Snowman Bed, and Snowman Vanity.
To build a snowman, roll up snowballs as described earlier in the article. Once you’ve built a complete snowman, it will come to life and reward you with a Snowman Series DIY recipe. You can then use these recipes to craft adorable snowman-themed furniture to decorate your home or outdoor areas.
Additionally, you may come across special characters like Jingle during holiday events, such as Toy Day. They may offer snowman-themed DIY recipes as event rewards, providing even more opportunities to expand your Snowman Set collection.
Some other snowman-themed DIY recipes that you can obtain include the Ice Chair, Ice Table, Ice Bed, and Ice Vanity. These items add an enchanting frozen touch to your island, allowing you to create a cohesive winter wonderland theme.
Don’t forget to check in with your villagers as well. They may occasionally offer you snowman-themed DIY recipes as gifts, further adding to your collection. Keep building snowmen, participating in events, and interacting with your villagers to unlock even more Snowman Set DIY recipes.
Once you’ve gathered the necessary materials for a specific Snowman Set DIY recipe, head to a DIY workstation or crafting table to craft the item. The required materials can vary depending on the recipe, so make sure to gather the appropriate resources in advance.
Crafting the Snowman Set DIY recipes allows you to personalize your island with delightful and seasonally appropriate furniture and decorations. These items can be placed both indoors and outdoors, giving you the flexibility to experiment and create unique scenes.
Embrace the snowy season and create a cohesive Snowman Set theme throughout your island. Combine the different snowman-themed items to form charming and inviting areas for your villagers and visitors to enjoy.
The Snowman Set DIY recipes add an extra layer of customization and creativity to Animal Crossing: New Horizons, allowing you to infuse your island with the magic of winter and the whimsy of snowmen.
How to Prevent Your Snowman from Melting
In Animal Crossing: New Horizons, snowmen are temporary creations that will eventually melt away. However, there are a few steps you can take to prolong the lifespan of your snowman and prevent it from melting too soon, allowing you to enjoy its presence for a bit longer.
Firstly, avoid placing your snowman in direct sunlight. The heat from the sun can speed up the melting process, causing your snowman to shrink and lose its shape. Instead, choose a shady spot or an area that receives less direct sunlight throughout the day.
It’s also essential to avoid positioning your snowman near sources of heat or warmth. Indoor heaters, fireplaces, or other heat-emitting objects can quickly melt your snowman. Be mindful of the placement of your snowman in relation to these heat sources to prevent unintended melting.
Additionally, try to avoid rainy or wet weather conditions. Excessive moisture can cause your snowman to melt at a faster rate. Monitor the weather forecast in the game and plan accordingly. If rain is expected, consider moving your snowman to a covered area or temporarily relocating it indoors.
Beyond environmental factors, be cautious of accidentally touching or bumping into your snowman. Physical interactions can cause the snowman to lose its shape or collapse. Avoid pushing or shoving your snowman, and be careful not to walk or run into it during your activities on the island.
Lastly, consider taking pictures or capturing screenshots of your snowman to preserve its memory even after it melts away. This way, you can cherish the fond moments you shared with your snowman and reminisce about the winter wonderland you created in Animal Crossing: New Horizons.
While it’s inevitable that your snowman will eventually melt, taking these preventative measures can help extend its existence on your island. Enjoy the presence of your snowman for as long as possible and make the most out of the winter season in the game.
Remember, the temporary nature of snowmen adds to their charm and makes them a special part of your Animal Crossing experience. Embrace and appreciate their fleeting presence, knowing that new snowmen will return in the next winter season.
Tips and Tricks for Snowman Building
Building a snowman in Animal Crossing: New Horizons can be a fun and rewarding experience. To make the most of your snowman building sessions, here are some helpful tips and tricks to keep in mind:
1. Plan your snowman’s location: Before you start rolling snowballs, choose a suitable location for your snowman. Consider the terrain, aesthetics, accessibility, and future melting to ensure the best placement.
2. Watch out for obstacles: Pay attention to your surroundings when rolling snowballs. Collisions with objects like trees, buildings, or cliffs can cause snowballs to break or shrink, requiring you to start over.
3. Time it right: Keep track of in-game time and weather. Snowballs can melt if you take too long to gather or build the snowman. Plan accordingly to make the most of your time and avoid any snowball-related mishaps.
4. Optimal snowball size: Aim for snowballs that are well-rounded and proportionate. Take your time to roll them to the desired size, ensuring they are not too small or too large. Proportional snowballs make for a more visually appealing snowman.
5. Practice makes perfect: Building snowmen may take some practice, especially when it comes to rolling snowballs without them breaking or losing size. Keep trying, and with time, you’ll become more skilled at crafting the perfect snowman.
6. Use the “mole trick”: If you’re finding it difficult to roll snowballs without them breaking, consider using the “mole trick.” Dig holes around the area where you’re rolling to help guide the snowball and prevent it from colliding with obstacles.
7. Save extra snowballs: Once you’ve built your snowman, save any extra snowballs you find. They can be used to create additional snowmen on your island or shared with friends who may not have snow available on their islands.
8. Customize with accessories: Adding accessories to your snowman gives it character and individuality. Get creative with hats, scarves, and other items to make your snowman truly unique and reflective of your personal style.
9. Experiment with custom designs: Take advantage of the custom design feature and modify your snowman’s face to your liking. Create your own designs or search for player-made designs online to give your snowman a personalized touch.
10. Enjoy the process: Building a snowman is not just about the final result but also the joy and fun you have along the way. Embrace the whimsy of the snowman building process and embrace the temporary nature of these icy creations.
By keeping these tips and tricks in mind, you’ll be well-equipped to build delightful and charming snowmen in Animal Crossing: New Horizons. Enjoy the snowy season and spread the magic of winter across your island!