
Crafting Basics in Animal Crossing: New Horizons
One of the key elements in Animal Crossing: New Horizons is crafting. By utilizing the DIY crafting system, players can create a wide range of tools, furniture, and other items to enhance their island life. Crafting allows players to gather resources and use them to create useful items that will help them progress in the game.
To start crafting, players need to gather materials found around the island. These materials can be obtained by shaking trees, hitting rocks with a shovel, catching bugs, fishing, and more. The key is to explore and interact with the environment to collect different resources. Some common resources include wood, branches, stones, iron nuggets, and clay.
Once you have gathered the necessary materials, you can access the DIY crafting menu from your Nook Phone. This menu provides a wide range of DIY recipes that you can use to create various items. Start by selecting a recipe and then gather the required materials from your inventory. After gathering the materials, you can begin the crafting process.
Crafting takes time, with each item requiring a different amount of time to complete. While waiting for an item to finish crafting, you can continue exploring the island, talking to villagers, fishing, or performing other activities. Once the crafting process is complete, the item will be added to your inventory, ready for use.
Crafting in Animal Crossing: New Horizons is a dynamic and rewarding system that adds depth and customization to the gameplay. By experimenting with different recipes and materials, players can create unique items to suit their personal tastes and island aesthetic. Whether it’s crafting tools for exploration, furniture for decorating your home, or gifts for your animal neighbors, the possibilities are endless.
Make the most of the DIY crafting system in Animal Crossing: New Horizons to create a thriving and personalized island paradise.
Exploring the Island for Resources
Exploring the island in Animal Crossing: New Horizons is not only a delightful adventure but also an opportunity to collect valuable resources. These resources are essential for crafting various tools, furniture, and other items that will make your island life thrive.
One of the primary resources you can find on the island is wood. Look for trees and simply shake them to make the branches and sometimes even pieces of wood fall to the ground. By hitting trees with a flimsy or stone axe, you can gather valuable wood that can be used in a wide range of crafting recipes.
Stones can also be found scattered around the island. They can be obtained by hitting rocks with a shovel or an axe. Be prepared, though, as rocks will only give resources when struck repeatedly in a short amount of time. The rocks may yield materials like stones, iron nuggets, or clay, which are vital for crafting tools and constructing various customizations.
Bugs and fish are another valuable resource that can be found while exploring the island. Use your bug-catching net to catch insects that flutter around the trees, flowers, or buzzing around bodies of water. Likewise, equip your fishing rod to try your hand at catching fish in the rivers or the ocean. These creatures can be donated to the museum or sold for Bells, the game’s currency.
Don’t forget to keep an eye out for balloons floating across the sky. These colorful orbs carry presents, which can contain valuable items such as DIY recipes or rare furniture. Use your slingshot to shoot down the balloons and claim the gifts.
Remember to explore every nook and cranny of your island, as resources can be hidden in unexpected places. Engage with your surroundings, dig up buried items using a shovel, and shake trees to dislodge furniture or other surprises.
By thoroughly exploring your island, you can amass a wealth of resources that will fuel your crafting endeavors in Animal Crossing: New Horizons. Combine your findings with your creativity to construct a unique and vibrant island paradise.
Unlocking Blathers and the Museum
In Animal Crossing: New Horizons, the museum is a vital facility that allows players to showcase and learn about the wildlife and artifacts they encounter on their island. To unlock the museum, you’ll need to attract the knowledgeable Blathers, who is passionate about collecting and preserving various specimens.
To initiate the process of unlocking the museum, you must first set up residential services on your island. Tom Nook, the raccoon character who guides you through the game, will instruct you on how to build houses for new villagers. Once you have constructed the first three houses and welcomed the required number of villagers, residential services will be available.
After setting up residential services, talk to Tom Nook to further advance the island development. Follow his instructions, and soon you’ll receive a special visitor. Blathers, the owl, will arrive on the island the following day in his tent.
However, Blathers won’t be able to set up a permanent museum right away. In order to secure a suitable location, you need to gather at least five unique specimens of either fish or bugs. These specimens should be placed in your inventory, ready to be assessed by Blathers. Once you have collected the required number of specimens, return to Blathers and present them for evaluation.
Blathers will be overjoyed by your collection and will express his desire to establish a museum on your island. He will ask you to designate a location for the museum, allowing you to select a spot anywhere on the island. Choose a location that suits your island’s layout and aesthetic.
Once you have selected a spot, Blathers will set up the museum the next day. From that point on, you can donate fish, bugs, fossils, and art pieces to the museum, expanding its exhibits and earning the gratitude of Blathers.
Unlocking Blathers and the museum is an important milestone in Animal Crossing: New Horizons. It opens up a world of knowledge and curiosity, providing a unique and educational experience for both players and their island residents.
Donating Fish and Bugs to the Museum
Once you have unlocked the museum in Animal Crossing: New Horizons, you can start contributing to its extensive collection by donating fish and bugs. Donating these creatures not only enhances the museum’s exhibits but also provides valuable information and a sense of accomplishment.
To donate a fish or bug, simply catch it using your fishing rod or bug net. Once caught, the creature will be stored in your inventory. Head over to the museum, where you’ll find Blathers eagerly waiting to assess and display your newfound specimens.
Talk to Blathers and select the option to donate a fish or bug. He will guide you through the process, giving you information about each specimen before placing it in the appropriate exhibit. It’s worth noting that Blathers will not accept duplicates of creatures he already has in the museum’s collection.
As you continue to donate fish and bugs, the exhibits in the museum will gradually expand. You’ll be able to see a wide variety of species, learn interesting facts about them, and appreciate their beauty. Each new addition brings life and depth to the museum, making it an exciting place to revisit.
Donating fish and bugs to the museum not only contributes to the island’s cultural and educational value but also rewards you with a sense of accomplishment. Completing the collection for each species can be a thrilling task that keeps you engaged and motivated to explore the island’s diverse habitats.
Furthermore, showcasing a complete collection in the museum can attract visitors and boost the island’s reputation. Friends and other players who visit your island will admire your dedication to preserving the wildlife.
So, be sure to take the time to explore the waters, rivers, and forests of your island to discover a variety of fish and bugs. By sharing your findings with Blathers, you can make a meaningful contribution to the cultural heritage of Animal Crossing: New Horizons.
Unlocking Timmy and Tommy’s Shop
In Animal Crossing: New Horizons, Timmy and Tommy’s shop is a hub for all your shopping needs. From tools to furniture, seeds to wallpapers, this shop offers a wide variety of items that can enhance your island life. To unlock this convenient store, you’ll need to accomplish a few key tasks.
Initially, Timmy and Tommy will be operating out of a small Resident Services tent. To upgrade their services and unlock the shop, you’ll need to help them gather information on the island residents’ preferences. They will request your assistance in collecting specific items, such as fish or bugs.
To fulfill their requests, explore the island to catch the required fish or bugs. Return to Timmy and Tommy with the requested items, and they will use this information to gather data on the residents’ shopping preferences. This will allow them to tailor their inventory and expand their services.
After a few successful item requests, Timmy and Tommy will announce their plans to build a permanent shop on the island. They will shut down operations for a day to accomplish this task. The next day, the shop will be open for business, providing a wider range of items for you to purchase.
Timmy and Tommy’s shop is not just a place to buy items but also a marketplace where you can sell your own creations, such as fish, bugs, or fruits. Simply approach the counter, select the “I want to sell!” option, and choose the items from your inventory that you wish to sell. Timmy and Tommy will buy them from you for Bells, which can be used to further enhance your island.
As you continue to support the shop and make purchases, Timmy and Tommy will expand their inventory even further, offering new and exciting items. They may even introduce seasonal or limited-edition items for you to collect and decorate your island with.
Unlocking Timmy and Tommy’s shop is a significant milestone in Animal Crossing: New Horizons, as it provides access to a wider variety of items and opportunities to buy and sell. Keep supporting the shop and helping Timmy and Tommy gather information, and they will ensure that your island has all the supplies you need to transform it into a thriving and vibrant community.
Using Nook Miles to Purchase Tools
In Animal Crossing: New Horizons, Nook Miles are a special currency that can be earned by completing various tasks and achievements on your island. These Nook Miles can be used for a variety of purposes, including purchasing tools that will aid you in your daily activities.
To start earning Nook Miles, you’ll need to complete tasks listed on your NookPhone. These tasks can range from catching fish and bugs to planting trees or building furniture. By fulfilling these objectives, you’ll accumulate Nook Miles that can be redeemed for a range of rewards.
One of the most practical uses for Nook Miles is to purchase different types of tools. Initially, you’ll have basic tools like the flimsy fishing rod and flimsy net, but using Nook Miles, you can upgrade to sturdier and more durable tools.
Using your NookPhone, access the Nook Miles Redemption option. Here, you’ll find a selection of tools available for purchase using your earned Nook Miles. These tools include the regular fishing rod, net, shovel, watering can, and more. Each tool offers improved durability and efficiency compared to their flimsy counterparts.
The upgraded tools will greatly enhance your island activities. A sturdier fishing rod will allow you to catch rarer and larger fish, while a more robust net will help you capture elusive bugs swiftly. The shovel will enable you to dig up fossils, bury items, and develop your island’s landscape.
Additionally, as you progress in the game, more advanced tools such as the axe, ladder, and vaulting pole will become available for purchase with Nook Miles. These tools are essential for accessing previously inaccessible areas on your island, allowing you to explore and discover new adventures.
Earning Nook Miles and using them to purchase tools is a valuable strategy in Animal Crossing: New Horizons. It provides you with essential equipment and upgrades that will enhance your gameplay experience and make your island life more enjoyable and efficient.
So, embark on your daily tasks, earn those Nook Miles, and invest them wisely in tools that will help you become a thriving island resident!
Unlocking the DIY Recipes for Tools
In Animal Crossing: New Horizons, DIY recipes are essential for crafting a wide range of tools. Initially, your catalog of DIY recipes will be limited, but as you progress through the game, you’ll have the opportunity to unlock more recipes for various tools that can aid you on your island.
To start unlocking DIY recipes, you’ll need to assist Tom Nook in developing your island. Follow his instructions and complete tasks like gathering resources, building structures, and inviting villagers. As you accomplish these objectives, Tom Nook will reward you with DIY recipes for basic tools.
An important milestone is reaching the point where you can build the Resident Services building. Once built, this facility will provide you with the Nook’s Cranny shop, where you can purchase additional DIY recipes. Timmy and Tommy will have a rotating selection of DIY recipe cards available for purchase each day, so be sure to visit the shop regularly to browse their latest offerings.
Another avenue to unlock DIY recipes is by talking to your fellow island residents. They may teach you unique DIY recipes for various tools. Building relationships with your neighbors and sharing conversations can lead to discovering new opportunities to expand your DIY repertoire.
Additionally, keep an eye out for special events and visitors on your island. Some events may have exclusive DIY recipes tied to them, while certain visitors, such as Gulliver or Wisp, can reward you with DIY recipes as a token of their gratitude upon completion of their quests.
As you advance further in the game and complete certain milestones, you’ll also receive DIY recipes for more advanced tools, such as the axe, shovel, and ladder. These tools will be vital for exploring different parts of your island and unlocking its full potential.
It’s worth noting that you may also encounter floating balloons carrying presents. Shooting down these balloons with your slingshot can reward you with DIY recipe cards, expanding your collection of tools and items.
By actively engaging with the game, talking to residents, visiting shops, and participating in events, you’ll gradually unlock more DIY recipes for tools. Take the time to experiment and craft different tools, expanding your abilities and making island life more enjoyable and efficient.
So, continue your island journey, embrace your DIY spirit, and unlock the vast array of tools waiting to be crafted in Animal Crossing: New Horizons.
Finding a Shovel Recipe
In Animal Crossing: New Horizons, the trusty shovel is an essential tool for digging up fossils, planting trees, and unearthing hidden treasures on your island. To acquire the recipe for crafting a shovel, you’ll need to explore and interact with your surroundings.
One way to find the shovel recipe is by purchasing it from Timmy and Tommy’s shop, Nook’s Cranny. Keep an eye out for the rotating selection of recipes that they offer in the shop each day. If the shovel recipe is available, you can purchase it using your hard-earned Bells. However, please note that the availability of the shovel recipe may vary from day to day.
Another method of obtaining the shovel recipe is by interacting with your fellow island residents. Villagers can occasionally gift DIY recipes as a token of friendship. Engage in conversations, help them with tasks, and you may be lucky enough to receive the coveted shovel recipe.
As you continue to explore the island, you may come across floating presents held by colorful balloons moving across the sky. Use your slingshot to shoot down these balloons and collect the presents that they carry. Occasionally, these presents may contain DIY recipe cards, and there’s a chance that the shovel recipe could be one of them.
If you’re feeling particularly adventurous, you can also visit mystery islands using Nook Miles tickets. On these islands, you’ll encounter various resources, including DIY recipe bottles washed up on the beach. Interact with the recipe bottles to discover new DIY recipes, and perhaps you’ll stumble upon the coveted shovel recipe while exploring these mystery locations.
Keep in mind that luck and persistence play a role in finding the shovel recipe. Some players may acquire it early on, while others may need to wait a bit longer. Patience and continued exploration are key in uncovering this important recipe.
By finding the shovel recipe and crafting this invaluable tool, you’ll be able to dig up fossils, unearth buried items and create your dream island in Animal Crossing: New Horizons.
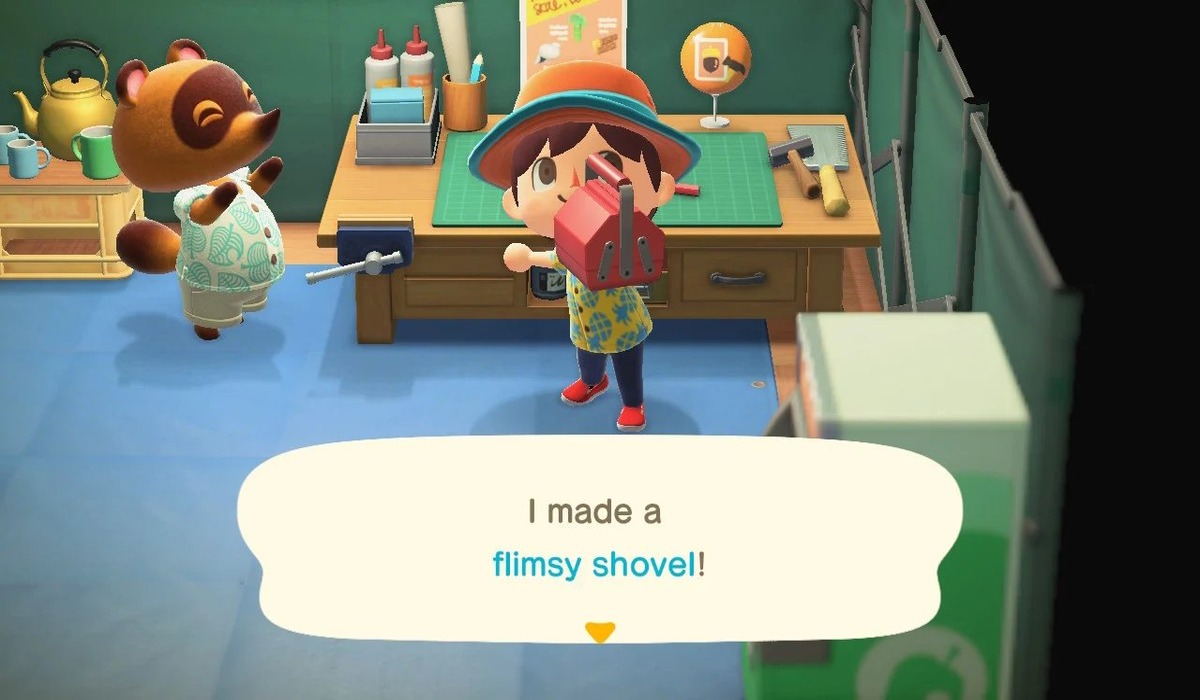
Crafting a Shovel
Once you have obtained the recipe for a shovel in Animal Crossing: New Horizons, it’s time to gather the necessary materials and craft this versatile tool. With a shovel in hand, you’ll be able to dig up fossils, plant trees, and even unearth valuable treasures on your island.
To craft a shovel, you’ll need the following materials:
- 1 hardwood
- 5 softwood
- 1 iron nugget
Hardwood can be obtained by hitting trees with an axe, which will cause hardwood to drop from the tree. Softwood can also be collected by hitting trees, but it is a more common drop compared to hardwood. Iron nuggets are obtained by hitting rocks with either a shovel or an axe, and they are a valuable resource used in various crafting recipes.
Once you have gathered the required materials, access the DIY crafting menu on your NookPhone. Select the shovel recipe and choose the “Craft” option. Your character will then work their magic, combining the materials into a fully functional shovel.
Remember, crafting takes time, and once you initiate the crafting process, you’ll need to wait until it’s complete. While waiting, you can explore the island, talk to villagers, or take care of other activities. Once the crafting process is finished, the shovel will be added to your inventory, ready for use.
Now that you have a shovel, a whole new world of possibilities opens up on your island. Use it to dig up fossils, which can be assessed at the museum, or to unearth valuable items buried in the ground. You can also use the shovel to clear up weeds, create paths, or plant trees and flowers in specific locations.
Keep in mind that the shovel, like other tools, has a limited durability. With each use, it will gradually wear out. To ensure that you can continue using the shovel for a long time, it’s a good idea to carry multiple shovels or gather materials to create more shovels in the future.
Crafting a shovel in Animal Crossing: New Horizons is a simple yet rewarding process. Explore your island, gather the necessary materials, and enjoy the countless possibilities and opportunities that come with having this essential tool at your disposal.
Using the Shovel for Digging
The shovel is an incredibly versatile tool in Animal Crossing: New Horizons, allowing you to dig up fossils, bury items, and discover buried treasures on your island. Mastering the art of using the shovel will unlock a whole new world of possibilities and enhance your island life.
One of the primary uses of the shovel is to dig up fossils. Fossils can be found by searching for mysterious cracks in the ground, indicated by a star-like pattern. Equip your shovel, stand over the crack, and press the action button to dig it up. The fossil will be added to your inventory, ready to be assessed by Blathers at the museum. Collecting and completing fossils will expand the museum’s exhibits and earn you praise and knowledge from Blathers.
The shovel also allows you to bury items such as fruit or even hidden surprises like time capsules or fossils you want to save for later. To bury an item, access your inventory and select the item you want to bury. Stand over the desired spot, then press the action button to dig a hole. Afterward, select the item from your inventory and choose the “Bury” option. The item will be safely buried, ready for you or other players to discover later on.
However, digging up fossils and burying items are not the only uses for the shovel. Occasionally, while digging up holes or hitting rocks with the shovel, you may stumble upon valuable treasures like bells, fossils, or even rare items. Keep an eye out for these unexpected surprises as they can provide a pleasant boost to your island’s resources and economy.
The shovel is also the key tool for creating paths and changing the layout of your island. By using the shovel, you can remove unwanted trees, bushes, or flowers, clear up weeds, and reshape the land to your liking. Let your creativity run wild as you transform and customize your island’s terrain.
It’s important to note that like other tools in the game, the shovel has a durability. With each use, it will gradually wear out. To ensure you have a shovel when you need it, remember to keep an eye on its durability and consider crafting or acquiring additional shovels to have backups ready.
With the shovel in hand, you’ll have the power to dig up hidden treasures, create paths, and reshape your island to reflect your vision. Embrace the versatility of this essential tool and let it guide you to new discoveries and endless possibilities in Animal Crossing: New Horizons.
Finding Fossils, Bells, and More with the Shovel
The trusty shovel in Animal Crossing: New Horizons is not only used for digging up fossils but also for unearthing a variety of treasures and valuable resources on your island. By exploring and using the shovel, you can uncover hidden surprises, gather bells, and discover more about the rich history of your island.
One of the main rewards of using the shovel is the ability to dig up fossils. As you explore your island, keep an eye out for the star-like patterns on the ground indicating the presence of buried fossils. Equip your shovel, stand over the pattern, and press the action button to dig up the fossil. Fossils can be assessed by Blathers at the museum, and once identified, they can be displayed to complete various collections.
In addition to fossils, you may also unearth valuable resources while digging with the shovel. For example, you may find shiny rocks that, when hit repeatedly with a shovel, produce bells – the currency of Animal Crossing. Keep an eye out for these rocks as they can provide a significant boost to your island’s economy.
Furthermore, occasionally, while digging holes or hitting rocks, you may stumble upon buried items such as DIY recipe bottles, clothing, furniture pieces, or even rare Art pieces. These hidden treasures add an element of surprise and excitement to your island exploration. Be sure to scour every inch of your island with your shovel to uncover these hidden delights.
The shovel also allows you to customize and shape your island to your preferences. Not only can you use it to remove unwanted trees, bushes, or flowers, but you can also dig up trees and move them to different locations. This flexibility gives you the freedom to create curated spaces and design your island’s layout exactly how you envision it.
It’s worth noting that while using a shovel can be rewarding, it’s important to remember that durability plays a role. Each shovel has a limited number of uses before it breaks. To ensure you always have a working shovel, consider keeping extra shovels in your inventory or storing materials to craft new ones when needed.
By utilizing the shovel in Animal Crossing: New Horizons, you can uncover fossils to expand the museum’s collection, discover buried treasures, gather valuable resources like bells, and customize your island to reflect your unique vision. Embrace the possibilities and use the power of the shovel to unearth the wonders that await you.