
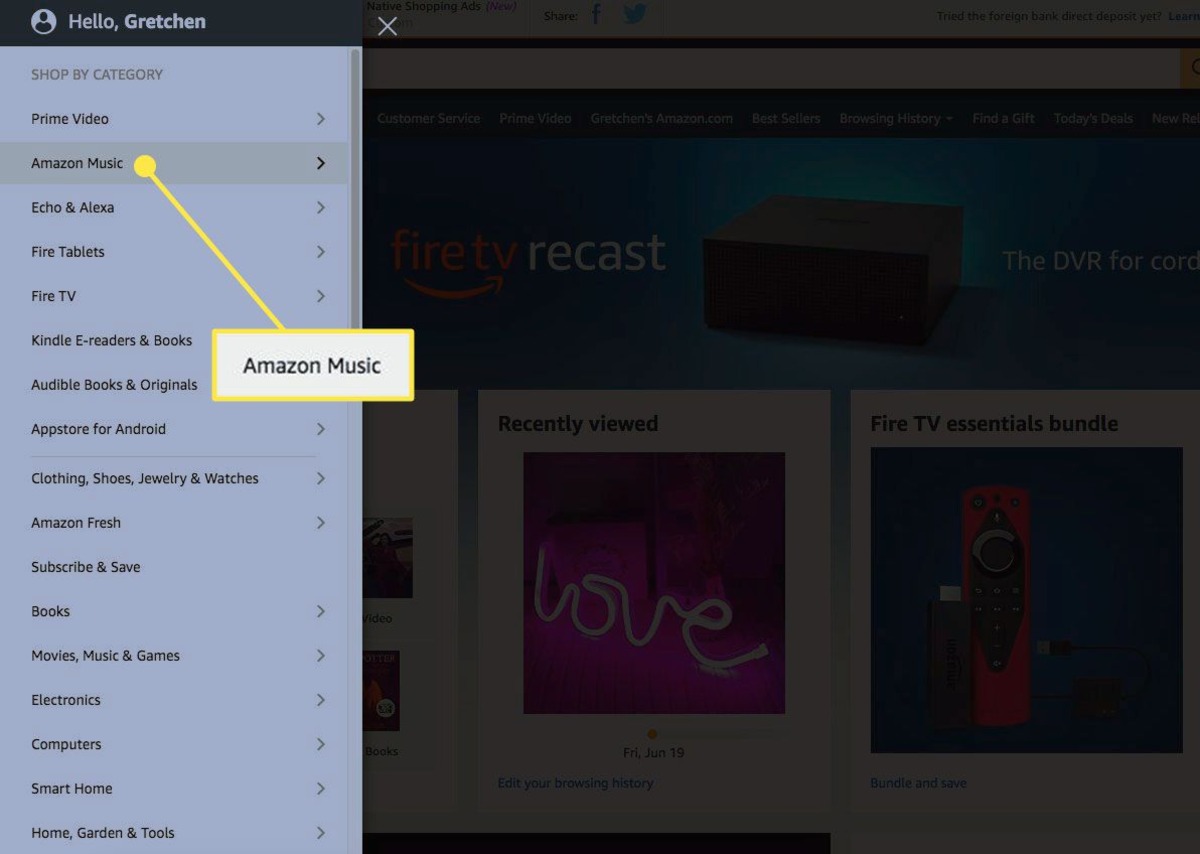
Logging in to Amazon Music
Before you can start creating your own playlists on Amazon Music, you’ll need to log in to your account. Here’s a step-by-step guide to help you get started:
- Launch the Amazon Music app on your device or open the Amazon Music website in your browser.
- Click on the “Sign In” button located in the top right corner of the screen.
- Enter your Amazon account credentials, including your email address and password.
- Click on the “Sign In” button to proceed.
If you’re using the Amazon Music app on a mobile device, you may have the option to sign in using your Amazon account, Google account, or Facebook account. Simply choose the account that you prefer to use and follow the prompts to sign in.
Once you’ve successfully logged in to Amazon Music, you’ll have access to a world of music at your fingertips. From here, you can start exploring different genres, artists, and albums to create your personalized playlists.
Note: If you don’t have an Amazon account, you can easily create one by clicking on the “Create your Amazon account” link on the sign-in page and following the steps provided.
Now that you’re logged in, it’s time to dive into the exciting world of creating your own music playlists on Amazon Music. Get ready to curate your favorite tracks and discover new songs to enhance your listening experience.
Accessing your account settings
Accessing your account settings on Amazon Music allows you to customize your music listening experience and personalize your playlists. Here’s how you can access your account settings:
- Open the Amazon Music app or go to the Amazon Music website and log in to your account.
- Click on the settings icon, usually represented by a gear or a profile picture, located in the top-right corner of the screen.
- A dropdown menu will appear. Select “Account Settings” from the options.
Once you’re in the account settings section, you’ll have various options to tweak and optimize your Amazon Music settings. Here are some key settings you can explore:
- Profile settings: Customize your profile picture, display name, and other profile details to add a personal touch to your Amazon Music account.
- Playback settings: Adjust the playback quality, equalizer settings, crossfade options, and other audio preferences to suit your listening preferences.
- Notification settings: Choose whether to receive email notifications about new music releases, recommendations, and other updates from Amazon Music.
- Privacy settings: Manage your privacy preferences, such as whether you want your listening activity to be visible to others or if you want to hide specific playlists.
- Connected devices: View and manage the devices connected to your Amazon Music account, such as smartphones, speakers, or other streaming devices.
Exploring and adjusting these account settings can help you tailor your Amazon Music experience to your preferences and enjoy a more personalized and seamless listening journey.
Remember to save any changes you make to your account settings before navigating away from the page. Additionally, you can always revisit the account settings section to modify or update your preferences as needed.
Now that you know how to access your account settings on Amazon Music, take some time to customize your experience and make the most out of your musical journey.
Navigating the Amazon Music app
Once you’ve logged in to the Amazon Music app, familiarizing yourself with its navigation will make it easier for you to browse and discover new music. Here’s a guide on how to navigate the Amazon Music app:
1. Home screen: The home screen is your starting point and displays personalized recommendations, recently played songs, popular playlists, and new releases. Scroll through the screen to explore and discover music tailored to your taste.
2. Navigation menu: Located at the bottom of the app, the navigation menu consists of several tabs to help you navigate through different sections of Amazon Music. These tabs may include options like Home, Browse, Search, My Music, and more. Tap on each tab to explore its respective content.
3. Browsing: The Browse tab allows you to explore music by genres, moods, charts, and curated playlists. You can also discover new releases and browse by specific categories such as artists, albums, and songs. Use the search feature to find specific artists, songs, or albums you’re looking for.
4. My Music: The My Music tab is where you can access your saved music library, including songs, albums, playlists, and artists you’ve added to your collection. You can organize your music into playlists and create folders to keep everything organized.
5. Playback controls: While listening to a song, you’ll find playback controls at the bottom of the screen. These controls allow you to play, pause, skip, rewind, and adjust the volume of the music. You can also repeat or shuffle songs to suit your listening preferences.
6. Discover more: Amazon Music provides personalized recommendations based on your listening habits. Explore the “Recommended for You” section on the home screen or the personalized playlists in the Browse tab to discover new music tailored to your taste.
7. Settings: Access the settings menu by tapping on the profile icon or the gear icon, depending on your device. From there, you can customize your account settings, playback preferences, and other options to enhance your Amazon Music experience.
Familiarizing yourself with these navigation features will help you easily navigate through the Amazon Music app, discover new music, and create customized playlists to suit your mood and preferences.
Now that you know how to navigate the Amazon Music app, it’s time to dive into the vast collection of music and begin your musical journey.
Finding songs to add to your playlist
With Amazon Music’s vast library of songs, finding the perfect tracks to add to your playlist is a breeze. Here are several methods you can use to discover and add songs to your playlist:
- Search bar: Use the search bar at the top of the Amazon Music app or website to search for specific songs, artists, albums, or genres. Simply type in the keywords, and Amazon Music will display relevant search results.
- Browse by genre: Explore different genres by accessing the “Browse” tab in the navigation menu. Amazon Music offers a wide range of genres, including pop, rock, hip-hop, country, classical, and more. Click on a specific genre to view recommendations and popular playlists within that category.
- Discover playlists: Amazon Music offers a vast collection of curated playlists that cater to various moods, activities, and themes. Browse through the “Featured Playlists” section on the home screen or explore the “Top Playlists” in the Browse tab. These playlists are a great source for finding songs that match the mood or theme you’re looking for.
- Explore new releases: Stay up to date with the latest music by checking out the “New Releases” section on the home screen or browsing the “New Music” category in the Browse tab. Here, you’ll find recently released songs and albums across different genres, giving you the opportunity to discover fresh tracks to add to your playlist.
- Recommendations: Amazon Music provides personalized recommendations based on your listening history. These recommendations can be found in the “Recommended for You” section on the home screen. The more you listen to and add songs to your playlists, the better the recommendations become.
- Radio stations: Create a radio station based on your favorite artist, song, or genre by selecting the “Start Radio” option. Amazon Music will curate a playlist of similar songs and artists for you to enjoy.
Utilize these methods to find songs that resonate with your musical taste and add them to your playlist. Experiment with different genres, playlists, and recommendations to discover hidden gems and expand your music library.
Remember, creating a playlist is all about personalization and expressing your unique musical preferences. Take the time to explore various avenues and curate a playlist that reflects your style and mood.
Now that you know how to find songs to add to your playlist on Amazon Music, it’s time to start curating your perfect music collection. Get ready to create a playlist that will keep you entertained and inspired for hours on end!
Adding songs to your playlist
One of the joys of using Amazon Music is the ability to create and customize your own playlists. Here’s a step-by-step guide on how to add songs to your playlist:
- Create a playlist: If you haven’t already created a playlist, start by selecting the “My Music” tab in the navigation menu and then click on “Create Playlist.” Give your playlist a name that reflects the theme or mood you want to capture.
- Search for songs: Use the search bar at the top of the app or website to find the songs you want to add to your playlist. You can search by song titles, artist names, or album names to locate the specific tracks you’re looking for.
- Add songs: Once you’ve found a song you want to add to your playlist, simply click on the “+” or “Add” button next to the track. The song will be automatically added to your playlist.
- Add multiple songs: To add multiple songs to your playlist at once, hold the Shift or Ctrl key (Windows) or Command key (Mac) while clicking on the songs you want to add. Then, click on the “+” or “Add” button to add the selected songs.
- Explore recommended songs: Amazon Music provides recommendations based on your listening history. You can find these recommendations in the “Recommended for You” section on the home screen. Click on a recommended song and click the “+” or “Add” button to add it to your playlist.
- Import songs: If you have songs stored on your device, you can import them into your Amazon Music library and add them to your playlists. Simply go to the “My Music” tab, click on “Upload Music,” and follow the prompts to upload and add your own songs.
- Repeat the process: Continue searching for and adding songs to your playlist until you’ve compiled the perfect collection of tracks.
Remember to save your playlist after adding songs to ensure that your additions are preserved.
Whether you’re adding your favorite hits, discovering new music, or creating themed playlists, the process of adding songs to your playlist on Amazon Music is simple and enjoyable. Take your time to curate a collection of songs that resonates with you and enhances your listening experience.
Now that you know how to add songs to your playlist, it’s time to start building your ultimate musical collection. Get ready to curate a playlist that will accompany you through every mood and moment.
Organizing your playlist
Once you’ve added songs to your playlist on Amazon Music, you may want to organize them to create a cohesive and enjoyable listening experience. Here are some tips on how to organize your playlist:
- Reordering songs: To change the order of songs in your playlist, simply click on the song and drag it to the desired position. This allows you to create a flow and arrangement that suits your preference.
- Add descriptions: Give your playlist some context by adding a description. This can be done by clicking on the pencil icon next to the playlist title and entering a brief description. Use this space to provide information about the theme, mood, or inspiration behind the playlist.
- Create sections or folders: If your playlist is extensive, consider creating sections or folders to group similar songs together. This can be especially useful if your playlist covers different genres or moods. Simply create a new section or folder within your playlist and organize songs accordingly.
- Add artwork: Personalize your playlist by adding artwork. Click on the pencil icon next to the playlist title, select “Add Image,” and choose an image from your device or select one from the available options. This adds visual appeal and helps identify your playlist easily.
- Add tags: Use tags to categorize your playlist and make it easier to find. You can add tags such as “workout,” “relaxation,” “road trip,” or any other relevant labels. To add tags, click on the pencil icon next to the playlist title and enter the desired tags.
- Collaborate: If you’d like to have others contribute to your playlist, you can invite them to collaborate. Click on the three-dot menu next to the playlist title, select “Collaborate,” and share the invitation link with friends or family. They can then add songs to the playlist, making it a collective effort.
Remember to save your changes after organizing your playlist to ensure they are applied.
Organizing your playlist on Amazon Music allows you to create a personalized and seamless listening experience. Take the time to arrange your songs, add descriptions and artwork, and explore collaboration options to make your playlist truly unique.
Now that you know how to organize your playlist, go ahead and put your creative touch into play. Transform your collection of songs into a well-structured and satisfying musical journey.
Editing your playlist
Once you’ve created a playlist on Amazon Music, you have the flexibility to edit and fine-tune it to better reflect your musical preferences. Here are some key ways you can edit your playlist:
- Adding or removing songs: To add more songs to your playlist, search for the desired tracks and click the “+” or “Add” button to include them. If you want to remove a song, simply click on the three-dot menu next to the song and choose the “Remove from Playlist” option.
- Reordering songs: Change the order of your playlist by clicking on a song and dragging it to a new position. This allows you to create a flow and arrangement that enhances your listening experience.
- Editing song details: Click on the three-dot menu next to a song and select the “Edit Song Details” option. From there, you can modify the song title, artist name, album name, and other details to ensure accuracy and consistency.
- Renaming your playlist: If you want to change the name of your playlist, click on the pencil icon next to the playlist title and enter a new name that better represents the theme or mood of your collection.
- Adding descriptions: Provide more information about your playlist by adding a description. Click on the pencil icon next to the playlist title and enter a brief description that offers insights into the playlist’s theme, mood, or inspiration.
- Customizing playlist artwork: Add a personal touch to your playlist by selecting custom artwork. Click on the pencil icon next to the playlist title, choose “Add Image,” and either select an image from your device or choose one from the available options.
- Changing privacy settings: Adjust the privacy settings for your playlist to control who can view or collaborate on it. Click on the three-dot menu next to the playlist title, select “Edit Playlist Details,” and choose the desired privacy settings.
Remember to save your changes after editing your playlist to ensure they are applied.
Editing your playlist allows you to refine and curate the perfect collection of songs. Take advantage of the editing options available on Amazon Music to create a playlist that truly represents your musical taste and preferences.
Now that you know how to edit your playlist, unleash your creativity and make the necessary adjustments to make your musical collection even more enjoyable and personalized.
Collaborating on a playlist
One of the benefits of using Amazon Music is the ability to collaborate on playlists with friends, family, or fellow music enthusiasts. Collaborating on a playlist allows everyone to contribute their favorite songs, creating a diverse and inclusive collection. Here’s how you can collaborate on a playlist:
- Create a playlist: Start by creating a playlist and give it a name that reflects the theme or purpose of the collaboration.
- Invite collaborators: Click on the three-dot menu next to the playlist title and select the “Collaborate” option. Share the invitation link with desired collaborators either through email, messaging apps, or social media.
- Add songs: Each person with access to the playlist can add their favorite songs. They can search for the desired tracks, click on the “+” or “Add” button, and the songs will be added to the playlist.
- Reorder and organize: Collaborators can also rearrange or organize the songs in the playlist by dragging and dropping them into the desired order or creating sections or folders.
- Edit and modify: Collaborators can edit the playlist details, such as the title, description, and artwork, to ensure the playlist reflects the collective vision.
- Communicate and share: To enhance collaboration, use the playlist’s comment section or external communication channels to discuss song choices, provide feedback, and share thoughts on the playlist’s progression.
- Respect and diversity: Keep in mind that collaborating on a playlist means accepting and appreciating different music preferences. Embrace the diversity of choices and use it as an opportunity to explore new genres and artists.
- Update and evolve: As collaborators continue to discover new songs, the playlist can be updated and expanded over time. Encourage everyone to contribute regularly to keep the playlist fresh and dynamic.
Collaborating on a playlist is a fun way to engage with others and discover new music. It encourages sharing and bonding over a collective love of music, allowing everyone to contribute their unique taste and insights.
Remember to save any changes made to the playlist to ensure they are applied and visible to all collaborators.
Now that you know how to collaborate on a playlist with others, gather your friends, family, or fellow music enthusiasts, and create a playlist that represents the collective musical journey and celebrates the power of shared music experiences.
Sharing your playlist
Sharing your playlist with others allows you to spread the joy of music and connect with fellow music lovers. Whether you want to share your carefully crafted playlist with friends, family, or on social media, Amazon Music provides several options for sharing. Here’s how you can share your playlist:
- Direct link: Amazon Music allows you to generate a direct link to your playlist. Simply click on the three-dot menu next to the playlist title and select the “Share” option. Copy the link provided and share it with the intended recipients via email, messaging apps, or any other preferred communication method.
- Social media sharing: If you want to share your playlist on social media platforms like Facebook, Twitter, or Instagram, Amazon Music makes it easy. Click on the three-dot menu next to the playlist title and select the desired social media platform to automatically post a link to your playlist.
- Embedding: Amazon Music also provides the option to embed your playlist in websites or blogs. To do this, click on the three-dot menu next to the playlist title, select the “Embed” option, and follow the instructions to embed the playlist widget into your website or blog.
- Collaborative sharing: If you’ve collaborated on a playlist with others, you can all share the playlist collectively with your respective networks. Each collaborator can use the sharing options mentioned above, ensuring that the playlist reaches a wider audience.
- QR codes: Another way to share your playlist is by generating a QR code. Click on the three-dot menu next to the playlist title, select the “Get Playlist Code” option, and save or share the generated QR code. Others can scan the code using their smartphones to access the playlist directly.
Choose the sharing method that best suits your needs and preferences, considering the audience you want to reach and the platforms you prefer to engage with. Be mindful of any privacy settings you’ve set for your playlist and make adjustments accordingly before sharing.
Sharing your playlist is an excellent way to introduce others to new artists, genres, and songs. It’s an opportunity to connect, inspire, and bond over shared musical experiences.
Now that you know how to share your playlist, it’s time to spread the magic of music. Share your favorite playlist with others and let the power of music bring joy and inspiration to those around you.
Downloading playlists for offline listening
One of the convenient features of Amazon Music is the ability to download your playlists for offline listening. This means you can enjoy your favorite songs even when you don’t have an internet connection. Here’s how you can download playlists on Amazon Music:
- Open the Amazon Music app: Launch the Amazon Music app on your device, or go to the Amazon Music website in your browser and log in to your account.
- Select the playlist: Locate the playlist that you want to download from your collection. If you haven’t created the playlist yet, make sure to create one and add songs to it.
- Enable offline mode: Toggle the offline mode switch located next to the playlist. When the switch turns green, it indicates that the playlist is available for offline listening.
- Wait for the download: Amazon Music will begin downloading the playlist to your device. The time it takes to download depends on the size of the playlist and your internet connection speed. Once the download is complete, you can start enjoying your playlist offline.
- Access your offline playlist: To access your downloaded playlist, go to the “My Music” section in the app or website. Look for the “Offline Music” or “Downloads” tab, where you’ll find all the playlists and songs you’ve downloaded.
It’s important to note that downloaded playlists are stored locally on your device and can only be accessed through the Amazon Music app or website. They cannot be transferred or shared with other devices or platforms.
Remember to periodically check for updates to your downloaded playlists, as Amazon Music may remove songs or albums from their library, which could affect the availability of those songs in your offline playlist. Re-downloading the playlist ensures you have the most up-to-date versions of the songs.
Downloading playlists for offline listening provides the flexibility to enjoy your favorite music anytime, anywhere. It’s especially useful when you’re traveling, in areas with limited internet connectivity, or simply want to conserve data usage.
Now that you know how to download playlists on Amazon Music, start building your collection of offline-ready playlists and never miss a beat. Enjoy uninterrupted music wherever you go.
Deleting a playlist
If you no longer need a playlist or want to remove it from your collection, Amazon Music allows you to easily delete playlists. Deleting a playlist helps keep your library organized and decluttered. Here’s how you can delete a playlist on Amazon Music:
- Open the Amazon Music app: Launch the Amazon Music app on your device, or access the Amazon Music website in your browser and log in to your account.
- Locate the playlist: Find the playlist you want to delete from your collection. You can find your playlists under the “My Music” section.
- Access the playlist options: Click on the three-dot menu located next to the playlist title. This will open a dropdown menu with various options.
- Select “Delete Playlist”: Scroll down the options and choose the “Delete Playlist” option. You may be asked to confirm the deletion.
- Confirm deletion: If prompted, confirm the deletion by clicking “OK” or a similar option. This will permanently remove the playlist from your collection.
Once deleted, the playlist and its associated songs cannot be recovered. Make sure you are certain about deleting the playlist before confirming the action.
Deleting a playlist helps maintain an organized music library and makes it easier to manage your collection. It allows you to remove playlists that are no longer relevant or needed, creating space for new creations.
Remember that deleting a playlist only removes it from your account and does not affect the availability of the songs in Amazon Music’s library. Songs from the deleted playlist can still be found and added to other playlists or accessed individually.
Now that you know how to delete a playlist on Amazon Music, take control of your library and remove any playlists that no longer serve your needs. Keeping your collection tidy will make it easier to navigate and enjoy the music that matters most to you.