
What are Photoshop Brushes and Why Use Them in GIMP?
Photoshop brushes are a powerful tool used in graphic design and digital art to create various effects, textures, and patterns. They allow you to seamlessly apply different brush strokes, shapes, or designs to your artwork with just a click. Photoshop brushes come in a wide variety, enabling artists to experiment and explore their creativity.
When it comes to GIMP, a popular open-source image editing software, you might ask why use Photoshop brushes instead of native GIMP brushes? The answer lies in the extensive collection and versatility offered by Photoshop brushes. As Photoshop is widely used in the industry, there is a vast selection of high-quality brushes available for download.
By using Photoshop brushes in GIMP, you can access a diverse range of brush styles, including natural media brushes, grunge brushes, smoke brushes, splatter brushes, and much more. This opens up a whole new world of creative possibilities, allowing you to add unique and professional-looking effects to your artwork.
Additionally, Photoshop brushes are often designed with great attention to detail, providing realistic textures and intricate patterns. These brushes can significantly enhance the visual appeal of your artwork and save you valuable time in creating complex designs from scratch.
Furthermore, using Photoshop brushes in GIMP gives you the ability to achieve seamless compatibility between the two software. You can easily transfer and utilize your favorite brushes across platforms, eliminating the need to switch between different programs for specific effects.
Overall, incorporating Photoshop brushes into your GIMP workflow allows you to tap into a vast library of powerful and creative tools. Whether you are a professional designer or an aspiring artist, using Photoshop brushes in GIMP offers endless possibilities to elevate your artwork and bring your creative vision to life.
Finding and Downloading Photoshop Brushes
When it comes to finding and downloading Photoshop brushes, the internet is your best friend. There are several trusted websites and online communities dedicated to providing a wide range of free and premium Photoshop brushes. Here’s a step-by-step guide to help you find and download Photoshop brushes for use in GIMP:
- Start by searching on popular graphic design websites or platforms that offer Photoshop resources. Some reliable sources include Adobe’s official website, DeviantArt, Brusheezy, and Creative Market.
- Use the search bar or browse through the available categories to find the type of brushes you are looking for. Whether you need natural brushes, grunge brushes, or something more specific, these websites usually have a variety of categories to choose from.
- Once you find a set of brushes that catches your interest, click on the download button or follow the provided instructions to obtain the brush files. Most brushes are packaged as .ABR files (Adobe Brush Files) or .ZIP files.
- Be cautious when downloading from unfamiliar websites. Stick to reputable sources to ensure the brushes are of high quality and safe to use.
- After you’ve downloaded the brush files, navigate to the location where they were saved on your computer.
- Extract the contents of any .ZIP files using your preferred file extraction software.
- Now, you’re ready to install the Photoshop brushes in GIMP. Refer to the next section for detailed instructions on how to do this.
Remember, while there are many free brushes available, some websites also offer premium brushes for purchase. These premium brushes often provide even more intricate and unique designs. Consider supporting the creators by purchasing their premium brush sets if you find them valuable for your artwork.
By exploring various sources and downloading Photoshop brushes from reputable websites, you will have access to a wealth of creative tools that can enhance your GIMP workflow and take your designs to the next level.
Installing Photoshop Brushes in GIMP
Installing Photoshop brushes in GIMP is a straightforward process that allows you to harness the power of these brushes within the GIMP software. Follow these steps to install Photoshop brushes in GIMP:
- Open GIMP on your computer.
- If you have just downloaded a new brush set, make sure to extract the brush files from any .ZIP files.
- Locate the GIMP brush folder on your computer. The exact location of the brush folder depends on your operating system.
- For Windows: Navigate to “C:\Users\[Your Username]\.gimp-[Version]\brushes\”.
- For macOS: Go to “/Users/[Your Username]/Library/Application Support/GIMP/[Version]/brushes/”.
- For Linux: Find the folder “~/.gimp-[Version]/brushes/”.
- Copy the .ABR brush files or the extracted brush files from the downloaded set into the GIMP brush folder.
- Once the brush files are in the correct folder, close and reopen GIMP.
- To access your newly installed brushes, select the “Paintbrush” tool from the GIMP toolbox.
- In the brush options panel at the bottom of the GIMP window, click on the brush icon.
- In the brush selection dialogue box, you should see your newly installed Photoshop brushes alongside the default GIMP brushes.
- Select the brush you want to use, adjust the brush size and opacity as desired, and start painting or creating amazing effects in GIMP!
By following these simple steps, you can easily install Photoshop brushes in GIMP and expand your creative options. With a wide range of brushes at your disposal, you can explore new styles and techniques and elevate your artwork to new levels.
Using Photoshop Brushes in GIMP
Once you have installed Photoshop brushes in GIMP, you can unleash their creative potential and incorporate them into your digital artwork. Here’s how you can use Photoshop brushes in GIMP:
- Select the “Paintbrush” tool from the GIMP toolbox. It is represented by an icon resembling a paintbrush.
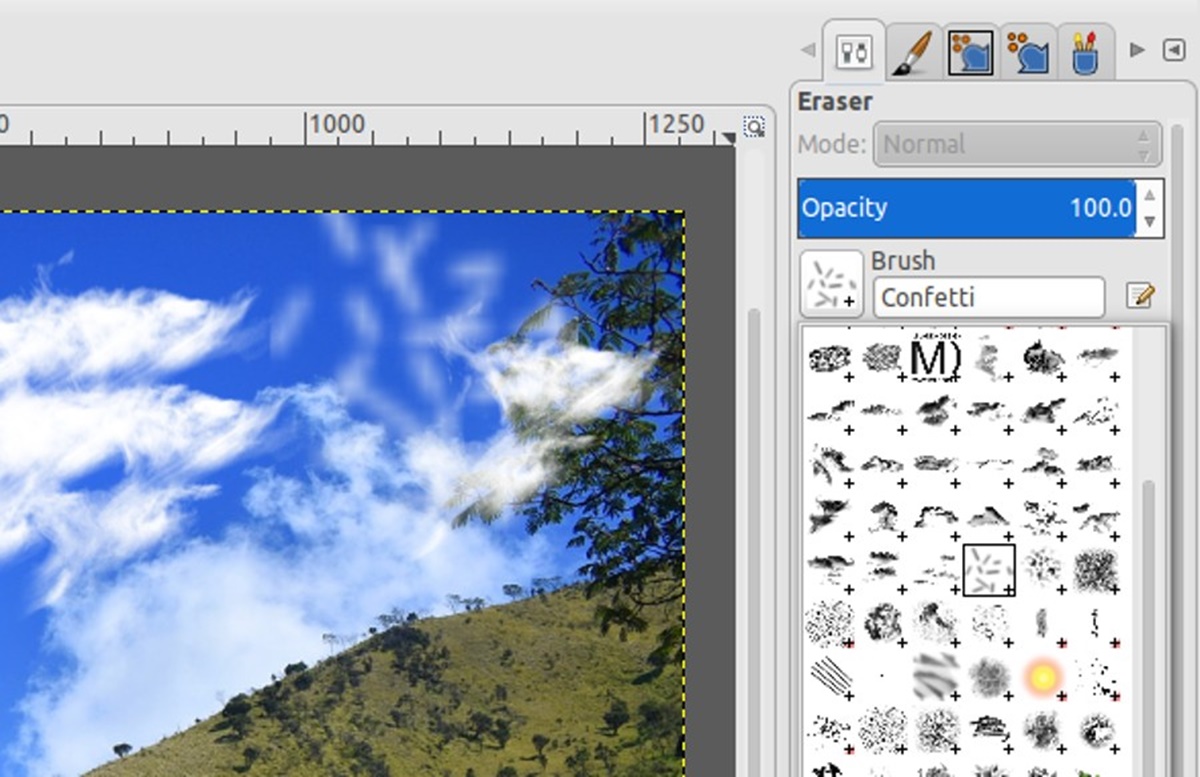
- In the brush options panel at the bottom of the GIMP window, click on the brush icon to open the brush selection dialogue box.
- Choose the desired brush from the available options. The brush preview will give you a glimpse of how it will look when applied to your artwork.
- Adjust the brush size using the “Size” slider. Increase the size for broader strokes or decrease it for more precise details.
- Set the brush opacity by adjusting the “Opacity” slider. Lower opacity will result in more transparent strokes, while higher opacity will create solid, opaque strokes.
- Choose a foreground color by clicking on the color swatch next to the brush options. This color will be applied when you paint with the selected brush.
- Click on the canvas and start painting with the Photoshop brush. Experiment with different strokes, pressures, and movements to achieve the desired effect.
- To switch between brushes, simply reopen the brush selection dialogue box and choose a different brush.
GIMP also offers additional options to fine-tune and customize Photoshop brushes. You can access these options by right-clicking on the canvas while using the brush tool and selecting “Brush Dynamics” in the context menu. Here, you can adjust parameters like brush spacing, scattering, and rotation to achieve more dynamic and varied brush effects.
By using Photoshop brushes in GIMP, you can enhance your digital artwork with unique textures, patterns, and designs. Whether you’re working on illustrations, photo editing, or graphic design projects, the diverse range of Photoshop brushes available for use in GIMP allows for endless creative possibilities.
Changing Brush Size and Opacity in GIMP
One of the benefits of using Photoshop brushes in GIMP is the ability to customize the brush size and opacity to fit your artistic vision. Here’s how you can change the brush size and opacity in GIMP:
Changing Brush Size:
- Select the “Paintbrush” tool from the GIMP toolbox.
- In the brush options panel at the bottom of the GIMP window, locate the “Size” slider.
- Drag the slider to the left to decrease the brush size or to the right to increase it.
- You can also manually enter a specific size value in the text field next to the slider.
- Observe the brush preview on the canvas as you adjust the size to see the changes in real-time.
By changing the brush size, you can create a range of stroke thicknesses, from broad strokes for filling areas to fine details for precise work.
Changing Brush Opacity:
- Select the “Paintbrush” tool from the GIMP toolbox.
- In the brush options panel at the bottom of the GIMP window, locate the “Opacity” slider.
- Drag the slider to the left to decrease the brush opacity or to the right to increase it.
- You can also manually enter a specific opacity value in the text field next to the slider.
- Observe the brush preview on the canvas as you adjust the opacity to see how transparent or opaque the strokes become.
By changing the brush opacity, you can achieve different levels of transparency and blending in your artwork. Lower opacity settings are useful for creating subtle shading or building up layers of color gradually, while higher opacity settings result in more solid and pronounced strokes.
Experimenting with different brush sizes and opacities allows you to achieve varied effects and control the overall look and feel of your artwork. By adjusting these parameters to suit your specific needs, you can bring your creative ideas to life in a precise and expressive manner.
Adjusting Brush Settings in GIMP
While using Photoshop brushes in GIMP, you have the flexibility to further customize and adjust various brush settings. These settings allow you to fine-tune your brush strokes and achieve specific effects. Here are some common brush settings that you can adjust in GIMP:
Brush Dynamics:
GIMP offers a range of brush dynamics that can be modified to control how the brush behaves when applied to the canvas. To access the brush dynamics settings, follow these steps:
- Select the “Paintbrush” tool from the GIMP toolbox.
- Right-click on the canvas to open the context menu.
- Select “Brush Dynamics” to open the brush dynamics window.
- Within the brush dynamics window, you can adjust various settings such as:
- Spacing: Controls the gap between individual brush marks. Increase the spacing for scattered brush strokes or decrease it for denser strokes.
- Scattering: Determines the randomness and dispersion of brush marks. Increase scattering for a more scattered effect or decrease it for more controlled placement.
- Rotation: Alters the angle at which the brush tip is applied. This is especially useful for creating natural and organic-looking strokes.
- Size: Allows you to vary the brush size dynamically based on factors such as pressure, speed, or randomness. This can add variations and dynamics to your brush strokes.
By adjusting these dynamics settings, you can achieve more natural and expressive brush strokes that mimic traditional painting techniques.
Additional Brush Options:
GIMP also provides additional options to tweak the behavior of Photoshop brushes. These options include:
- Hardness: Controls the edge sharpness of the brush. A high hardness value creates crisp, well-defined edges, while a lower value results in softer transitions.
- Brush Scaling: Allows you to scale the brush size uniformly. Scaling up the brush size increases its overall dimensions, while scaling it down reduces its size.
- Brush Aspect Ratio: Adjusts the ratio between the width and height of the brush. This can be useful when you want to create more elongated or flattened brush strokes.
- Brush Angle: Changes the angle at which the brush is positioned. Rotating the angle can help you achieve specific directional strokes or create interesting textural effects.
By exploring and experimenting with these additional brush options, you can further fine-tune the behavior and appearance of your Photoshop brushes in GIMP. This level of control allows you to create customized and unique brush strokes that align with your creative vision.
Creating Custom Brushes in GIMP
In addition to using pre-made Photoshop brushes in GIMP, you can also create your own custom brushes. This allows you to add a personal touch to your artwork and create brushes tailored to your specific needs. Here’s how you can create custom brushes in GIMP:
- Select the “Paintbrush” tool from the GIMP toolbox.
- Choose a brush tip shape that you want to use as the basis for your custom brush. You can select from the default GIMP brushes or import an image from your computer to use as the brush tip.
- To import an image as a brush, go to File > Open and choose the image you want to use.
- Select the entire image by pressing Ctrl+A (or Command+A on Mac).
- Copy the image by pressing Ctrl+C (or Command+C on Mac).
- Go back to the GIMP canvas and create a new image by clicking File > New. The dimensions of the new image will determine the brush size.
- Paste the image onto the new canvas by pressing Ctrl+V (or Command+V on Mac).
- Adjust the brush size and position the image as desired on the canvas.
- To save the custom brush, go to Edit > Define Brush. Give your brush a name and click “OK”.
Your custom brush is now saved and ready to use in GIMP!
You can access your custom brush by selecting the “Paintbrush” tool and opening the brush selection dialogue box. Your newly created brush should appear in the list of available brushes alongside the default brushes.
Creating custom brushes in GIMP allows you to utilize unique shapes or designs that are not available in standard brush sets. This gives you the freedom to add a personal touch to your artwork and create original textures or patterns.
Furthermore, GIMP provides additional options to further customize your custom brushes. You can adjust parameters such as spacing, scattering, rotation, and dynamics to tailor the behavior of the brush to your liking.
With the ability to create custom brushes, you have endless creative possibilities at your fingertips. Whether you want to replicate a specific texture, create a signature style, or explore new artistic expressions, custom brushes can add an extra level of creativity to your GIMP workflow.
Troubleshooting Common Issues with Photoshop Brushes in GIMP
While using Photoshop brushes in GIMP, you may encounter a few common issues. Understanding how to troubleshoot these issues will help ensure a smooth experience. Here are some solutions to common problems:
1. Incompatibility:
Sometimes, certain Photoshop brushes may not work seamlessly in GIMP due to compatibility issues. To resolve this, ensure that you download brushes specifically designed for use with GIMP or those that are compatible with both GIMP and Photoshop.
2. Brush Size and Opacity Issues:
If you encounter issues with brush size or opacity not adjusting as expected, check if dynamic brush settings are enabled. Open the brush dynamics window by right-clicking on the canvas and selecting “Brush Dynamics”. Make sure the desired options such as size or opacity are selected and configured correctly.
3. Brush Lag or Slow Performance:
If you experience performance issues or brush lag in GIMP while using Photoshop brushes, try reducing the brush size or simplifying the brush tip shape. Large, complex brushes may require more processing power and can cause lag. Additionally, close any unnecessary programs or processes running in the background to free up system resources.
4. Loading Brush Sets:
If you have downloaded a set of Photoshop brushes and are having trouble loading them into GIMP, check that the brush files are in the correct folder. Ensure the brush files have been extracted from any .ZIP files and copied into the designated GIMP brush folder (location varies depending on your operating system). Restart GIMP to ensure the brushes are recognized and available for use.
5. Compatibility with Different GIMP Versions:
Sometimes, brush compatibility can vary across different versions of GIMP. If you experience issues with brushes not working or behaving erratically, ensure that the brushes you downloaded are compatible with the version of GIMP you are using. It’s advisable to update to the latest version of GIMP for improved compatibility and performance.
6. Brush Spacing and Dynamics:
If you notice uneven or irregular brush strokes, check the brush spacing and dynamics settings. Some brushes may require specific spacing and dynamics configurations to optimize their appearance. Adjusting these settings can result in smoother and more consistent brush strokes.
By troubleshooting these common issues, you can overcome any hurdles and make the most out of using Photoshop brushes in GIMP. Remember to always use reliable and compatible brush sets and keep your software up to date to ensure optimum performance and creative flexibility.