
Choosing a Scanner
When it comes to choosing a scanner, it’s important to consider your specific needs and preferences. There are several factors to keep in mind before making a purchase. Here are some key points to consider:
- Type of Scanner: Scanners come in different types, such as flatbed scanners, sheet-fed scanners, and portable scanners. Each type has its own advantages and limitations, so determine which one suits your scanning requirements.
- Resolution: The scanner’s resolution determines the quality of the scanned images. Higher resolution scanners produce clearer and more detailed scans, which is particularly important for scanning photos or documents with small text.
- Scan Speed: Consider how quickly you need to scan your documents. If you have a high volume of documents to scan regularly, opting for a faster scanner can significantly improve your productivity.
- Compatibility: Ensure that the scanner you choose is compatible with your computer operating system. Most scanners are compatible with Windows and macOS, but it’s always wise to double-check.
- Connectivity: Decide whether you prefer a scanner that connects via USB, Wi-Fi, or both. USB connectivity provides a stable and direct connection, while Wi-Fi allows for more flexibility in scanner placement.
- Software Features: Consider the software that comes with the scanner. Look for features like optical character recognition (OCR), which can convert scanned documents into editable text, and automatic document feeders (ADF) for multi-page scanning.
By considering these factors, you can narrow down your options and make an informed decision when choosing a scanner. Remember to read reviews, compare prices, and visit local electronics stores to see the scanners in person before making your final choice. Now that you have a clearer understanding of what to look for, let’s move on to the next step – checking system compatibility.
Checking System Compatibility
Before purchasing a scanner, it’s crucial to ensure that it is compatible with your computer system. Here are some essential steps to check system compatibility:
- Operating System: Verify that the scanner supports your computer’s operating system. Whether you’re using Windows, macOS, or a Linux distribution, make sure that the scanner’s drivers and software are compatible.
- Hardware Requirements: Check the scanner’s minimum hardware requirements. This includes processor speed, RAM, and available disk space. Ensure that your computer meets or exceeds these requirements for optimal performance.
- Interface Compatibility: Determine how the scanner connects to your computer. Most scanners use USB, but some models may offer additional connectivity options such as Wi-Fi or Ethernet. Ensure that your computer has the appropriate ports or wireless capabilities.
- Driver Availability: Check if the scanner’s manufacturer provides up-to-date drivers for your operating system. It’s important to have access to the latest drivers to ensure compatibility and to benefit from any improvements or bug fixes.
- Software Compatibility: Consider the software you intend to use for scanning. Ensure that the scanner’s software is compatible with your preferred scanning applications, image editing programs, or document management systems.
By thoroughly checking system compatibility, you can avoid any potential issues or frustrations that may arise from incompatible hardware and software. It’s essential to do your research and verify compatibility before making a purchase. Once you’ve confirmed that the scanner is compatible with your system, it’s time to gather the necessary materials for installation. Let’s move on to the next section and see what you’ll need.
Gathering Necessary Materials
Before you can begin setting up your scanner, it’s important to gather all the necessary materials. Here’s a checklist of items you’ll need:
- Scanner: Of course, you’ll need the scanner itself. Make sure you have the correct model and ensure that it is in good working condition.
- Power Cord: Most scanners require a power source, so make sure you have the power cord that came with the scanner. Check if it has any specific voltage requirements.
- USB Cable: If your scanner connects to your computer via USB, you’ll need a USB cable. Ensure that it is long enough to reach your computer comfortably.
- Installation CD or Download Link: Check if your scanner comes with an installation CD that contains the necessary drivers and software. Alternatively, you may need to download these files from the manufacturer’s website.
- Quick Start Guide or Manual: It’s always a good idea to have the scanner’s user manual or quick start guide on hand. These documents provide valuable instructions and troubleshooting tips.
- Cleaning Supplies: Depending on the type of scanner you have, you may need cleaning supplies to keep it in optimal condition. This can include lint-free cloths, cleaning solutions, or compressed air.
Make sure to double-check the contents of the scanner package and gather any additional materials mentioned in the user manual. Having all the necessary materials upfront will help streamline the setup process and prevent any delays or frustrations. With the materials gathered, you’re ready to move on to the next step – setting up the scanner hardware. Keep reading to learn how to do it.
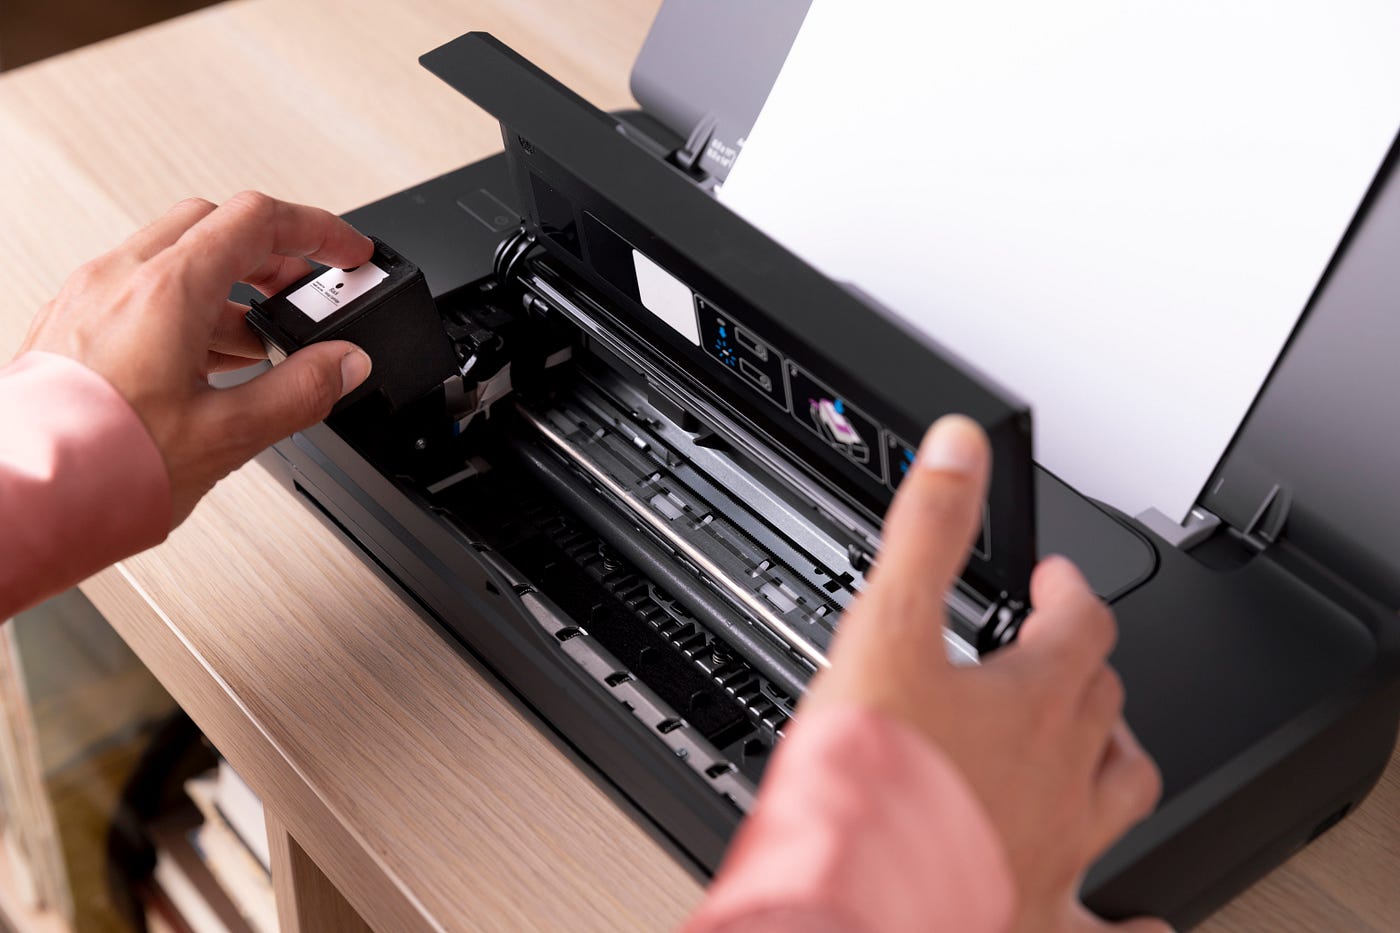
Setting Up the Scanner Hardware
Now that you have all the necessary materials, it’s time to set up the scanner hardware. Follow these steps to get your scanner ready for use:
- Choose a Suitable Location: Find a suitable location for your scanner. Ensure that there is enough space for the scanner to operate and that it is easily accessible.
- Unpack the Scanner: Carefully unpack the scanner from its packaging, making sure to remove any protective tapes or foam inserts. Check for any visible damage that may have occurred during shipping.
- Place the Scanner: Position the scanner on a flat and stable surface. Avoid placing it near heat sources or in direct sunlight, as it may affect the scanner’s performance and longevity.
- Connect the Power Cord: Plug one end of the power cord into the scanner and the other end into a power outlet. Ensure that the power cord is securely connected.
- Connect the USB Cable: If your scanner connects via USB, plug one end of the USB cable into the scanner and the other end into an available USB port on your computer. Make sure the connection is secure.
- Power On the Scanner: Press the power button on the scanner to turn it on. Wait for the scanner to initialize and perform any startup processes. Refer to the user manual if any specific instructions are required.
- Check Indicator Lights: Look for any indicator lights on the scanner panel. These lights indicate various status conditions, such as power, connectivity, and error notifications. Consult the manual for their meanings.
Once you have completed these steps, the scanner hardware should be set up and ready to use. However, before you can start scanning, you’ll need to install the scanner software. We’ll cover that in the next section. Keep reading!
Connecting the Scanner to the Computer
After setting up the scanner hardware, the next step is to connect the scanner to your computer. Follow these steps to establish the connection:
- Ensure Scanner Power On: Confirm that the scanner is powered on and ready to connect to the computer.
- Insert USB Cable: Take the USB cable that came with the scanner and insert one end into the USB port on the scanner. Ensure that the connection is secure.
- Connect USB Cable to Computer: Plug the other end of the USB cable into an available USB port on your computer. Make sure the connection is firm.
- Driver Installation: Once the scanner is connected, your computer should recognize it as a new device. In many cases, the operating system will automatically install the necessary drivers. If not, you may need to install the drivers manually from the installation CD or download them from the manufacturer’s website.
- Wait for Driver Installation: Depending on your computer and the scanner model, the driver installation process may take a few moments. Be patient and allow the computer to complete the installation without interruption.
- Confirm Connection: Once the driver installation is complete, double-check the scanner’s connection by launching a scanning application or software. The scanner should be detected and ready for use.
It’s important to ensure a secure and stable connection between the scanner and computer to avoid any interruption during scanning. If you encounter any issues with the connection, refer to the scanner’s user manual or consult the manufacturer’s support resources for troubleshooting steps.
Now that you have successfully connected your scanner to the computer, it’s time to install the required scanning software. The next section will guide you through the installation process. Let’s move on!
Installing Scanner Software
Once you have connected the scanner to your computer, the next step is to install the scanner software. This software allows you to control and manage the scanning process. Follow these steps to install the scanner software:
- Check Installation CD: If your scanner came with an installation CD, insert it into your computer’s CD/DVD drive. The installation process should start automatically. If the installation does not start, you can manually open the CD and launch the setup file.
- Download Software: If you don’t have an installation CD or prefer to download the software, visit the scanner manufacturer’s website. Look for the support or downloads section and locate the appropriate software for your scanner model and operating system.
- Follow Installation Wizard: Once you have the installation file, run it on your computer. This will launch the installation wizard. Follow the on-screen instructions to proceed with the installation.
- Select Installation Options: During the installation process, you may have the option to choose specific components or features to be installed. Select the necessary options based on your preferences and requirements.
- Accept License Agreement: In order to proceed with the installation, you will need to accept the software’s license agreement. Read the agreement carefully and click on the appropriate button to accept.
- Complete Installation: The installation process may take a few minutes to complete. Once finished, you may be prompted to restart your computer. Follow any additional instructions provided by the installation wizard.
- Test Scanner Software: After the installation is complete, launch the scanner software to ensure that it is working properly. Familiarize yourself with the different features and settings available to optimize your scanning experience.
It’s worth noting that some scanners may not require separate software installation, as they are plug-and-play devices. In such cases, the necessary drivers and software may already be included in your computer’s operating system.
With the scanner software successfully installed, you are one step closer to scanning your documents and images. In the next section, we will explore how to calibrate the scanner for optimal results. Keep reading!
Calibrating the Scanner
Calibrating your scanner is an important step to ensure accurate and high-quality scans. Calibration helps the scanner optimize color accuracy, contrast, and image clarity. Follow these steps to calibrate your scanner:
- Open Scanner Software: Launch the scanner software on your computer. If the software is already open, make sure you are on the main scanning interface or settings page.
- Locate Calibration Option: Look for the calibration option within the scanning software. It is usually found in the settings or maintenance section. The exact location may vary depending on the software and scanner model you are using.
- Follow On-Screen Instructions: Once you have found the calibration option, click on it to start the process. Follow the instructions provided by the software. This may involve placing a calibration sheet on the scanner bed or performing a series of actions as directed.
- Wait for Calibration: Allow the scanner to complete the calibration process. This may take a few minutes depending on the scanner model. Avoid interrupting the process or turning off the scanner during calibration.
- Perform Test Scan: After the calibration is complete, perform a test scan using a sample document or image. This will allow you to evaluate the quality of the scanned output and make any necessary adjustments in the software’s settings.
- Make Fine-Tuning Adjustments: If you notice any issues with the scanned output, such as color inaccuracies or skewing, you can make fine-tuning adjustments within the scanner software. Refer to the software’s user manual or help documentation for guidance on adjusting specific settings.
It’s important to note that not all scanners require manual calibration. Some models may have automatic calibration features that continuously monitor and adjust scan settings as needed. In such cases, the software will handle the calibration process automatically.
By calibrating your scanner, you can ensure that your scanned documents and images are of the highest quality, with accurate colors and optimal clarity. With the scanner properly calibrated, you are now ready to test its functionality in the next section. Keep reading!
Testing the Scanner
After setting up and calibrating your scanner, it’s crucial to test its functionality to ensure that it is working properly. Follow these steps to conduct a test scan:
- Prepare Test Document: Gather a sample document or image that you would like to scan. It can be a plain document, a photo, or any other material that represents what you will be scanning in the future.
- Place Document on Scanner Bed: Open the scanner lid and carefully place the test document face-down on the scanner bed. Align it according to the scanner’s guidelines for proper positioning.
- Set Scan Settings: Launch the scanner software on your computer. Choose the appropriate scan settings based on your requirements. This may include selecting the desired file format, resolution, color mode, and other specific settings.
- Initiate Scanning: Click on the “Scan” or similar button within the software interface to start the scanning process. The scanner will begin scanning the document according to the selected settings.
- Review Scanned Output: Once the scan is complete, the scanned image or document will be displayed on your computer screen. Take a close look at the scanned output to ensure that it meets your expectations in terms of quality, clarity, color accuracy, and alignment.
- Make Adjustments, if Necessary: If you notice any issues with the scanned output, such as blurriness, incorrect colors, or improper alignment, you may need to adjust the scan settings or make adjustments within the scanner software. Refer to the software’s user manual or help documentation for guidance on fine-tuning the settings.
- Repeat the Test: If necessary, make the required adjustments and repeat the test scan to evaluate the changes. Continue this process until you are satisfied with the quality of the scanned output.
Testing the scanner allows you to ensure that it is functioning correctly and producing high-quality scans. It also gives you the opportunity to become familiar with the scanner software’s features and settings, enabling you to achieve the desired results in future scanning tasks.
If you encounter any issues or problems during the testing process, refer to the scanner’s user manual or contact the manufacturer’s customer support for assistance. They can provide specific troubleshooting steps to resolve any issues you may encounter.
With the scanner successfully tested and functioning properly, you are now ready to begin your scanning tasks efficiently. However, it’s important to be prepared for potential issues that may arise. The next section will cover some common troubleshooting tips that can help you resolve any scanner-related problems. Keep reading!
Troubleshooting Common Issues
While scanners are generally reliable devices, you may encounter some common issues during their operation. Here are some troubleshooting tips to help you resolve common scanner-related problems:
- Poor Scan Quality: If the scanned images appear blurry, grainy, or faded, check the scanner glass for smudges or debris. Clean it with a soft, lint-free cloth and consider adjusting the scan settings for improved clarity.
- Scanner Not Detected: If your computer does not recognize the scanner, verify that the connections are secure and the device is properly powered on. Try connecting the scanner to a different USB port or restarting your computer.
- Scanner Jamming: If the scanner frequently jams or misfeeds papers, ensure that the paper guides are properly aligned and the tray is not overfilled. Clean the paper feed rollers with a damp cloth and adjust the settings for paper thickness if necessary.
- Software Compatibility Issues: If the scanner software is not functioning correctly or crashes frequently, check for software updates from the manufacturer’s website. Ensure that the software is compatible with your operating system and any other relevant software applications.
- Slow Scanning Speed: If the scanning process is slower than expected, consider adjusting the scan settings to a lower resolution or utilizing the scanner’s fast scan mode if available. You may also need to optimize your computer’s performance by closing unnecessary applications or freeing up system resources.
- Driver Issues: If you encounter driver-related problems, uninstall the scanner software and reinstall it using the latest drivers from the manufacturer’s website. Ensure that the drivers are compatible with your operating system.
- Scan Distortion or Skewing: If the scanned images appear distorted or skewed, make sure that the documents are properly aligned on the scanner bed. Check for any obstructions or debris that may be affecting the scanning process. Adjust the paper guides if necessary.
If you encounter persistent issues that cannot be resolved using these troubleshooting tips, consult the scanner’s user manual or contact the manufacturer’s customer support for further assistance. They can provide more specific guidance based on your scanner’s model and circumstances.
By familiarizing yourself with these common issues and their troubleshooting solutions, you can overcome challenges that may arise during scanning tasks and ensure a smooth scanning experience.
Now that you are equipped with troubleshooting knowledge, let’s move on to some tips for maximizing scanning efficiency in the next section. Keep reading!
Tips for Scanning Efficiency
Scanning efficiency is crucial for saving time and optimizing productivity. Here are some helpful tips to enhance your scanning process:
- Organize Your Documents: Before scanning, organize your documents and papers in a systematic manner. Group similar documents together to streamline the scanning process and prevent any unnecessary delays or confusion.
- Utilize Batch Scanning: If you have multiple documents to scan, take advantage of the batch scanning feature, if available. This allows you to scan multiple pages in a single scan, saving time and effort.
- Optimize Scan Settings: Customize the scan settings to suit the specific requirements of your documents. Adjust the resolution, file format, and color mode to balance image quality and file size, depending on the purpose of the scan.
- Use Automatic Document Feeders (ADFs): If your scanner is equipped with an automatic document feeder, utilize it for faster and more efficient scanning of multi-page documents. ADFs can save you valuable time by automatically feeding and scanning each page without manual intervention.
- Remove Staples and Paper Clips: To avoid damaging your scanner or documents, remove any staples or paper clips before scanning. They can cause paper jams or scratches, affecting the quality and efficiency of the scanning process.
- Regularly Clean the Scanner: Clean your scanner on a regular basis to maintain optimal performance. Use a soft, lint-free cloth and non-abrasive cleaning solutions to remove dust, smudges, and debris from the scanner glass and paper feed rollers.
- Preview Scans: Take advantage of the preview feature in your scanning software to review the scanned image before saving. This allows you to make any necessary adjustments to cropping, rotation, or image settings to ensure the final scan meets your requirements.
- Organize Scanned Files: Develop a proper filing system to organize your scanned files. Create folders and subfolders with meaningful names to easily locate and retrieve scanned documents later. Consider using descriptive filenames for your scanned files as well.
- Backup Scanned Files: It’s important to back up your scanned files regularly. Store them in multiple locations, such as external hard drives, cloud storage, or network servers, to prevent accidental loss or damage to your scanned documents.
By following these tips, you can enhance scanning efficiency, save time, and ensure accurate and organized digital documents. Remember to adapt these tips to your specific scanning needs and explore any additional features or capabilities offered by your scanner and scanning software.
With these efficiency tips in mind, you are now well-equipped to make the most out of your scanning tasks. Enjoy an efficient and productive scanning experience!