
Getting Started
Welcome to the world of barcode scanners! These handy devices are essential for streamlining your business operations and improving productivity. Whether you run a retail store, warehouse, or healthcare facility, connecting a barcode scanner to your computer can greatly simplify inventory management and data entry tasks. In this guide, we’ll walk you through the process of getting started with a barcode scanner.
Before diving into the technical details, it’s important to note that there are different types of barcode scanners available on the market. The two main categories are handheld scanners and fixed-mount scanners, each designed for specific use cases. Handheld scanners are portable and can be used to scan barcodes from various angles, while fixed-mount scanners are stationary and are often used in settings where products move along a conveyor belt.
To ensure compatibility and ease of use, it’s recommended to opt for a handheld barcode scanner for connecting to your computer. These scanners typically come in three different connectivity options: USB, wireless, and Bluetooth.
If you prefer a wired connection, a USB barcode scanner is the most commonly used option. It simply requires plugging the USB cable into an available port on your computer. Wireless barcode scanners offer more flexibility, allowing you to move around without a physical connection to your computer. These scanners use a wireless receiver that needs to be connected to your computer’s USB port.
For even more flexibility and mobility, Bluetooth barcode scanners are the way to go. They can connect to your computer via Bluetooth wireless technology, eliminating the need for any physical cables. Bluetooth barcode scanners are ideal for situations where you need to move around freely while scanning barcodes.
Now that you have a basic understanding of the different types of barcode scanners available, it’s time to move on to the next step: installing the necessary drivers on your computer. In the following sections, we’ll guide you through the specific steps for each type of barcode scanner, ensuring a smooth and hassle-free setup process.
Types of Barcode Scanners
Barcode scanners come in a variety of types, each suited for different purposes and environments. Understanding the different types will help you choose the right one for your specific needs. Here are the most common types of barcode scanners:
- 1D Barcode Scanners: These scanners are designed to read traditional 1D barcodes, also known as linear barcodes. They read barcodes with vertical lines of varying thickness. 1D barcode scanners are widely used in retail, warehouses, and healthcare to scan product barcodes, track inventory, and process transactions quickly and efficiently.
- 2D Barcode Scanners: Unlike 1D barcode scanners, 2D barcode scanners can read both 1D and 2D barcodes. 2D barcodes consist of square patterns, and they can store more information compared to traditional 1D barcodes. These scanners are commonly used in industries such as transportation, logistics, and healthcare, where more complex data needs to be captured.
- Fixed-Mount Barcode Scanners: Fixed-mount barcode scanners are designed to be installed in a fixed position, such as on a conveyor belt or a production line. They automatically scan barcodes as products pass by, eliminating the need for manual scanning. Fixed-mount scanners are commonly used in manufacturing and logistics environments for high-volume scanning.
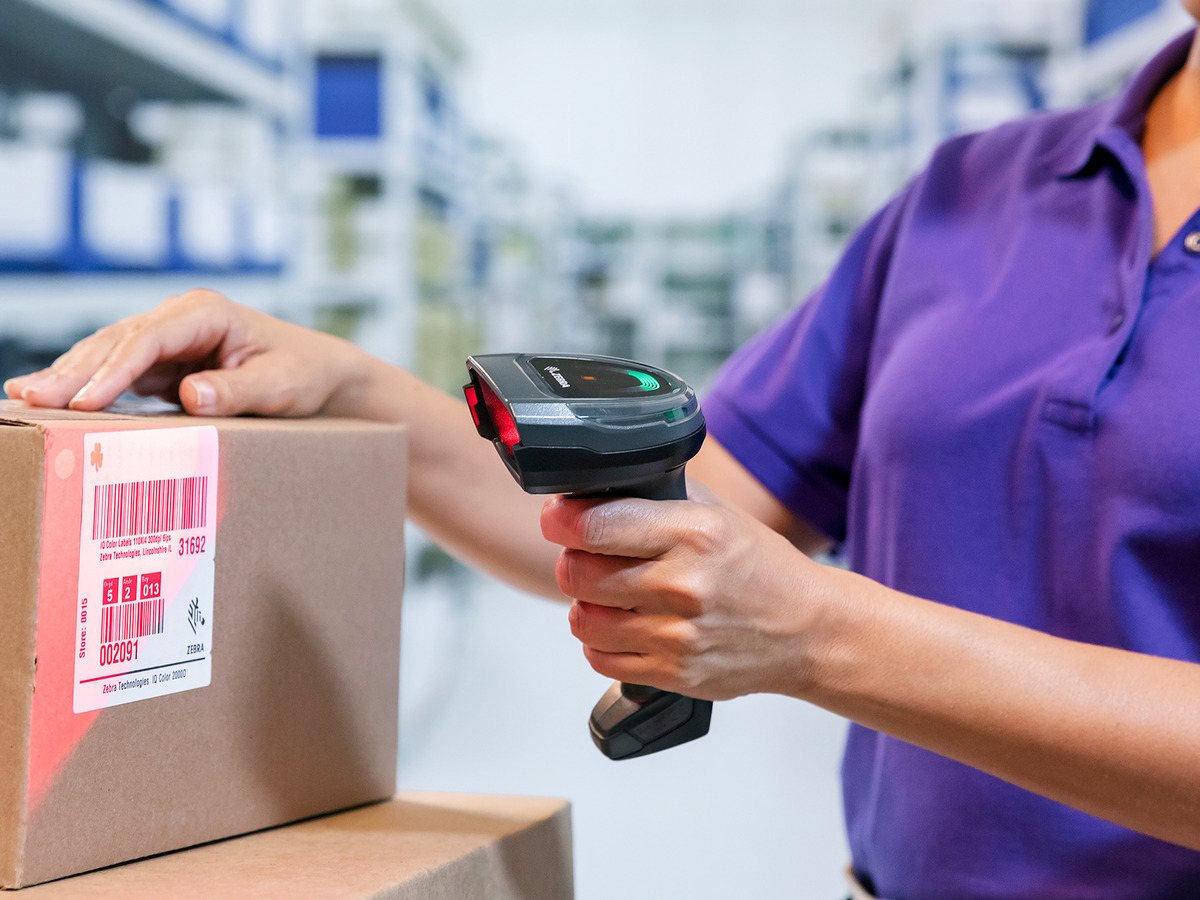
- Handheld Barcode Scanners: Handheld barcode scanners are portable devices that can be held in your hand. They allow you to scan barcodes from various angles and distances. Handheld scanners offer flexibility and ease of use, making them suitable for a wide range of applications, including retail, inventory management, and ticketing.
- Wireless Barcode Scanners: Wireless barcode scanners, as the name suggests, operate without the need for a physical connection to a computer or terminal. They use radio frequency (RF) technology to transmit scan data wirelessly to a receiver connected to the computer. Wireless barcode scanners provide freedom of movement and are ideal for situations where mobility is required.
- Bluetooth Barcode Scanners: Bluetooth barcode scanners are a type of wireless scanner that connects to a computer or mobile device via Bluetooth technology. They offer the convenience of wireless scanning without the need for a dedicated receiver. Bluetooth barcode scanners are popular in retail, healthcare, and inventory management, allowing users to move around freely while staying connected.
Now that you’re familiar with the different types of barcode scanners, you can choose the one that best suits your specific requirements. Remember to consider factors such as the scanning capabilities, connectivity options, and the environment in which the scanner will be used. With the right barcode scanner, you can streamline your operations and improve efficiency in no time.
USB Barcode Scanners
USB barcode scanners are the most commonly used type of barcode scanners due to their simplicity and ease of use. These scanners are connected to your computer via a USB cable, making the setup process quick and straightforward. Here’s a step-by-step guide on how to connect a USB barcode scanner to your computer:
- Check Compatibility: Before purchasing a USB barcode scanner, ensure that it is compatible with your computer’s operating system. Most USB scanners are plug-and-play, meaning they do not require additional drivers for basic functionality.
- Power Off Your Computer: Before connecting the barcode scanner, it’s recommended to power off your computer to avoid any potential issues.
- Locate an Available USB Port: Identify an available USB port on your computer. USB ports are typically found on the front and back of desktop computers and on the sides of laptops.
- Connect the USB Cable: Plug one end of the USB cable into the USB port on your computer and the other end into the USB port on the barcode scanner.
- Power On Your Computer: Once the USB cable is connected, power on your computer.
- Test the Connection: Open a text editor or spreadsheet application on your computer and scan a barcode. The scanner should read the barcode and input the data into the application.
- Adjust Scanner Settings: Some USB scanners allow you to customize settings such as scanning mode and prefixes/suffixes. Refer to the scanner’s manual for instructions on adjusting these settings if needed.
That’s it! You have successfully connected your USB barcode scanner to your computer. The scanner is now ready to scan and input barcodes into any application or software that accepts keyboard input. USB barcode scanners are versatile and widely compatible, making them a popular choice for businesses of all sizes.
It’s important to note that if the scanner is not functioning properly, you may need to install specific drivers provided by the manufacturer. However, in most cases, USB barcode scanners should work seamlessly without the need for additional drivers.
Now that you know how to connect a USB barcode scanner to your computer, you can start enjoying the benefits of efficient barcode scanning in your business operations. Whether it’s streamlining inventory management or speeding up data entry, a USB barcode scanner is a valuable tool that improves productivity and accuracy.
Wireless Barcode Scanners
Wireless barcode scanners offer flexibility and mobility by eliminating the need for a physical connection to your computer or terminal. These scanners use radio frequency (RF) technology to transmit scan data wirelessly to a receiver connected to the computer. Here’s a step-by-step guide on how to connect a wireless barcode scanner:
- Choose the Right Receiver: Wireless barcode scanners come with a receiver that needs to be connected to your computer. Some scanners use a USB dongle as the receiver, while others may have a Bluetooth-enabled receiver. Make sure to select the appropriate receiver for your computer’s connectivity options.
- Power Off Your Computer: Before connecting the receiver, power off your computer to avoid any potential issues.
- Locate an Available USB Port: If your wireless barcode scanner uses a USB dongle as the receiver, locate an available USB port on your computer to plug in the dongle. USB ports are typically found on the front and back of desktop computers and on the sides of laptops.
- Connect the Receiver: Plug the receiver into the USB port on your computer. If your scanner uses a Bluetooth-enabled receiver, follow the manufacturer’s instructions to pair it with your computer.
- Power On Your Computer: Once the receiver is connected, power on your computer.
- Pair the Scanner with the Receiver: Follow the scanner’s manual to pair it with the receiver. This usually involves scanning a specific barcode or pressing a combination of buttons on the scanner.
- Test the Connection: Open a text editor or spreadsheet application on your computer and scan a barcode. The scanner should read the barcode and input the data into the application.
- Adjust Scanner Settings: Similar to USB scanners, wireless scanners may have settings that can be customized. Refer to the scanner’s manual for instructions on adjusting the settings if needed.
Congratulations! You have successfully connected your wireless barcode scanner to your computer. You can now enjoy the freedom of scanning barcodes without the constraints of a physical connection. Wireless barcode scanners are particularly beneficial in environments where mobility is important, such as warehouses, retail stores, and healthcare facilities.
It’s worth noting that the range of wireless barcode scanners can vary, so it’s important to stay within range of the receiver for optimal performance. Additionally, ensure that the batteries in the scanner are fully charged or replaced when needed to maintain reliable wireless connectivity.
With a wireless barcode scanner, you can efficiently scan barcodes from various angles and distances, improving productivity and accuracy in your business operations. Whether you need to track inventory, process transactions, or manage assets, a wireless barcode scanner provides the flexibility you need to streamline your workflows.
Bluetooth Barcode Scanners
Bluetooth barcode scanners offer the convenience of wireless scanning without the need for a dedicated receiver. These scanners connect directly to your computer or mobile device via Bluetooth technology, allowing you to move around freely while staying connected. Here’s a step-by-step guide on how to connect a Bluetooth barcode scanner:
- Turn On Bluetooth: Ensure that the Bluetooth function is enabled on your computer or mobile device. Refer to the device’s settings to enable Bluetooth if it’s not already turned on.
- Put the Scanner in Pairing Mode: Follow the instructions provided by the scanner’s manufacturer to put it in pairing mode. This typically involves pressing a combination of buttons or scanning a specific barcode.
- Scan for Devices: On your computer or mobile device, scan for Bluetooth devices. The scanner should appear in the list of available devices.
- Select the Scanner: Select the scanner from the list of available Bluetooth devices on your computer or mobile device.
- Pair the Scanner: Follow the on-screen instructions to pair the scanner with your computer or mobile device. This may involve entering a passkey or confirming a PIN.
- Test the Connection: Open a text editor or a barcode scanning application on your computer or mobile device. Scan a barcode using the scanner, and the data should be inputted into the application.
- Adjust Scanner Settings: If necessary, refer to the scanner’s manual to customize settings such as scanning mode or prefix/suffix options.
Great! You have successfully connected your Bluetooth barcode scanner to your computer or mobile device. Now you can enjoy the freedom of wireless scanning without the constraints of physical cables. Bluetooth barcode scanners are especially useful in environments where mobility is required, such as retail stores, warehouses, and field operations.
It’s important to maintain a stable Bluetooth connection by staying within the recommended range of the scanner and your computer or mobile device. Additionally, ensure that the scanner’s battery is charged to avoid interruptions in scanning.
With a Bluetooth barcode scanner, you can efficiently scan barcodes on the go, improving productivity and accuracy in your daily tasks and workflows. Whether you’re conducting inventory management, processing sales transactions, or tracking assets, a Bluetooth barcode scanner offers the convenience and flexibility you need.
Installing Drivers
While most USB barcode scanners are plug-and-play, meaning they can be used without additional drivers, some scanners may require specific drivers to be installed for full functionality. Here’s a step-by-step guide on how to install drivers for your barcode scanner:
- Check Scanner Manufacturer’s Website: Visit the website of the barcode scanner manufacturer to find the necessary drivers. Look for a “Support” or “Downloads” section on their website.
- Identify Your Scanner Model: Locate the model number or name of your scanner. This information is usually found on the scanner itself or in the user manual.
- Download the Drivers: Find the appropriate drivers for your scanner model and download them to your computer. Make sure to select the drivers compatible with your computer’s operating system.
- Unzip/Extract the Driver Files: If the driver files are compressed in a ZIP or RAR format, use a file compression tool like WinZip or WinRAR to extract the driver files.
- Install the Drivers: Run the installer file (.exe or .msi) for the barcode scanner drivers. Follow the on-screen instructions to complete the installation process. During the installation, you may be prompted to connect the scanner to your computer.
- Restart Your Computer: Once the drivers are installed, it’s recommended to restart your computer to ensure the changes take effect.
- Test the Scanner: After restarting your computer, open a text editor or a barcode scanning application and test the scanner by scanning a barcode. The scanner should read the barcode and input the data into the application.
If you encounter any issues during the driver installation process, consult the scanner’s user manual or visit the manufacturer’s support page for troubleshooting guidance. They may have FAQ sections or forums where you can find solutions to common issues.
It’s important to keep your scanner drivers up-to-date to ensure compatibility and optimal performance. Periodically check the manufacturer’s website for any updated drivers or firmware for your barcode scanner model.
By following these steps and installing the necessary drivers, you can ensure that your barcode scanner functions properly and provides all the features and capabilities it offers.
Connecting with USB
Connecting a barcode scanner to your computer via USB is a simple and straightforward process. Here’s a step-by-step guide on how to connect a barcode scanner using a USB cable:
- Power off your computer: Before connecting the barcode scanner, it’s recommended to power off your computer to avoid any potential issues.
- Locate an available USB port: Identify an available USB port on your computer. USB ports are typically found on the front and back of desktop computers, and on the sides of laptops.
- Connect the USB cable: Plug one end of the USB cable into the USB port on your computer and the other end into the USB port on the barcode scanner. Some scanners have more than one USB ports – make sure to connect the cable to the correct port.
- Power on your computer: Once the USB cable is connected, power on your computer.
- Install necessary drivers: In most cases, USB barcode scanners are plug-and-play, meaning they do not require additional drivers for basic functionality. However, if your scanner requires specific drivers for advanced features, follow the manufacturer’s instructions to install them on your computer.
- Test the connection: Open a text editor or a spreadsheet application on your computer and position the barcode scanner in front of a barcode. Aim the scanner at the barcode and press the trigger button (if applicable). The scanner should read the barcode and input the data into the application.
- Adjust scanner settings: Depending on the barcode scanner model, you may have the option to customize settings such as the scanning mode or the behavior of function keys. Refer to the scanner’s user manual for instructions on adjusting these settings.
That’s it! You have successfully connected your barcode scanner to your computer using a USB cable. The scanner is now ready to use, and you can start scanning barcodes for various purposes, such as inventory management, product identification, or processing transactions.
If, for any reason, the scanner is not functioning properly, ensure that the USB cable is securely connected and try connecting it to a different USB port on your computer. If the issue persists, refer to the scanner’s user manual or contact the manufacturer’s support for further assistance.
USB barcode scanners are widely compatible and offer a reliable connection for efficient barcode scanning. Whether you’re running a retail store, warehouse, or healthcare facility, a USB barcode scanner is a valuable tool that helps streamline operations and improve productivity.
Connecting with Wireless or Bluetooth
Connecting a barcode scanner wirelessly, whether through a wireless receiver or Bluetooth technology, offers flexibility and convenience. Here’s a step-by-step guide on how to connect a wireless barcode scanner:
- Choose the right receiver: For wireless barcode scanners that use a wireless receiver, locate the receiver that comes with your scanner. The receiver is a small device that connects to your computer via USB. If your scanner uses Bluetooth technology, ensure that Bluetooth is enabled on your computer or device.
- Power off your computer or device: Before connecting the wireless receiver or enabling Bluetooth, power off your computer or device to avoid any conflicts or connection issues.
- Locate an available USB port: If your wireless barcode scanner uses a wireless receiver, find an available USB port on your computer and insert the receiver. For scanners that use Bluetooth, verify that Bluetooth is turned on and in discoverable mode on your computer or device.
- Power on your computer or device: Once the wireless receiver is connected or Bluetooth is enabled, power on your computer or device.
- Pair the barcode scanner with the receiver or device: Refer to the scanner’s manual for specific instructions on how to pair it with the wireless receiver or your Bluetooth-enabled device. This typically involves pressing a button or scanning a barcode to establish the connection.
- Test the connection: Open a text editor or a spreadsheet application on your computer or device. Position the barcode scanner in front of a barcode and press the trigger button (if applicable). The scanner should read the barcode and input the data into the application.
- Adjust scanner settings: Depending on the barcode scanner model, you may have the option to customize settings such as the scanning mode or the behavior of function keys. Consult the scanner’s user manual or manufacturer’s instructions for guidance on adjusting these settings.
Congratulations! You have successfully connected your wireless barcode scanner to your computer or device. Now you can benefit from the freedom of movement and flexibility that wireless connectivity offers.
It’s important to ensure that you are within range of the wireless receiver or Bluetooth connection to maintain a stable connection. Additionally, keep in mind that different barcode scanner models and brands may have variations in the pairing process.
If you encounter any issues during the connection process or experience connection problems afterward, refer to the scanner’s user manual or contact the manufacturer’s support for further assistance.
Whether you choose a wireless receiver or Bluetooth technology, wireless barcode scanners provide convenience, allowing you to move around freely while scanning barcodes. This makes them ideal for environments where mobility is essential, such as warehouses, retail stores, and events.
Testing the Connection
After connecting your barcode scanner to your computer or device, it’s important to test the connection to ensure that the scanner is functioning properly. This step is crucial to verify that the scan data is accurately captured and inputted into the desired application or software. Here’s a step-by-step guide on how to test the connection:
- Open a text editor or a barcode scanning application: Launch a text editor or a spreadsheet application on your computer or device. This will serve as the testing environment.
- Position the barcode scanner: Hold the barcode scanner in a comfortable position and aim it at a barcode that you want to test. Ensure that the barcode is within the scanner’s reading range.
- Initiate the scanning process: Depending on your barcode scanner, you may need to press a trigger button or simply aim the scanner at the barcode to initiate the scanning process.
- Scan the barcode: Position the barcode within the scanning area of the scanner, ensuring that the entire barcode is captured within the frame. Press the trigger button or wait for the scanner to automatically read the barcode.
- Observe the output: Check the text editor or spreadsheet application to see if the scanned barcode data appears as text or values in the desired format. Verify that the scanned data matches the barcode information accurately.
- Repeat the process if necessary: If the scanned barcode data did not appear correctly, double-check the positioning of the barcode within the scanner’s frame and try again. Ensure that the barcode is not damaged or obstructed.
By following these steps, you can perform a thorough test of the barcode scanner and the connection to your computer or device. Testing the connection helps you identify any potential issues and ensures that the scanner is functioning as intended.
If the barcode scanner does not read the barcode or the scanned data does not appear in the text editor or application, troubleshoot the issue by referring to the scanner’s manual or contacting the manufacturer’s support for further assistance. They can provide specific troubleshooting steps based on the make and model of your barcode scanner.
Regularly testing the connection of your barcode scanner not only helps verify its functionality but also allows you to catch any problems early on, ensuring smooth barcode scanning operations in your business or personal use.
Troubleshooting Tips
While connecting and using a barcode scanner is typically straightforward, occasional issues may arise. If you encounter any challenges or the scanner is not functioning as expected, here are some troubleshooting tips to help you resolve common problems:
- Check the connection: Ensure that all cables and connections are secure. For USB scanners, verify that the USB cable is properly plugged into both the scanner and the computer. For wireless scanners, confirm that the wireless receiver or Bluetooth connection is correctly connected.
- Restart your computer or device: Sometimes, a simple restart can resolve temporary glitches or conflicts. Power off your computer or device, wait a few seconds, and then power it back on.
- Update drivers or firmware: Visit the manufacturer’s website to check for any available driver or firmware updates for your barcode scanner. Installing the latest updates can ensure compatibility and fix known issues.
- Verify compatibility: Double-check that the barcode scanner is compatible with your computer’s operating system. Some scanners may only work with specific versions or require additional software or drivers for full functionality.
- Try a different USB port: If you’re using a USB barcode scanner and experiencing connection problems, try connecting it to a different USB port on your computer. Faulty or incompatible ports can sometimes cause issues.
- Check for barcode quality: Ensure that the barcode you’re trying to scan is intact and readable. Damaged or smudged barcodes may not scan properly.
- Adjust scanner settings: Refer to the scanner’s user manual to verify that the settings are properly configured. Some scanners have adjustable settings for scanning mode, symbology, or scanning distance.
- Reset the scanner: Some barcode scanners have a reset function that can help resolve minor issues. Consult the scanner’s user manual for instructions on how to perform a reset.
- Test the scanner on a different computer: If possible, try connecting and testing the scanner on a different computer. This can help determine if the issue is specific to your computer or if it’s a problem with the scanner itself.
- Contact technical support: If none of the above troubleshooting tips resolve the issue, reach out to the manufacturer’s technical support for further assistance. They can provide specialized guidance and help you troubleshoot specific problems related to your barcode scanner.
By following these troubleshooting tips, you can typically resolve common issues with barcode scanners. Remember to consult the scanner’s user manual and the manufacturer’s support resources for more detailed troubleshooting guidance specific to your scanner model.
Effective troubleshooting not only saves time but also ensures that your barcode scanner operates smoothly, enabling efficient barcode scanning and data capture for your business or personal needs.