
Checking Your Laptop’s Compatibility
Before you rush to insert an SD card into your laptop, it’s essential to ensure that your laptop is compatible with this type of storage. SD cards come in various sizes and formats, such as SDHC (Secure Digital High Capacity) and SDXC (Secure Digital Extended Capacity). Additionally, some laptops may have built-in SD card slots, while others require the use of an external SD card reader.
To determine if your laptop is compatible with an SD card, follow these simple steps:
1. Check your laptop’s specifications: Look for information about card slots or card readers in the product manual or on the manufacturer’s website. This will indicate whether your laptop has an integrated SD card slot or if you will need to use an external reader.
2. Inspect your laptop’s physical features: Look for any visible signs of an SD card slot on the laptop’s sides, front, or back. It may be labeled with an SD card icon or a miniaturized representation of an SD card.
3. Check your laptop’s operating system compatibility: Ensure that your laptop’s operating system supports SD cards. Most modern operating systems, such as Windows, macOS, and Linux, are compatible with SD cards by default. However, it’s always a good idea to double-check for any specific requirements or compatibility issues.
By taking these steps, you can determine if your laptop is compatible with an SD card and avoid any frustrations or potential damage to your device. If your laptop does not have a built-in SD card slot, don’t worry – you can still use an external SD card reader to access and transfer files from an SD card.
Remember, it’s crucial to check your laptop’s compatibility before inserting an SD card to ensure a smooth and hassle-free experience.
Choosing the Right SD Card
When it comes to choosing the right SD card for your laptop, several factors need to be considered. Here are some key considerations to help you make an informed decision:
1. Storage capacity: Determine how much storage space you require. SD cards come in various capacities, ranging from a few gigabytes to several terabytes. Consider your specific needs, such as storing documents, photos, videos, or other media files, and choose a card with sufficient capacity to accommodate your data.
2. Speed class: Pay attention to the speed class of the SD card. The speed class refers to how quickly data can be read from or written to the card. This is particularly important if you plan to use the SD card for tasks that involve capturing high-resolution photos or recording videos. Look for Class 10 or UHS (Ultra High Speed) cards for faster and smoother performance.
3. Compatibility: Make sure the SD card is compatible with your laptop’s specifications. Verify if your laptop supports SDHC or SDXC cards and choose accordingly. SDHC cards have a maximum capacity of 32GB, while SDXC cards can offer up to 2TB of storage.
4. Reliability: Opt for SD cards from reputable brands known for their reliability and durability. This ensures that your data is secure and protected. Read reviews and check ratings before making a purchase to gauge the card’s performance and longevity.
5. Budget: Consider your budget when selecting an SD card. Higher capacities and faster speeds usually come at a higher price. Determine what is most important for your needs and find a balance between performance and cost.
Remember that the SD card you choose for your laptop can also be used in other devices, such as cameras, smartphones, or tablets. Therefore, selecting a versatile and compatible card will maximize its usability across different devices.
With these considerations in mind, you can confidently choose the right SD card that suits your laptop’s requirements and offers ample storage space and optimal performance.
Preparing the SD Card
Before inserting the SD card into your laptop, it’s important to properly prepare it for use. Here are the steps to ensure your SD card is ready:
1. Formatting the SD card: If the SD card is new or has been used in a different device, it is recommended to format it before use. Formatting will erase any existing data and optimize the card for your laptop. To format the SD card, insert it into your laptop’s SD card slot or use an external card reader. Open the File Explorer or Finder on your laptop, locate the SD card, right-click on it, and select the “Format” option. Follow the prompts to complete the formatting process.
2. Choosing the file system: When formatting the SD card, you will be prompted to choose a file system. For Windows, the recommended file system is NTFS, which provides better compatibility with the operating system. For macOS, it is recommended to choose the exFAT file system, as it is compatible with both Windows and macOS. Select the appropriate file system and proceed with the formatting.
3. Assigning a volume label: While formatting, you may have the option to assign a volume label or name to the SD card. This is helpful for easy identification if you have multiple SD cards. Choose a descriptive label that will help you recognize the card’s content or purpose.
4. Completing the formatting process: Once you have selected the file system and assigned a volume label, click “Start” or “Format” to begin the formatting process. Depending on the size of the SD card, formatting may take a few seconds to several minutes. Once the process is complete, you will receive a confirmation message.
By following these steps, you can prepare your SD card for use with your laptop. Formatting the card ensures compatibility, optimizes performance, and creates a clean slate for storing your files. It’s important to note that formatting will erase all data on the SD card, so make sure to back up any important files before proceeding.
Once the SD card is formatted and prepared, you are now ready to insert it into your laptop’s SD card slot and start using it for storing and transferring data.
Locating the SD Card Slot on Your Laptop
Finding the SD card slot on your laptop is the first step in successfully inserting an SD card. The location of the SD card slot can vary depending on the laptop model and design. Here are some common places to look:
1. Side of the laptop: Many laptops have their SD card slots located on the sides. Carefully inspect the sides of your laptop to see if you can find a slot that matches the size and shape of an SD card. It may be covered by a protective flap or protrude slightly from the laptop’s surface.
2. Front of the laptop: In some laptops, especially ones designed for multimedia or gaming purposes, the SD card slot can be situated at the front. Look for an opening or a label indicating the SD card slot near the front edges of your laptop.
3. Back of the laptop: While less common, there are laptops that have the SD card slot at the rear. Check the back of your laptop to see if there is a slot that matches the size and shape of an SD card. It may be labeled with the SD card logo or a description.
4. Underneath the battery: In a few laptops, the SD card slot may be located under the battery. If you cannot find the slot on the sides or other visible areas, refer to your laptop’s user manual to determine if the SD card slot is positioned beneath the battery compartment.
If you are unable to locate the SD card slot through visual inspection, refer to your laptop’s user manual or visit the manufacturer’s website for assistance. The manual or website will provide detailed information about the exact location of the SD card slot on your specific laptop model.
It’s important to handle the SD card slot with care to avoid any damage. Additionally, make sure that your laptop is powered off before inserting or removing the SD card to prevent any data loss or hardware issues.
Once you have identified the SD card slot on your laptop, you are ready to insert the SD card and begin utilizing its storage capabilities.
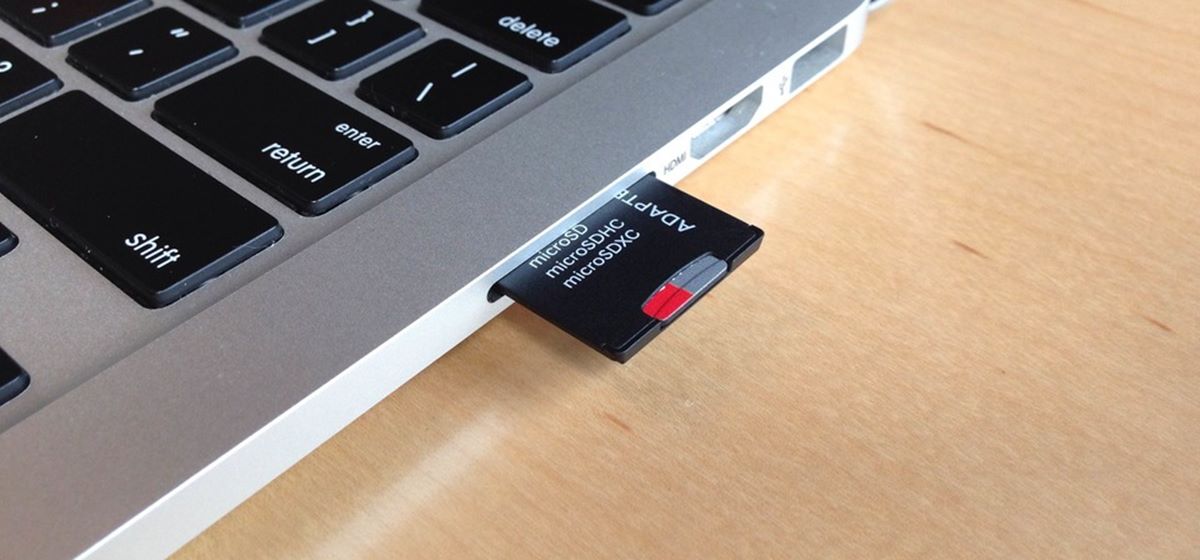
Inserting the SD Card Properly
Now that you have located the SD card slot on your laptop, it’s time to insert the SD card correctly. Follow these steps to ensure a proper insertion:
1. Power off your laptop: Before inserting or removing the SD card, it’s crucial to power off your laptop. This minimizes the risk of data corruption or damage to the card or your laptop.
2. Orient the SD card: Take a moment to familiarize yourself with the orientation of the SD card. One edge of the card will have a diagonal cut, while the opposite edge will be straight. Align the card accordingly, ensuring that the metal contacts on the card are facing downward.
3. Insert the SD card: Gently and carefully insert the SD card into the SD card slot on your laptop. Apply just the right amount of pressure to ensure a snug fit, but avoid using excessive force that could damage the card or the slot.
4. Push until the card is fully inserted: Continue pushing the SD card into the slot until it is fully inserted. Depending on the laptop model, you may feel a slight click or resistance when the card is securely in place. Do not force the card if it does not go in smoothly; check the alignment and try again.
5. Close any protective flaps: If the SD card slot on your laptop has a protective flap, close it gently to secure the SD card in its slot. This ensures that the card remains in place and prevents accidental removal.
Remember to handle the SD card with care to avoid any physical damage or contamination. Avoid touching the metal contacts on the card as it may interfere with proper functioning.
Now that you have successfully inserted the SD card into the slot, you can power on your laptop and begin utilizing the additional storage capacity provided by the card. Your laptop should automatically recognize the SD card, and you can use it to store files, transfer data, or expand your storage options.
If you encounter any issues with the SD card not being recognized, refer to the troubleshooting section in your laptop’s user manual or seek assistance from the manufacturer’s support team.
Verifying the SD Card is Recognized
After inserting the SD card into your laptop, it’s important to ensure that it is recognized and accessible. Here are a few steps you can follow to verify that your laptop recognizes the SD card:
1. Check File Explorer or Finder: Open File Explorer on Windows or Finder on macOS to see if the SD card is listed as a storage device. Look for a new drive or volume that corresponds to the SD card. If you see the SD card listed, it means that your laptop has successfully recognized the card.
2. View disk management: In Windows, you can check the Disk Management utility to verify if the SD card is recognized. To access Disk Management, right-click the Start button, select “Disk Management,” and look for the SD card in the list of disks. If you can see the SD card listed with a proper drive letter and volume, it indicates that your laptop has recognized the card.
3. Try accessing the SD card: Double-click on the SD card drive in File Explorer or Finder to open it. If you can navigate through the file directories and see the contents of the SD card, it confirms that the card is recognized and accessible by your laptop.
4. Perform a read or write test: Copy a small file to the SD card and then open it to ensure that the write and read functions are working correctly. This test helps ensure that the SD card is not only recognized but also functioning properly.
If you encounter any issues with the SD card not being recognized, try the following troubleshooting steps:
– Remove the SD card and reinsert it firmly, ensuring proper alignment.
– Restart your laptop and see if the SD card is recognized upon reboot.
– Test the SD card on another device or laptop to see if the issue is with the card or your laptop.
– Update your laptop’s drivers or firmware if available.
– Connect the SD card through a different SD card reader or adapter to rule out any issues with the reader or adapter.
By following these steps, you can verify that your laptop recognizes the SD card and ensure that it is ready for use. If you continue to experience issues with the SD card, consider seeking assistance from the manufacturer’s support team or consulting professional help to diagnose and resolve the problem.
Ejecting the SD Card Safely
When you’re finished using the SD card in your laptop, it’s crucial to eject it safely to prevent data loss or potential damage. Here are the steps to safely remove the SD card:
1. Save and close any files: Before ejecting the SD card, make sure that you have saved and closed any files or applications that you were using on the card. This ensures that all data has been properly written and minimizes the risk of data corruption.
2. Locate the eject option: In Windows, look for the “Safely Remove Hardware” icon in the notification area of the taskbar. It may appear as a small icon with a USB plug. Click on the icon to open the “Safely Remove Hardware” dialog box. In macOS, you can either click on the SD card drive icon on the desktop and select “Eject” from the context menu or drag the SD card icon to the Trash.
3. Select the SD card: In the “Safely Remove Hardware” dialog box (Windows) or Finder (macOS), locate and select the SD card that you want to eject. Ensure that you have chosen the correct device to prevent accidentally ejecting the wrong storage device.
4. Eject the SD card: Once you have selected the SD card, click the “Eject,” “Safely Remove,” or “Unmount” button to initiate the ejection process. The operating system will ensure that all data has been written and that there are no active processes using the SD card.
5. Wait for confirmation: Depending on your operating system, you may receive a notification or confirmation message indicating that it is safe to remove the SD card. Wait for this confirmation before physically removing the card.
6. Remove the SD card: Gently and carefully remove the SD card from the SD card slot. Hold the card by its edges to avoid touching the metal contacts.
Remember that abruptly removing the SD card without ejecting it properly can result in data corruption or damage to the card. This can lead to data loss or even render the card unusable.
It’s worth noting that some laptops have a spring-loaded mechanism that pushes the SD card out when you gently push it inwards. In such cases, it’s important to make sure that the card is fully ejected before removing it.
By following these steps and ejecting the SD card safely, you can protect your data and ensure that the card remains in good condition for future use.