
Types of SD Cards
SD cards, or Secure Digital cards, are a common form of removable storage used in various electronic devices. They are available in different types and formats, each with its own features and specifications. Understanding the different types of SD cards can help you choose the right one for your needs.
1. SDSC (Standard Capacity) Cards: These are the original SD cards and have a storage capacity of up to 2GB. They are suitable for basic tasks such as storing photos, music, and documents.
2. SDHC (High Capacity) Cards: SDHC cards have a higher storage capacity ranging from 4GB to 32GB. They are commonly used in digital cameras, camcorders, and portable gaming consoles. SDHC cards are compatible with devices that support the SDHC standard.
3. SDXC (Extended Capacity) Cards: SDXC cards offer even larger storage options, starting from 64GB and going up to 2TB. They are ideal for professional photographers and videographers who need ample space to store high-resolution images and videos. SDXC cards can be used in devices that support the SDXC format.
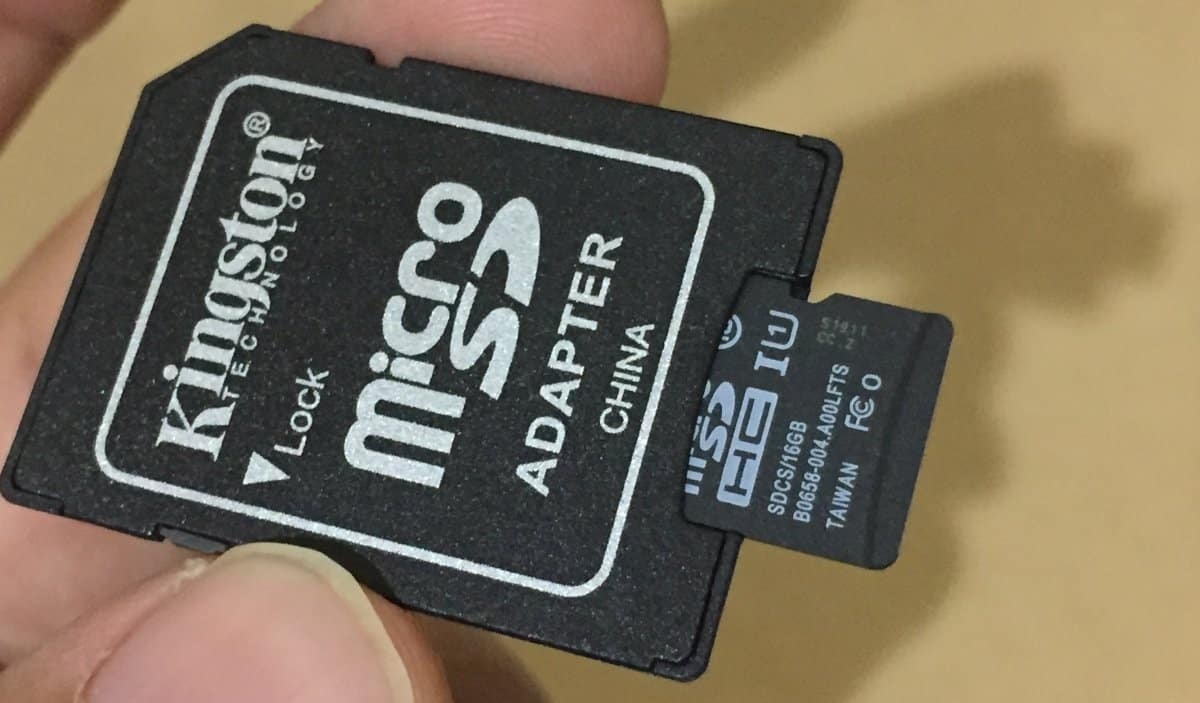
4. MicroSD Cards: MicroSD cards are smaller versions of SD cards and are commonly used in smartphones, tablets, and action cameras. They are available in different capacities, including MicroSDHC and MicroSDXC, and require an adapter to be used with SD card slots.
5. MiniSD Cards: MiniSD cards are larger than MicroSD cards but smaller than standard SD cards. They were popular in the past, but their usage has significantly decreased with the rise of MicroSD cards.
6. SDIO (SD Input/Output) Cards: SDIO cards are specialized SD cards that provide additional functionality to devices. They can support features such as Wi-Fi, Bluetooth, or GPS, enabling devices to connect wirelessly or perform specific tasks.
Keep in mind that not all devices are compatible with every type of SD card. Before purchasing an SD card, check the device’s specifications or user manual to ensure compatibility. Additionally, it is advisable to choose a reputable brand to ensure reliability and performance.
Understanding SD Card Capacity
When shopping for an SD card, understanding the different storage capacities available is essential. SD cards come in various sizes, which determine how much data they can hold. Here’s a breakdown of SD card capacity and how it affects your storage needs.
1. Gigabytes (GB): The storage capacity of an SD card is measured in gigabytes. A gigabyte is equal to 1,073,741,824 bytes. The larger the capacity, the more data the card can hold. Common capacities include 8GB, 16GB, 32GB, 64GB, and so on.
2. File Sizes: The amount of data you can store on an SD card depends on the size of the files you want to save. For example, a 1-minute video recorded in 1080p resolution can take up around 100-200MB of storage space, while a high-quality JPEG photo can range from 5-10MB. Consider the type and size of files you intend to store to determine the appropriate capacity for your SD card.
3. Usage Scenarios: The ideal capacity for an SD card will vary depending on the intended use. For casual photography and storing music or documents, lower capacities like 8GB or 16GB may suffice. However, for professional photographers, videographers, or those who frequently transfer large files, higher capacities such as 64GB or 128GB are recommended to accommodate the increased data size.
4. Formatting Overhead: It is important to note that the actual usable space on an SD card is slightly less than its advertised capacity. This is due to the formatting process and the file system used by the card. Manufacturers typically state the card’s formatted capacity rather than its raw capacity.
5. Upgradability: One advantage of SD cards is that they are easily upgradeable. If you find that your current SD card is filling up quickly, you can opt to purchase a higher capacity card to accommodate your growing storage needs. However, not all devices will support larger capacity cards, so it’s essential to check for compatibility.
Ultimately, understanding SD card capacity is crucial for ensuring you have sufficient storage for your files. Consider your usage scenarios, file sizes, and potential future needs when selecting the appropriate capacity for your SD card. It’s always better to have a bit more storage than you currently need to avoid running out of space unexpectedly.
Checking for Compatibility
Before purchasing or using an SD card, it is important to check for compatibility with your device. Not all devices support all types and capacities of SD cards, and using an incompatible card can lead to issues or potential damage. Here are some steps to ensure a compatible SD card:
1. Device Compatibility: First, check your device’s specifications or user manual to determine the type and capacity of SD cards it supports. Different devices have different SD card standards, such as SD, SDHC, and SDXC. Ensure that the card you choose aligns with your device’s specific requirements.
2. SD Card Slot: Verify that your device has an SD card slot. Most smartphones, tablets, digital cameras, and laptops have built-in SD card slots. However, some smaller or older devices may not have an SD card slot, in which case you may need to use an external card reader or adapter to access the card.
3. Maximum Capacity: Check the maximum SD card capacity supported by your device. While many devices today support high-capacity SDXC cards, older devices may have limitations on the maximum capacity they can handle. Inserting an SD card with a higher capacity than what your device supports can lead to errors or data inaccessibility.
4. Speed Class: SD cards also have speed classes denoted by a number inside a circle. This speed class represents the minimum sustained data writing speed of the card. Some devices, particularly those that record high-definition videos or capture burst photos, may require a certain speed class of SD card to function properly. Check your device’s requirements for the appropriate speed class.
5. UHS Speed Class: For even higher data transfer speeds, some SD cards may have a UHS (Ultra High Speed) speed class. UHS-I, UHS-II, and UHS-III are the three UHS speed classes available. Ensure that your device supports the UHS speed class if you plan to use UHS-compatible SD cards.
By following these compatibility checks, you can ensure that the SD card you choose is suitable for your device. Using the wrong SD card can result in errors, data corruption, or even damage to your device’s card slot. Be sure to consult your device’s documentation or contact the manufacturer if you have any doubts or specific inquiries about SD card compatibility.
Inserting an SD Card
Inserting an SD card into a device is a simple process, but it’s important to handle the card with care to avoid damaging it or the device’s card slot. Here’s a step-by-step guide on how to properly insert an SD card:
1. Power Off: Before inserting or removing an SD card, make sure the device is powered off. This precaution ensures that the device is not accessing the card while you handle it, reducing the risk of data corruption.
2. Locate the SD Card Slot: Identify the location of the SD card slot on your device. It is typically located on the side or back of cameras, smartphones, and tablets, while laptops may have the slot on the side or front. Consult your device’s user manual if you’re unsure.
3. Remove any Tray or Cover: In some devices, the SD card slot may be covered by a removable tray or protective cover. Gently open or remove the tray/cover using your fingers or a small tool to expose the card slot.
4. Position the SD Card: Hold the SD card with the label side facing up and the metal contacts facing down. Align the card with the slot in the same orientation as the slot, usually with the metal contacts going in first.
5. Insert the Card: Gently and carefully insert the SD card into the slot, applying even pressure. Do not force the card; it should slide in smoothly without resistance. If you encounter any resistance, double-check the orientation, as forcing the card may damage it or the card slot.
6. Secure the Card: Once the card is fully inserted, ensure it is securely in place. In devices with a tray or cover, close it to hold the card in position. Avoid jarring or jostling the device while the card is inserted to prevent accidental ejection.
7. Power On: After inserting the SD card, power on the device. It may take a few moments for the device to recognize and initialize the card. Once recognized, you can begin accessing and using the SD card for storage and other purposes.
Remember to handle the SD card with care, avoiding touching the metal contacts to prevent damage from static electricity or fingerprints. If the card is not working properly or is not recognized by the device, try removing and reinserting it or test it in another compatible device to narrow down the issue.
By following these steps, you can safely and effectively insert an SD card into your device, expanding its storage capabilities and enabling you to enjoy additional features and functionality.
Removing an SD Card
When it comes to removing an SD card from your device, it is important to do it correctly to avoid any damage or data loss. Here is a step-by-step guide on how to properly remove an SD card:
1. Power Off: Before removing the SD card, ensure that your device is powered off. This precaution prevents any potential data corruption or damage to the card and device.
2. Locate the SD Card Slot: Identify the location of the SD card slot on your device. It is typically located on the side or back of cameras, smartphones, and tablets, while laptops may have the slot on the side or front. Refer to your device’s user manual if needed.
3. Eject the SD Card: Depending on the device, there are a few methods to eject the SD card. Some devices have a dedicated eject button or a small switch that needs to be pushed in a specific direction to release the card. For devices without a dedicated eject mechanism, you can gently press the card inwards to disengage it from the slot.
4. Remove the SD Card: Once the card is released, use your fingers to carefully pull it out of the slot. Hold the card by the edges, avoiding touching the metal contacts to prevent damage from static electricity or fingerprints.
5. Secure the SD Card: Once removed from the device, place the SD card in a safe and secure location. Preferably, use a protective case or a small plastic container to prevent any physical damage or exposure to dust or moisture.
6. Power On: With the SD card removed, you can now power on your device. It will operate without the SD card but may display a notification or message indicating that the card has been removed.
It is essential to follow these steps when removing an SD card to prevent any accidental damage or data loss. Abruptly removing the card without following proper procedures can lead to corrupt files, loss of data, or even damage to the card slot.
If you encounter any issues while ejecting or removing the SD card, refer to your device’s user manual or contact the manufacturer for guidance. They can provide specific instructions or troubleshoot any concerns you may have.
By adhering to these guidelines, you can safely and confidently remove an SD card from your device, allowing you to exchange or upgrade the card as needed and ensuring the preservation of your valuable data.
Accessing SD Card Data on a Computer
If you want to access the data on your SD card using a computer, there are multiple ways to do so. Here are a few methods to help you access SD card data on a computer:
1. Built-in SD Card Slot: Many modern laptops and desktop computers come equipped with built-in SD card slots. Locate the SD card slot on your computer and insert the SD card into it. The computer should recognize the card and display it as a removable drive. Open the file explorer or Finder on your computer and navigate to the SD card’s drive to access your files.
2. External Card Reader: If your computer doesn’t have a built-in SD card slot, you can use an external card reader. These small devices connect to your computer via USB. Insert the SD card into the card reader and then plug the card reader into an available USB port on your computer. The card should be recognized as a removable drive, allowing you to access the data just like you would with a built-in SD card slot.
3. Adapter or Dongle: Some SD cards, such as microSD cards, may require an adapter or dongle to be used with a computer. These adapters or dongles convert the SD card into a format that can be inserted into a USB port or SD card slot on the computer. Insert the SD card into the adapter or dongle and then connect it to the computer. The SD card should then appear as a removable drive in the file explorer or Finder.
4. Cloud Storage or File Synchronization: Another method to access SD card data on a computer is to upload the files to cloud storage services like Google Drive, Dropbox, or OneDrive. These services allow you to sync your files across multiple devices, including computers. All you need to do is upload the files from your SD card to the cloud storage platform on your device, and then you can access them on your computer by signing in to the cloud storage service.
5. Wireless Transfer: If your SD card is inserted in a device that supports wireless transfer, you can connect the device and computer to the same Wi-Fi network and transfer the files wirelessly. Some devices have built-in apps or software that facilitate this process. Follow the instructions specific to your device to transfer the files without directly accessing the SD card.
Ensure that you safely eject the SD card or disconnect the external card reader or adapter from your computer before removing the SD card. This helps prevent data corruption and protects the integrity of the files.
By utilizing these methods, you can easily access the data on your SD card from a computer, allowing you to view, edit, and transfer your files as needed.
Formatting an SD Card
Formatting an SD card is a process of preparing the card to be used with a specific file system. It wipes out all existing data and creates a clean file structure. Here are some important points to consider when formatting an SD card:
1. Backup Data: Before formatting the SD card, make sure to back up any important data stored on it. Formatting will erase all files and partitions on the card, so it’s crucial to have a copy of your data saved elsewhere to avoid permanent loss.
2. Device-Specific Formatting: In some cases, it may be necessary to format the SD card using the device it will be used with. Certain devices, such as cameras or game consoles, may have specific file system requirements. Consult the device’s user manual or documentation to ensure you format the SD card in the appropriate file system.
3. Computer Formatting: To format an SD card using a computer, insert the card into a card reader or use the built-in card slot if available. Open the file explorer or Finder on your computer and locate the SD card. Right-click on the SD card and choose the “Format” option. Select the desired file system (e.g., FAT32 or exFAT) and proceed with the formatting process. Be aware that formatting will erase all data on the SD card.
4. File System Options: The choice of file system depends on the specific requirements of your device. FAT32 is the most widely compatible file system and can be read by most devices, but it has a file size limit of 4GB. exFAT is a more modern file system that supports larger file sizes but may not be compatible with older devices. NTFS is a Windows-specific file system that offers advanced features but may have limited compatibility with non-Windows devices.
5. Quick Format vs. Full Format: When formatting an SD card, you may have the option to perform a quick format or a full format. A quick format simply initializes the file system, while a full format checks for bad sectors on the card in addition to initializing the file system. If your SD card is brand new or has been previously used without any issues, a quick format should suffice. However, if you suspect any problems with the card, a full format may be recommended.
It’s important to note that frequent formatting can contribute to wear and tear on an SD card. It is generally advisable to format the card only when necessary rather than as a regular maintenance task.
By following these guidelines, you can correctly format an SD card and ensure it is ready for use with your desired device or file system. Remember to exercise caution and double-check that you have backed up any important data before proceeding with the formatting process.
Troubleshooting SD Card Issues
While SD cards are generally reliable, there may be instances where you encounter issues when using them. Here are some common problems and troubleshooting steps you can take to resolve them:
1. Card Not Detected: If your device fails to recognize the SD card, ensure it is inserted correctly and securely. Try removing the card and reinserting it. If that doesn’t work, try inserting the card into a different device or card reader to determine if the issue lies with the card or the device. If the card is still not detected, it may be damaged or faulty.
2. Read/Write Errors: If you are experiencing read or write errors when accessing files on the SD card, it may indicate a corrupted file system. Try using a different card reader or connecting the SD card to a different device to see if the issue persists. If possible, back up the data on the card and then format it to resolve any file system issues. If the errors continue, it could indicate physical damage to the card.
3. Slow Performance: If your SD card is performing slowly or experiencing delays, it may be due to the card being nearly full or fragmented files. Try deleting unnecessary files or transferring them to another storage device to free up space. You can also try defragmenting the card using a computer if your operating system supports it. However, be aware that frequent formatting or defragmentation can contribute to wear and tear on the card.
4. File Corruption: If you encounter corrupted files or are unable to access certain data, it could be a sign of data corruption. In such cases, try using data recovery software to recover the files. There are various programs available online that can help retrieve lost or corrupted data from SD cards. Before using any recovery program, ensure that you have a reliable backup of the card’s data.
5. Write Protection: If you are unable to write or delete files on the SD card, it may be write-protected. Some SD cards have a physical switch on the side that allows you to enable or disable write protection. Ensure the switch is in the unlocked position. If the card does not have a physical switch, check the device or card reader settings to see if write protection is enabled. You may need to consult the device’s user manual for specific instructions.
6. Physical Damage: If your SD card is physically damaged, such as a bent or broken connector, it may be beyond repair. In such cases, the best course of action is to replace the card with a new one. Physical damage can result in data loss and may render the SD card unusable.
If you have tried the troubleshooting steps above and are still experiencing issues with your SD card, it may be best to seek professional assistance or contact the SD card manufacturer for further support. Remember to always back up your data regularly to prevent potential data loss.
By following these troubleshooting steps, you can resolve common SD card issues and ensure smooth and reliable performance with your SD card.
Protecting the Data on an SD Card
Keeping your data safe and secure is essential, especially when it comes to SD cards that store important files and personal information. Here are some measures you can take to protect the data on your SD card:
1. Enable Write Protection: Most SD cards have a physical write protection switch on the side. By enabling this switch, you can prevent any accidental deletion or modification of your files. This is especially useful when handling the card in devices that do not have built-in write protection features.
2. Regularly Backup Data: Make it a habit to regularly back up the data on your SD card. Create a separate copy of your important files on another storage device or in cloud storage services. This way, if anything happens to the SD card, you will still have access to your files.
3. Use Password Protection: Depending on your device, you may have the option to set up password protection for your SD card. This adds an extra layer of security, requiring a password to access the files on the card. Consult your device’s user manual to see if this feature is available and how to set it up.
4. Avoid using Public Devices: While it may be tempting to insert your SD card into any available device for quick access to your files, it is not recommended. Public devices, such as shared computers or public kiosks, may be compromised or infected with malware that could potentially compromise your SD card’s data. Stick to trusted devices and avoid using public devices unless absolutely necessary.
5. Keep Your SD Card Safe: Treat your SD cards with care and keep them in a safe place when not in use. Avoid exposing them to extreme temperatures, humidity, or physical damage. Consider investing in protective cases or pouches to store your SD cards, minimizing the risk of loss or damage.
6. Scan for Malware: Just like any other storage device, SD cards can be infected with malware. Before transferring files from your computer to the SD card, scan both the computer and the card with reliable antivirus software. This helps ensure that your SD card remains free from any potential threats.
7. Securely Erase Data: If you plan to dispose of or sell your SD card, ensure that you securely erase all the data on it. Simply formatting the card may not completely erase the data, as it can still be recovered with specialized software. Use data erasure or disk wiping tools to thoroughly remove all traces of your sensitive information.
By following these measures, you can significantly enhance the protection of the data stored on your SD card. Whether it’s personal photos, sensitive documents, or other valuable files, taking steps to safeguard your data provides peace of mind and ensures that your information remains secure.
Upgrading to a Higher Capacity SD Card
If you find that your current SD card is running out of storage space, upgrading to a higher capacity SD card can provide you with more room for your files and data. Here are some steps to help you smoothly transition to a higher capacity SD card:
1. Determine the Compatible Capacity: Check your device’s user manual or specifications to determine the maximum SD card capacity it supports. This ensures that you choose a new SD card that your device can recognize and utilize to its fullest capacity.
2. Backup Your Data: Prior to upgrading, it is crucial to backup all the data from your existing SD card. This ensures that you have a copy of your files and prevents any potential data loss during the transition process. Transfer the files to a computer, external hard drive, or cloud storage to keep them safe.
3. Format the New SD Card: Insert the new SD card into your device or a card reader connected to your computer. Format the new card using the appropriate file system, such as FAT32 or exFAT, compatible with your device. This prepares the card for use and initializes the file structure.
4. Transfer Files: Once the new SD card is formatted, you can begin transferring your files from the backup location to the new card. Connect the backup device or access your cloud storage and copy the files to the new SD card. Take care to organize the files and maintain the same folder structure, if necessary.
5. Verify the Transfer: After transferring the files, double-check that all your important data has been successfully copied to the new SD card. This step ensures that no files are missing or corrupted during the transfer process.
6. Store or Repurpose the Old SD Card: Once you have successfully transferred all your data to the new SD card, decide what to do with the old card. If it still has storage capacity, you can repurpose it for other files or store it as a backup, keeping it in a safe and secure location.
7. Test the New SD Card: Insert the new SD card into your device and ensure that it is recognized and accessible. Check that all the transferred files are intact and accessible without any errors. If any issues arise, verify the formatting and the compatibility of the new card with your device.
By following these steps, you can smoothly upgrade to a higher capacity SD card and continue to expand your storage capabilities. It’s important to choose a reputable brand and ensure compatibility with your device to guarantee optimal performance and reliability.
Best Practices for Handling and Storing SD Cards
SD cards are small and delicate storage devices, and the way you handle and store them can significantly impact their performance and lifespan. Here are some best practices to follow for proper handling and storage of SD cards:
1. Avoid Touching the Contacts: The metal contacts on an SD card are crucial for proper connectivity. To prevent damage from static electricity or fingerprints, avoid touching the contacts when handling the card. Hold the card by its edges or use the provided protection case or packaging.
2. Insert and Remove SD Cards Carefully: When inserting an SD card into a device or card reader, ensure that it is properly aligned and inserted smoothly into the slot. Avoid forcing the card into the slot or removing it abruptly, as this can cause damage to the card or the card slot. Take your time and handle them with care.
3. Store SD Cards in Protective Cases: It is advisable to store SD cards in protective cases or containers specifically designed for them. These cases protect the cards from physical damage, dust, moisture, and static electricity. Choose a case that securely holds the cards and provides adequate protection during transportation and storage.
4. Keep SD Cards in Safe Locations: Store SD cards in a safe and secure location, away from extreme temperatures, humidity, and direct sunlight. High temperatures can damage the card’s components, while moisture and sunlight can lead to data corruption or loss. Optimal storage conditions help prolong the lifespan and maintain the integrity of the SD cards.
5. Label and Organize SD Cards: Labeling and organizing SD cards can save you time and effort. Use waterproof or permanent markers to label the cards with relevant information, such as their capacity or contents. Additionally, consider using a filing system or storage solution to keep track of multiple SD cards, ensuring easy access when needed.
6. Regularly Check and Clean SD Card Slots: If your device has a built-in SD card slot or you use card readers frequently, it is important to periodically check and clean the slots. Dust, debris, or residue can accumulate over time, affecting the card’s connectivity and performance. Use compressed air or a soft, dry cloth to remove any particles from the slot before inserting an SD card.
7. Avoid Excessive Read/Write Operations: Excessive read/write operations on an SD card can contribute to wear and tear. Avoid repeatedly filling up the card to its maximum capacity or frequently reformatting it unless necessary. Balancing the usage and periodically giving the card a break can prolong its lifespan.
By following these best practices for handling and storing SD cards, you can ensure their longevity, protect your valuable data, and maintain optimal performance. Treat SD cards with care and prioritize their safekeeping to make the most out of these compact storage devices.