
What is an ICS Calendar File?
An ICS (iCalendar) file is a popular file format used to store and exchange calendar data. It is a universal format supported by various calendar applications and services, making it easy to share and import calendar events across different platforms.
The ICS file contains all the necessary information of a calendar event, such as the event title, date and time, location, description, and any additional details or attachments. These files can be created by various calendar applications, including Google Calendar, Microsoft Outlook, Apple Calendar, and many others.
An ICS file serves as a convenient way to share calendar events with others, allowing them to easily import the events into their own calendar applications. It simplifies the process of scheduling and coordinating with colleagues, friends, or family members, as everyone can seamlessly import the shared events into their own calendar without the need for manual entry.
Furthermore, ICS files can also be used to subscribe to public calendar feeds or event listings. By subscribing to an ICS feed, you can automatically sync and display the events on your calendar application, ensuring that you stay up-to-date with the latest events and appointments.
The ICS file format is based on the widely-used iCalendar standard, which provides a standardized format for the storage and exchange of calendar information. This compatibility ensures that ICS files can be seamlessly imported and exported across different calendar applications, making them highly versatile and widely supported.
Whether you’re scheduling a business meeting, planning a family gathering, or subscribing to a public calendar, understanding how to import an ICS calendar file is essential for effortlessly managing and organizing your events. In the next sections, we will guide you through the steps of importing an ICS calendar file into your preferred calendar application.
Why would you need to import an ICS calendar file?
Importing an ICS calendar file can be useful for a variety of reasons, whether you’re an individual, a business professional, or part of an organization. Here are a few common scenarios where importing an ICS calendar file can simplify your scheduling and planning process:
- Collaborating with a team: If you’re working on a project with a team, importing an ICS calendar file can help ensure everyone is on the same page. By sharing a calendar file containing important deadlines, milestones, and team meetings, all team members can easily import these events into their own calendars and stay updated on the project’s progress.
- Attending an event or conference: If you’ve received an ICS calendar file for an upcoming event or conference, importing it into your calendar can save you time and prevent any scheduling conflicts. The file will automatically populate your calendar with the event details, including the date, time, location, and any additional information, ensuring that you don’t miss any important engagements.
- Transitioning to a new calendar application: If you’re switching to a new calendar application, you can easily migrate your events and appointments by importing an ICS calendar file. This ensures a smooth transition without the need for manual entry or risk of losing any crucial scheduling information.
- Sharing personal events: If you’re planning a family gathering, a birthday party, or any other personal event, you can create an ICS calendar file and share it with your family and friends. By importing the file into their own calendars, they can stay informed about the details and make necessary arrangements.
- Subscribing to public calendars: Many organizations, sports teams, and communities offer public calendars that you can subscribe to for updates on their events and activities. By importing the ICS calendar file provided by these sources, you can effortlessly populate your calendar with their events and never miss out on any important happenings.
Overall, importing an ICS calendar file simplifies the process of sharing, managing, and synchronizing events across different calendar applications and devices. Whether it’s for personal or professional use, importing an ICS calendar file can help you stay organized and ensure that your schedule is up-to-date.
Step 1: Open your calendar application
The first step to importing an ICS calendar file is to open your calendar application. This can be any calendar application that supports the import of ICS files, such as Google Calendar, Microsoft Outlook, Apple Calendar, or any other calendar application of your choice.
Locate the calendar application on your device or computer and open it. Depending on the operating system and device you’re using, you may find the calendar application in different locations. It could be an app icon on your home screen, a program in your applications folder, or a web-based application accessed through your internet browser.
If you’re uncertain about which calendar application you’re using or where to find it, you can try using the search functionality on your device or consult the documentation or support resources related to your specific operating system.
Once you’ve located and opened your calendar application, you’re ready to proceed to the next step of importing the ICS calendar file.
Step 2: Locate the import option
After opening your calendar application, the next step is to locate the import option. This option allows you to import the ICS calendar file into your calendar.
The location of the import option can vary depending on the calendar application you’re using. Some applications may have a dedicated import feature, while others may integrate the import functionality within their settings or preferences menu.
To locate the import option, you can follow these general guidelines:
- Desktop applications: If you’re using a calendar application installed on your computer, such as Microsoft Outlook or Apple Calendar, you can typically find the import option under the “File” or “Settings” menu. Look for options like “Import” or “Import Calendar” to proceed.
- Web-based applications: For online calendar applications like Google Calendar or Outlook.com, the import option is usually found in the settings or preferences section of the application. Look for options like “Settings,” “Preferences,” or a gear icon, and navigate to the “Import” or “Add calendar” section.
- Mobile applications: If you’re using a calendar application on your mobile device, the import option is typically located within the app’s settings or preferences menu. Look for options like “Settings,” “Preferences,” or a gear icon, and search for the “Import” or “Add calendar” option.
If you’re having difficulty locating the import option, you can refer to the documentation or support resources provided by your calendar application. These resources often contain step-by-step instructions tailored to the specific application and version you’re using.
Once you’ve located the import option, you’re ready to move on to the next step of selecting the ICS calendar file for import.
Step 3: Select the ICS calendar file
Once you have located the import option in your calendar application, the next step is to select the ICS calendar file that you want to import. This file contains the calendar events that you wish to add to your calendar.
The process of selecting the ICS calendar file may vary depending on the calendar application you are using. However, here are some general steps to follow:
- Click on the import option: In your calendar application, click on the import option that you located in the previous step. This will open a file selection dialog box or prompt.
- Navigate to the location of the ICS file: Use the file selection dialog box or prompt to navigate to the location where you have saved the ICS calendar file on your device or computer. The file may be saved in a specific folder or on your desktop.
- Select the ICS file: Once you have located the ICS file, click on it to select it for importing. You may need to choose the file from a list if there are multiple ICS files available.
- Confirm your selection: After selecting the ICS file, click on the “Open” or “Choose” button to confirm your selection. This will initiate the import process.
Remember to ensure that the selected ICS file contains the calendar events you want to import. If you don’t have the ICS file yet, make sure to obtain it from the source where it was shared with you, such as an email attachment or a download link.
Once you have followed these steps and selected the ICS calendar file, you are ready to proceed to the next step of choosing the calendar to import the events into.
Step 4: Choose the calendar to import to
After selecting the ICS calendar file for import in the previous step, the next step is to choose the specific calendar in your calendar application where you want to import the events.
The process of choosing the calendar may vary depending on the calendar application you are using. Here are some general steps to follow:
- Select the destination calendar: In your calendar application, you will be presented with a list of available calendars. This may include your default calendar, any secondary calendars you have created, or calendars from other accounts or services linked to your calendar application.
- Choose the appropriate calendar: Carefully review the available calendars and select the one that you want to import the events into. This may be your personal calendar, a work calendar, a shared family calendar, or any other calendar relevant to the imported events.
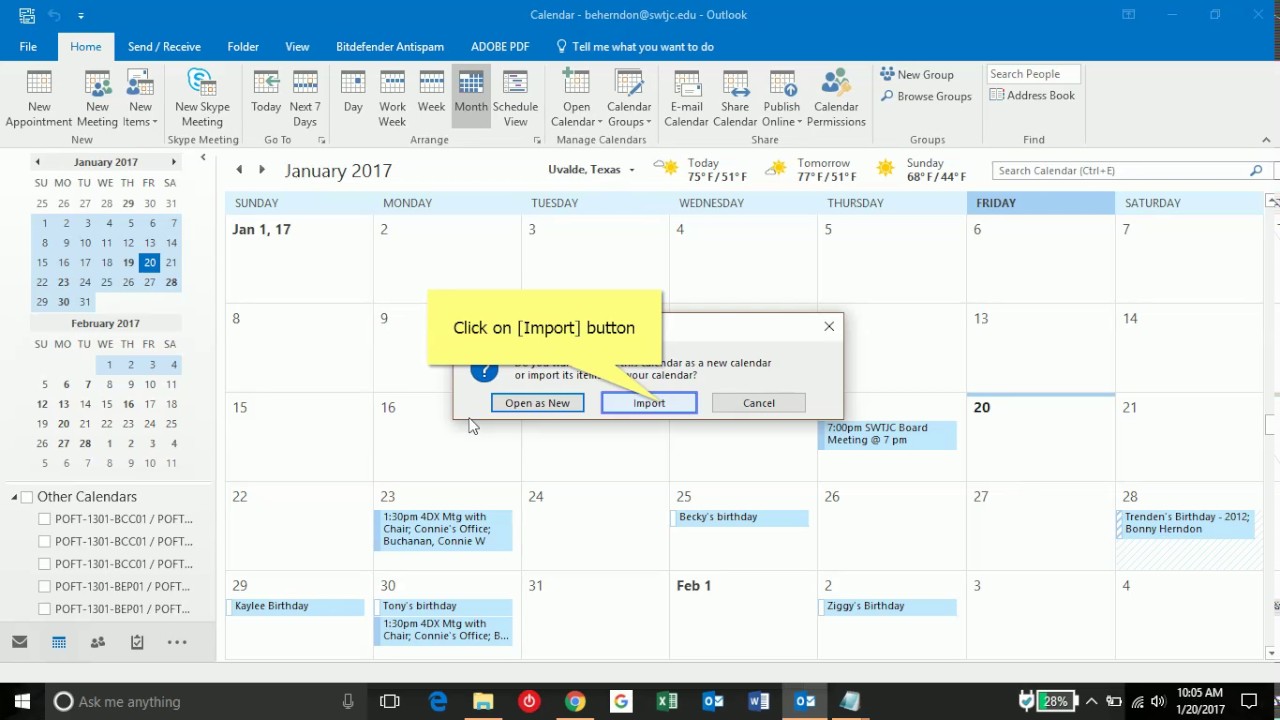
- Confirm your selection: Once you have chosen the destination calendar, click on the “Import” or “Confirm” button to initiate the import process. The calendar application will load the ICS file and begin importing the events into the selected calendar.
It is important to ensure that you select the correct calendar, as the imported events will be added to the chosen calendar. Take a moment to verify the destination calendar and ensure that it aligns with your intended purpose for importing the events.
If you are unsure about which calendar to choose or need assistance in making the selection, refer to the documentation or support resources provided by your calendar application. These resources often provide guidance on managing calendars and choosing the appropriate destination.
Once you have completed these steps and chosen the destination calendar, you can proceed to the next step of reviewing and confirming the import of the ICS calendar file.
Step 5: Review and confirm the import
After selecting the destination calendar in the previous step, it is important to review the imported events and confirm that everything is as expected before finalizing the import process. This step allows you to ensure accuracy and make any necessary adjustments.
The process of reviewing and confirming the import may vary depending on the calendar application you are using. Here are some general steps to follow:
- View the imported events: In your calendar application, navigate to the chosen destination calendar to view the imported events. The imported events should now be visible in the calendar view, displaying the event details such as title, date, time, and location.
- Verify the event details: Take a moment to review the imported events and verify that the event details match your expectations. Pay attention to the accuracy of dates, times, event titles, and any additional information associated with the events.
- Make any necessary adjustments: If you notice any discrepancies or inaccuracies in the imported events, you may need to make adjustments. This could involve modifying event dates or times, updating event titles or descriptions, or adding missing information.
- Confirm the import: Once you are satisfied with the imported events and have made any necessary adjustments, confirm the import by saving the changes. This will finalize the import process and add the events to your chosen calendar.
By reviewing and confirming the import, you can ensure that the imported events align with your intended schedule and that all the necessary information is accurate. This step helps you maintain an organized and reliable calendar.
If you encounter any difficulties during the review and confirmation process or require further assistance, consult the documentation or support resources provided by your calendar application. These resources often offer guidance on reviewing and managing imported events.
Once you have reviewed and confirmed the import, you can proceed to the next step of checking your calendar for the successfully imported events.
Step 6: Check your calendar for imported events
After confirming the import of the ICS calendar file in the previous step, the final step is to check your calendar to ensure that the events have been successfully imported. This step allows you to verify that the imported events are visible and properly integrated into your calendar.
The process of checking your calendar may vary depending on the calendar application you are using. Here are some general steps to follow:
- Open your calendar: Launch your calendar application and navigate to the chosen destination calendar where you imported the events.
- Review the imported events: Take a look at the calendar view and scan through the dates to locate the imported events. Look for the event titles, dates, times, and any additional details or attachments that were included in the ICS calendar file.
- Interact with the imported events: Click on an imported event to view its details or make any modifications if necessary. Depending on your calendar application, you may have the ability to edit event information, set reminders, or add notes.
- Confirm event integration: Ensure that the imported events are seamlessly integrated into your calendar, appearing alongside any existing events or appointments. Verify that the imported events are displayed accurately and do not overlap or conflict with any existing schedule.
- Double-check dates and times: Pay extra attention to the dates and times of the imported events to confirm that they are correctly reflected in your calendar. Verify that time zones are accurately accounted for, especially if you imported the ICS calendar file from a different time zone.
By checking your calendar for the imported events, you can have peace of mind knowing that the events have been successfully added and are now an integral part of your schedule. This step ensures that you stay organized and up-to-date with all your important engagements.
If you encounter any issues or discrepancies with the imported events, consult the documentation or support resources provided by your calendar application for further assistance. They can provide guidance on troubleshooting and resolving any potential issues.
Once you have checked your calendar and confirmed the successful integration of the imported events, you can now rely on your calendar to keep you informed and organized with all the important dates and appointments.
Troubleshooting common issues
While importing an ICS calendar file is usually a straightforward process, there may be instances where you encounter issues or complications. Here are some common issues that you may come across when importing an ICS calendar file and some troubleshooting tips to help resolve them:
- Invalid or corrupted ICS file: If the ICS file you’re trying to import is invalid or corrupted, your calendar application may not be able to read it properly. In this case, try obtaining a new copy of the ICS file from the source or ask the sender to resend it.
- Incompatible calendar application: Some calendar applications may have limitations or compatibility issues when importing ICS files. Ensure that you’re using a calendar application that supports the import of ICS files. If needed, consider using a different calendar application or updating your current one to the latest version.
- Inconsistent time zones: If the ICS file was created in a different time zone, the events may not display correctly in your local time zone. Ensure that your calendar application is set to the correct time zone and verify that the imported events are adjusted accordingly.
- Duplicate events: In some cases, importing an ICS file may result in duplicate events if the events in the ICS file overlap with existing events in your calendar. Review your calendar after the import and manually remove any duplicate events as necessary.
- Missing or incomplete event details: If some event details were not properly imported, it could be due to formatting issues in the ICS file. Double-check the original ICS file to ensure that all event details are included. If necessary, manually edit the imported events in your calendar application to add any missing information.
- Conflict with existing events: Imported events may conflict with pre-existing events in your calendar, resulting in overlapping or conflicting schedules. Review your calendar for any scheduling conflicts and make any necessary adjustments to resolve them.
- Importing the wrong file: It is possible to accidentally import the wrong ICS file, especially if you have multiple ICS files to choose from. Double-check the file you are importing to ensure that it contains the correct events and information.
If you encounter any other issues or difficulties during the import process, consult the documentation or support resources provided by your calendar application. They can offer specific troubleshooting steps and guidance tailored to your calendar application and version.
By identifying and resolving any issues that arise during the import, you can ensure a smooth and successful integration of the ICS calendar file into your calendar application.