
Removing the Factory Stereo
Before you can begin identifying the OEM car stereo wires, you first need to remove the factory stereo from your vehicle. While this process may vary depending on the make and model of your car, the general steps are relatively similar. Here’s a guide to help you get started:
- Start by disconnecting the negative terminal of your car battery to prevent any electrical mishaps while working on the stereo wiring.
- Using a panel removal tool or a flat screwdriver wrapped in a cloth to avoid scratches, gently pry off the trim panel that surrounds the stereo. Be careful not to force anything and refer to your car’s manual if you encounter any resistance.
- Once the trim panel is removed, you will likely see screws or bolts securing the stereo in place. Use the appropriate tools to unscrew or unbolt them, being mindful of any wiring connections that may still be attached.
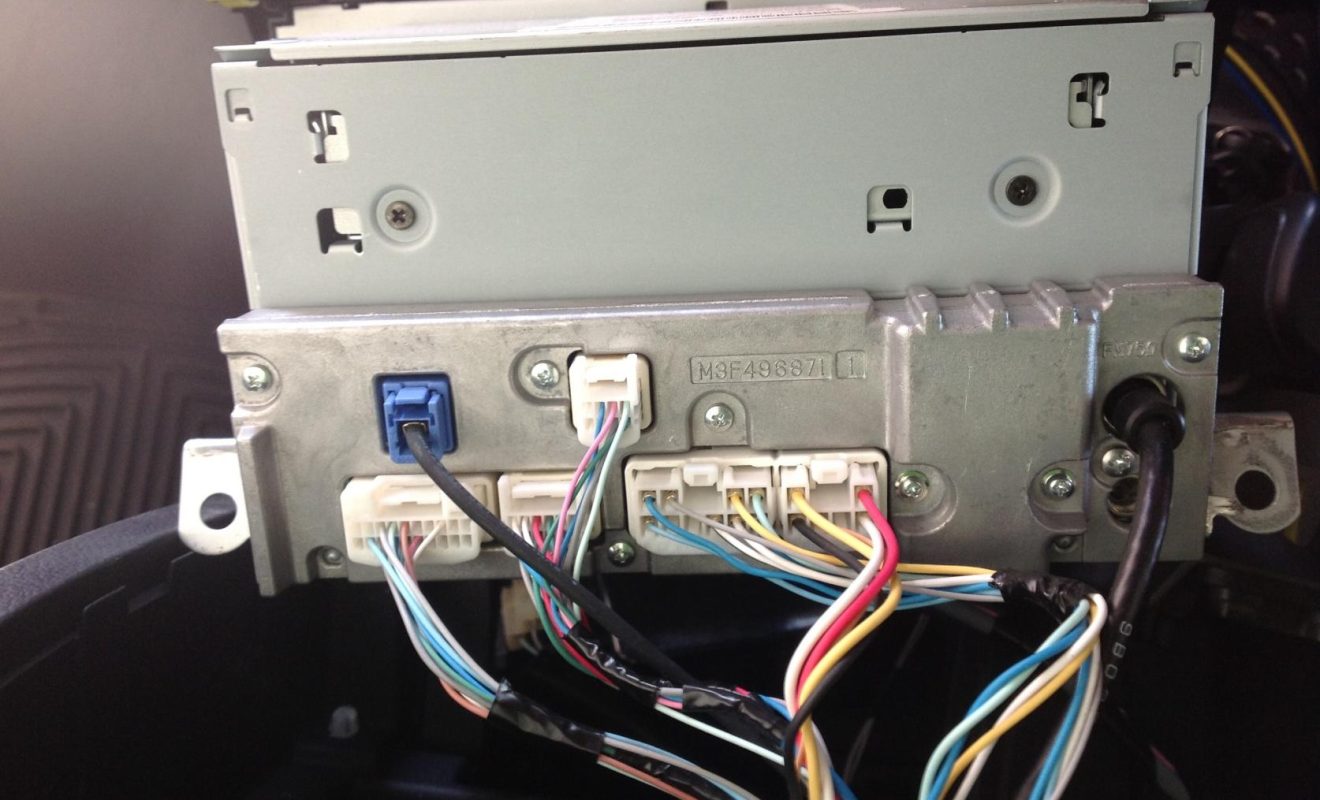
- After removing the screws or bolts, carefully pull the stereo unit out of the dash. Take note of any wiring harnesses or connectors that are still connected to the back of the stereo.
- Locate the wiring harness connectors and release them by pressing the release tab or using a small screwdriver to gently pry them apart. Be cautious and ensure you don’t damage any of the wires or connectors.
- Once all the connections are released, you can fully remove the factory stereo from your car.
By following these steps, you’ll be able to safely remove the factory stereo and gain access to the wiring behind it. With the stereo removed, you can now proceed to identify the different wires and their functions.
Keep in mind that these steps may vary for different car models, so consult your car’s manual or consult a professional if you encounter any difficulties during the stereo removal process.
Identifying the Power Wires
When it comes to identifying the power wires in your OEM car stereo, there are a few key wires you need to look out for. These wires are responsible for powering the stereo unit and other components. Here’s how to identify them:
- Constant Power Wire: This wire provides power to the stereo at all times. It allows the stereo to retain settings such as time, preset stations, and other memory functions, even when the car is turned off. It is usually colored yellow or red.
- Switched Power Wire: This wire supplies power to the stereo when the car ignition is turned on. It allows the stereo to turn on and off along with the car. It is typically colored red.
To identify these wires, you can use a multimeter or a voltage tester. Start by disconnecting the car battery to ensure your safety. Then, locate the wiring harness that connects to the back of the stereo unit.
Strip a small section of insulation from the wire you suspect is the constant power wire and insert the multimeter probe into the exposed section. Set the multimeter to measure DC voltage and touch the ground probe to a metal part of the car. If the multimeter displays a stable voltage reading, typically around 12 volts, then you have identified the constant power wire.
Next, repeat the same process with the wire you believe to be the switched power wire. This time, the multimeter should only display voltage when the car ignition is turned on. If the voltage reading fluctuates or disappears when you turn off the ignition, you have found the switched power wire.
Remember to label these wires once you have identified them to avoid confusion during installation or future maintenance.
Identifying the power wires is a crucial step in connecting an aftermarket stereo or troubleshooting any electrical issues. By following these steps, you will be able to determine the constant power wire and the switched power wire in your OEM car stereo.
Determining the Ground Wire
When working with car stereo wiring, it’s important to identify and connect the ground wire properly. The ground wire serves as a pathway for electrical currents to return to the car’s electrical system, ensuring proper functioning of the stereo unit. Here’s how you can determine the ground wire:
- Locate the wiring harness that connects to the back of the OEM car stereo. The ground wire is typically black or brown and may have a ring terminal or be bare wire.
- Using a multimeter set to measure continuity or resistance, touch one probe to a metal part of the car’s chassis and the other probe to the exposed metal part of the suspected ground wire. If the multimeter displays a reading or beeps, it indicates that you’ve found the ground wire.
- If you don’t have a multimeter, you can also perform a visual inspection. Look for wires that are connected to the car’s metal structure or any bare wires that are bolted or screwed directly to metal components. These are likely the ground wires.
It’s important to ensure a solid connection between the ground wire and the car’s chassis. This can be achieved by stripping a small section of insulation from the ground wire and using a ring terminal or a crimp connector to securely attach it to a metal part of the car. Clean the metal surface and use a screw or bolt to fasten the connection tightly.
Properly grounding the stereo unit is essential for minimizing the risk of electrical noise, interference, and even potential damage to the audio system. It also ensures that the stereo functions correctly and maintains a stable electrical connection.
Don’t overlook the importance of identifying and connecting the ground wire while working on your OEM car stereo. By following these steps, you can easily determine the ground wire and establish a solid electrical connection for your car’s audio system.
Locating the Speaker Wires
Identifying the speaker wires in your OEM car stereo is essential when it comes to connecting aftermarket speakers or troubleshooting audio issues. By correctly locating the speaker wires, you can ensure optimal sound quality in your vehicle. Here’s how to find the speaker wires:
- Once again, locate the wiring harness that connects to the back of the OEM car stereo. Look for wires with distinct colors, such as white, gray, green, and purple. These are typically associated with the speakers in your car.
- Refer to your car’s manual or an online wire diagram to determine the specific colors assigned to each speaker. This varies depending on the make and model of your vehicle.
- Using a multimeter set to measure AC voltage, touch one probe to the suspected speaker wire and the other probe to the corresponding wire of the same color in the rear connector of the car’s wiring harness. Play audio through the stereo to generate an electrical signal. If the multimeter displays voltage or you hear sound coming from the speaker, you have successfully located the speaker wire.
- If you don’t have a multimeter, you can also use a 9-volt battery to identify the speaker wires. Briefly touch the positive terminal of the battery to the suspected speaker wire while simultaneously touching the negative terminal to the corresponding wire in the car’s wiring harness. If you hear a popping sound coming from the speaker, you have found the correct wire.
- Repeat these steps for each speaker wire until you have identified the wires for all the speakers in your car.
Label each speaker wire once you have located them to ensure easy identification during installation or future maintenance. This will help you avoid confusion and save time when working with the car’s speaker system.
By following these steps and using the appropriate tools, you can easily locate the speaker wires in your OEM car stereo. This will allow you to connect aftermarket speakers or troubleshoot any audio-related issues with confidence.
Pinpointing the Antenna Wire
The antenna wire is an integral part of your car’s audio system, allowing you to receive radio signals and enjoy your favorite stations while on the road. Identifying the antenna wire in your OEM car stereo will enable you to connect or troubleshoot the antenna more effectively. Here’s how to pinpoint the antenna wire:
- Locate the wiring harness that connects to the back of your OEM car stereo. The antenna wire is typically a thin, single wire, often with a coaxial-like connector.
- Inspect the wiring harness and look for a wire that matches the description. Depending on your car’s make and model, the antenna wire may be blue, blue with a white stripe, or a color designated specifically for the antenna.
- If you’re unsure which wire is the antenna wire, refer to your car’s manual or search online for a wire diagram specific to your vehicle’s stereo system. This will help you confirm the color code for the antenna wire in your car.
- Once you have identified the wire that is most likely the antenna wire, you can perform a quick test to verify. Turn on the AM or FM radio on the OEM car stereo and touch the suspected antenna wire briefly. If the reception strengthens or you notice clearer audio, you have pinpointed the correct antenna wire.
Once you have confirmed the antenna wire, you can connect it to the appropriate input on your aftermarket stereo or troubleshoot any antenna-related issues. Properly connecting and positioning the antenna wire is crucial for optimal radio reception, ensuring that you can enjoy a wide range of stations while driving.
Remember to handle the antenna wire with care and avoid damaging it during the process. Additionally, if you are installing an aftermarket stereo, some models may require the use of an antenna adapter to connect the OEM antenna wire to the new stereo unit.
By following these steps and relying on the wire color code or a wire diagram, you can confidently pinpoint the antenna wire in your OEM car stereo and enhance your radio listening experience on the road.
Finding the Remote Wire
The remote wire in your OEM car stereo is responsible for powering an external amplifier or other audio accessories when the stereo is turned on. Locating the remote wire is essential if you plan to install an aftermarket amplifier or other audio equipment in your vehicle. Here’s how you can find the remote wire:
- Start by locating the wiring harness that connects to the back of your OEM car stereo. Look for a wire that is typically blue or blue with a white stripe, though the color coding may vary depending on the car’s make and model.
- If you’re unsure about the color code for the remote wire in your specific vehicle, consult the car’s manual or search online for a wire diagram that corresponds to your stereo system. This will help you confirm the correct color for the remote wire.
- Once you have identified the wire that is most likely the remote wire, perform a continuity test with a multimeter. Set the multimeter to measure continuity or resistance, and touch one probe to the suspected remote wire and the other probe to a known ground or to the negative terminal of the car battery. If the multimeter displays a reading or beeps, it indicates that you have found the remote wire.
- If you don’t have a multimeter, you can also test the wire by connecting it to an amplifier or other accessory that requires a remote turn-on signal. Securely attach the wire to the remote input of the amplifier and power on the stereo. If the amplifier turns on along with the stereo, you have successfully located the remote wire.
Once you have identified the remote wire, you can connect it to the appropriate input on your aftermarket amplifier or other accessories. This will ensure that the amplifier powers on and off with the stereo, providing seamless integration and enhanced audio performance.
Remember to handle the remote wire with care and avoid damaging it during the installation process. If you are uncertain about any steps or encounter difficulties, it’s advisable to consult a professional car audio installer to handle the wiring job.
By following these steps and utilizing the wire color code or a wire diagram, you can successfully find the remote wire in your OEM car stereo and set up your aftermarket audio accessories for optimal performance.
Discovering the Illumination Wire
The illumination wire in your OEM car stereo controls the backlighting of the stereo’s display and buttons. By identifying the illumination wire, you can integrate it with your aftermarket stereo or other lighting accessories for a cohesive and visually pleasing interior. Here’s how you can discover the illumination wire:
- Locate the wiring harness that connects to the back of your OEM car stereo. Look for a wire that is typically orange or orange with a white stripe, although the color coding may differ depending on your car’s make and model.
- If you’re unsure about the correct color code for the illumination wire in your car, consult the car’s manual or search online for a wire diagram specific to your stereo system. This will help you verify the precise color of the illumination wire.
- Once you have identified the wire that is likely the illumination wire, perform a simple test. Turn on the car’s headlights or interior lights, and then touch the suspected illumination wire to a known ground or to the negative terminal of the car battery. If the stereo’s display and buttons dim or brighten along with the lighting, you have discovered the correct illumination wire.
Once you have located the illumination wire, you can integrate it with your aftermarket stereo or other lighting accessories. To do this, connect the illumination wire to the corresponding input on your new stereo or use it to trigger additional lighting effects in your car’s interior. This will ensure that the backlighting of the stereo matches the rest of your vehicle’s lighting system and creates a cohesive aesthetic.
Always handle the wires carefully during the installation process to avoid any damage. If you have any doubts or encounter difficulties, it is recommended to consult a professional car audio installer for assistance.
By following these steps and utilizing the wire color code or a wire diagram, you can easily discover the illumination wire in your OEM car stereo. This will enable you to integrate it with your aftermarket stereo or other lighting accessories, enhancing the visual appeal of your car’s interior.
Locating the Amp Turn-On Wire
The amp turn-on wire in your OEM car stereo is responsible for providing a signal to turn on an external amplifier or other audio equipment. Finding the amp turn-on wire is crucial if you plan to install an aftermarket amplifier or other accessories in your vehicle. Here’s how you can locate the amp turn-on wire:
- Start by locating the wiring harness that connects to the back of your OEM car stereo. Look for a wire that is typically blue or blue with a white stripe, although the color coding may vary depending on the make and model of your car.
- If you’re unsure about the correct color code for the amp turn-on wire in your specific vehicle, consult the car’s manual or search online for a wire diagram that corresponds to your stereo system. This will help you confirm the correct color for the amp turn-on wire.
- Once you have identified the wire that is most likely the amp turn-on wire, perform a continuity test with a multimeter. Set the multimeter to measure continuity or resistance, and touch one probe to the suspected amp turn-on wire and the other probe to a known ground or to the negative terminal of the car battery. If the multimeter displays a reading or beeps, it indicates that you have found the amp turn-on wire.
- If you don’t have a multimeter, you can also test the wire by connecting it to your aftermarket amplifier or other accessories that require a remote turn-on signal. Securely attach the wire to the remote input of the amplifier or accessory and power on the stereo. If the amplifier or accessory turns on along with the stereo, you have successfully located the amp turn-on wire.
Once you have confirmed the amp turn-on wire, you can connect it to the appropriate input on your aftermarket amplifier or other accessories. This will ensure that the amplifier or accessory powers on and off with the stereo, providing synchronized operation and optimal audio performance.
Handle the amp turn-on wire with care during the installation process to avoid any damage. If you are uncertain about any steps or encounter difficulties, it’s advisable to consult a professional car audio installer to handle the wiring job.
By following these steps and utilizing the wire color code or a wire diagram, you can successfully locate the amp turn-on wire in your OEM car stereo. This will allow you to seamlessly integrate your aftermarket amplifier or other accessories for enhanced audio performance in your vehicle.
Identifying the Backup Camera Wire
The backup camera wire in your OEM car stereo is essential for connecting and integrating a backup camera system. Identifying the backup camera wire allows you to install and use a backup camera effectively, enhancing your vehicle’s safety and convenience. Here’s how you can identify the backup camera wire:
- Start by locating the wiring harness that connects to the back of your OEM car stereo. Look for a wire that is typically purple or purple with a white stripe, although the color coding may vary depending on your car’s make and model.
- If you’re unsure about the correct color code for the backup camera wire in your specific vehicle, consult the car’s manual or search online for a wire diagram that corresponds to your stereo system. This will help you confirm the correct color for the backup camera wire.
- Once you have identified the wire that is most likely the backup camera wire, perform a continuity test with a multimeter. Set the multimeter to measure continuity or resistance, and touch one probe to the suspected backup camera wire and the other probe to the reverse light wire or any other wire that activates when the car is put into reverse. If the multimeter displays a reading or beeps, it indicates that you have found the backup camera wire.
- Another way to verify the backup camera wire is to visually inspect the wiring harness and look for a wire with a smaller gauge compared to other wires. The backup camera wire is typically thinner and might be labeled as “CAM” or “BACKUP” on the wiring harness or connector.
Once you have confirmed the backup camera wire, you can connect it to your aftermarket backup camera system. This usually involves connecting the backup camera power wire to a constant power source, the ground wire to a suitable ground connection, and the signal wire to the backup camera input of your new stereo or a separate display/screen.
Always take care when handling the wires during installation to avoid damage or improper connections. If you are unsure about any steps or encounter difficulties, it’s recommended to consult a professional car audio installer for assistance.
By following these steps and utilizing the wire color code or a wire diagram, you can successfully identify the backup camera wire in your OEM car stereo. This will enable you to connect and use a backup camera system for an enhanced driving experience and improved safety while reversing.
Pinpointing the Steering Wheel Control Wire
The steering wheel control wire in your OEM car stereo allows you to retain and utilize the functionality of your vehicle’s steering wheel controls with an aftermarket stereo. Identifying the steering wheel control wire is necessary if you want to connect and integrate these controls seamlessly. Here’s how you can pinpoint the steering wheel control wire:
- Start by locating the wiring harness that connects to the back of your OEM car stereo. Look for a wire that is typically green or green with a white stripe, although the color coding may vary depending on your car’s make and model.
- If you’re unsure about the correct color code for the steering wheel control wire in your specific vehicle, consult the car’s manual or search online for a wire diagram that corresponds to your stereo system. This will help you confirm the correct color for the steering wheel control wire.
- Once you have identified the wire that is most likely the steering wheel control wire, perform a continuity test with a multimeter. Set the multimeter to measure continuity or resistance, and touch one probe to the suspected steering wheel control wire and the other probe to the corresponding wire in the steering wheel control interface. If the multimeter displays a reading or beeps, it indicates that you have found the steering wheel control wire.
- If you don’t have a multimeter, another method is to consult an aftermarket steering wheel control interface. These interfaces typically come with a wire that connects to the steering wheel control wire of your OEM stereo. By following the interface’s installation instructions, you can easily identify and connect the steering wheel control wire.
Once you have confirmed the steering wheel control wire, you can connect it to the appropriate input on your aftermarket stereo or steering wheel control interface. This will allow you to retain the functionality of your steering wheel controls, such as volume adjustments, track changes, and phone call handling, while using the new stereo.
Always handle the wires with care during installation to avoid damage or improper connections. If you are unsure about any steps or encounter difficulties, it’s advisable to consult a professional car audio installer for guidance.
By following these steps and utilizing the wire color code or a wire diagram, you can successfully pinpoint the steering wheel control wire in your OEM car stereo. This will enable you to integrate your aftermarket stereo while retaining the convenience and safety of your vehicle’s steering wheel controls.