
Importance of Identifying Aftermarket Car Stereo Wire Colors
When it comes to installing an aftermarket car stereo, identifying the wire colors is crucial. It may seem like a daunting task, but understanding the wire colors will greatly simplify the installation process and ensure a seamless integration with your vehicle’s electrical system. Let’s explore the importance of identifying aftermarket car stereo wire colors.
1. Proper Connection: Identifying the wire colors correctly allows you to make the proper connections between the stereo and your vehicle’s wiring harness. This ensures that all the necessary signals and power are transferred correctly, preventing any issues with audio quality or functionality.
2. Safety: Incorrectly connecting wires can lead to electrical shorts or even damage to the stereo and vehicle’s electrical system. Identifying wire colors helps eliminate guesswork and reduces the risk of potential hazards.
3. Troubleshooting: Knowing the wire colors makes troubleshooting easier in case any issues arise later on. If you’re facing problems with audio output, power supply, or any other functionality, being familiar with the wire colors will allow you to quickly pinpoint the potential problem areas.
4. Upgrading and Customizing: Recognizing aftermarket car stereo wire colors enables you to easily upgrade or customize your audio system. Whether you want to install additional speakers, amplifiers, or other accessories, understanding the wire colors is essential for a successful modification.
5. Installation Efficiency: Identifying the wire colors reduces installation time significantly. Rather than having to trace each wire and make educated guesses, knowing the colors allows you to connect the correct wires efficiently, saving both time and frustration.
6. Compatibility: Different manufacturers may use different wire colors for specific functions. Identifying the wire colors ensures compatibility, allowing you to choose the right aftermarket stereo that matches your vehicle’s wiring harness.
7. Resale Value: A properly installed aftermarket car stereo adds value to your vehicle, especially if you decide to sell it later on. Knowing the wire colors will enable you to install the stereo correctly, maintaining its functionality and enhancing the overall appeal.
By understanding the importance of identifying aftermarket car stereo wire colors, you can confidently tackle the installation process and enjoy the benefits of an upgraded audio system. Take the time to familiarize yourself with the wire colors and refer to the wiring diagram for your vehicle to ensure a successful and hassle-free installation.
Tools Needed for Identifying Aftermarket Car Stereo Wire Colors
When it comes to identifying aftermarket car stereo wire colors, having the right tools can make the process much easier and more efficient. These tools will help you accurately determine the function and corresponding wire colors, allowing for a seamless installation. Let’s take a look at the tools you’ll need:
- Wiring Diagram: First and foremost, obtain the correct wiring diagram for your vehicle. This diagram is crucial as it outlines the specific wire colors and their functions, ensuring a proper connection between the car stereo and your vehicle’s wiring harness.
- Multimeter: A multimeter is an essential tool that allows you to test wires for voltage, resistance, and continuity. It helps confirm the functions of different wires and identifies any discrepancies or issues in the wiring.
- Wire Strippers: Wire strippers are used to remove the insulation from the wire ends. This allows for a secure and proper connection of wires, ensuring they are attached correctly to the stereo and the wiring harness.
- Wire Connectors: Wire connectors are essential for connecting wires together securely. They come in various types such as butt connectors, crimp connectors, and twist-on connectors. Choose the appropriate connectors based on the wire gauge and follow the manufacturer’s instructions for proper installation.
- Electrical Tape: Electrical tape provides insulation and protects the wire connections from moisture and short circuits. It is used to wrap and secure the wire connectors and any exposed or spliced wires.
- Test Light: A test light is a simple tool that helps determine if a wire is carrying power. It consists of a handle, a transparent plastic housing, and a light bulb. When the test probe comes into contact with a live wire, the bulb inside the test light will illuminate.
- Wire Labels: Wire labels are useful for identifying wires during the installation process. They can be adhesive labels with pre-printed colors or blank labels that can be written on to mark the function of each wire.
- Flashlight: A flashlight is handy for illuminating hard-to-reach or poorly lit areas, making it easier to see and identify the wire colors.
- Safety Equipment: Lastly, ensure you have safety equipment such as gloves and safety glasses to protect yourself during the installation process. Working with wires and electrical components requires caution and proper protective gear.
Having these tools at your disposal will greatly simplify the process of identifying aftermarket car stereo wire colors. They will help you make accurate connections, troubleshoot any issues, and ensure a successful installation. Remember to consult the wiring diagram for your specific vehicle and follow the manufacturer’s instructions when using these tools.
Understanding the Wiring Diagram
When it comes to identifying aftermarket car stereo wire colors, the wiring diagram plays a crucial role. It serves as a roadmap, providing a detailed illustration of the wire connections and their functions. Understanding the wiring diagram is essential for a successful installation. Here’s a breakdown of how to interpret and utilize the wiring diagram:
1. Identifying Wire Colors: The wiring diagram will display various wire colors and their corresponding functions. Common colors include red for power, black or brown for ground, blue for accessory/remote, and various colors for speaker wires. Be sure to refer to the legend or key provided in the wiring diagram to understand the meaning of each color.
2. Locating Component Connections: The wiring diagram will indicate the connections between the car stereo and other components, such as speakers, amps, power sources, and more. It will show how the wires from the stereo connect to these components and the recommended wiring scheme.
3. Understanding Symbols and Abbreviations: The wiring diagram may utilize symbols and abbreviations to represent different components and connections. For example, a simple line with a dot at the end may indicate a speaker, while a zigzag line may represent an amplifier. Take the time to familiarize yourself with these symbols to accurately decipher the diagram.
4. Identifying Wire Sizes and Types: The wiring diagram may also provide information on the gauge (thickness) of the wires and the type of wire used for specific connections. This information is vital, as it ensures that the wire sizes and types are compatible with the stereo and the vehicle’s electrical system.
5. Tracing Circuits: The wiring diagram illustrates the flow of current through different circuits. This helps you understand how the components are connected and how the electrical signals are transmitted. By following the path of the wires in the diagram, you can trace specific circuits and troubleshoot any issues that may arise.
6. Using Color Codes: Some wiring diagrams may use color codes alongside the wire colors. These codes provide additional information about the wire’s function or other relevant details. Make sure to refer to the color codes explained in the wiring diagram’s legend to ensure accurate identification and connection of the wires.
Understanding the wiring diagram is crucial for properly identifying aftermarket car stereo wire colors and making the correct connections. It is recommended to study the wiring diagram thoroughly before starting the installation process. Take your time to familiarize yourself with the various components, wire colors, symbols, and abbreviations used. This knowledge will enable you to confidently connect the stereo to your vehicle’s electrical system and ensure a successful and functional installation.
Common Wire Colors and Their Functions
When it comes to identifying aftermarket car stereo wire colors, understanding the functions associated with each wire color is essential. While wire colors may vary between manufacturers and models, there are some commonly used colors and their corresponding functions that you should be aware of. Here are the most common wire colors and their functions:
1. Red: The red wire is typically the power wire, carrying the main 12-volt power supply for the car stereo. It connects to the battery positive terminal or a power source that remains active even when the ignition is turned off (known as the “constant” power wire).
2. Black or Brown: The black or brown wire is typically the ground wire, providing a path for electrical current to return to the vehicle’s battery or chassis ground. It is essential for a proper and safe electrical connection.
3. Yellow: The yellow wire is usually the accessory wire or remote turn-on wire. It provides power to the car stereo when the ignition key is turned on or in the accessory position. This wire allows the stereo to be powered on and off along with the vehicle.
4. Blue: The blue wire is commonly used as the remote wire for amplifiers or powered antenna. It sends a signal to turn on or off external audio equipment when the car stereo is turned on or off.
5. White and White/Black: These wires are commonly associated with front left speaker connections. The white wire is for the positive (+) speaker signal, while the white/black wire is for the negative (-) speaker signal.
6. Gray and Gray/Black: Similar to the white wires, the gray wire is for the positive (+) speaker signal of the front right speaker, while the gray/black wire is for the negative (-) speaker signal.
7. Green and Green/Black: These wires are usually connected to the rear left speaker. The green wire is for the positive (+) speaker signal, and the green/black wire is for the negative (-) speaker signal.
8. Purple and Purple/Black: These wires are associated with the rear right speaker. The purple wire is for the positive (+) speaker signal, and the purple/black wire is for the negative (-) speaker signal.
Remember that these wire colors and their functions can vary depending on the vehicle’s make and model, as well as the specific stereo being installed. Always refer to the wiring diagram or instructions provided by the manufacturer for accurate information regarding wire colors and their functions for your particular installation.
By familiarizing yourself with the common wire colors and their functions, you’ll be better equipped to identify and connect the wires during the installation of an aftermarket car stereo. This knowledge will ensure a proper and functional connection, resulting in an enhanced audio experience in your vehicle.
Locating the Wire Harness
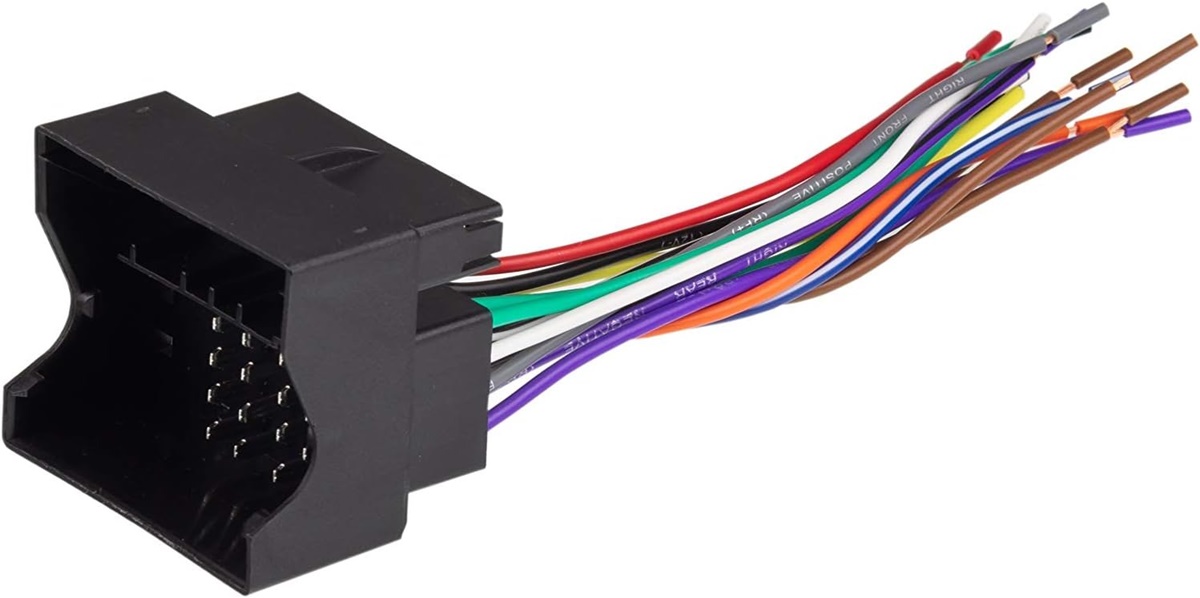
When installing an aftermarket car stereo, locating the wire harness is an important step in the process. The wire harness is a connector or bundle of wires that connects the car stereo to the vehicle’s wiring system. It serves as the intermediary between the stereo and the electrical system of the vehicle. Here’s a guide on how to locate the wire harness:
1. Consult the Vehicle Manual: The vehicle’s manual is a valuable resource when it comes to locating the wire harness. It often provides a diagram or description of the wiring system, including the location of the wire harness. Look for the section that covers the electrical system or stereo installation for guidance.
2. Understand Common Locations: In most vehicles, the wire harness is located behind the car stereo unit. It is typically tucked away in the dashboard or console area. However, the exact location can vary depending on the make and model of the vehicle.
3. Remove the Factory Stereo: To access the wire harness, you may need to remove the factory stereo. The removal process can differ for each vehicle, so refer to the vehicle’s manual or an installation guide specific to your make and model. Typically, removing the stereo involves carefully prying off the trim or control panel surrounding the stereo, then unscrewing or releasing the mounting screws or clips holding the stereo in place.
4. Inspect the Dashboard or Console: Once the factory stereo is removed, inspect the dashboard or console area for a rectangular opening. This opening is where the wire harness is usually located. The wire harness may be easily visible or may require further removal of additional panels or components to access it.
5. Identify the Wire Harness: The wire harness is a connector with multiple wires coming out of it. It is typically made up of different colored wires, each with its own unique function. Refer to the wiring diagram or the vehicle manual to identify the wire harness based on the wire colors and their corresponding functions.
6. Unclip or Disconnect the Wire Harness: Once located, unclip or disconnect the wire harness from the vehicle’s wiring system. This may involve pressing on release tabs, sliding the connectors apart, or unscrewing any fasteners holding the harness in place.
It’s worth noting that some vehicles may have additional wire harnesses located in different areas of the vehicle, such as in the trunk or behind the rear seats, depending on the audio and electrical setup. Consult the vehicle’s manual or an installation guide specific to your vehicle to ensure you locate all the necessary wire harnesses.
Locating the wire harness is a critical step when connecting an aftermarket car stereo to the vehicle’s electrical system. By following the steps outlined above and referring to the vehicle’s manual or an installation guide, you can easily find the wire harness and proceed with the installation process.
Matching the Wire Colors
Matching the wire colors is an important step when installing an aftermarket car stereo. It involves connecting the wires from the stereo to the corresponding wires in the vehicle’s wire harness. By properly matching the wire colors, you ensure the correct function and integration of the car stereo with the vehicle’s electrical system. Here’s a guide on how to match the wire colors:
1. Refer to the Wiring Diagram: Start by referring to the wiring diagram for both the aftermarket car stereo and your vehicle. The wiring diagram will indicate the wire colors and their corresponding functions. Make sure you have the accurate and up-to-date wiring diagrams for both the stereo and the vehicle.
2. Identify the Wire Colors: Next, identify the wire colors coming from the aftermarket car stereo. These wires are typically labeled or marked with their function, such as power, ground, speaker wires, accessory/remote, and so on. Use the wiring diagram to match the wire colors from the stereo to the corresponding wire colors in the vehicle’s wire harness.
3. Inspect the Vehicle’s Wire Harness: After identifying the wire colors from the stereo, inspect the wire harness in the vehicle. Look for wires with the same or similar colors as those from the stereo. Take note of the functions associated with these wires based on the wiring diagram.
4. Connect the Wires: Once you have identified the matching wire colors from the stereo and the vehicle’s wire harness, it’s time to make the connections. Strip the ends of the wires from both the stereo and the harness using wire strippers, exposing a small portion of the metal conductor. Twist the corresponding wires together, ensuring a secure and tight connection.
5. Secure the Connections: After making the connections, secure them properly to prevent any loose or exposed wires. You can use wire connectors, such as crimp connectors or twist-on connectors, to secure and insulate the connections. Wrap the connections with electrical tape for added protection against moisture and potential short circuits.
6. Test the Connections: Once all the wires are connected, it’s essential to test the connections before fully reinstalling the stereo. Turn on the car’s ignition and test the stereo’s functionality. Make sure all the speakers are working correctly, and the stereo receives power and properly controls the volume, source, and other functions.
Remember, wire colors can vary between manufacturers and vehicle models, so it’s crucial to refer to the specific wiring diagrams for accurate wire color matching. Take your time during the process and double-check all the connections to ensure a proper and functional installation.
By carefully matching the wire colors, you can successfully install an aftermarket car stereo and enjoy an enhanced audio experience in your vehicle. However, if you’re uncertain about the process or encounter any difficulties, it’s always recommended to seek professional assistance or guidance.
Testing the Wires with a Multimeter
Testing the wires with a multimeter is an important step in the installation of an aftermarket car stereo. A multimeter allows you to accurately measure voltage, resistance, and continuity, ensuring that the connections are correct and the electrical system is functioning properly. Here’s a guide on how to test the wires with a multimeter:
1. Select the Testing Mode: Set your multimeter to the appropriate testing mode for the task at hand. Depending on the specific multimeter model, you may have different modes such as voltage, resistance, or continuity. Refer to the multimeter’s user manual to select the correct mode.
2. Prepare the Multimeter: Depending on the testing mode, you may need to select the voltage range, resistance range, or turn on continuity mode. Follow the instructions provided with your multimeter to ensure proper setup.
3. Connect the Multimeter Probes: Attach the multimeter probes to the appropriate terminals. For voltage or continuity testing, connect the red probe to the positive terminal and the black probe to the negative terminal. For resistance testing, both probes can be connected to the corresponding ends of the wire being tested.
4. Test for Voltage: To test for voltage, touch the multimeter probes to the corresponding wire ends or connections. For example, place one probe on the red power wire and the other on the black ground wire. The multimeter will display the voltage reading if a voltage is present.
5. Test for Continuity: Continuity testing is used to check if a wire is continuous or has a break. Place one probe on one end of the wire being tested and the other probe on the opposite end. If the multimeter beeps or indicates a closed circuit, it means there is continuity in the wire.
6. Test for Resistance: Resistance testing is used to measure the resistance of a wire or a component. Connect the multimeter probes to the ends of the wire being tested. The multimeter will display the resistance reading, which should correspond to the expected value based on the wiring diagram or specifications.
7. Interpret the Multimeter Readings: When testing the wires with the multimeter, pay attention to the readings. Compare them to the expected values based on the wiring diagram or specifications. If the readings deviate significantly or show no response, there may be an issue with the connection or the wire itself.
Testing the wires with a multimeter allows you to ensure that the connections are correct and the electrical system is functioning as intended. It not only helps identify any wiring errors but also helps troubleshoot potential issues and confirm the integrity of the connections. If you encounter any discrepancies or unexpected readings during the test, double-check the wire connections and consult the wiring diagram to rectify any problems.
Remember to follow the safety precautions recommended by the multimeter manufacturer and exercise caution when working with electrical components. If you’re unsure about the testing process or have concerns, it’s advisable to seek professional assistance or guidance.
Identifying Speaker Wires
Identifying speaker wires correctly is crucial when installing an aftermarket car stereo. Properly identifying the speaker wires ensures that each speaker is connected to the correct channel, resulting in optimal sound quality and stereo performance. Here’s a guide on how to identify speaker wires:
1. Consult the Wiring Diagram: Begin by referring to the wiring diagram for your specific car stereo and vehicle. The wiring diagram will indicate the wire colors associated with each speaker. Make sure you have the accurate and up-to-date wiring diagram to identify the speaker wires correctly.
2. Identify Positive (+) and Negative (-) Speaker Terminals: Speaker wires typically have two terminals – positive (+) and negative (-). Positive terminals are often marked with a “+” symbol or a colored stripe, while negative terminals may have a “-” symbol or no marking at all. Additionally, some manufacturers use different color combinations to indicate polarity, so consult the wiring diagram to determine the specific color conventions for your car stereo.
3. Locate Speaker Connectors: In most cases, the speaker wires will be found near the wire harness or behind the factory stereo. They may appear as pairs of wires, with each pair corresponding to a specific speaker. Identify the pairs of wires associated with each speaker location using the wire colors indicated in the wiring diagram.
4. Test the Wires: To confirm the speaker wires, you can perform a simple test using a 9-volt battery. Strip a small portion of the wire insulation for each pair of wires and briefly touch one wire to the positive terminal and the other wire to the negative terminal of the battery. If you hear a clicking sound or see the speaker cone move, it indicates that the wires are correctly connected to the corresponding speaker.
5. Label the Speaker Wires: Once you have identified the speaker wires, it’s helpful to label them to avoid confusion during installation. Use wire labels or strips of masking tape to mark each wire with its corresponding speaker location (such as “Front Left,” “Front Right,” “Rear Left,” “Rear Right,” etc.).
6. Connect the Speaker Wires: After identifying and labeling the speaker wires, connect them to the appropriate speaker terminals. Match the positive (+) wire to the positive terminal and the negative (-) wire to the negative terminal of each speaker. Secure the connections using connectors appropriate for your specific installation, such as crimp connectors or soldering.
Remember to follow the polarity conventions indicated in the wiring diagram to ensure each speaker is correctly phased and aligned. Reversed polarity can result in diminished sound quality and reduced stereo imaging.
By correctly identifying the speaker wires and ensuring each wire is connected to the right speaker, you can achieve optimal audio performance and an immersive listening experience from your aftermarket car stereo. Following the steps outlined above and referring to the wiring diagram will enable you to make accurate connections and enjoy high-quality sound reproduction in your vehicle.
Identifying Power, Ground, and Constant Wires
Identifying power, ground, and constant wires is crucial when installing an aftermarket car stereo. These wires play essential roles in providing power and maintaining the functionality of the stereo. Here’s a guide on how to identify these key wires:
1. Consult the Wiring Diagram: Start by referring to the wiring diagram for your specific car stereo and vehicle. The wiring diagram will indicate the wire colors associated with power, ground, and constant functions. Make sure you have the accurate and up-to-date wiring diagram to identify the wires correctly.
2. Power Wire: The power wire is responsible for supplying 12-volt power to the car stereo. It is usually red in color, but it’s important to consult the wiring diagram to confirm the specific color associated with the power wire for your stereo. The power wire should connect to a constant power source, one that provides power even when the ignition is turned off (to retain settings, clock, and memory functions).
3. Ground Wire: The ground wire provides a pathway for electrical current to return to the vehicle’s battery or chassis ground. It serves as a reference point and ensures stable and reliable electrical connections. The ground wire is typically black or brown, but again, consult the wiring diagram for your specific stereo to confirm the associated color.
4. Constant Wire: The constant wire, also known as the “memory” wire, is responsible for retaining the settings and memory functions of the stereo. It is typically connected to a constant power source along with the power wire. The constant wire allows the stereo to remember radio presets, equalizer settings, and other user preferences. Consult the wiring diagram to determine the color associated with the constant wire.
5. Locate the Wire Harness: The wire harness is a connector or bundle of wires that connects the car stereo to the vehicle’s electrical system. Locate the wire harness behind the factory stereo or in the dashboard area. The power, ground, and constant wires are usually found within this wire harness.
6. Verify Wire Functions: Once you have located the wire harness, visually inspect the wires to identify the power, ground, and constant wires. Compare the wire colors to those indicated in the wiring diagram to verify their functions. Take note of any markings, labels, or conventions used to designate these specific wires in your particular wiring setup.
7. Connect the Wires: After successfully identifying the power, ground, and constant wires, connect them according to their respective functions. Strip a small portion of the wire insulation, twist the stripped ends together, and secure them using appropriate connectors such as crimp connectors or soldering. Ensure a tight and secure connection to prevent any electrical faults or intermittent operation.
By correctly identifying the power, ground, and constant wires, you ensure the proper functionality and reliable performance of your aftermarket car stereo. Following the steps outlined above and referencing the wiring diagram specific to your stereo model will allow you to make accurate connections and enjoy a seamless integration with your vehicle’s electrical system.
Identifying Accessory and Illumination Wires
Identifying accessory and illumination wires is essential when installing an aftermarket car stereo. These wires enable certain features and functionalities, such as powering accessories and controlling display illumination. Here’s a guide on how to identify these wires:
1. Consult the Wiring Diagram: Start by referring to the wiring diagram for your specific car stereo and vehicle. The wiring diagram will indicate the wire colors associated with the accessory and illumination functions. Make sure you have the accurate and up-to-date wiring diagram to identify the wires correctly.
2. Accessory Wire: The accessory wire, also known as the remote turn-on wire or ignition wire, provides power to the car stereo when the ignition key is turned on or in the accessory position. It allows the stereo to turn on and off along with the vehicle. The accessory wire is typically yellow in color, but consult the wiring diagram for your specific stereo to confirm the associated color.
3. Illumination Wire: The illumination wire controls the brightness or dimness of the car stereo’s display lights. When the vehicle’s headlights are turned on, the illumination wire triggers the stereo display to adjust its illumination level accordingly. The illumination wire is typically orange or orange/white, but check the wiring diagram for your specific stereo to confirm the associated color.
4. Locate the Wire Harness: The wire harness is a connector or bundle of wires that connects the car stereo to the vehicle’s electrical system. Locate the wire harness behind the factory stereo or in the dashboard area. The accessory and illumination wires are usually found within this wire harness.
5. Verify Wire Functions: Once you have located the wire harness, visually inspect the wires to identify the accessory and illumination wires. Compare the wire colors to those indicated in the wiring diagram to verify their functions. Take note of any markings, labels, or conventions used to designate these specific wires in your particular wiring setup.
6. Connect the Wires: After successfully identifying the accessory and illumination wires, connect them according to their respective functions. Strip a small portion of the wire insulation, twist the stripped ends together, and secure them using appropriate connectors such as crimp connectors or soldering. Ensure a tight and secure connection to prevent any electrical faults or intermittent operation.
7. Test the Functionality: With the wires connected, test the functionality of the accessory and illumination features. Turn the ignition key to the accessory position and verify that the stereo powers on. Additionally, turn on the vehicle’s headlights and confirm that the stereo display adjusts its illumination level accordingly.
By correctly identifying and connecting the accessory and illumination wires, you enable essential features in your aftermarket car stereo. Following the steps outlined above and referencing the wiring diagram specific to your stereo model will allow you to make accurate connections and enjoy the convenience and enhanced visibility provided by these wires.
Identifying Antenna and Amplifier Wires
Identifying antenna and amplifier wires is crucial when installing an aftermarket car stereo. These wires enable proper reception of radio signals and enhance audio performance through external amplifiers. Here’s a guide on how to identify these wires:
1. Consult the Wiring Diagram: Begin by referring to the wiring diagram for your specific car stereo and vehicle. The wiring diagram will indicate the wire colors associated with the antenna and amplifier functions. Make sure you have the accurate and up-to-date wiring diagram to identify the wires correctly.
2. Antenna Wire: The antenna wire is responsible for receiving radio signals and transmitting them to the car stereo. It is typically a single wire connected to the antenna on the vehicle. The antenna wire is usually blue or blue/white, but consult the wiring diagram for your specific stereo to confirm the associated color.
3. Amplifier Wire: If your vehicle is equipped with an external amplifier, there will be wires specifically for connecting to the amplifier. These wires provide the audio signal from the stereo to the amplifier, allowing for amplified sound output. Consult the wiring diagram for your specific stereo and vehicle to identify the wire colors associated with the amplifier connections.
4. Locate the Wire Harness: The wire harness is a connector or bundle of wires that connects the car stereo to the vehicle’s electrical system. Locate the wire harness behind the factory stereo or in the dashboard area. The antenna and amplifier wires are usually found within this wire harness.
5. Verify Wire Functions: Once you have located the wire harness, visually inspect the wires to identify the antenna and amplifier wires. Compare the wire colors to those indicated in the wiring diagram to verify their functions. Take note of any markings, labels, or conventions used to designate these specific wires in your particular wiring setup.
6. Connect the Wires: After successfully identifying the antenna and amplifier wires, connect them according to their respective functions. Strip a small portion of the wire insulation, twist the stripped ends together, and secure them using appropriate connectors such as crimp connectors or soldering. Ensure a tight and secure connection to maintain proper signal transmission.
7. Test the Functionality: Once the wires are connected, test the functionality of the antenna and amplifier. Turn on the car stereo and tune in to a radio station to verify that the antenna wire is receiving a clear signal. If you have an external amplifier, play audio through the stereo and confirm that it is being amplified by the connected amplifier.
By correctly identifying and connecting the antenna and amplifier wires, you ensure optimal radio reception and enhanced audio performance in your aftermarket car stereo. Following the steps outlined above and referencing the wiring diagram specific to your stereo model and vehicle will allow you to make accurate connections and enjoy a superior audio experience.
Troubleshooting Common Issues
During the installation of an aftermarket car stereo, it is common to encounter some issues. However, with proper troubleshooting techniques, most problems can be resolved quickly and effectively. Here are some common issues you may encounter and how to troubleshoot them:
1. No Power: If the stereo does not power on, check the power connections. Ensure that the power wire is securely connected to a constant power source and the ground wire is properly grounded. If the connections are correct, use a multimeter to test for power at the stereo’s power wire connection. If no power is detected, check the fuse box for a blown fuse or a faulty wiring connection.
2. No Sound: If there is no sound coming from the speakers, first check the speaker wire connections. Ensure that each speaker wire is connected to the correct channel and that the connections are secure. Verify that the speakers themselves are functional by testing them with a separate audio source. If the speakers are working, check the stereo’s audio settings and balance/fade controls to ensure they are correctly configured.
3. Poor Sound Quality: If you are experiencing distorted or poor sound quality, there might be an issue with the speaker wiring. Check for proper polarity and ensure that positive and negative speaker wires are correctly connected. Verify that the speaker wires are not touching any metal surfaces or other wires, as this can cause interference. Adjust the equalizer settings on the stereo to fine-tune the sound quality to your preferences.
4. Intermittent Power or Sound: If the stereo or speakers experience intermittent power or sound, check for loose or faulty connections. Ensure that all wires are securely connected and not frayed or damaged. If the issue persists, there may be a problem with the wiring harness or a faulty component. Consider replacing the wiring harness or seeking professional assistance to diagnose and fix the problem.
5. Display Issues: If the stereo’s display is not functioning correctly, check the illumination wire connection. The illumination wire controls the display’s brightness and might be improperly connected. Verify that the wire is correctly connected to the vehicle’s illumination system or a designated power source. If the issue persists, there may be a problem with the stereo’s display unit that requires further inspection or replacement.
6. Noise or Electrical Interference: If you hear unwanted noise or electrical interference, such as whining or buzzing sounds, there may be a grounding issue. Ensure that the ground wire is properly connected, making a solid connection with the vehicle’s chassis ground. It is also advisable to check for proper shielding of audio cables and keep them away from power cables to minimize interference. Consider using noise filters or ground loop isolators if necessary.
7. Resetting the System: If you are experiencing multiple issues or the stereo is not functioning properly, try performing a system reset. Disconnect the power source from the stereo for a few minutes, then reconnect it. This allows the system to reset and often resolves any temporary issues or glitches.
Remember to consult the wiring diagrams, follow instructions carefully, and double-check all connections during the installation process. If troubleshooting efforts do not resolve the issues, it may be necessary to consult a professional or seek assistance from a car audio specialist.
With patience and the right approach, most common issues can be resolved during the installation of an aftermarket car stereo. Following these troubleshooting steps will help ensure a smooth and enjoyable audio experience in your vehicle.