
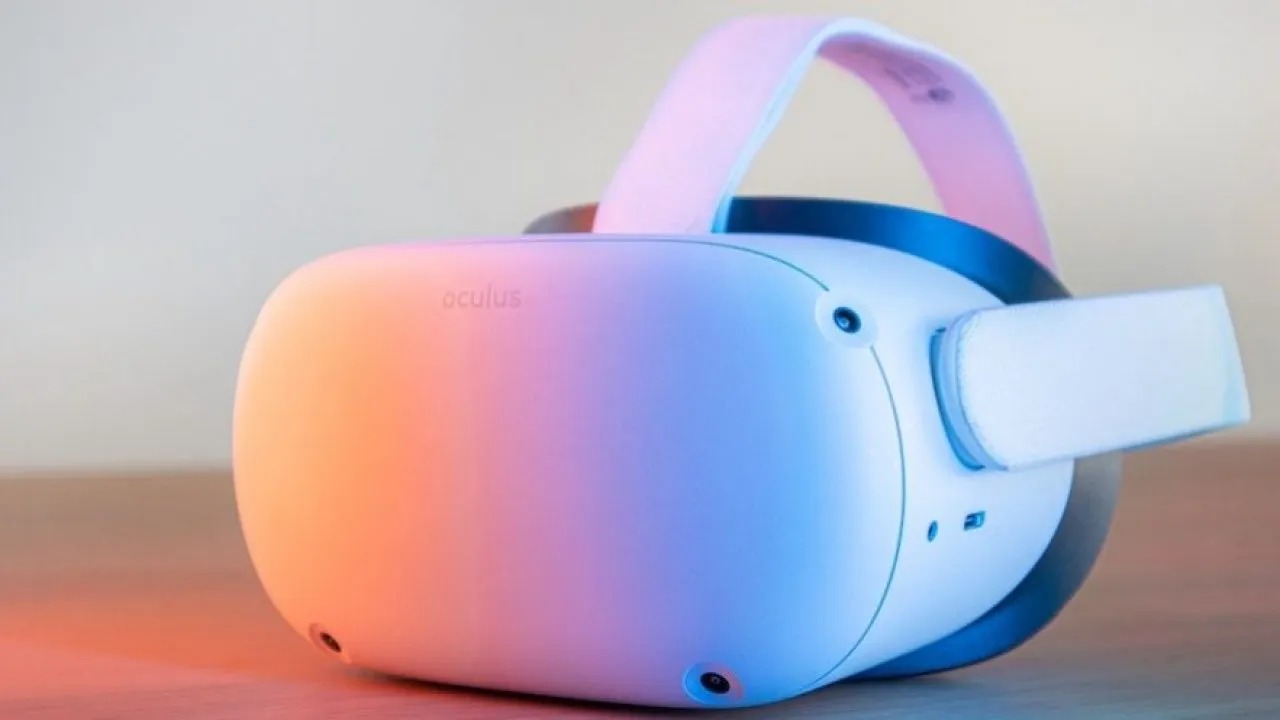
Check the Power Connection
One of the first troubleshooting steps you should take when your Oculus Rift isn’t staying on is to check the power connection. Ensure that the cables are properly connected to both the headset and your computer. Sometimes, a loose connection can cause intermittent power issues.
Start by disconnecting and reconnecting the cables at both ends. Make sure they are securely plugged in and that there are no signs of damage or wear. Inspect the USB and HDMI ports for any debris or dirt that may be obstructing the connection.
Additionally, if you are using an external power adapter for your Oculus Rift, make sure it is firmly connected and receiving power. Check if the LED indicator on the power adapter is lit, indicating that it is functioning properly.
If the power connection appears to be fine, try connecting the Oculus Rift to a different USB port on your computer. Sometimes, a faulty USB port can cause power instability. Switching to a different port can help determine if the issue is specific to that particular port.
It’s also worth noting that some USB ports may not provide enough power to properly run the Oculus Rift. In such cases, using a powered USB hub can help ensure a stable power supply. Connect the Oculus Rift to the powered USB hub, then connect the hub to your computer’s USB port.
Once you have checked the power connection and made any necessary adjustments, try turning on your Oculus Rift again and see if it stays on. If the issue persists, proceed to the next troubleshooting step.
Adjust the Headset Straps
If your Oculus Rift keeps falling off or feels uncomfortable to wear, adjusting the headset straps can make a significant difference. Properly adjusting the head straps can not only improve the fit but also help distribute the weight evenly for a more comfortable VR experience.
Start by putting on the headset and adjusting the top head strap. Loosen or tighten the strap until it comfortably rests on the top of your head, providing adequate support without feeling too tight or loose. The strap should be snug enough to prevent the headset from sliding down but not so tight that it causes discomfort.
Next, adjust the side straps. These straps go over your ears and help secure the headset in place. Make sure they are adjusted to a length that allows the headset to sit firmly against your face, providing a clear field of view. If the straps are too loose, the headset may move around during use, causing it to lose tracking or fall off.
Some Oculus Rift models also have a dial on the back of the head strap. This dial can be rotated to further tighten or loosen the fit of the headset. Experiment with the dial until you find a comfortable and secure fit.
It’s important to note that everyone’s head shape and size are different, so you may need to spend some time adjusting the straps to find the optimal fit for you. Take breaks in between adjustments to allow your head to adjust to the changes and ensure that you’re not wearing the headset for too long at a stretch.
Once you have adjusted the straps to your liking, put on the Oculus Rift again and test if it stays in place during use. If the issue persists, continue troubleshooting using the other methods outlined in this guide.
Clean the Sensor Area
If your Oculus Rift is experiencing tracking issues or losing its position frequently, it could be due to dirt or smudges on the sensor area. The sensors on the headset need a clear view to accurately track your movements, so cleaning the sensor area can help improve tracking performance.
Start by turning off your Oculus Rift and unplugging any cables connected to it. Gently wipe the front-facing lenses with a microfiber cloth or lens cleaning wipe. Avoid using harsh chemicals or abrasive materials that could damage the lenses.
Next, clean the external sensors located on the front of the headset. They are responsible for tracking the position of the headset in the virtual space. Use a dry cloth or a slightly damp cloth to wipe away any dirt or smudges. Be gentle when cleaning to avoid any damage to the sensors.
In addition to cleaning the headset itself, it’s also important to ensure that the area around the sensors is free from obstructions. Make sure there are no objects, furniture, or other devices blocking the sensors’ line of sight. Clear the surrounding area to allow for unobstructed tracking.
If you’re using an Oculus Rift with inside-out tracking, such as the Oculus Quest, clean the tracking cameras located on the front of the headset. These cameras track your movement and the environment. Clean them using the same gentle wiping motion as described earlier.
Once you have cleaned the sensor area and ensured there are no obstructions, plug in and turn on your Oculus Rift again. Test the tracking performance to see if there is any improvement. If the issue persists, move on to the next troubleshooting step.
Restart your Computer
If you’re encountering issues with your Oculus Rift, one of the simplest but often effective troubleshooting steps is to restart your computer. Restarting your computer can help resolve temporary software glitches or conflicts that may be causing the problem.
Before restarting, make sure to close any Oculus-related applications or processes running in the background. You can do this by right-clicking on the taskbar and selecting “Task Manager.” In the Task Manager window, navigate to the “Processes” tab and end any Oculus-related processes that are running.
Once you’ve closed any Oculus-related processes, click on the Start button in the bottom left corner of your screen and select “Restart.” This will initiate a system restart, which will close all programs and refresh the operating system.
After your computer restarts, wait for it to fully boot up and then launch the Oculus software. Check if the issues you were experiencing with your Oculus Rift are resolved. If the problem persists, proceed to the next troubleshooting step.
Restarting your computer can often help resolve minor software issues, but if the problem continues, there may be other underlying causes that need addressing. In the following sections, we will explore further troubleshooting steps to get your Oculus Rift working smoothly again.
Update your Oculus Software
Keeping your Oculus software up to date is crucial for ensuring optimal performance and compatibility with your Oculus Rift. Oculus frequently releases updates that include bug fixes, performance improvements, and new features. If you’re experiencing issues with your Oculus Rift, updating the software should be one of the first steps you take.
To update your Oculus software, open the Oculus app on your computer. If an update is available, you will see a notification prompting you to update. Click on the notification and follow the instructions to download and install the latest update.
If you don’t see a notification for an update, you can manually check for updates by clicking on the “Settings” tab in the Oculus app. Under the “General” section, click on “Check for Updates.” The Oculus app will then check for any available updates and guide you through the installation process if updates are found.
During the update process, make sure that your Oculus Rift is connected to your computer and powered on. Keep any cables connected and avoid disconnecting or turning off your headset while the update is in progress.
After the update is complete, restart your computer and launch the Oculus software again. Check if the issues you were experiencing with your Oculus Rift have been resolved. If the problems persist, continue troubleshooting using the additional methods outlined in this guide.
Updating your Oculus software ensures that you have the latest features and improvements that can enhance your VR experience. It also helps ensure compatibility with the latest games and applications.
Note that some firmware updates may also be available for your Oculus Rift itself. These updates can bring performance enhancements and bug fixes specific to the headset. You can check for firmware updates by clicking on the “Devices” tab in the Oculus app and selecting your Oculus Rift from the list of connected devices.
Optimize your Computer Settings
Optimizing your computer settings can help improve the performance and stability of your Oculus Rift. By ensuring that your system is properly configured for VR, you can enhance the overall experience and minimize potential issues. Here are some tips to optimize your computer settings:
1. Update Graphics Card Drivers: Make sure you have the latest drivers installed for your graphics card. Visit the manufacturer’s website or use their software to check for updates and install them accordingly. Up-to-date drivers can improve graphics performance and compatibility with VR games and applications.
2. Disable Power Saving Features: VR requires a significant amount of processing power, so it’s important to disable any power-saving features that may hamper performance. In your computer’s power settings, set the “Power Plan” to High Performance or Balanced mode.
3. Adjust Visual Effects: Modify the visual effects settings of your operating system to prioritize performance. Reduce or disable resource-intensive effects such as shadows, transparency, and animations. This can help allocate more resources to the Oculus Rift and improve overall performance.
4. Close Unnecessary Background Processes: Close any unnecessary applications or processes running in the background. These can consume valuable system resources and potentially interfere with the performance of your Oculus Rift. Use the Task Manager to identify and close any non-essential processes.
5. Clear Temporary Files: Regularly clear temporary files and caches that accumulate on your computer. These files can take up valuable storage space and potentially slow down system performance. Utilize disk cleanup tools or delete these files manually.
6. Manage Anti-Virus and Firewall Settings: Ensure that your anti-virus and firewall software is not blocking any necessary components of the Oculus Rift. Add exceptions or exclusions for the Oculus software and related processes to prevent any conflicts or interruptions.
7. Optimize VR Game Settings: Adjust the graphics settings within your VR games to match the capabilities of your computer. Lowering the graphics quality or resolution can help improve performance and reduce strain on your system.
8. Monitor System Temperature: Keep an eye on your computer’s temperature while using the Oculus Rift. Overheating can lead to performance issues and potential shutdowns. Ensure proper cooling by cleaning dust from fans and vents and consider using additional cooling solutions if necessary.
By implementing these optimization tips, you can create a more VR-friendly environment on your computer. Remember to restart your computer after making any changes to ensure they take effect. If the issues with your Oculus Rift persist, proceed to the next troubleshooting steps.
Check for Software Conflicts
If you’re experiencing issues with your Oculus Rift, such as crashes, freezes, or performance problems, it’s important to check for software conflicts. Conflicts with other applications or processes running on your computer can sometimes interfere with the proper functioning of the Oculus software and headset. Here are some steps to help identify and resolve software conflicts:
1. Close Unnecessary Programs: Close any unnecessary applications running in the background. These can consume system resources and potentially conflict with the Oculus software. Use the Task Manager to identify and close any non-essential programs.
2. Disable Antivirus or Firewall Temporarily: Temporarily disable your antivirus or firewall software to see if they are causing any conflicts. Some security software may erroneously block Oculus processes or interfere with the connection between your computer and the headset. If the issues are resolved after disabling the software, consider adding exceptions or exclusions for the Oculus software.
3. Check for Overlapping VR Software: If you have other VR software or platforms installed on your computer, such as SteamVR or Windows Mixed Reality, make sure they are not conflicting with the Oculus software. Close or uninstall any overlapping VR software and restart your computer to see if the issues persist.
4. Scan for Malware: Conduct a thorough malware scan on your computer to check for any malicious software that could be interfering with the Oculus software. Use reliable antivirus or anti-malware software to scan and remove any potential threats.
5. Update or Reinstall Conflicting Applications: If you suspect that a specific application is causing conflicts with the Oculus software, try updating or reinstalling that application. Sometimes, older or incompatible versions of software can cause compatibility issues. Visit the application’s official website or contact their support for guidance on ensuring compatibility with the Oculus Rift.
6. Clean Boot: Perform a clean boot to start your computer with only essential services and processes running. This helps identify if any third-party applications or services are causing conflicts with the Oculus software. Instructions for performing a clean boot can be found on Microsoft’s support website.
7. Check for Software Updates: Ensure that all your software, including the operating system, is up to date. Software updates often include bug fixes and compatibility improvements that may resolve conflicts with the Oculus Rift.
By checking for software conflicts and addressing any issues, you can help ensure a smoother experience with your Oculus Rift. If the problems persist, move on to the next troubleshooting steps in this guide.
Adjust the Power Management Settings
If you’re experiencing power-related issues with your Oculus Rift, such as random shutdowns or power fluctuations, adjusting the power management settings on your computer can help resolve these problems. Here are some steps you can take to optimize your power management settings:
1. Disable USB Selective Suspend: USB Selective Suspend is a feature that allows the computer to turn off USB devices when they’re not in use to save power. However, this can sometimes interfere with the stability of the Oculus Rift. To disable USB Selective Suspend, go to the Power Options settings on your computer (typically found in the Control Panel), locate the USB settings, and disable the “Selective USB Suspension” option.
2. Adjust Power Plan Settings: Make sure your computer is set to a balanced or high-performance power plan. These power plans provide the necessary resources for the Oculus Rift to function optimally. To modify your power plan settings, go to the Power Options settings and select the desired power plan.
3. Set Display Sleep to Never: To prevent your display from turning off while using the Oculus Rift, set the display sleep timer to “Never” in your computer’s power settings. This ensures that your Oculus Rift remains active even if your display goes into power-saving mode.
4. Disable Power-saving Features: Some power-saving features, such as “Sleep” or “Hibernate” modes, can interfere with the Oculus Rift’s stability. Disable these features in your power settings to ensure that your computer remains active and doesn’t go into power-saving modes during VR sessions.
5. Update BIOS and Drivers: Outdated BIOS firmware or drivers can sometimes cause power-related issues. Check the manufacturer’s website for your computer’s motherboard and other hardware components to ensure that you have the latest BIOS firmware and drivers installed. Updating these can help resolve power-related conflicts with the Oculus Rift.
6. Utilize a Dedicated Power Outlet: Plug your computer and the Oculus Rift into a dedicated power outlet to ensure a stable and reliable power supply. Avoid using power strips or extension cords that may not provide a consistent power flow, as this can cause fluctuations and interruptions in the Oculus Rift’s operation.
By adjusting the power management settings on your computer, you can help ensure a stable power supply to your Oculus Rift and minimize power-related issues. If the problems persist, continue troubleshooting using the other methods described in this guide.
Use a Powered USB Hub
If you’re encountering USB power issues with your Oculus Rift, such as intermittent connectivity or power instability, using a powered USB hub can help provide a stable power supply. A powered USB hub can act as a middleman between your computer and the Oculus Rift, ensuring that it receives a consistent and reliable power source. Here’s how you can use a powered USB hub:
1. Choose a Compatible USB Hub: Select a powered USB hub that is compatible with the Oculus Rift. Look for a hub that provides USB 3.0 or higher ports, as these offer faster data transfer speeds and are better suited for VR experiences. Additionally, ensure that the hub has an external power source to supply sufficient power to the connected devices.
2. Connect the USB Hub to your Computer: Connect the powered USB hub to an available USB port on your computer. Make sure the hub is securely plugged in and that the power adapter is connected to a power source. The USB hub should have its own power supply to provide sufficient power to the connected devices.
3. Connect the Oculus Rift to the USB Hub: Use the USB cable that came with your Oculus Rift to connect it to one of the USB ports on the powered hub. Make sure the connection is secure. This will allow the Oculus Rift to draw power from the hub, ensuring stable connectivity and power supply.
4. Connect Additional Devices (Optional): If you have other devices, such as sensors or additional peripherals, you can connect them to the remaining USB ports on the powered hub. This can help simplify cable management and ensure that all devices receive sufficient power.
5. Test the Connection: Turn on your Oculus Rift and test its connectivity and performance. With the powered USB hub, you should experience improved stability and reduced power-related issues. The hub’s external power source will help alleviate any power drain or instability that may have been occurring when directly connected to your computer’s USB ports.
Using a powered USB hub can provide a dedicated power supply for your Oculus Rift, helping to eliminate power-related issues and ensure a smoother VR experience. If you continue to experience problems, consult the Oculus support website or try other troubleshooting methods outlined in this guide.
Adjust the Oculus Display Settings
If you’re experiencing visual issues or display inconsistencies with your Oculus Rift, adjusting the display settings can help improve the overall visual quality and enhance your VR experience. By optimizing the display settings, you can ensure that the Oculus Rift is delivering the best possible visuals for your specific setup. Here’s how you can adjust the Oculus display settings:
1. Open the Oculus App: Launch the Oculus app on your computer and ensure your Oculus Rift is connected and detected by the app.
2. Go to the Devices Section: Click on the “Devices” tab in the Oculus app’s navigation bar at the left-hand side of the screen. This section allows you to manage your connected Oculus Rift devices and adjust various settings.
3. Select your Oculus Rift: From the list of devices, select your Oculus Rift. This will open the settings and options specific to your headset.
4. Adjust Display Preferences: Within the Oculus Rift device settings, you will find an option to adjust the display preferences. This typically includes options for changing the display resolution, refresh rate, virtual desktop size, and lens spacing. Experiment with different settings to find the combination that offers the best visual experience for your preferences.
5. Calibrate IPD (Interpupillary Distance): IPD refers to the distance between your eyes, and calibrating it properly is essential for achieving the optimal visual experience. Use the IPD calibration tool within the Oculus app to accurately measure and adjust the IPD settings specific to your eyes. This will help ensure that the visuals appear crisp and properly aligned.
6. Enable Night Mode (optional): Night Mode is a feature within the Oculus app that reduces the brightness and blue light emitted by the Oculus Rift display. Enabling Night Mode can help reduce eye strain and improve overall comfort, particularly during extended usage sessions or in low-light environments.
7. Test and Fine-Tune: After making adjustments to the display settings, test your Oculus Rift by launching a VR game or application. Observe the visual quality and comfort level, adjusting the settings as necessary to achieve the best balance of clarity, performance, and comfort.
By taking the time to adjust and optimize the display settings of your Oculus Rift, you can enhance the visual experience and ensure that it is tailored to your preferences and specific setup. If visual issues persist, consider checking for hardware compatibility, updating graphics drivers, or exploring other troubleshooting methods to address the problem.
Try a Different HDMI Port
If you’re experiencing display issues, flickering, or no signal on your Oculus Rift, trying a different HDMI port on your computer can help resolve the problem. Sometimes, the HDMI port you’re using may have compatibility issues or a hardware problem. Here’s how you can troubleshoot by switching to a different HDMI port:
1. Identify Available HDMI Ports: Take note of the available HDMI ports on your computer or graphics card. Locate the ports on the back of your computer tower or on the side of your laptop, depending on your setup.
2. Disconnect the Oculus Rift: Start by disconnecting your Oculus Rift from the current HDMI port. Gently remove the HDMI cable from the port, ensuring not to force it or damage the connectors in the process.
3. Connect to a Different HDMI Port: Plug the HDMI cable into a different HDMI port on your computer or graphics card. Make sure the connection is secure and that there are no visible signs of damage or debris in the port itself.
4. Power on the Oculus Rift: Turn on your Oculus Rift and check if the display issue is resolved. The new HDMI port may provide a better connection and stability for your Oculus Rift, improving the visual quality and reducing any flickering or signal problems.
5. Test for Compatibility: It’s worth noting that not all HDMI ports may be compatible with the Oculus Rift. Some HDMI ports on certain graphics cards or integrated graphics may not meet the necessary HDMI specification requirements. If you encounter any compatibility issues, refer to the Oculus support website or consult with their customer support for further assistance.
6. Consider Using HDMI Adapters: If your computer or graphics card doesn’t have available HDMI ports, you can use HDMI adapters to connect the Oculus Rift. For example, you can use an HDMI-to-DisplayPort or HDMI-to-USB-C adapter, provided they are compatible with the Oculus Rift’s HDMI requirements.
By trying a different HDMI port on your computer, you can diagnose whether the issue lies with the previous HDMI port or if it is related to another hardware or software problem. If the issue persists, explore other troubleshooting methods or contact the Oculus support team for further assistance.
Check the USB Connections
If your Oculus Rift is experiencing connectivity issues, tracking problems, or other USB-related errors, it’s important to check the USB connections to ensure they are properly set up. USB connection problems can often be the cause of various issues with the Oculus Rift. Here are some steps to check the USB connections:
1. Inspect USB Cables: Examine the USB cables connecting your Oculus Rift to the computer. Look for any visible signs of damage, such as frayed cables or bent connectors. If you notice any issues, replace the cable with a new one that is compatible with the Oculus Rift.
2. Reconnect USB Cables: Disconnect and reconnect the USB cables at both the computer and headset ends. Ensure that they are securely plugged in and that there are no obstructions preventing a proper connection.
3. Use Different USB Ports: Try plugging the Oculus Rift into different USB ports on your computer. Some USB ports may provide better power or data transfer capabilities, which can help resolve connectivity issues. Use both USB 3.0 and USB 2.0 ports if available, as this can sometimes make a difference.
4. Avoid USB Hubs and Extensions: Whenever possible, connect the Oculus Rift directly to the computer’s USB ports. USB hubs or extension cables can introduce additional variables that may interfere with the proper functioning of the headset. If you must use an extension cable, ensure it is of high quality and specifically designed for VR devices.
5. Check USB Power Management: Disable USB power management settings that may turn off USB ports to save power. Open the Device Manager on your computer, expand the “Universal Serial Bus controllers” section, and check each USB root hub’s properties. Uncheck the “Allow the computer to turn off this device to save power” option if enabled.
6. Restart Oculus Service: Restarting the Oculus service can also help resolve USB connectivity issues. In the Oculus app, go to “Settings,” select “Beta” from the left-hand side menu, and click “Restart Oculus.” This will restart the Oculus service and reinitialize the USB connections.
7. Update USB Drivers: Ensure that your computer’s USB drivers are up to date. Visit the manufacturer’s website for your computer or motherboard to download and install the latest USB drivers. Outdated drivers can cause compatibility issues and impede USB connectivity.
By thoroughly checking the USB connections and implementing the above steps, you can identify and resolve common USB-related issues with the Oculus Rift. If problems persist, consider seeking further assistance from the Oculus support website or their customer support team for advanced troubleshooting steps specific to your situation.
Make Sure the Firmware is Up to Date
Keeping the firmware of your Oculus Rift up to date is essential for maintaining the stability, performance, and compatibility of the device. Firmware updates often include bug fixes, feature enhancements, and optimizations that can address various issues you may encounter. Here’s how you can check and update the firmware of your Oculus Rift:
1. Launch the Oculus App: Start by launching the Oculus app on your computer and ensuring that your Oculus Rift is connected and detected by the app.
2. Go to the Devices Section: Click on the “Devices” tab within the Oculus app’s navigation bar on the left-hand side of the screen. This section allows you to manage your connected Oculus Rift devices and adjust various settings.
3. Select your Oculus Rift: From the list of devices, select your Oculus Rift. This will display the specific settings and options related to your headset.
4. Check for Firmware Updates: Within the Oculus Rift device settings, there should be an option to check for firmware updates. Click on this option to verify if any updates are available for your headset’s firmware.
5. Update the Firmware: If there is a firmware update available, follow the prompts to download and install it. Ensure that your Oculus Rift remains connected to your computer throughout the update process, and avoid interrupting or disconnecting the device until the update is complete.
6. Restart Oculus Service: After the firmware update is installed, close and restart the Oculus app to ensure that the changes take effect. This will help ensure that your Oculus Rift is running the latest firmware version.
7. Repeat for Additional Devices (optional): If you have other Oculus devices, such as sensors or controllers, make sure to check and update their firmware as well. Follow the same procedure outlined above for each device connected to your Oculus system.
Regularly checking and updating the firmware of your Oculus Rift helps ensure that you have the latest features, performance improvements, and bug fixes. Keeping the firmware up to date can help resolve issues and optimize your overall VR experience. If problems persist after updating the firmware, consult the Oculus support website or contact their customer support for further assistance.
Reinstall the Oculus App
If you’re experiencing persistent issues with your Oculus Rift that haven’t been resolved through other troubleshooting methods, reinstalling the Oculus app on your computer can often provide a fresh start and resolve software-related problems. Reinstalling the Oculus app is a straightforward process and can help fix issues such as crashes, software glitches, or compatibility conflicts. Here’s how you can reinstall the Oculus app:
1. Uninstall the Oculus App: Start by uninstalling the existing Oculus app from your computer. To do this, go to the Control Panel on Windows or the Applications folder on macOS, find the Oculus app in the list of installed programs, and select Uninstall. Follow the prompts to complete the uninstallation.
2. Delete Remaining Oculus Files: After uninstalling the app, make sure to delete any remaining Oculus files from your computer. Open File Explorer (Windows) or Finder (macOS) and navigate to the following folders to remove any Oculus-related files:
- For Windows: Delete the Oculus folder located in C:\Program Files and the Oculus folder located in C:\Users\
\AppData\Roaming. - For macOS: Delete the Oculus folder located in /Applications and the Oculus folder located in your user’s Library/Application Support.
3. Restart your Computer: It’s good practice to restart your computer after uninstalling the Oculus app and deleting the associated files. This ensures a clean slate and helps clear any remaining system resources related to the previous installation.
4. Download the Oculus App: Visit the official Oculus website and download the latest version of the Oculus app for your operating system. Make sure to download the correct version for your computer: Windows or macOS.
5. Install the Oculus App: Once the download is complete, run the installer and follow the on-screen instructions to install the Oculus app on your computer. It may take a few minutes to complete the installation process.
6. Set Up Oculus: After reinstalling the app, launch it and follow the prompts to set up your Oculus Rift again. Ensure that your headset is properly connected, and follow the on-screen instructions to complete the setup process.
7. Test Oculus Rift: Once the setup is complete, test your Oculus Rift by launching a VR application or game. Check if the issues you were experiencing have been resolved. If the problems persist, consider reaching out to the Oculus support website or contacting their customer support for further assistance.
Reinstalling the Oculus app can often help resolve persistent software-related issues with your Oculus Rift. It’s a recommended step to take when other troubleshooting methods have been unsuccessful. By starting fresh with a clean installation, you can potentially resolve the problem and enjoy a smoother VR experience.
Contact Oculus Support
If you’ve exhausted all troubleshooting options and are still experiencing issues with your Oculus Rift, it may be time to contact Oculus support. Oculus provides dedicated customer support to assist users with technical problems or inquiries related to their VR devices. Here’s how you can contact Oculus support:
1. Visit the Oculus Support Website: Start by visiting the Oculus support website. You can access it through the Oculus website or by searching for “Oculus Support” in your preferred search engine. The support website provides a wealth of articles, guides, and frequently asked questions that may help resolve your issue.
2. Search the Knowledge Base: Use the search function on the support website to look for specific troubleshooting guides or solutions related to your problem. Oculus has an extensive knowledge base that covers various topics and common issues that users may encounter.
3. Submit a Support Ticket: If you haven’t found a solution in the knowledge base, you can submit a support ticket to directly contact Oculus support. Look for a “Contact Oculus Support” or “Submit a Request” button on the support website. Provide as much detail as possible about the issue you’re facing, including any error messages or steps you’ve already taken to troubleshoot the problem.
4. Check for Community Solutions: Oculus has an active community of users and developers who may have encountered similar issues in the past. Explore the Oculus forums or other VR-related communities to see if there are any community-provided solutions or workarounds for your problem.
5. be Patient and Responsive: Once you’ve submitted a support ticket, be patient and responsive to any follow-up communication from the Oculus support team. They may request additional information or provide specific instructions to help further diagnose or resolve your issue. Provide prompt responses to expedite the support process.
6. Follow Support Guidance: If Oculus support provides specific troubleshooting steps or instructions, follow them carefully. They may ask for log files, diagnostic information, or other data to help identify the root cause of the problem. Cooperate with their requests to facilitate a resolution.
7. Escalate if Necessary: If your issue remains unresolved or if you believe there has been a miscommunication, don’t hesitate to escalate your support ticket or request further assistance. Oculus support is dedicated to helping users, and they will work with you to find a resolution.
Contacting Oculus support is an excellent option when you’ve exhausted all other troubleshooting avenues. Their knowledgeable support team is equipped to handle various technical issues and can provide personalized assistance tailored to your situation. Don’t hesitate to reach out – they are there to help you get the most out of your Oculus Rift experience.