
What is window.dll and why is it important?
Window.dll is a dynamic link library file that is an integral part of the Windows operating system. DLL stands for Dynamic Link Library, and it contains code and functions that multiple programs can use simultaneously. Window.dll is specifically related to the window management functions in Windows.
The window.dll file plays a crucial role in the overall functioning and stability of the Windows operating system. It provides essential functions that enable the creation, management, and display of windows for various applications and processes.
Windows operating system relies on window.dll to ensure smooth multitasking, effective window handling, and optimized system resources usage. It allows programs to interact with the graphical environment and perform tasks such as opening, closing, resizing, and moving windows on the screen.
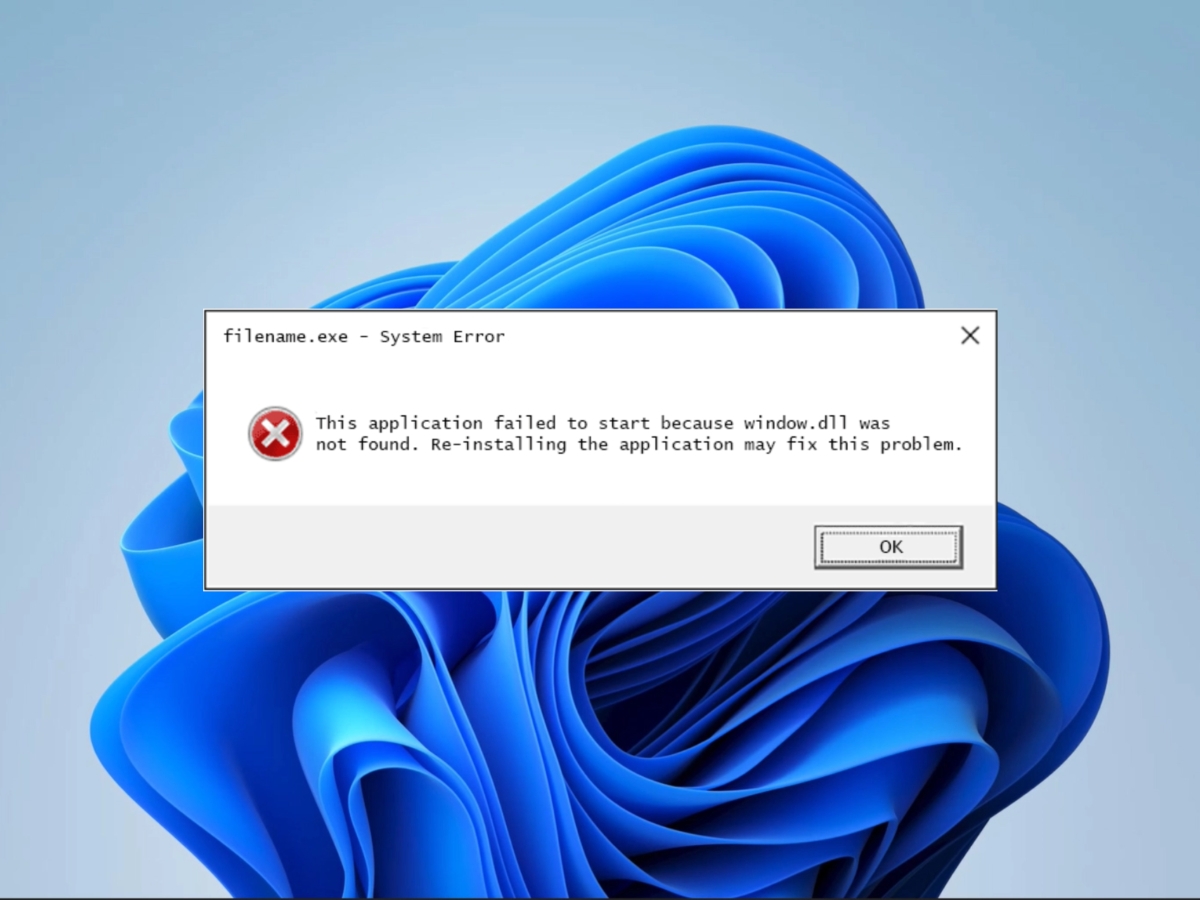
Without window.dll, programs may encounter errors or fail to function correctly, leading to various issues and disruptions on the system. When a window.dll file is missing or corrupted, it can result in error messages such as “window.dll is missing” or “window.dll not found.”
It is important to keep the window.dll file intact and up-to-date to maintain the stability and performance of Windows. Any problems with this file can negatively impact the overall user experience, causing system crashes, application errors, or unexpected behavior.
Understanding the significance of window.dll helps users troubleshoot issues related to this file and take appropriate steps to fix any errors or problems that arise. In the next section, we will discuss common causes of window.dll errors and various methods to fix them.
Common causes of window.dll errors
Window.dll errors can occur due to various reasons, and understanding the underlying causes can help in troubleshooting and resolving the issues effectively. Here are some common causes of window.dll errors:
- Missing or deleted window.dll file: One of the most common causes of window.dll errors is when the file itself is missing or has been accidentally deleted. This can occur during software installation or uninstallation, or due to malware or system corruption.
- Corrupted window.dll file: If the window.dll file becomes corrupted or damaged, it can lead to errors. This can happen due to improper software installations, hardware issues, or virus infections.
- Outdated or incompatible drivers: Incompatible or outdated device drivers can also cause window.dll errors. When the drivers that interact with the window.dll file are not compatible with the operating system or other software, it can lead to errors and malfunctions.
- Malware or virus infections: Malware or virus infections can corrupt or replace system files, including the window.dll file. This can result in errors and affect the overall stability and performance of the system.
- Registry issues: Problems in the Windows registry, such as invalid or missing entries related to the window.dll file, can lead to errors. Registry errors can occur due to improper software installations, system crashes, or malware infections.
These are some of the common causes of window.dll errors. Identifying the specific cause can help in determining the appropriate solution to resolve the errors. In the next section, we will explore different methods to fix window.dll errors in Windows.
How to fix window.dll errors in Windows
Experiencing window.dll errors can be frustrating, but there are several methods you can try to resolve them. Here are some effective solutions to fix window.dll errors in Windows:
- Restart your computer: Sometimes, a simple restart can resolve temporary issues that may be causing window.dll errors. Restarting your computer can refresh the system and ensure that all processes are running smoothly.
- Restore window.dll from the Recycle Bin: If you accidentally deleted the window.dll file, it may still be in the Recycle Bin. To restore it, open the Recycle Bin, locate the window.dll file, right-click on it, and select “Restore”.
- Update your drivers: Outdated or incompatible drivers can cause window.dll errors. Update your drivers to the latest version by visiting the manufacturer’s website or using a reliable driver updating tool.
- Run a malware scan: Malware infections can corrupt system files, including window.dll. Use a reputable antivirus or anti-malware software to scan your system and remove any malicious threats.
- Repair the Windows registry: Registry errors can lead to window.dll errors. Use a trusted registry cleaner tool to scan and repair any issues in the Windows registry.
- Perform a system restore: If the window.dll errors started occurring recently, you can try restoring your system to a previous point in time when the errors were not present. Use the System Restore feature in Windows to perform this action.
- Reinstall the software/application: If the window.dll errors are specific to a particular software or application, try uninstalling and then reinstalling it. This will ensure that all necessary files, including window.dll, are properly installed.
- Use System File Checker to replace window.dll: System File Checker is a built-in Windows tool that scans for and repairs corrupted system files. Open the Command Prompt as an administrator and run the command “sfc /scannow” to initiate the scan and repair process.
- Perform a clean installation of Windows: If all else fails, performing a clean installation of Windows can often resolve persistent window.dll errors. Back up your important files and follow the instructions provided by Microsoft to reinstall Windows.
These methods should help you resolve window.dll errors in Windows. However, if the issue persists or you are unsure about any of the steps, it is recommended to seek professional assistance or consult relevant support forums for further guidance.
Method 1: Restart your computer
One of the simplest and often effective solutions for resolving window.dll errors is to restart your computer. Sometimes, temporary issues or conflicts within the system can cause these errors, and a restart can help in resolving them. Here’s how you can restart your computer:
- Save and close any open programs or files on your computer.
- Click on the “Start” menu at the bottom left corner of the screen.
- Select the “Power” option.
- From the dropdown menu, choose “Restart”.
- Wait for your computer to shut down and restart.
Once your computer restarts, check if the window.dll error persists. In many cases, errors caused by temporary glitches or conflicts are resolved after restarting the system. If the error still persists, try the other methods mentioned in this article to address the issue.
Restarting your computer not only helps in resolving window.dll errors but also refreshes the system, clearing any temporary files or processes that might be causing problems. It is a quick and easy way to troubleshoot common issues.
If you find that restarting your computer does not fix the window.dll error, it is advisable to proceed with other troubleshooting methods outlined in this article. These methods are designed to provide more targeted solutions to address specific causes of window.dll errors.
Remember, before attempting any troubleshooting steps, it is essential to create a backup of your important files to prevent any accidental data loss. If you are unsure about any of the methods or encounter difficulties, it is recommended to seek help from a technical expert or consult relevant support resources.
Method 2: Restore window.dll from the Recycle Bin
If you accidentally deleted the window.dll file, it may still be in the Recycle Bin. Restoring the file from the Recycle Bin can sometimes fix window.dll errors. Here’s how you can restore window.dll:
- Double-click on the Recycle Bin icon on your desktop to open it.
- Search for the window.dll file in the list of deleted files. You can use the search bar at the top-right corner of the window to quickly locate it.
- Once you find the window.dll file, right-click on it.
- Select the “Restore” option from the context menu.
After restoring the window.dll file, try running the program or process that was giving you the error to see if the issue has been resolved. In many cases, restoring the deleted file from the Recycle Bin can fix window.dll errors that occur due to accidental deletion.
If you cannot find the window.dll file in the Recycle Bin or if it has been permanently deleted from there, you may need to consider other methods to fix the error. The following methods in this article outline additional steps you can take to troubleshoot and resolve window.dll errors.
Remember, it is always a good practice to create regular backups of important files to avoid any unintended deletions. Additionally, exercise caution when deleting files to prevent the accidental removal of essential system files like window.dll.
If you are still experiencing window.dll errors or encounter difficulties with the restoration process, it is recommended to seek assistance from a technical expert or consult relevant support resources for further guidance.
Method 3: Update your drivers
Outdated or incompatible drivers can often be the cause of window.dll errors. Updating your drivers to the latest version can resolve these errors and ensure optimal system performance. Here’s how you can update your drivers on Windows:
- Open the Start menu and type “Device Manager” in the search bar. Click on the “Device Manager” option that appears in the search results.
- In the Device Manager window, you will see a list of different hardware categories. Locate the hardware category that corresponds to the device driver you want to update.
- Expand the category by clicking on the > arrow next to it. This will display the list of devices within that category.
- Right-click on the specific device that you want to update and select the “Update driver” option from the context menu.
- In the following window, you will have two options to choose from: “Search automatically for updated driver software” or “Browse my computer for driver software.” Choose the option that best suits your needs.
- If you choose the first option, Windows will search online for the latest driver software and install it automatically. If you choose the second option, you will need to browse your computer to locate the downloaded driver software and install it manually.
- Follow the on-screen instructions to complete the driver update process.
- Once the driver update is complete, restart your computer to apply the changes.
Updating your drivers regularly is essential for system stability and compatibility with the latest software. It can help resolve window.dll errors caused by outdated or incompatible drivers. If the window.dll error was specifically related to a particular device or hardware, updating the corresponding driver might fix the issue.
If you are unable to find updated drivers for a specific device, you can visit the manufacturer’s official website and search for the latest drivers compatible with your operating system. Alternatively, you can use third-party driver update software to automate the process.
Remember to create a system restore point before updating any drivers so that you can revert to a previous state if any issues arise during the update process.
If updating your drivers does not resolve the window.dll error or if you encounter any difficulties during the process, it is recommended to seek assistance from the manufacturer’s support or consult a technical expert for further guidance.
Method 4: Run a malware scan
Malware or virus infections can corrupt system files, including window.dll, leading to errors and malfunctions. Running a malware scan can help identify and remove any malicious software that may be causing window.dll errors. Here’s how you can run a malware scan on your Windows computer:
- Make sure you have reliable antivirus or anti-malware software installed on your computer. If you don’t have one, it is recommended to install a trusted security solution.
- Open your antivirus or anti-malware software.
- Look for a “Scan” or “Full Scan” option, usually located on the home screen or main interface of the software.
- Initiate a full system scan by clicking on the appropriate option.
- The scan process may take some time, depending on the size and contents of your hard drive. Allow the scan to complete.
- If any malware or viruses are detected, follow the instructions provided by the antivirus software to remove or quarantine them.
- Once the scan and removal process is complete, restart your computer.
By running a malware scan, you can eliminate the possibility of window.dll errors caused by malicious software. Removing malware and viruses from your system not only helps resolve these errors but also improves overall system security and performance.
It is important to keep your antivirus or anti-malware software up to date to ensure that it can effectively detect and remove the latest threats. Regularly perform system scans to prevent and address any potential security issues.
If the window.dll error persists even after running a malware scan, it is recommended to explore other methods discussed in this article to troubleshoot and resolve the issue.
If you are unsure about running a malware scan or encounter difficulties during the process, consider seeking help from a technical expert or referring to the documentation provided by your antivirus software’s manufacturer.
Method 5: Repair the Windows registry
Problems in the Windows registry, such as invalid or missing entries related to the window.dll file, can lead to errors. Repairing the Windows registry can help resolve window.dll errors and restore system stability. Here’s how you can repair the Windows registry:
- Press the Windows key + R on your keyboard to open the Run dialog box.
- Type “regedit” into the Run dialog box and press Enter. This will open the Windows Registry Editor.
- In the Registry Editor, navigate to the following path:
HKEY_LOCAL_MACHINE\SOFTWARE\Microsoft\Windows\CurrentVersion\SharedDLLs - Look for the entry related to the window.dll file. If you find it, right-click on it and select “Delete”. Note: Exercise caution when making changes in the registry, as deleting or modifying the wrong entries can have serious consequences.
- Once you have deleted the entry, close the Registry Editor.
- Restart your computer to apply the changes.
Repairing the Windows registry can help fix window.dll errors caused by incorrect or missing registry entries. However, it is important to exercise caution when making changes to the registry, as improper modifications can lead to system instability or other issues. If you are not comfortable working with the registry, it is advisable to seek assistance from a technical expert.
If repairing the Windows registry does not resolve the window.dll error, consider exploring other methods outlined in this article to address the issue. It is also recommended to regularly clean and optimize the Windows registry using reliable registry cleaner software to prevent registry-related errors in the future.
Remember to create a backup of your registry before making any changes, so you can restore it in case of any undesirable outcomes. This will help you revert to a previous stable state if any issues arise during the repair process.
If you are unsure about repairing the Windows registry or encounter difficulties during the process, it is recommended to seek assistance from a technical expert or consult relevant support resources for further guidance.
Method 6: Perform a system restore
If you have started experiencing window.dll errors recently, performing a system restore to a previous point in time can help resolve the issue. System Restore allows you to revert your computer’s settings and configuration back to a previous state when it was functioning properly. Here’s how you can perform a system restore:
- Press the Windows key + R on your keyboard to open the Run dialog box.
- Type “rstrui” into the Run dialog box and press Enter. This will open the System Restore wizard.
- In the System Restore wizard, select “Choose a different restore point” and click “Next”.
- You will see a list of available restore points. Choose a restore point that was created before the window.dll errors started occurring.
- Click “Next” and then “Finish” to initiate the system restore process.
- Wait for the system to restore to the selected restore point. This may take some time, and your computer will restart during the process.
Performing a system restore can undo recent changes to your system, including any modifications that may have caused window.dll errors. It can help bring your computer back to a previous state of stability.
Note that system restore will not affect your personal files but will uninstall installed programs or updates after the selected restore point. Therefore, it is recommended to back up any important files before performing a system restore.
If the window.dll error is resolved after performing a system restore, it indicates that the issue was likely caused by changes made to the system recently. However, if the error persists or if you didn’t find a suitable restore point, consider trying other methods discussed in this article to troubleshoot and fix the issue.
If you encounter any difficulties or have concerns about performing a system restore, it is advisable to seek assistance from a technical expert or consult relevant support resources for further guidance.
Method 7: Reinstall the software/application
If the window.dll error is specific to a particular software or application, reinstalling it can often resolve the issue. This method ensures that all necessary files, including the window.dll file, are properly installed and configured. Here’s how you can reinstall the software/application:
- Open the “Settings” app on your computer.
- Click on “Apps” or “Apps & features”, depending on your operating system version.
- Scroll through the list of installed applications and locate the software or application that is causing the window.dll error.
- Click on the software/application and select “Uninstall”. Follow the on-screen prompts to complete the uninstallation process.
- Once the software/application is successfully uninstalled, restart your computer.
- After restarting, visit the official website of the software/application and download the latest version.
- Run the downloaded installer file and follow the on-screen instructions to reinstall the software/application.
Reinstalling the software/application ensures that any corrupted or missing files, including the window.dll file, are replaced with fresh copies. This can resolve window.dll errors that occur due to issues with the software itself.
Before reinstalling, ensure that you have access to the necessary installation files or download links and any required license keys or activation codes for the software/application.
If the window.dll error persists after reinstalling the software/application, consider exploring other troubleshooting methods discussed in this article. Additionally, you may want to check if there are any updates or patches available for the software/application that specifically address window.dll-related issues.
If you encounter difficulties during the reinstallation process or have any questions, it is recommended to refer to the software/application’s documentation or contact their support for further assistance.
Method 8: Use System File Checker to replace window.dll
If the window.dll file is corrupt or missing, using the System File Checker (SFC) tool can help replace it with a healthy copy from the Windows installation. The SFC tool scans and repairs corrupted system files, including the window.dll file. Here’s how you can use System File Checker:
- Open the Command Prompt as an administrator. You can do this by right-clicking on the Start button and selecting “Command Prompt (Admin)” or “Windows PowerShell (Admin)”.
- In the Command Prompt window, type the command
sfc /scannowand press Enter. The System File Checker will begin scanning your system files, including the window.dll file. - Wait for the scan to complete. This may take a while, so be patient.
- If any corrupted files are found, the System File Checker will attempt to repair them automatically. This includes replacing the window.dll file if necessary.
- After the repair process is complete, restart your computer to apply the changes.
Using the System File Checker can help restore the window.dll file to its original state, resolving any issues caused by corruption or missing files. It is a built-in tool in Windows designed to maintain system integrity.
During the scan and repair process, it is important not to interrupt or cancel it as it may lead to incomplete repairs. Additionally, ensure that you are running the Command Prompt as an administrator to have the necessary privileges to perform system file repairs.
If the window.dll error persists after using System File Checker or if you encounter any difficulties during the process, consider trying other methods outlined in this article to address the issue.
Remember, the SFC tool is a valuable resource for checking and repairing system files, but it may not be able to resolve all issues. If you continue experiencing problems, seeking assistance from a technical expert or consulting relevant support resources is recommended.
Method 9: Perform a clean installation of Windows
If all other methods have failed to resolve window.dll errors, performing a clean installation of Windows can be a last resort. This method involves completely reinstalling the Windows operating system, which can help fix any underlying issues affecting the window.dll file. Here’s how you can perform a clean installation of Windows:
- Before proceeding with a clean installation, ensure that you have a backup of all your important files and data. This process will erase all existing data on your system drive.
- Obtain a copy of the Windows installation media, either on a USB drive or a DVD.
- Restart your computer and enter the BIOS or UEFI settings by pressing the appropriate key during startup (typically Del, F2, F10, or Esc).
- In the BIOS or UEFI settings, change the boot order to prioritize the installation media (USB or DVD) so that your computer boots from it.
- Save the changes and exit the BIOS or UEFI settings. Your computer will restart and begin the Windows installation process.
- Follow the on-screen prompts to set the preferred language, time zone, and keyboard layout.
- Select the option to install a fresh copy of Windows and choose the appropriate installation drive.
- Proceed with the installation process, following the instructions provided by the Windows installer.
- After the installation is complete, reinstall any necessary drivers, software, and applications.
- Restore your backed-up files and data to the appropriate locations.
A clean installation of Windows can help eliminate any underlying issues that were causing the window.dll errors. It gives you a fresh start with a clean system, ensuring the stability and optimal performance of your computer.
Performing a clean installation of Windows is a complex process and should be done with caution. If you are not familiar with the installation process or encounter difficulties, it is recommended to seek assistance from a technical expert or consult relevant support resources for guidance.
Remember to back up your important files and data before proceeding with a clean installation to avoid permanent data loss.
Performing a clean installation should only be considered as a last resort when all other methods have failed to resolve the window.dll errors. It is a time-consuming process, but it can help provide a long-lasting solution to persistent issues with the window.dll file.