Check if Wi-Fi Calling is Supported by Your Carrier
Before troubleshooting the issue with Wi-Fi calling on your Android device, it is crucial to determine if your carrier supports this feature. Wi-Fi calling allows you to make and receive calls over a Wi-Fi network, which can be beneficial in areas with weak cellular signal. To check if Wi-Fi calling is supported by your carrier, follow these steps:
- Visit Your Carrier’s Website: Go to the official website of your carrier and navigate to the support section. Look for information on Wi-Fi calling to see if it is offered as a feature.
- Search Online: Conduct a search online using the name of your carrier along with “Wi-Fi calling.” This should give you relevant information regarding whether Wi-Fi calling is supported or not.
- Contact Your Carrier: If you are unable to find the necessary information online, reach out to your carrier’s customer support. They will be able to confirm whether Wi-Fi calling is supported by your plan and device.
Keep in mind that support for Wi-Fi calling can vary depending on the carrier and your specific plan. Some carriers may offer Wi-Fi calling as a standard feature, while others may require you to have a specific plan or subscription. Additionally, not all Android devices are compatible with Wi-Fi calling, so it is important to check if your device supports this feature as well.
If you find that Wi-Fi calling is not supported by your carrier or device, you may need to explore alternative options to improve your calling experience. Consider using a signal booster or exploring different cellular plans that offer better coverage in your area.
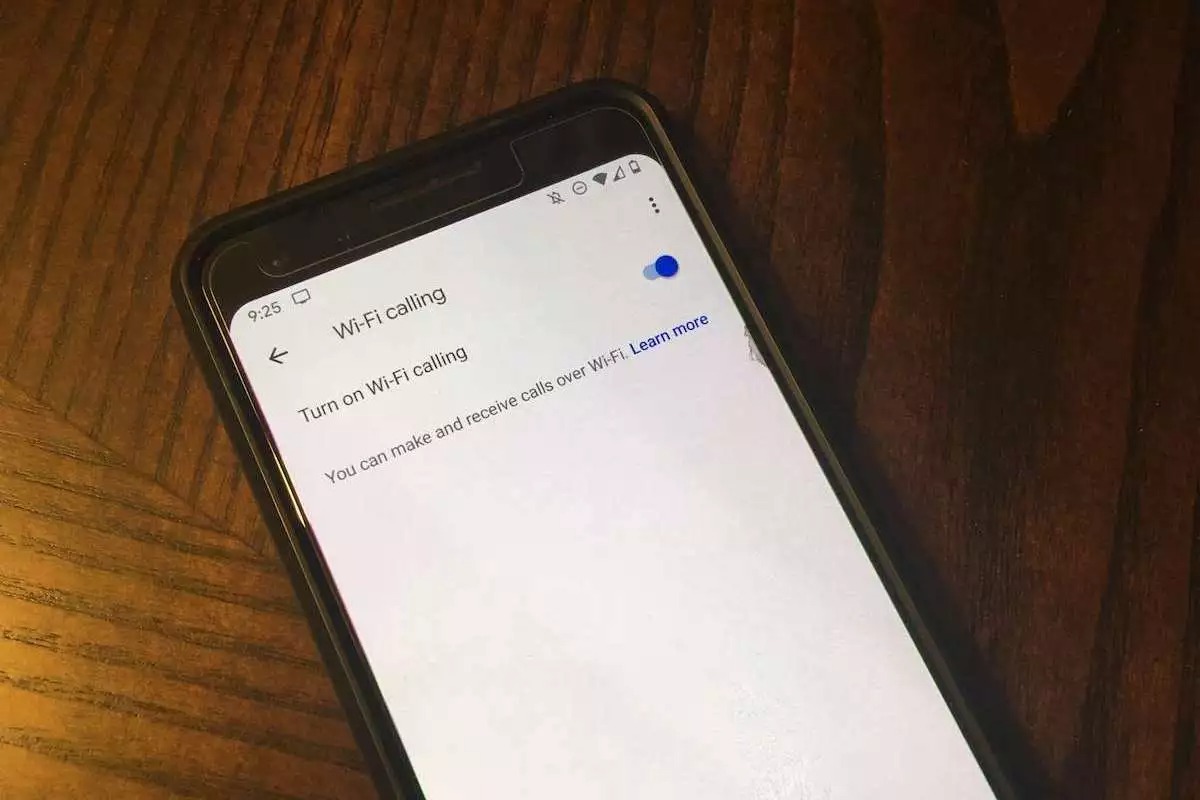
Make Sure Wi-Fi Calling is Enabled on Your Android Device
Once you have confirmed that Wi-Fi calling is supported by your carrier, the next step is to ensure that it is enabled on your Android device. Follow these steps to check and enable Wi-Fi calling on your device:
- Open Settings: Navigate to the Settings app on your Android device. You can usually find it in your app drawer or by swiping down from the top of the screen and tapping on the gear icon.
- Select “Connections” or “Network & Internet”: The exact name of the option may vary depending on your Android version and device manufacturer.
- Tap on “Wi-Fi Calling” or “Advanced Calling”: Look for the Wi-Fi Calling option in the menu. If you can’t find it, try checking under the “Advanced Calling” or similar section.
- Toggle Wi-Fi Calling On: Once you have accessed the Wi-Fi Calling settings, toggle the switch to enable Wi-Fi Calling on your device. If prompted, follow any additional instructions or agree to the terms and conditions.
It is important to note that the location of the Wi-Fi Calling option may vary depending on your device and Android version. If you are unable to find the option in your device settings, refer to your device’s user manual or contact the manufacturer’s support for assistance.
After enabling Wi-Fi calling, it is recommended to restart your device for the changes to take effect. Once your device has restarted, you should be able to make and receive calls over Wi-Fi when connected to a compatible network.
If Wi-Fi calling is already enabled on your device, but you are still experiencing issues, proceed to the next troubleshooting step.
Check if Wi-Fi Calling Feature is Enabled in Settings
If you have confirmed that Wi-Fi calling is supported by your carrier and enabled on your Android device, the next step is to ensure that the Wi-Fi Calling feature is also enabled in the settings. Follow these steps to check and enable the Wi-Fi Calling feature:
- Open the Phone or Dialer App: Navigate to the Phone or Dialer app on your Android device. You can usually find it on your home screen or in your app drawer.
- Access the Settings: Look for the three-dot menu icon or the settings gear icon in the Phone app. Tap on it to access the settings.
- Select “Wi-Fi Calling”: Within the Phone settings, locate the option for “Wi-Fi Calling” or a similar name. Tap on it to access the Wi-Fi Calling settings.
- Toggle Wi-Fi Calling On: If the Wi-Fi Calling feature is disabled, toggle the switch to enable it. You may also have additional options such as “Wi-Fi Preferred” or “Cellular Preferred.” Choose the preferred option based on your preference.
Once the Wi-Fi Calling feature is enabled, it is recommended to restart your Android device for the changes to take effect. After the restart, you should be able to make and receive calls using Wi-Fi when connected to a compatible network.
If the Wi-Fi Calling feature is already enabled and you are still experiencing issues, continue to the next troubleshooting step.
Ensure Airplane Mode is Turned Off
One common reason why Wi-Fi calling may not be working on your Android device is if Airplane Mode is enabled. Airplane Mode disables all wireless connections on your device, including Wi-Fi and cellular networks. To ensure that Wi-Fi calling functions properly, follow these steps to turn off Airplane Mode:
- Open the Quick Settings Menu: Swipe down from the top of your Android device’s screen to access the Quick Settings menu. This can vary depending on your device; on some devices, you may need to swipe twice or use two fingers to access the menu.
- Look for the Airplane Mode Icon: In the Quick Settings menu, look for the icon that represents Airplane Mode. It’s typically an airplane silhouette. Tap on the Airplane Mode icon to disable it.
- Verify Airplane Mode is Turned Off: Check the status bar or the Quick Settings menu to confirm that Airplane Mode has been turned off. The icon should no longer be highlighted or active.
Once Airplane Mode is turned off, it is recommended to restart your Android device. After the restart, you should be able to use Wi-Fi calling without any issues. Remember that Airplane Mode can impact both Wi-Fi and cellular connectivity, so it is important to ensure that it is disabled for Wi-Fi calling to work properly.
If Airplane Mode was already turned off, or if turning it off did not resolve the issue, proceed to the next troubleshooting step.
Restart Your Android Device
Sometimes, a simple restart can resolve issues with Wi-Fi calling on your Android device. Restarting your device can help refresh the system and clear any temporary glitches that may be interfering with Wi-Fi calling. Follow these steps to restart your Android device:
- Press and Hold the Power Button: Locate the power button on your Android device. It is typically located either on the side or the top of the device. Press and hold the power button until the power menu appears on the screen.
- Tap on “Restart” or “Reboot”: In the power menu, look for the option to restart or reboot your device. The exact wording may vary depending on your device.
- Confirm the Restart: Tap on the restart option and wait for your device to shut down and boot up again. This process may take a few moments.
Once your Android device has restarted, try using Wi-Fi calling again to see if the issue has been resolved. In many cases, a simple restart can fix minor software or connectivity issues that may have been affecting Wi-Fi calling functionality.
If the problem persists after restarting your device, proceed to the next troubleshooting step.
Reset Network Settings on Your Android Device
Resetting the network settings on your Android device can help resolve connectivity issues that may be affecting Wi-Fi calling. This process will remove any saved Wi-Fi networks, VPN configurations, and Bluetooth pairings, so you may need to set them up again after the reset. Here’s how you can reset the network settings on your Android device:
- Open the Settings: Navigate to the Settings app on your Android device. You can usually find it in your app drawer or by swiping down from the top of the screen and tapping on the gear icon.
- Select “System” or “System & Device”: Look for the option labeled “System” or “System & Device” in your device settings. The exact name may vary depending on your device.
- Tap on “Reset Options” or “Advanced”: Within the System settings, search for the “Reset Options” or “Advanced” section.
- Choose “Reset Network Settings”: Look for the option to reset network settings. It may be labeled as “Reset Wi-Fi, Mobile & Bluetooth,” “Reset Network Settings,” or something similar. Tap on this option.
- Confirm the Reset: Read the warning message that appears, as resetting network settings will remove all saved Wi-Fi networks, Bluetooth pairings, and VPN configurations. If you’re okay with this, confirm the reset. You may be prompted to enter your device passcode or pattern to authenticate the reset.
Once the network settings have been reset, your Android device will restart. You can then set up your Wi-Fi networks again and reconfigure any VPN or Bluetooth connections as needed. After completing the network setup, check if Wi-Fi calling is functioning properly.
If resetting the network settings did not resolve the issue, proceed to the next troubleshooting step.
Update Your Android Device Software
Keeping your Android device’s software up to date is essential for optimal performance and compatibility with various features, including Wi-Fi calling. Software updates often include bug fixes, security patches, and improvements that can help resolve issues with Wi-Fi calling. Here’s how you can check for and install software updates on your Android device:
- Open the Settings: Navigate to the Settings app on your Android device. You can usually find it in your app drawer or by swiping down from the top of the screen and tapping on the gear icon.
- Scroll down and tap on “System” or “System & Device”: Look for the option labeled “System” or “System & Device” in your device settings. The exact name may vary depending on your device.
- Select “Software Update” or “Software Update & Security”: Within the System settings, search for the “Software Update” or “Software Update & Security” section. Tap on it to access the software update options.
- Check for Updates: Look for the option to check for updates. It may be labeled as “Check for Updates,” “System Updates,” or something similar. Tap on this option to initiate the update check.
- Install Software Updates: If a software update is available for your device, you will be prompted to download and install it. Follow the on-screen instructions to proceed with the update installation. Your device may need to restart during the update process.
It is recommended to always update your Android device to the latest software version available. This ensures that you have the most recent bug fixes and improvements that can help resolve issues with Wi-Fi calling. After updating your device’s software, check if Wi-Fi calling is functioning properly.
If updating your Android device software did not resolve the issue, move on to the next troubleshooting step.
Check for Carrier Software Updates
In addition to updating your Android device’s software, it is important to check for carrier-specific software updates. These updates are released by your mobile carrier and can include improvements and optimizations specifically tailored to enhance the performance of Wi-Fi calling. Follow these steps to check for carrier software updates on your Android device:
- Open the Settings: Navigate to the Settings app on your Android device. You can usually find it in your app drawer or by swiping down from the top of the screen and tapping on the gear icon.
- Scroll down and tap on “System” or “System & Device”: Look for the option labeled “System” or “System & Device” in your device settings. The exact name may vary depending on your device.
- Select “Advanced” or “About Phone”: Within the System settings, search for the “Advanced” or “About Phone” section. Tap on it to access additional device information.
- Tap on “Software Update” or “System Updates”: Look for the option related to software updates. It may be labeled as “Software Update,” “System Updates,” or something similar. Tap on this option to access the update settings.
- Check for Carrier Updates: Look for an option to check for carrier updates or carrier-specific software updates. It may be labeled as “Check for Carrier Updates” or something similar. Tap on this option to initiate the update check.
- Install Carrier Updates: If a carrier software update is available for your device, follow the on-screen instructions to download and install it. Your device may need to restart during the update process.
Carrier software updates can provide crucial fixes and enhancements specifically for Wi-Fi calling on your Android device. After installing any available carrier updates, check if Wi-Fi calling is functioning properly.
If there are no carrier updates available or if installing them did not resolve the issue, continue with the next troubleshooting step.
Disable Any Third-Party Apps or VPNs that May Interfere with Wi-Fi Calling
Sometimes, third-party apps or Virtual Private Networks (VPNs) can interfere with the proper functioning of Wi-Fi calling on your Android device. These apps or VPNs may conflict with network settings or prioritize their own connections, causing issues with Wi-Fi calling. If you have any third-party apps or VPNs installed, follow these steps to disable them temporarily and check if Wi-Fi calling works correctly:
- Open the Settings: Navigate to the Settings app on your Android device. You can usually find it in your app drawer or by swiping down from the top of the screen and tapping on the gear icon.
- Select “Apps” or “Applications”: Look for the option labeled “Apps” or “Applications” in your device settings. The exact name may vary depending on your device.
- Find and Select the App: Scroll through the list of installed apps and find any third-party apps or VPNs that may be running in the background. Tap on the app to access its settings.
- Disable the App or VPN: Within the app settings, look for the option to disable or turn off the app. Tap on it to disable the app or VPN temporarily. You may also have the option to force stop the app if disabling is not available.
- Restart Your Device: After disabling the app or VPN, it is recommended to restart your Android device. This will ensure that any changes made take effect.
After restarting your device, check if Wi-Fi calling is now functioning properly. If it is, then one of the disabled apps or VPNs may have been causing the interference. You can try enabling them one by one to identify the specific app or VPN causing the issue.
If disabling third-party apps or VPNs did not resolve the issue, proceed to the next troubleshooting step.
Check if Wi-Fi Calling is Allowed in Battery Optimization
The battery optimization feature on Android devices can sometimes interfere with the proper functioning of Wi-Fi calling. Battery optimization manages power consumption by restricting background activities of apps, which might affect the performance of Wi-Fi calling. To ensure Wi-Fi calling is not affected by battery optimization, follow these steps:
- Open the Settings: Go to the Settings app on your Android device. You can typically find it in the app drawer or by swiping down from the top of the screen and tapping on the gear icon.
- Select “Battery” or “Battery & Performance”: Look for the option labeled “Battery” or “Battery & Performance” in your device settings. The exact name may vary depending on your device.
- Tap on “Battery Optimization” or “Battery Usage”: Within the Battery settings, search for the “Battery Optimization” or “Battery Usage” section.
- View the App List: You should see a list of apps installed on your device. Tap on the menu or the three-dot icon, then select “All Apps” or a similar option to view all the apps on your device.
- Find the Phone or Dialer App: Scroll through the list of apps and find the Phone or Dialer app. Tap on it to access the app settings.
- Select “Don’t Optimize” or “No Restrictions”: In the app settings, look for an option to disable battery optimization for the Phone or Dialer app. It may be labeled as “Don’t Optimize” or “No Restrictions.” Select this option to ensure that Wi-Fi calling is not affected by battery optimization.
After selecting the “Don’t Optimize” or “No Restrictions” option for the Phone or Dialer app, restart your device. This will apply the changes made to battery optimization settings. Check if Wi-Fi calling is now working properly.
If Wi-Fi calling is still not working or if the Phone or Dialer app is not present in the app list under battery optimization settings, proceed to the next troubleshooting step.
Reset the Wi-Fi Calling Provisioning on Your Android Device
If you have followed the previous troubleshooting steps and Wi-Fi calling is still not working on your Android device, resetting the Wi-Fi calling provisioning may help resolve the issue. Resetting the Wi-Fi calling provisioning essentially refreshes the settings and configurations related to Wi-Fi calling. Here’s how you can do it:
- Open the Phone or Dialer App: Navigate to the Phone or Dialer app on your Android device. You can typically find it on your home screen or in your app drawer.
- Enter the Special Code: On the dial pad, enter the special code *#*#72786#*#*. This code is specific to resetting the Wi-Fi calling provisioning on Android devices.
- Confirm the Reset: After entering the code, you may be prompted to confirm the reset. Read the on-screen instructions carefully and proceed with the reset if necessary. Note that during the reset, your device may restart automatically.
Once the Wi-Fi calling provisioning has been reset, your Android device will reestablish the necessary settings for Wi-Fi calling. After the restart, check if Wi-Fi calling is functioning properly. It is recommended to test Wi-Fi calling in different locations to ensure consistent functionality.
If resetting the Wi-Fi calling provisioning did not resolve the issue, or if you are unable to access the dial pad to enter the special code, consider contacting your carrier’s support or customer service for further assistance. They may be able to provide additional troubleshooting steps or verify if there are any account-related issues affecting Wi-Fi calling on your Android device.
Contact Your Carrier for Support or to Verify Account Eligibility for Wi-Fi Calling
If you have tried all the previous troubleshooting steps and Wi-Fi calling is still not working on your Android device, it is recommended to reach out to your mobile carrier for further assistance. They can provide support and verify if your account is eligible for Wi-Fi calling. Here’s how you can contact your carrier:
- Locate Customer Support Information: Visit your carrier’s website or check your billing statement to find the customer support contact information. Look for a dedicated support phone number or email address.
- Call or Email Customer Support: Use the provided phone number to call the customer support line of your carrier. Alternatively, you can send an email to the designated support email address. Explain the issue with Wi-Fi calling on your Android device and provide all relevant details.
- Follow the Guidance: Customer support will guide you through additional troubleshooting steps or request specific details about your device and account. Provide any requested information and follow their instructions accordingly.
- Account Verification: If necessary, customer support may verify your account eligibility for Wi-Fi calling. They may request to review your account settings or make any necessary adjustments on their end.
- Ask for Technician Support: If the initial customer support representative is unable to resolve the issue, ask to be escalated to a technician or specialized team. They will have a deeper level of technical knowledge and can offer more advanced troubleshooting steps.
Remember to remain patient and polite when dealing with customer support representatives. They are there to assist you and work towards resolving the issue with Wi-Fi calling on your Android device. They may have additional resources, knowledge, or account-specific information that can help troubleshoot and resolve the problem.
If the issue persists even after contacting your carrier’s support, consider visiting a physical store location to have a technician directly examine your device or to discuss alternative solutions that may be available.