
Check if the rules are disabled
If you find that your Outlook rules are not working as expected, the first step is to check if the rules are disabled. Sometimes, rules can get accidentally disabled, causing them to stop functioning. Here’s how you can check and enable the rules:
- Open Microsoft Outlook on your computer.
- Click on the “File” tab at the top-left corner of the Outlook window.
- Select “Options” from the drop-down menu that appears.
- In the Outlook Options window, choose the “Mail” category from the left-hand side.
- Scroll down until you find the “Automatic Processing” section.
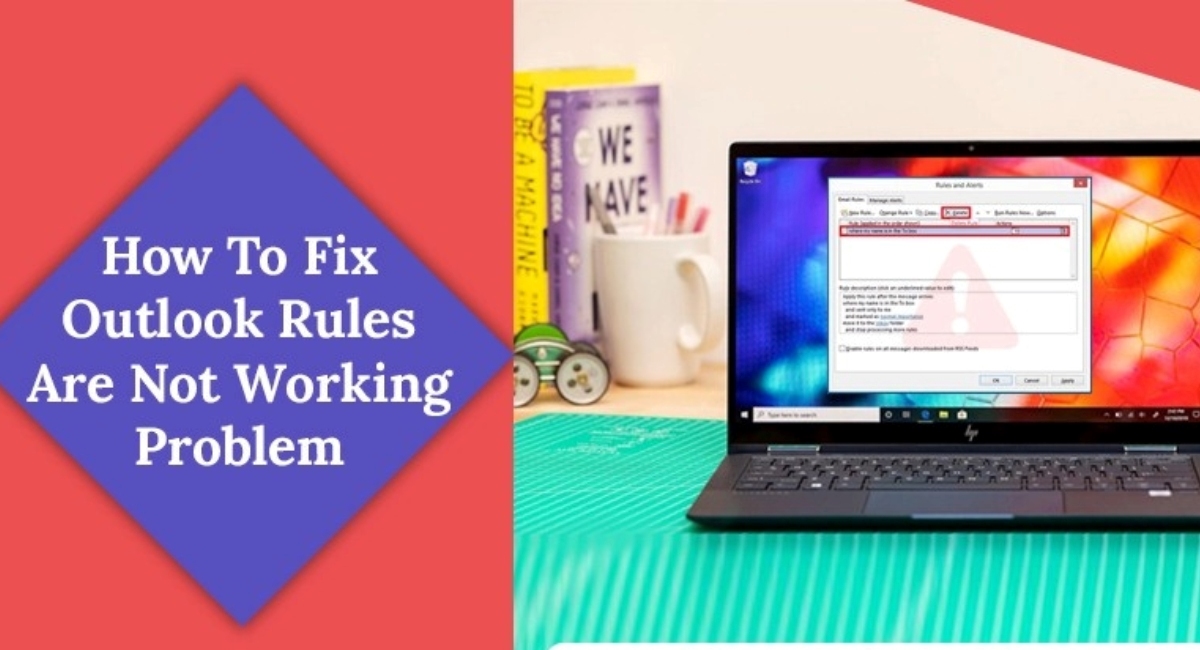
- Click on the “Rules and Alerts” button.
- In the Rules and Alerts window, click on the “E-mail Rules” tab.
- Look for the rule that is not working and make sure there is a checkmark next to it.
- If the checkbox is empty, it means the rule is disabled. Click on the checkbox to enable it.
- Click on the “Apply” button to save the changes.
- Close the Rules and Alerts window and restart Outlook for the changes to take effect.
By following these steps, you can ensure that your rules are not disabled and have a higher chance of resolving the issue. However, if enabling the rules did not fix the problem, you can move on to the next troubleshooting steps.
Check if the rules are in the correct order
If your Outlook rules are not working, it’s possible that the order of the rules may be causing conflicts or preventing certain rules from being executed. To ensure the proper functioning of your rules, follow these steps to check their order:
- Launch Microsoft Outlook on your computer.
- Click on the “File” tab located at the top-left corner of the Outlook window.
- Select “Options” from the drop-down menu.
- In the Outlook Options window, choose the “Mail” category from the left-hand side.
- Scroll down until you find the “Automatic Processing” section.
- Click on the “Rules and Alerts” button.
- In the Rules and Alerts window, click on the “E-mail Rules” tab.
- Review the list of rules displayed and note their order.
- If necessary, use the “Up” and “Down” buttons to rearrange the order of the rules.
- Make sure that the rules are listed in the desired priority, with the most important ones at the top.
- Click on the “Apply” button to save any changes.
- Close the Rules and Alerts window and restart Outlook to apply the updated rule order.
Verifying the order of your rules is crucial as Outlook processes them in sequence, and the placement of a rule can affect the outcome of subsequent rules. By following these steps, you can ensure that your rules are in the correct order and increase the likelihood of them working as intended.
Verify the criteria and actions of the rules
If your Outlook rules are not working, it’s crucial to review the criteria and actions of the rules to ensure they are properly configured. Follow these steps to verify and adjust the criteria and actions of your rules:
- Open Microsoft Outlook on your computer.
- Click on the “File” tab at the top-left corner of the Outlook window.
- Select “Options” from the drop-down menu.
- In the Outlook Options window, choose the “Mail” category from the left-hand side.
- Scroll down until you find the “Automatic Processing” section.
- Click on the “Rules and Alerts” button.
- In the Rules and Alerts window, click on the “E-mail Rules” tab.
- Review the list of rules displayed and select the rule that is not working correctly.
- Click on the “Change Rule” button and choose either “Edit Rule” or “Delete Rule and Close” to modify or remove the rule, respectively.
- If you choose to edit, ensure that the criteria for the rule are accurate and match the desired conditions for triggering the rule.
- Check the actions assigned to the rule and confirm that they are appropriate and set to perform the desired actions on the messages.
- If needed, make any necessary modifications to the criteria or actions of the rule.
- Click on the “Apply” button to save the changes.
- Close the Rules and Alerts window and restart Outlook to apply the updated rule settings.
By thoroughly reviewing the criteria and actions of your rules, you can identify any potential issues or inaccuracies. Making necessary adjustments to the rules will help ensure they function correctly and effectively manage your emails in Outlook.
Test the rules manually
If you are experiencing issues with your Outlook rules, it’s important to test them manually to see if they are working as intended. Following these steps will allow you to verify the functionality of your rules:
- Open Microsoft Outlook on your computer.
- Select one or more emails that should trigger your rule.
- Right-click on the selected email(s) and choose “Apply Rules” from the context menu.
- Observe if the rule is applied correctly and if the expected actions are executed.
- If the rule does not trigger or if the actions are not performed, there may be an issue with the rule configuration.
- Go to the “File” tab at the top-left corner of the Outlook window and select “Options”.
- In the Outlook Options window, choose the “Mail” category from the left-hand side.
- Click on the “Rules and Alerts” button.
- Select the rule you want to troubleshoot and click on the “Change Rule” button.
- Review and update the criteria and actions of the rule as needed.
- Click on the “Apply” button to save the changes.
Testing your rules manually allows you to simulate real-world scenarios and identify any issues with their functionality. By following these steps and making any necessary adjustments, you can ensure that your rules are working correctly and effectively managing your emails in Outlook.
Clear corrupted rules
If your Outlook rules are not working properly, it is possible that some of the rules have become corrupted or damaged. To resolve this issue, you will need to clear the corrupted rules from your Outlook profile. Here’s how you can do it:
- Close Microsoft Outlook on your computer.
- Press the Windows key + R to open the Run dialog box.
- Type “%appdata%” (without the quotation marks) and press Enter.
- In the File Explorer window that opens, locate and open the “Microsoft” folder.
- Inside the “Microsoft” folder, open the “Outlook” folder.
- Look for a file named “Outlook.xml” and delete it. This file contains the corrupted rules.
- Restart Outlook.
- Open the “Rules and Alerts” window by clicking on the “File” tab and selecting “Manage Rules & Alerts”.
- Click on the “Options” button and then select “Export Rules”. Save the exported rules file to a safe location.
- Once the rules have been exported, click on the “Delete” button to remove all the existing rules.
- Exit the “Rules and Alerts” window and restart Outlook.
- Open the “Rules and Alerts” window again and click on the “Options” button.
- Select “Import Rules” and choose the previously exported rules file to import your rules back into Outlook.
- Click on the “Apply” button to save the imported rules.
By clearing the corrupted rules and reimporting your previously exported rules, you can eliminate any issues caused by corrupted rule configurations. This process helps ensure the smooth and effective functioning of your Outlook rules.
Restart Outlook in Safe Mode
If you are facing issues with your Outlook rules, restarting the application in Safe Mode can help identify if any add-ins or extensions are interfering with the proper functioning of the rules. Here’s how you can restart Outlook in Safe Mode:
- Close Microsoft Outlook if it is open on your computer.
- Press the “Windows” key + “R” to open the Run dialog box.
- Type “outlook.exe /safe” (without the quotation marks) in the Run dialog box and press Enter.
- Outlook will now launch in Safe Mode, indicated by a “Safe Mode” label in the Outlook window title bar.
- Check if the Outlook rules are working correctly in Safe Mode. Create a test rule or apply existing rules to see if they execute as expected.
- If the rules function properly in Safe Mode, it indicates that an add-in or extension is likely causing the issue with rule execution.
- To identify the problematic add-in or extension, remove them one by one and restart Outlook normally to see if the rules work properly without them.
- Once you identify the troublesome add-in or extension, consider disabling or removing it.
Restarting Outlook in Safe Mode can help pinpoint any compatibility issues with add-ins or extensions that may be interfering with the functioning of your rules. By following these steps and eliminating any problematic add-ins or extensions, you can ensure that your Outlook rules function smoothly.
Repair the Outlook data file
If your Outlook rules are not working correctly, it’s possible that the Outlook data file has become corrupted. Repairing the Outlook data file can help resolve issues and restore the proper functioning of your rules. Here’s how you can repair the Outlook data file:
- Close Microsoft Outlook on your computer.
- Press the “Windows” key + “R” to open the Run dialog box.
- Type “scanpst.exe” (without the quotation marks) and press Enter.
- The Microsoft Outlook Inbox Repair Tool will open.
- In the “Enter the name of the file you want to scan” field, enter the path and name of your Outlook data file. By default, the data file is located in the following location: C:\Users\your_username\AppData\Local\Microsoft\Outlook\
- Click on the “Start” button to initiate the scanning and repair process.
- The tool will analyze the Outlook data file for any issues and prompt you to repair any detected problems.
- Click on the “Repair” button to fix the identified issues.
- Once the repair process is complete, open Microsoft Outlook and check if the rules are functioning properly.
Repairing the Outlook data file can help resolve rule-related issues caused by file corruption. By following these steps and using the Inbox Repair Tool, you can restore the integrity of your Outlook data file and improve the functioning of your rules.
Create a new Outlook profile
If you have tried various troubleshooting methods and your Outlook rules are still not working, creating a new Outlook profile may be an effective solution. Sometimes, an issue with the current profile can interfere with the proper functioning of rules. Follow these steps to create a new Outlook profile:
- Close Microsoft Outlook on your computer.
- Go to the Control Panel on your system.
- Click on “User Accounts” or “User Accounts and Family Safety”.
- Select “Mail (Microsoft Outlook)” or “Mail (32-bit)” to open the Mail Setup wizard.
- In the Mail Setup window, click on the “Show Profiles” button.
- Click on the “Add” button to create a new profile.
- Enter a name for the new profile and click on the “OK” button.
- Follow the prompts to set up the new Outlook profile, including configuring your email account(s) if necessary.
- Once the new profile is set up, open Outlook and check if the rules are working correctly.
- If the rules function properly in the new profile, it indicates that the issue was related to the previous profile.
- You can then import your emails, contacts, and other data from the old profile to the new one, if desired.
Creating a new Outlook profile can resolve issues that are specific to the configuration of the previous profile. By following these steps and setting up a new profile, you can ensure a fresh start and improve the functionality of your Outlook rules.
Contact Microsoft Support for assistance
If you have exhausted all troubleshooting options and your Outlook rules are still not working, it may be time to seek assistance from Microsoft Support. Microsoft provides dedicated support services to help users resolve complex issues with their Outlook application. Here’s how you can contact Microsoft Support:
- Open a web browser and go to the Microsoft Support website.
- Navigate to the Outlook support page or search for “Outlook support” on the website.
- Explore the available support options, such as FAQs, community forums, or contact options.
- If you prefer to speak with a support representative, choose the contact option that best suits your needs. This could include live chat, phone support, or email support.
- Provide the necessary details and describe the issue you are experiencing with your Outlook rules.
- Follow the instructions provided by the support representative to troubleshoot the issue further.
- Be prepared to share relevant information such as your Outlook version, operating system, and any error messages you have encountered.
- Work with the support representative to follow their guidance and implement any recommended solutions.
- Continue communication with Microsoft Support until the issue with your Outlook rules is resolved.
Microsoft Support is equipped with the knowledge and expertise to address complex Outlook issues and provide you with the necessary guidance to resolve them. Contacting Microsoft Support will ensure that you receive professional assistance tailored to your specific problem, helping you get your Outlook rules back on track.